Wednesday, 26 November 2014

Plans taking shape!

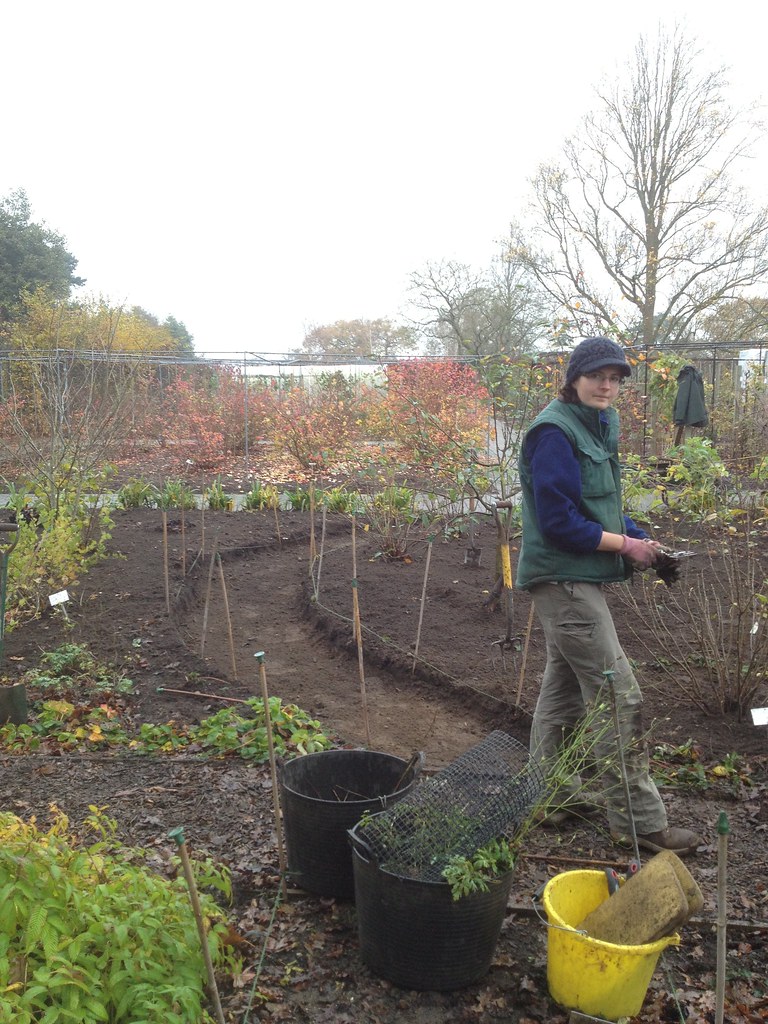
Another great day's work in the Cottage Garden as I got our intern and one trainee to help too.

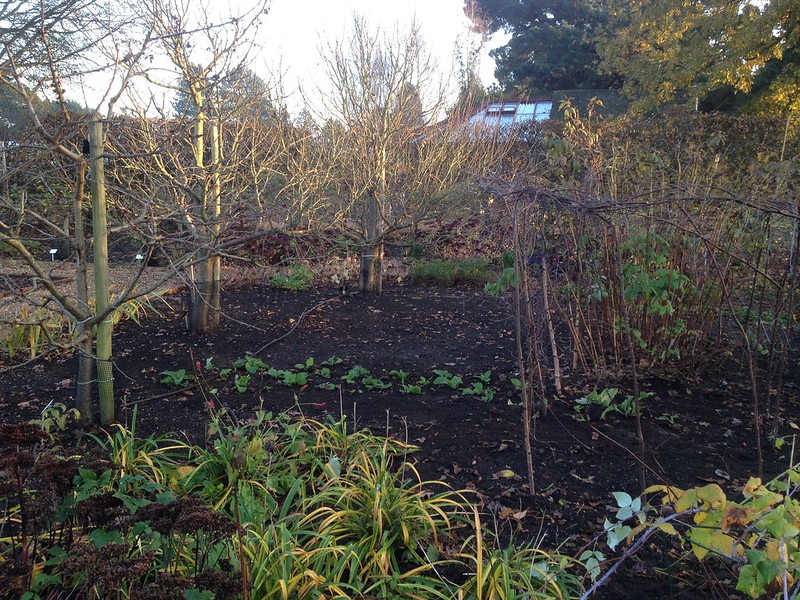
My proposal for a new path was accepted, so I marked it out with bamboo canes and string and we dug in (literally) first thing in the morning. By teabreak time, we had already finished the outline. We had then to spread the extra soil, which was very useful to raise the ground level where a tree had been planted too high, and to fill in some dips here and there.

Some plants were in the way of the path, namely a couple of Agapanthus and 3 of the 4 blackcurrant (Ribes nigrum) shrubs in the area, so we had to move them. It is not ideal time to move Agapanthus as they are tender perennials and they'd rather be left alone over winter and only moved in spring, but we decided to go ahead anyway as the plants, should they die, are easily replaced - that might not always be the case, hence careful early planning might be needed. Sometimes trees are root-pruned one year in advance of moving them after a year, so that they have enough time to put up new growth of fine roots (which will enable better establishment) before the operation takes place.

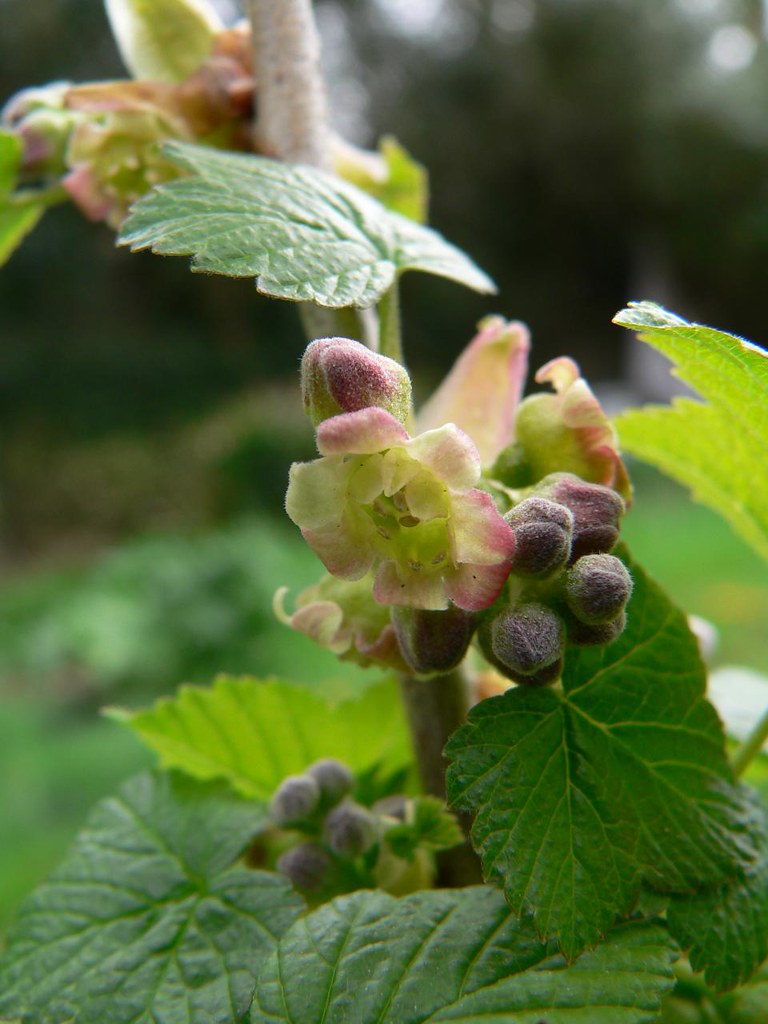
Ribes nigrum flowers
It was good enough time to move the blackcurrants, though, even if the season has been exceptionally mild and they are not fully dormant yet. I love blackcurrants with their unassuming but prettiest of flowers, delicious and nutritious berries and, most of all, fragrant foliage that releases on the lightest brushing against the plants. Because of that, we have now replanted them alongside the paths, so that visitors can enjoy them close-up.

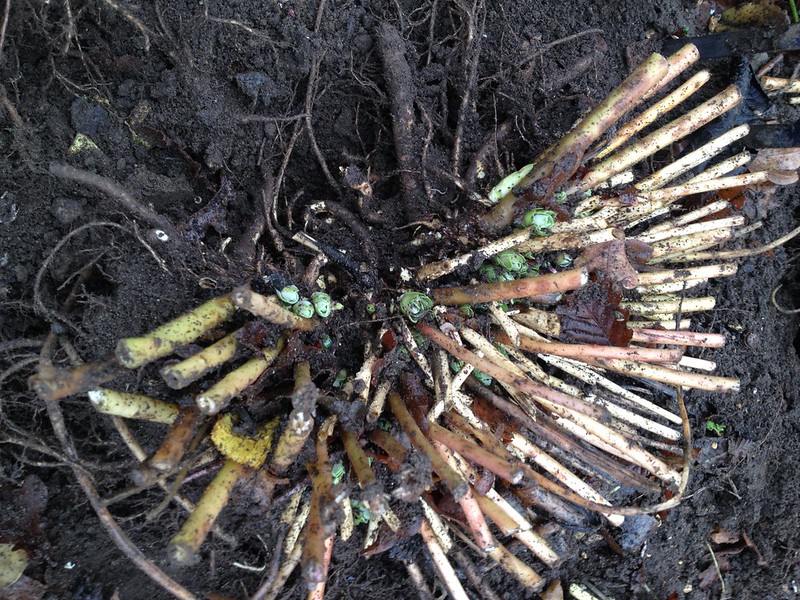
Divided Sedum crown
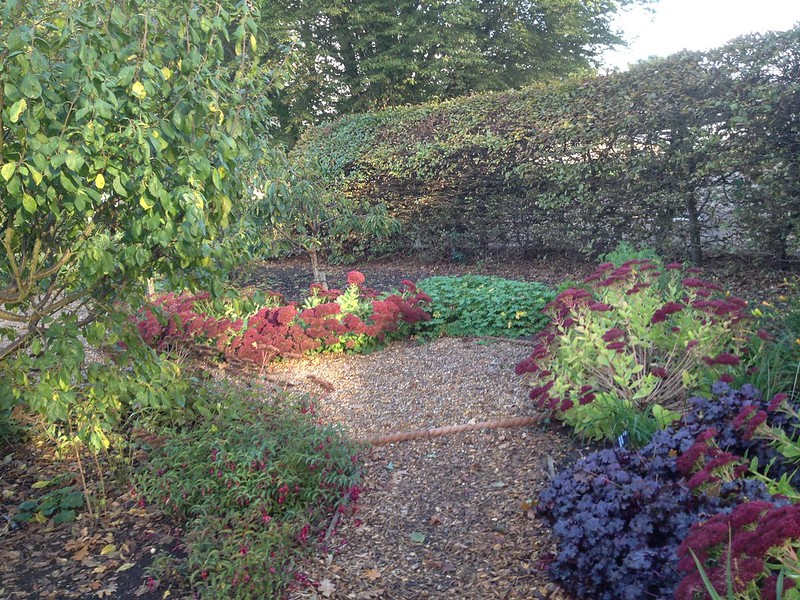
Sprawling, low to the ground Sedum on the left,
on the right, Sedum that received the Chelsea chop

Three people can work rather fast together, so we also managed to prune back the Sedum that was too sprawling: my colleague last year had experimented giving some plants a Chelsea chop, which had a rather marked impact on the affected plants, which have remained compact and tidy. The ones that were used for comparison, however, needed trimming back - you can see why in the picture on the rightm taken earlier in the month. We then lifted and divided them, ready for next year, when I want to interplant them with a vegetable crop, which I'm not going to reveal now...

After a good tidy up, we could take some pictures of the result: I loved it and was so thankful to my colleagues that made it possible so quickly.

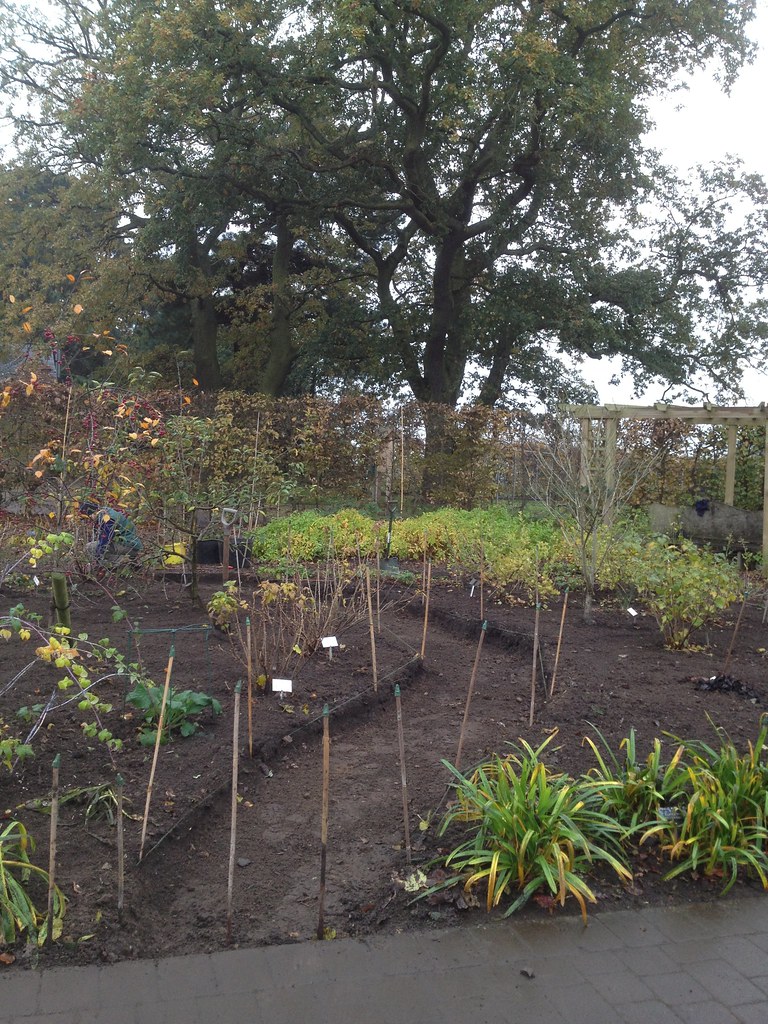
View from the main path: before
View from the main path: after
View from the inside: before
View from the inside: towards the end


As I had taken a panorama picture from the same spot on the main path one month and a half ago, I can now make a comparison of the wider view. There is now closer access to the blackberries, the chuckleberries (a cross of redcurrant, gooseberry and jostaberry ), the two Malus that flank the path on one side and the Asimina triloba (or pawpaw, a rather interesting tree too) on the other.

Panorama view from the main path: 3 Oct

Panorama view from the main path: 21 Nov

Tuesday, 25 November 2014

Fig dressing

The preparations for winter continue, and today it was the Model Fruit Garden fan-trained fig's turn to be put to sleep.

The fig, ready to go to bed
The first step was pruning the tree, untying it from the frame.

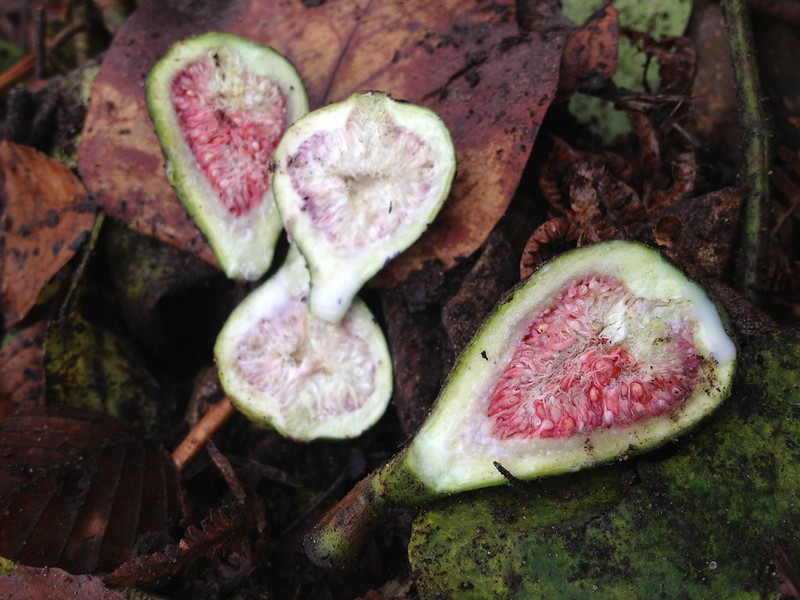
Syconium inflorescence, with inward looking florets and fruits

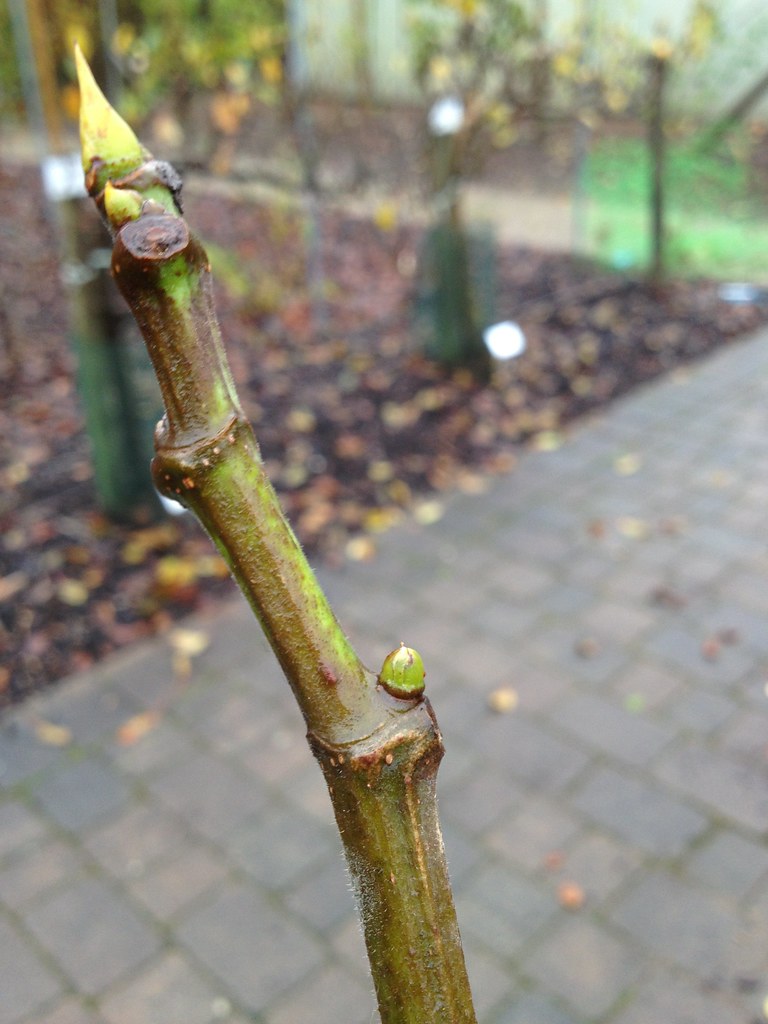
Figs (an inflorescence called syconium giving origin to a multiple, accessory fruit) form in the leaf
axils at the tip of new branches, so it is necessary constantly to generate new material through replacement pruning.


Cutting back to stubs

This consists in taking back some of the older branches to stubs - the only case (together with Dutch
cuts) where leaving snags after pruning is not frowned upon for plant's health reasons. To preserve the shape of the fan, and keep branches to an appropriate distance of some 10 cm, one also has to cut some branches back to their origin, but one has to make sure to preserve enough branch tips to get fruiting the following summer.

The pruning regime for trained figs also consisted of pinching back new shoots to 5 leaves before the end of June, so they produce shorter sideshoots, that have time to ripen before the frosts.

The fig is planted in a concrete pipe section to restrict growth and improve fruiting (one could use concrete slabs, as I do at home), but roots have a habit to run out on the surface and away, so we did some root pruning too to bring them back. As figs layer quite easily, the lowest branches also needed pulling outof the ground and pruning back where they had rooted.
The pruned fig

Wood turning mature (still part green)
Figs are hardy plants, when the wood is completely mature, but in the UK it is best to give them protection so as not to risk losing branch tips that are still not completely ripe.

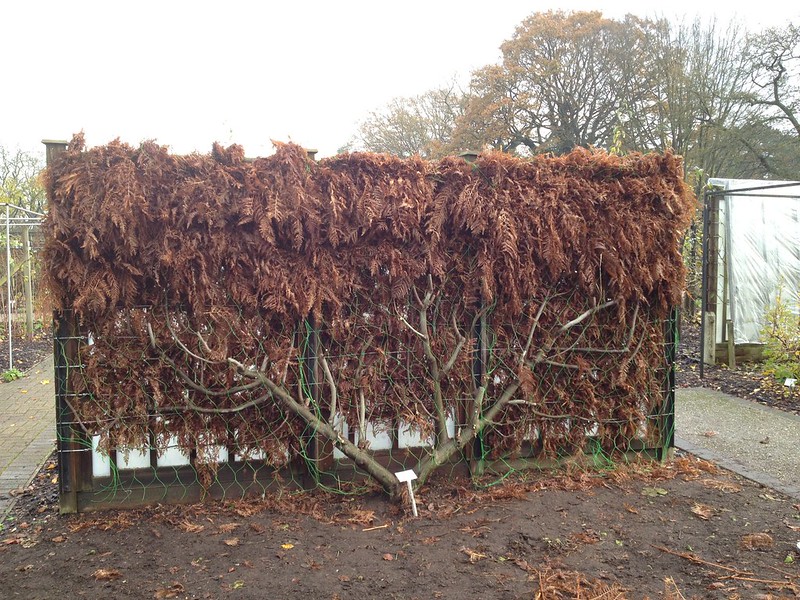
So the next step was to cover the tree with bracken, a material that does not soak in water, so helps keep the plant dry as well as warm - it comes with a minor health risk, though, as bracken spores (relased mostly on hot dry days in late summer) may be carcinogenic if inhaled, so one might want to wear a face mask if doing this often.

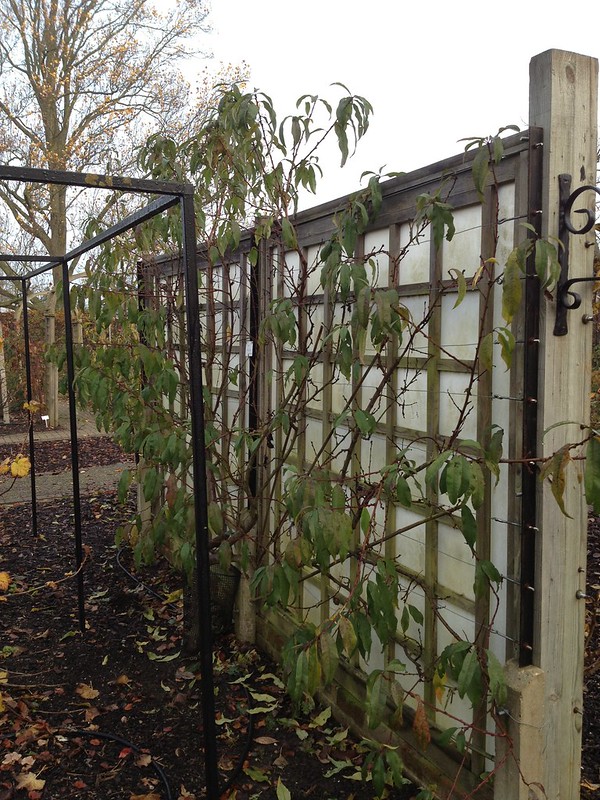
We train our fig against a screen, so we put bracken between the tree and the frame, and then secured some netting along the whole widtht and height in front of the tree and stuffed bracken in between there too.

There is a best way to stuff bracken by pulling leaflets from the stems (that will be discarded), bunching them up all in the same direction (fronds down) and using them like that, nice and tidy.  The reason is so that you can take it out without too much effort in the spring... if you get to take it out, that is! This year we could not do it in spring because a robin nested cosily into it, and we had to wait for the fledglings to leave the nest.
Steps in the covering of the fig


After one trailer full of bracken, we just needed a bit more for the front
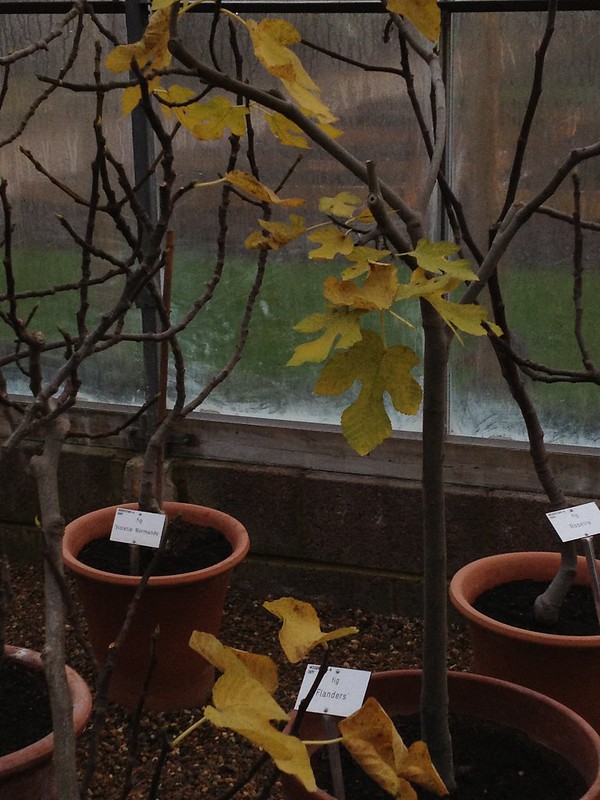
Fig in pots under cover
To complete our education on figs, we were taken round to the fig collection we have in pots under
cover in the greenhouse: they need free draining compost but regular watering and feeding, because in their natural dry habitat they spread far and wide to look for their nutrients.

There is plenty of information online to grow figs both outdoors and in pots:

RHS fig plant profile
Grow your own figs


I am fascinated by stories, and the one that caught my attention most today was one about there being volunteer figs around the country, outside bigger towns, on riverbanks, dating back to Victorian England. Apparently, dried figs were a popular festive food and they came seeded - the seed ended up in the sewers and were discharged in the rivers, where they germinated in the warmer microclimate.

Pollination and seed formation in figs is a very complex thing, for one the flower are enclosed in the syconium, so they are not easily accessed. But tiny - 1mm - wasps have co-evolved with the plant in its natural environment to enter through the fig's ostiole (the opening opposite the peduncle) and pollinate it while using the syconium as a breeding pod. That's amazing and if you want to read more about it I found some great sources.

Seeds?

But what I have not been able to check out is the statement that only figs from their native environments contain (viable) seeds because there are no suitable wasps in the UK.

I sliced open one of the figs we removed from the tree while working on it, and I can see what look like seeds. Are they?

Some of the fig cultivars we grow in the UK are parthenocarpic: does that mean they produce no seed or unviable seed?

I could not find a precise answer. If anyone knows and wants to put me out of my misery... :)

Monday, 24 November 2014

Digging

Digging. An activity I have traditionally quite enjoyed for the pleasure of physical exercise and that I have regularly undertaken on my plot, which is ridden with perennial weeds (couch grass, bindweed, creeping buttercup). It is also an activity I started to question when studying soil for my level 3 exams, the reason being it disrupts earthworms tunnels (which I gather they dislike) as well as the habitat of the rest of the microbiota, severing those all important micorrhyzae.

So I'm still undecided what is best: digging that organic matter into the soil (some say deep down through double digging so as to make the soil more porous and make life easier for roots, especially on heavy soils, like my plot's is) or layering it on the top, suppressing weeds and leaving worms and biota to do their thing, as it would normally happen in nature, with fallen leaves and other organic debris (as deep roots are mainly for stability awhile shallow roots get most nutrients)?

Vegetable plots are rather artificial environments anyway, the soil is compacted and weeds (especially ruderals) abound of bare ground, so digging has traditionally been recommended to bury the weeds and aerate the soil while breaking any pans.


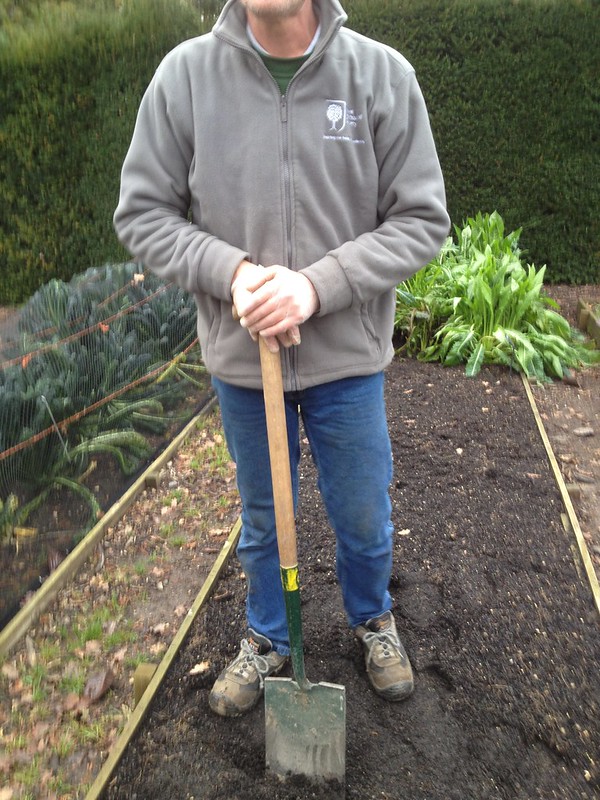
Correct size of spade
First of all, after making sure one is safe and properly equipped (especially boots), one has to find a spade adequate to one's own height, roughly to the top of one's hip. I understood why I had only seed long handled spade in Italy: outside the UK, a spade is not generally a digging tool. In Italy they use a tool called "zappa", which is apparently harder to work as you use it as a pickaxe then twist it with the soil in.

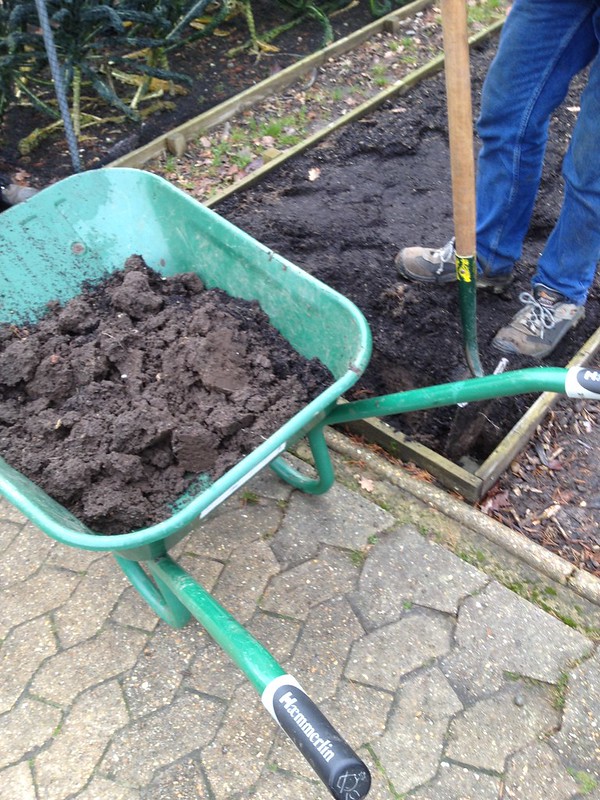
Step one: fill a barrow


Then one needs a barrow, where they will store the first row
of digging, which needs to be a spit dip and a spade width's wide.


Any matter that needs diggin in should be spread before starting usually to the rate of one barrow every 2 sqm (but never mix manure and lime because they release ammonia, which is a polluting gas and which takes away all the nitrogen; you need at least three weeks between one and the other).

The next step is to find how much soil you can comfortably lift, and dig linear strips, every spadeful roughly the same amaount of soil, filling with it the trench ahead of one (the first one being that which went into the barrow). And so on until the end of the area that needs digging, finishing by filling the last remaining strip with soil from the barrow.

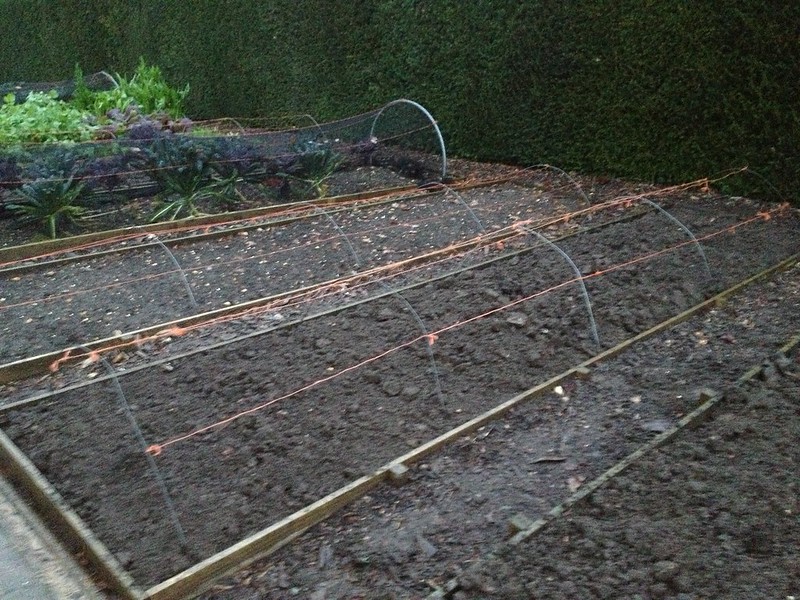
A perfectly done, and a less skilfully dug bed side by side

I and my fellow trainees had a go. It was really clear that my technique fell short of the perfection our teacher possessed: in fact, his finished bed was even, without dips and bumps, while mine was rather rough, because I could not calibrate the amount of soil I lifted evenly enough. That will require some raking before sowing... and I will need more practice! That is why I'm here, after all.


Wisley has rather a sandy soil, which can be dug throughout the winter, from October and through to March. Heavy soil are best dug earlier on, up until November, so that rain and frost break up any lumps. But I also find bare ground over winter a heresy myself: you should see how all the topsoil is washed away on my plot, every year in the winter, leaving behind a sea of white stones, the chalk and flint on the surface. It is quite a disconcerting sight...

We were also instructed that some crops like carrots dislike recently disturbed soils, so planning in advance is certainly a takeaway for me.

About earthworms, I found this very interesting blog post

Friday, 21 November 2014

Cane management and training

Berries of the Rubus genus cross liberally, and today we learnt how to deal with blackberries (R. fruticosus) and its hybrids, some of which I have tried to research in more details... a mammoth task, I suppose because in the search for the better berry, yielding more and more disease resistant - or even the novelty product to keep gardeners interested - so many different names have sprouted, even been patented. Here's a list of hybrid (and not so hybrid) berries:
  • Boysenberry (R. ursinus x idaeus), originated in the US under the aegis of Rudolph Boyse, it is a cross between a loganberry, blackberry and European raspberry, can be spiny or spineless and has black fruits, tasting like a sweeter blackberry*
  • Hildaberry
  • King's Acre, an old hybrid of blackberry and raspberry with black fruits of mild flavour, suitable for a small garden
  • Loganberry (R. × loganobaccus), with a sharp taste, loganberries (a cross between American blackberry and European raspberry, make a good culinary berry, which is sturdy and disease and frost resistant**
  • Silvanberry (R. 'Silvan'), with an AGM, this Australian hybrid, very vigorous and spiny, it's early fruiting
  • Sunberry, slow to establish but with large fruits, this hybrid has its origin in UK research centre East Malling****
  • Tayberry (R. Tayberry Group), a patented hybrid, with juicy, aromatic berries, sweeter than loganberry
  • Tummelberry, a patented hybrid, originally bred by the Scottish Crop Research Institute, this is a hardy tayberry with hairy canes, upright growth and sharper taste, more similar to the loganberry
  • Veitchberry (R. inermis × idaeus) one of the older crosses, with stout canesand excellent flavoured fruits
  • Wyeberry, developed at the University of Maryland, a hardier form of tayberry
  • Youngberry, with round fruits and fewer seeds, this cross of loganberry and dewberry has never gained much popularity.
Not all the canes that are generally grouped under hybrid berries are hybrids; some of those:
  • American dewberry (R. trivialis), trailing and evergreen in their native countries, sweet and used by the natives as dyes; European dewberry (R. caesius)
  • Japanese wineberry (Rubus phoenicolasius), with reddish, hairy stems and small light red berries
  • Marionberry, a blackberry cultivar bred in Oregon ***
  • Salmonberry (R. spectabilis) with perennial canes and orangey fruits, apparently eaten by the natives of the Pacific Northwest with salmon, best for culinary use
Canes come in three main types (trailing, semi-erect, erect), which require slightly different management, but in common to all is the fact that one needs to keep primocanes (vegetatively growing canes, in the first year) separate from floricanes (fruiting canes, second year - and sometimes short-lived perennials), so that they are not shading ripening berries and are in the way of picking ripe ones.

At RHS Garden Wisley some of those berries are being trialled, on a post and wire system, and we had the opportunity to work with them.

They are planted at 3 m apart (you could however use less for less vigorous and more for the bigger ones) and trained as a two-way rope system to 6 or so floricanes per side, set 15-20 cm apart on the three lowest wires, while the topmost one is kept free for new, primocanes to be tied in. Plants are lined up in order of ripening, for easier picking and management.

The pruning regime works as follows:
  • tipping: when new canes have grown to some 30 cm, they are pinched back to 10-15 cm so they produce shorter, thinner canes when they regrow, which makes erect/semi-erect canes to be more flexible and manageable; this is not generally needed for the trailing varieties
  • as they grow, primocanes are kept tidy with the use of strings, tied in the middle.
  • after picking, fruited canes are pruned back to the ground: any stubs left are at risk of infection from cane blight (Leptosphaeria coniothyrium), besides being an obstacle to new canes, causing twisting and rubbing wounds (that may also act as nesting sites for the raspberry cane midge, which is  associated with cane blight infection)
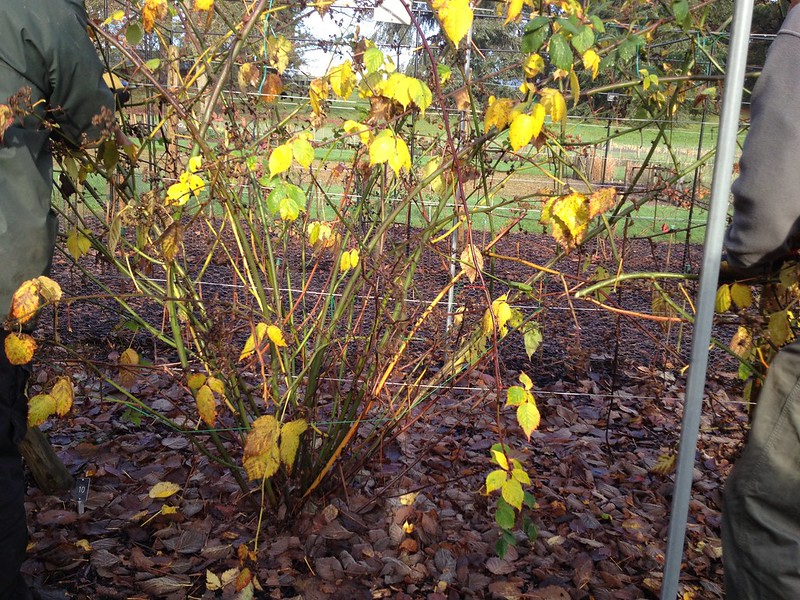
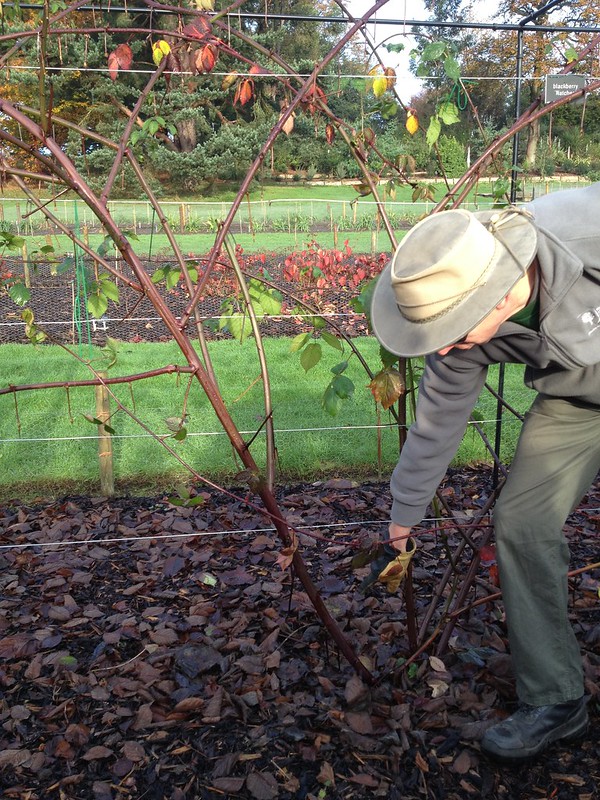
  • in the autumn, primocanes are laid out to replace the fruited floricanes on the lower wires, tied in the first instance with knots in the figure of 8 (knot away from the branch), on the side of the prevailing wind, trying to get them in the direction they want to go. Short laterals are shortened to 3 buds (longer ones may be kept entire). When the branches are all satisfactorily laid out, 15-20 cm from each other and evenly space on both sides, they are laced in, as it's done with raspberries.
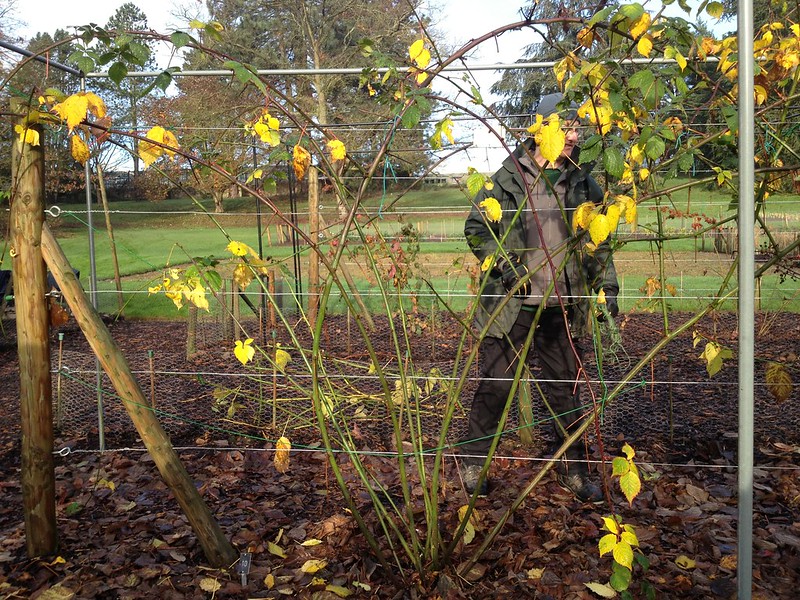
A rather vigorous, semi-erect cultivar of hybrid berry
The fruited and damaged canes are pruned back to the ground

Laying out the best primocanes for fruiting next year
Ready for lacing
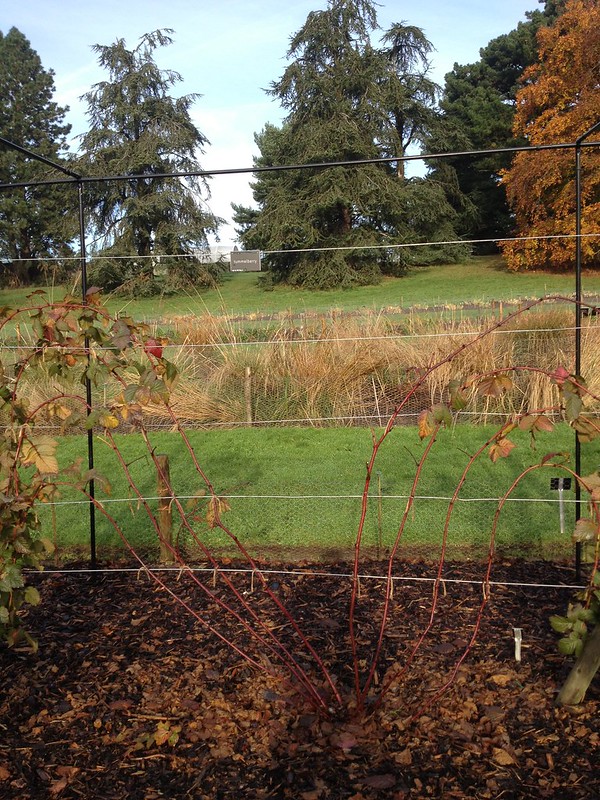
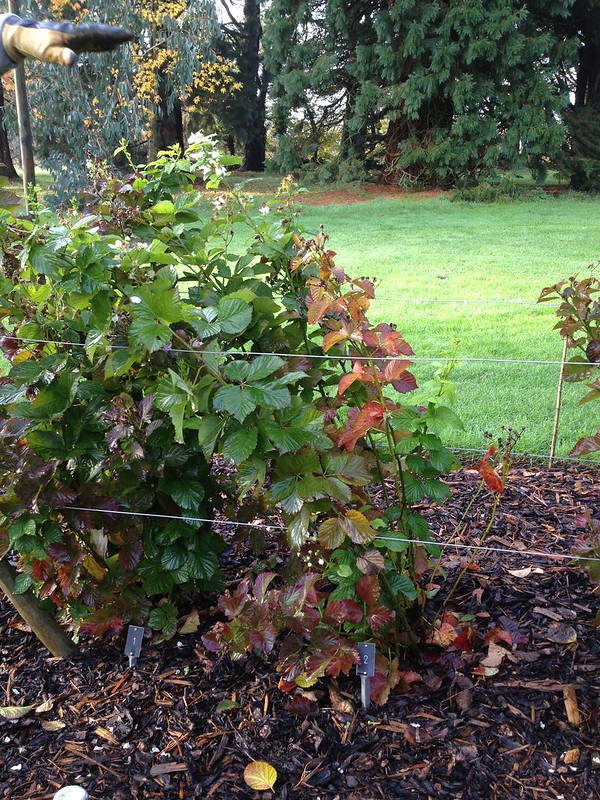
An erect cultivar with laterals
A trailing, less vigorous cultivar, ready for nex year

Primocane fruiting blackberries

As part of the trials, we were shown some primocane-fruiting blackberries that were bred in Arkansas, USA, which flower and fruit on top of the canes in their first year, and are therefore managed like autumn-fruiting raspberries, pruned in February and trained in between parallel wires. They should be quite easy to pick, however, fruits do not seem to be quite ripening in the short English summers, so more breeding will be needed before gardeners in the UK can make productive use of such new cultivars.


HDC released a cane management brochure, which has convenient diagrams for all the various support systems, and tying in and lacing techniques. 

Sources and footnotes:
  • Hessayon Dr D.G. (2012) The Fruit Expert, London: Expert Books
  • University of Vermont Extension, Dept, of Plant and Soil Science  http://perrysperennials.info/articles/lesserbram.html
* Victoriana Nursery http://www.victoriananursery.co.uk/Boysenberry/, Oregon Raspberry and Blackberry Commission http://www.oregon-berries.com/pick-a-berry/
** T&M http://www.thompson-morgan.com/fruit/fruit-plants/other-berry-plants/loganberry/cww3569TM
*** Oregon Raspberry & Blackberry Commission http://www.oregon-berries.com/pick-a-berry/
**** Blackmoor Nursery http://www.blackmoor.co.uk/products/447

Thursday, 20 November 2014

Gooseberry aplenty

... as over the last couple of months I have had several stints at pruning the cordon collection, and there are still a few to go. Cordon gooseberry pruning is, as of now, the only skill that I feel I really had time to practice long enough to master.

I have also tried to time myself to see if I was getting any faster, clocking up 17 plants in 3/4 on a day earlier in the month, then 10 in 1/4 of a day, then 25 in a day but because the plants were all different sizes, and in some instances we shared plants between us, that was not a particularly useful exercise.

But now that they are largely done, what I am really interested now is to see how these plants will fare in the summer, how they will flower and fruit: whether the size of the fruits really makes this system worth the effort. Because these rows of plants so close together (30-45 cm between plants and about 1 m between rows) and pruned so hard all the time (lateral to 5 leaves in the summer and to 2 buds in winter), while supposedly producing bigger fruit, they need to be replaced more frequently.

Discolouration in stem, indication
of fungal disease
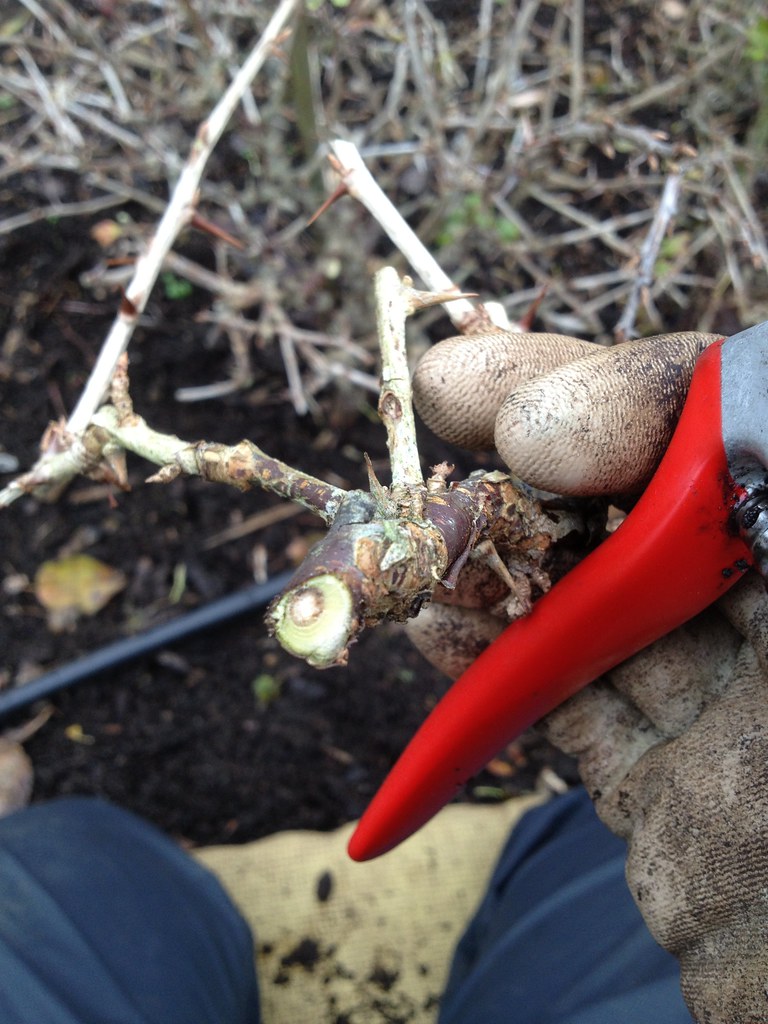
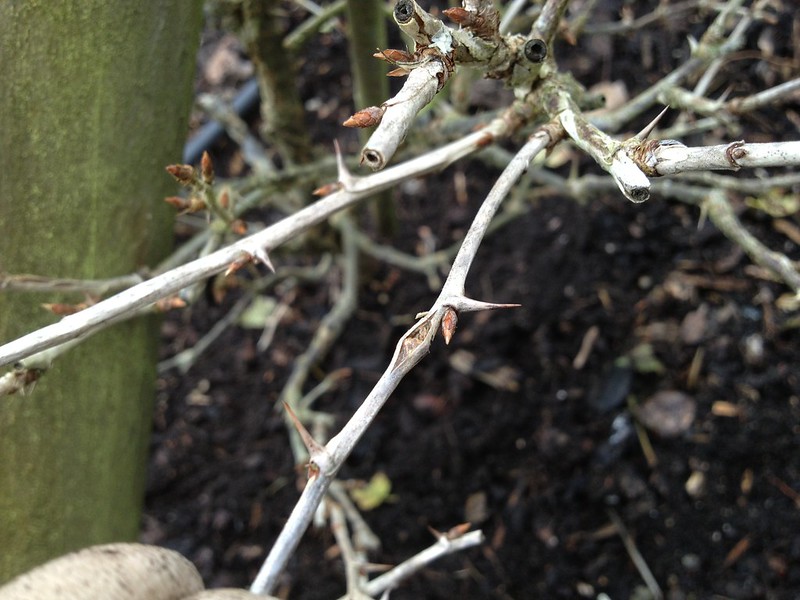
As a matter of fact, like a lot of the intensively grown gooseberries, they are affected by dieback (which I found out are caused not only by mildew - as mentioned in my previous entry - but also by a range of other air- and soil-borne pathogens, among which Eutypa fungus which also affects grapevines) and we have to be very careful when pruning to disinfect the tools between each plant with Propellar disinfectant. Wounds and stress cracks from tying to wires are likely to be the main entrance points of disease, according to the HDC study of gooseberry dieback, so pruning earlier in the season when wounds heal faster, and in dry weather when fewer spores are around, as well as good pruning (without fraying cuts or leaving snags) seem so far the best prevention strategy.


Swelling of stem above a bud
Slicing through the swelling
Localised nature of the discolouration
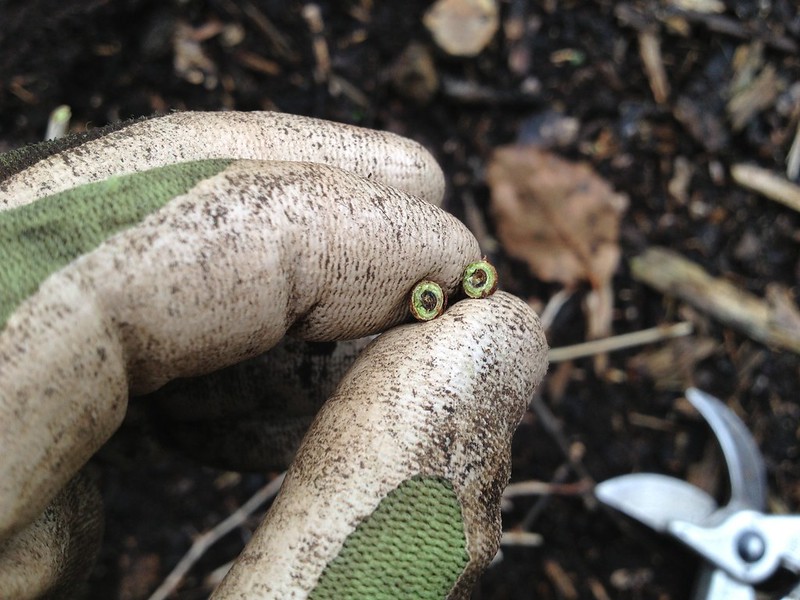
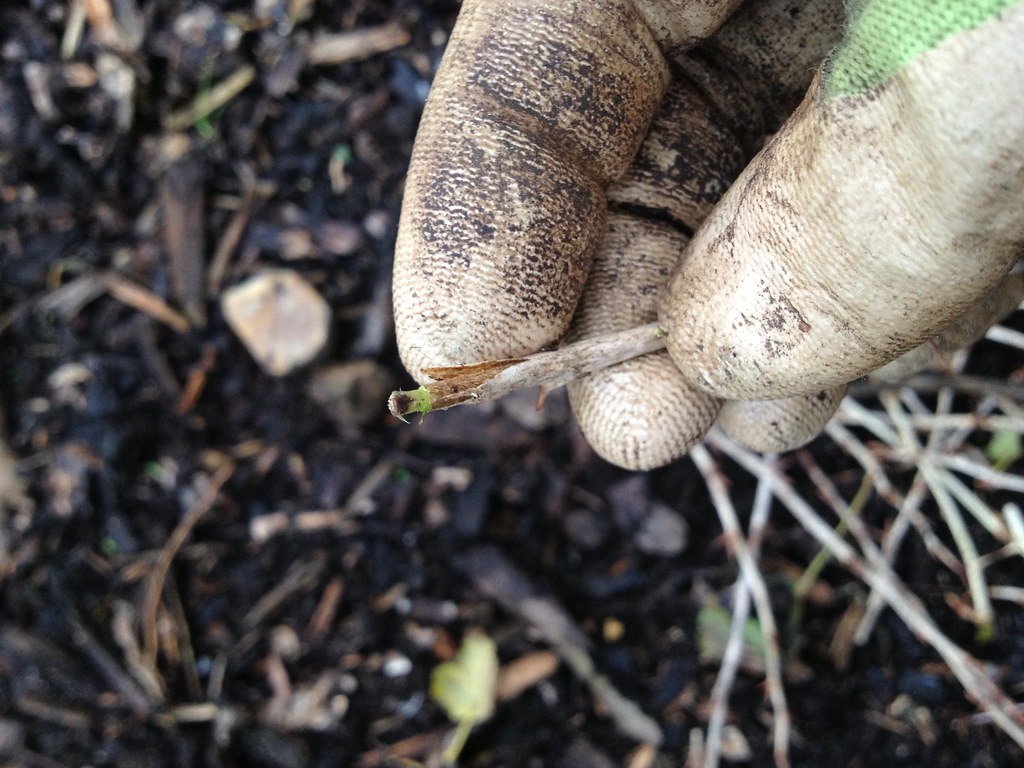
While pruning this time I also found swellings above some of the buds, which I'd like to investigate further as my colleague had not seen them before, as she is also relatively new to managing the collection. When sliced through, they show a healthy phloem around a swelling of the xylem, with localised brown discolouration.


The collection is being renewed and moved to a new site to try and improve its vigour, and I will be probably be able to take part in part of the renovation before I leave the Garden, which is quite exciting, really.

And for a change from just pruning, I have also helped propagate some of the cuttings we took for the purpose. The ones we had cut off last month had been heeled in in a pot, as we did not have time to deal with them straight away. When we went to fetch them we were rather surprised to find some of them had callused, or even already rooted quite well, thanks to the mild weather: very promising indeed (although we were told that sometimes you need to scratch away callus, as it prevents proper rooting in some cuttings, but it should not be the case with gooseberry)!

We used the propagation facilities to pot them properly.

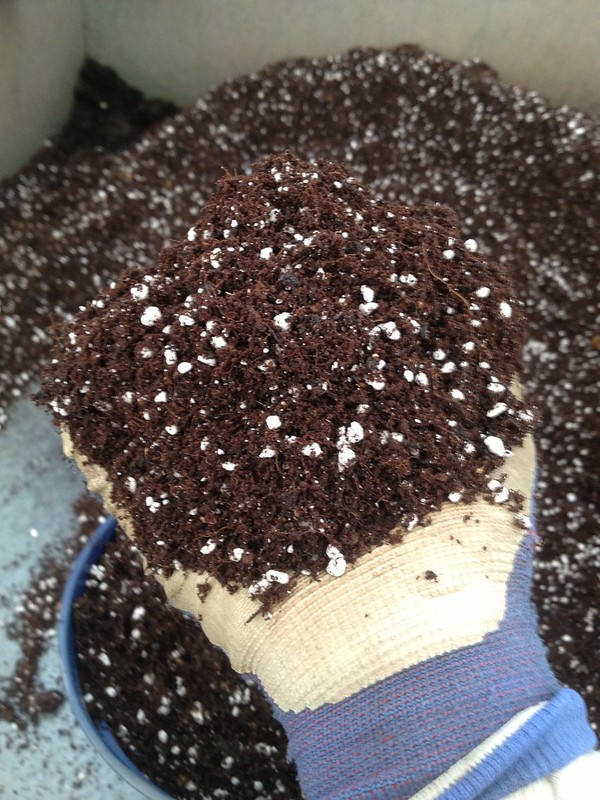
Scooping up compost
If topping up needed,hand
scooping avoided compacting
Light compost (pre-prepared coir mix with added perlite) was scooped up in the pots and levelled with a brief shake and tap on the bench, so as not to compact it.


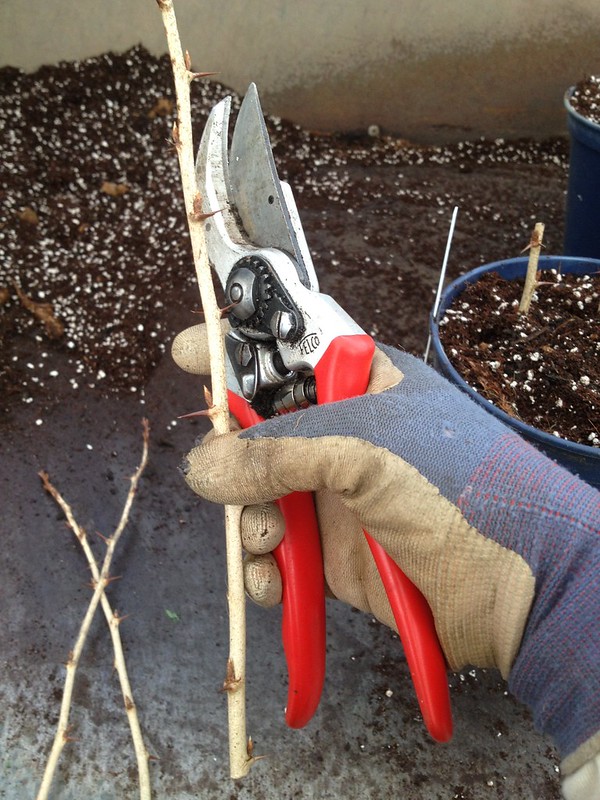
Cutting to size

Unless they had taken already (in which case they were potted whole) cuttings were cut to secateur's length to a bud (with slanting cut, to remember which side is which, as the bottom is cut flat)


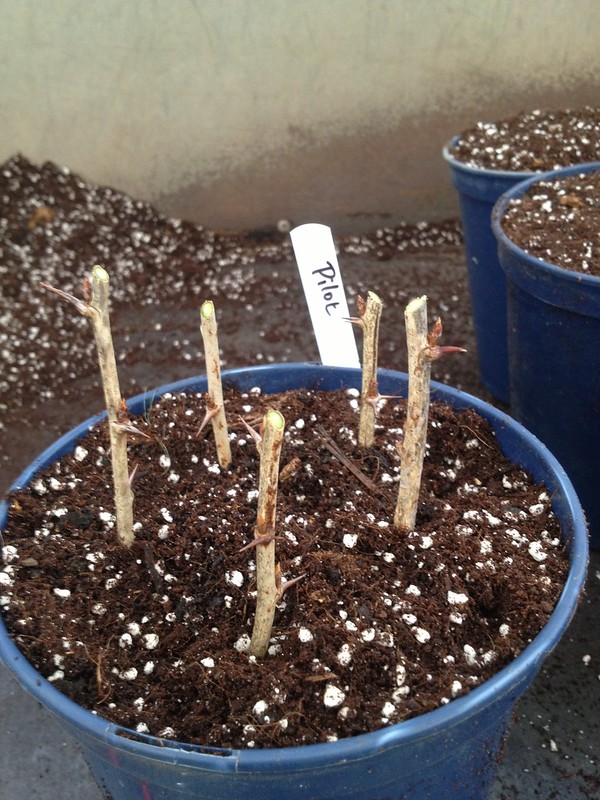
Potted

Five to a pot were they plunged into the compost (after dipping into hormone rooting powder, and leaving just the top 5-10 cm out), then labelled...


... and off were they wisked into the magic world of the propagation houses, where they will be taken care of so their chances of taking and thriving are maximised.

We did not remove any buds from the lower part of the cutting (which is done to avoid suckering and grow the bush on a leg) to help maximise rooting and minimise wounding to the cuttings. Once the cuttings are rooted, if you want to grow your shrubs on a leg (which is what we do with cordons, and which produces bigger fruits), you will disbud some 15-20 cm of the lower stem, keeping only 4 or 5 buds, which you will use for the framework of your shrub.

If you grow them as cordons, you encourage the leader to grow, up to the topmost wire, by cutting it to half its size, still encouraging upright growth, while keeping the other branches short (2 buds in winter).

If you grow them as shrubs on a leg, you keep a framework of four of five outward and upward growing branches, treating them all as different leaders (shortening them to half as you develop the framework) - we grow shrubs as if every framework branch was a cordon of its own in the Garden.

You can also grow your gooseberries as stools, by encouraging growth from the base and regularly renewing the structure: the fruits will be smaller, but the plants longer-lived. I found this leaflet provides useful propagation guidance.

Wednesday, 19 November 2014

Preparing for winter

It is late indeed as the season has been so mild, but the time has come to puts plants to rest for winter while cheering the place up with some winter bedding.

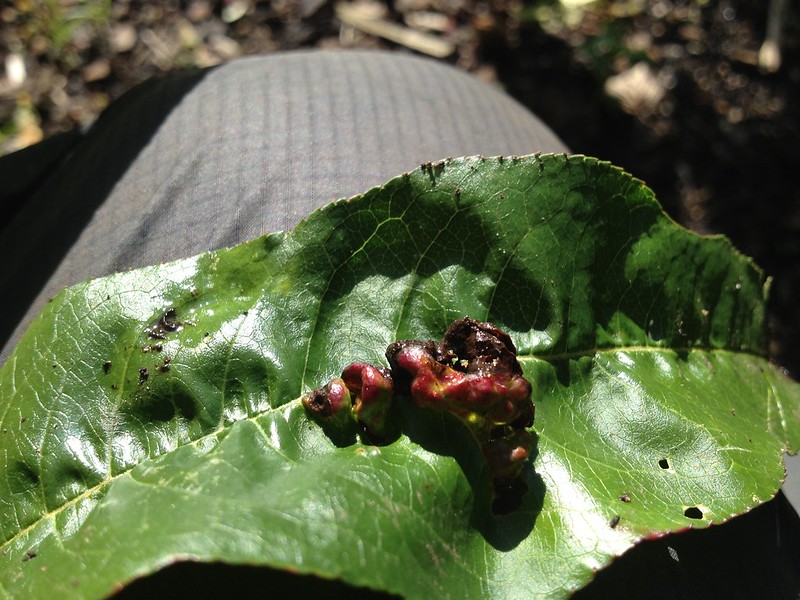
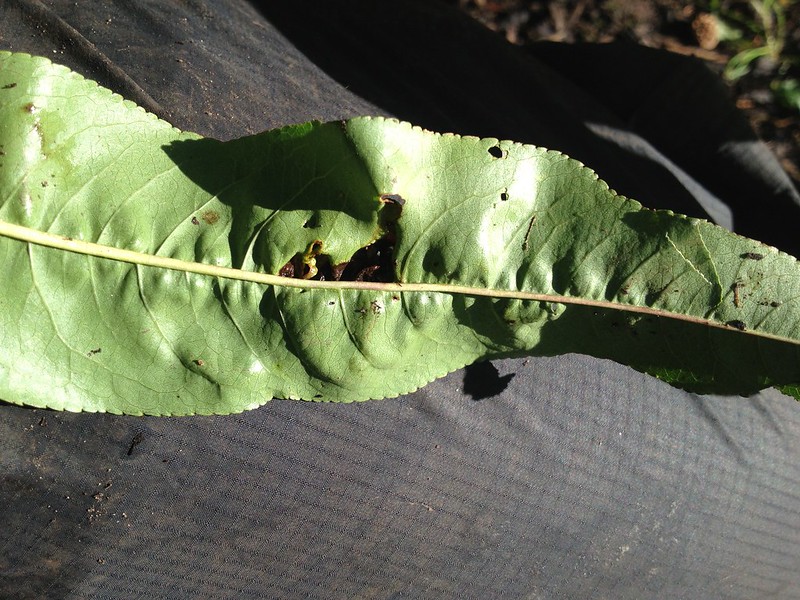
Today we put up the lean-to frames, made of wood battens and clear plastic sheeting, to cover the fan-trained peaches and apricots and keep them dry to prevent peach leaf curl (Taphrina deformans), a fungal disease that may weaken the plants and infection from which is promped by wet conditions in spring. 

Peach leaf curl on leaf

Peach leaf curl on underside of leaf
There is a very convenient leaflet with instructions on how to make lean-to frames, like the ones we put up today, on the RHS website.
The fan-trained plants...... with frames on


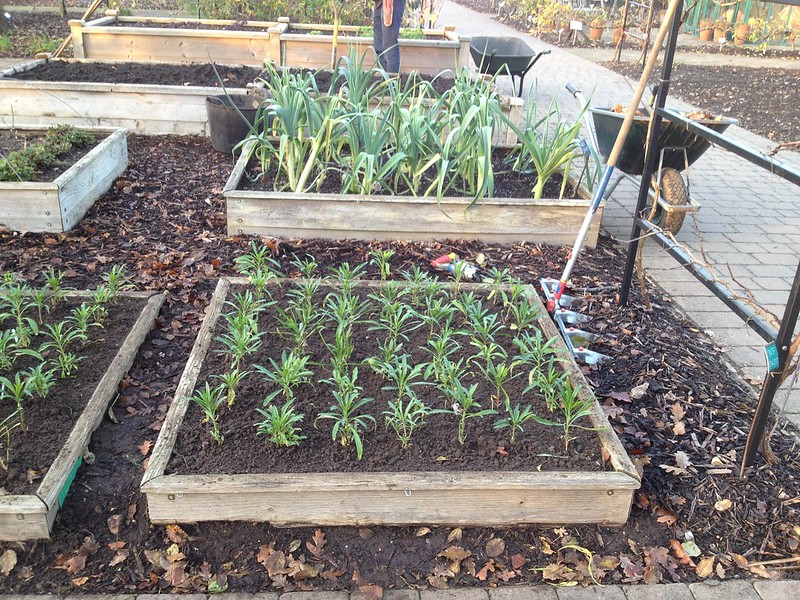
After that, I learnt the use of a new tool as we filled some empty raised beds with wallflowers (Erysimum) that will overwinter and flower for some early cheer.

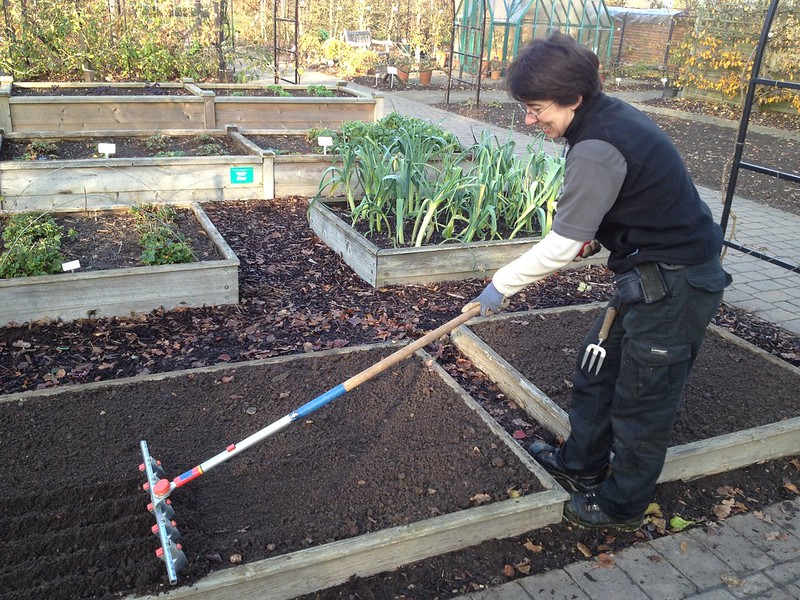
The row maker is like a rake with ruler markings and adjustable tines, so that you can space rows evenly, and draw a grid on the soil before you start planting - you can plant where the rows meet, or in the space between the rows. A convenient tool for extensive formal planting, or when you need accuracy in spacing rows, like in plant trials.

Drawing rows...
... and a grid
Bed planted

Tuesday, 18 November 2014

Learning, weeding and improvising

The Herb Garden at Wisley is a lovely little area that opened back in 2003 and where my colleague experiments with planting of old and novel herbs, some of which are used in the restaurants on site (they share some of the recipes online that might be interesting).

The area is divided by use of the herbs, and we were there today weeding the "herbs for infusion" area to start with: a display of, among other plants, tea (Camellia sinensis), liquorice (Glycyrrhiza glabra, which needed lifting for the winter) and a range of mints (Mentha spp).

Herbs for infusion area
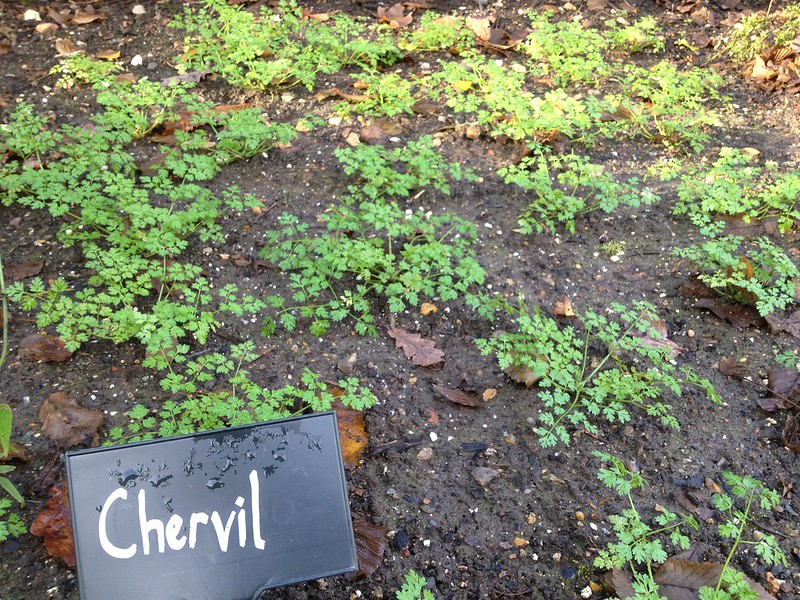
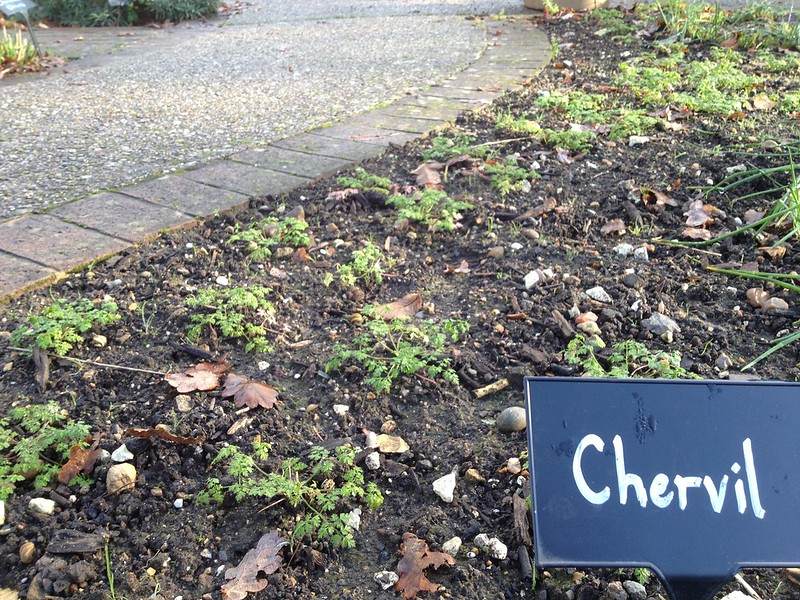
While I was there, I took the opportunity to check on the chervil in the "herbs for condiment" area that we planted back in October. I have been keeping an eye on it to see whether it made a difference whether the roots were disturbed or not at planting, and - a month and a half on, I must conclude it does. The plants I did plant, which I mistakenly disturbed the roots of, have grown rather smaller than the undisturbed plugs my colleague planted, as is clear in the pictures below:

Undisturbed roots, planted 3/10
Disturbed roots, planted 3/10
Of course there are other conditions that might have impacted on growth, such as the fact that the area my colleague planted her plugs is shadier and more sheltered, but the root disturbance must have had a part, and I will keep that well in mind in the future.

The next area we moved on to weed was covered in self-seeded Digitalis, which I was instructed to remove thoroughly. It was while pulling the first plant that it suddenly dawned on me that one of my dilemmas for the new year was solved!

I had planned to have foxgloves in my area, but - on a small budget that makes seeds more appealing than fully grown plants, especially as the area is quite big - and with the fact that Digitalis is a biennial, I was wondering how to proceed, and here was the answer.

So, with a bit of luck and improvisation, and my colleague's collaboration, I came into possession of some 35 plants, which are now adorning the Cottage Garden, a graceful curve, the first new planting in my area, and oh I love them!

Cottage garden: foxgloves planting

Friday, 14 November 2014

Three Counties Orchard Conference

As my dissertation for this year's traineeship will be on orchards, my colleagues suggested I attend the Three Counties Orchard Conference with them, and a very interesting day it was as a range of stakeholders in top fruit production, from conservation to commercial, presented to us.

An introduction to the UK orchard scene by John Edgeley of Pershore College started the days. John briefly outlined the three main orchards types out there:
  1. Commercial fresh fruit 
    • emphasis on fruit "quality" (and I write that in inverted commas, as it is in my opinion debatable what is intended by the word)
    • cone shaped trees most light efficient
    • reduced amount of pesticide linked to increase concern about wildlife conservation
    • crop cover (among other things to enhance pollination)
    • trials of mechanised tree trimming, windbrakes to increase temperature & pollination
    • monitoring of fruit ripeness (iodine for starch etc)
    • harvesting by hand but increased mechanisation (picking platforms and bulk bin trays)
    • cold and controlled atmosphere (CA) storage
  2. Commercial processed fruit
    • emphasis on fruit yield
    • increased tree height (means more shade and shedding of bottom branches)
    • new varieties to improve tree shape
    • increase in sales has meant more plantings and new training opportunities
    • harvesting: hand picked, allowed to fall, shaken from trees (shake and catch harvester)
    • mechanisation means increased potential amage to soil structure
    • soiling of fruit penalised by processors (grass for clean samples, washing impacts longevity)
    • bruised fruit needs processing within 48 hrs
  3. Conservation orchards
    • emphasis on conservation of landscape feature/genetic resource/wildlife habitat (i.e. Noble Chafer)
    • new planting needed to fill gaps but finances a problem
    • some income from sales of fruit; Heritage Lottery and Landfill Community Funds
    • several projects ongoing
Sarah-Jayne Dunsby, recent graduate of the Royal Agricultural University, presented briefly her academic research on the "Future of Top Fruit Industry in the West Midlands", mentioning a issue I have heard from several other young farmers before: succession planning. She also mentioned that availability of (seasonal) labour is getting scarcer, a concern expressed by other speakers as well.

A commercial producer, Michael Bentley of Castle Fruit Farms, introduced us to his recently created orchard where he grows trees for maximum efficiency by growing trees with double leaders, in order to maximise cropping and minimise labour (which takes up 2/3 of his costs - fuel electricity and fertiliser only adding up to 3% but pesticides costs running into the 20k/yr).

His key issues are:
  • soil fertility (green waste at 3% N and fertigation to get the trees to full production within 5 yrs)
  • mild winters causing poor vernalisation and pollination
  • seasonal labour (he needs 30-35 people during the fruit season)
  • pollination (he called bees "lazy pollinators" and is more keen to encourage moths, bumbles and hoverflies)
  • pest control (pesticides kill the beneficial insects as well as the pests!)
  • biodiversity
For the last 3 reasons above he manages headlands. Someone from the participants asked him whether, given his is an intensively managed orchard, he could not leave the odd tree to senesce as wildlife habitat, but apparently it would not be commercially feasible. The accepted practice is to rip out any dead tree, as they would cast shade (and light is a limiting factor to growth in the UK, in fact he can only grow his trees to 3 m high instead of the 4 m that are customary on the Continent) and reduce productivity: it costs 20-25k GBP to plant an orchard to last 15 yrs within which it has to yield a profit.
    We then got to hear from Dave Kaspar of  Day's Cottage Farm, who restored with his partner the traditional orchard on their family farm under a no-spray, no artificial fertiliser system: 100 acres with widely spaced trees on a ridge & furrow land that creates a suitable microclimate. The trees are set in permanent pasture and the business produces juice, cider and perry, besides running the orchard as a skills centre.
    With the great enthusiasm of the trainer and evangelist, Dave pointed out that traditional orchards were planted by hard-nosed farmers, not just for the environmental reasons we value them today, so restoring and operating them should come with a profit, and it does for them. Last year they managed to sell fruit for 7 months of the year, but they are also training the community to accept the fact that fruit - like all agricultural products - is naturally not there all year round.
    And he finds his orchard is "fantastically biodiverse" (9 species of bat, 30 species of birds, 70 species of plant and 120 species of insects in his uninproved grassland) and that beekeepers are keen to take hives to his land because of the no-spray regime that is best for bees. Some funding he receives from Countryside Stewardship and Natural England schemes, and he got a grant from the Gloucestershire Environment Trust.

    The day was concluded by a presentation of Adrian Barlow, English Apples and Pears Ltd, the trade association, who run through the recent and prospective developments of the Industry:
    • 1970s competition from Europe
    • 1980s greengrocers and wholesalers model change
    • 1990s causing a 36% reduction in hectarage
    • 2000s consumer concerns about locally grown food and traceability, as well as chemical residues; "plant protection products" expensive for growers too; large investment in packhouses and coldstores about efficiency and more precise grading
    A modern orchard contains about 4000 trees/ha and new varieties are yielding up to 70 tonnes/ha! I cannot quite picture such huge numbers in my mind: is that how people think of orchards?
    But what really struck me is the amount of work that is placed in sensory and appearance research to decide which cultivars will be popular and on finding the right name to market them successfully... isn't it a curious world where only the apples with the right balance of colours on their skin get eaten? The current fad seems to be bi-colour and vibrant; green is off, being associated with acidity and so is yellow, thought to indicate over-ripeness!

    Investment at the moment is stifled by concerns about recouping it on the market, and Russia has been a major importer, so when it closed to imports the market became really unbalanced. The market for apples and pears in the UK (dessert, culinary, cider etc) is just over 700,000 tonnes - I have tried to double check that on the Government's Basic Horticultural Statistics but groupings of fruit are not entirely clear; in any case, we import about 2/3 of the apples we use (although there seem to be some support by the "multiples" for British products, that can fetch a 25% premium).

    As this week I need to research apple cultivars for our Crop of the Week exercise, I have summarised below the considerations made about common and future cultivars as they were mentioned (together with some research I did myself for the homegrown market).

    Most popular cultivars
    Homegrown
    Flavour, good storage quality,
    Specific season (early, late), disease resistance, reliable cropping
    Commercial
    Sweet taste, firm and juicy texture, vibrant skin colour, no russeting/marks

    ‘Gala’ 26% of the market (up from 16% in 2003)
    ‘Braeburn’ 18% (up from 1% in 2003)
    ‘Rubens’ (earlyish)
    ‘Jazz’
    ‘Kanzi’ (NZ)
    ‘Zari’ (early, Sept apple)

    ‘Egremont Russet’ 35k tonnes/yr (of some 750k market) best sold traditional UK cultivar
    ‘Cox’s Orange Pippin’ 23k tonnes/yr
    There is a marketing campaign on in UK for ‘Bramley’ organised by the

    New cultivars
    Homegrown 
    Novelty, local and traditional
    T&M  Apple 'Isaac Newton' (Malus domestica, Apple 'Flower of Kent') hefty cooking apples with an old-fashioned, bumpy shape
    Frank P. Matthews ‘Little Pax®’ stunning spring flowers, from 19th century St. Cecilia’s Abbey on Isle of Wight
    ‘Rosette®’ sport or seedling of ‘Discovery’ red-fleshed from Worcestershire
    Commercial 
    Good taste and flavour, free of defects and russeting, skin colour vibrant, rapid fruit production (within 5 yrs), fruit size (not too big) and consistency (80% at least of the fruit being class 1) at higher yields (up to 70 tonnes/ha); replace imports, new early varieties and sell later ones even later (i.e. 'Cameo' has potential). 'Sweet Sensation' new cultivar being tested; 'Opal' to get into the 'Golden Delicious' market.
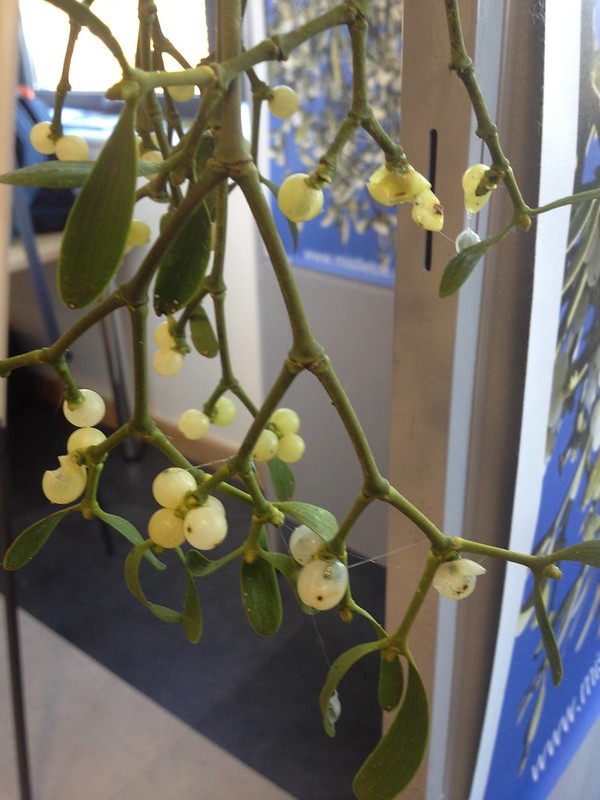
    Viscum album
    There were some stalls in the margins of the conference; the most interesting one for me was one about mistletoe (Viscum album). Is it a welcome niche habitat or a threat to orchards? An opportunity for a side crop or a threat for the main one? It is endemic in the Three Counties and there is a project trying to find out.
    Thursday, 13 November 2014

    The strawberry beds

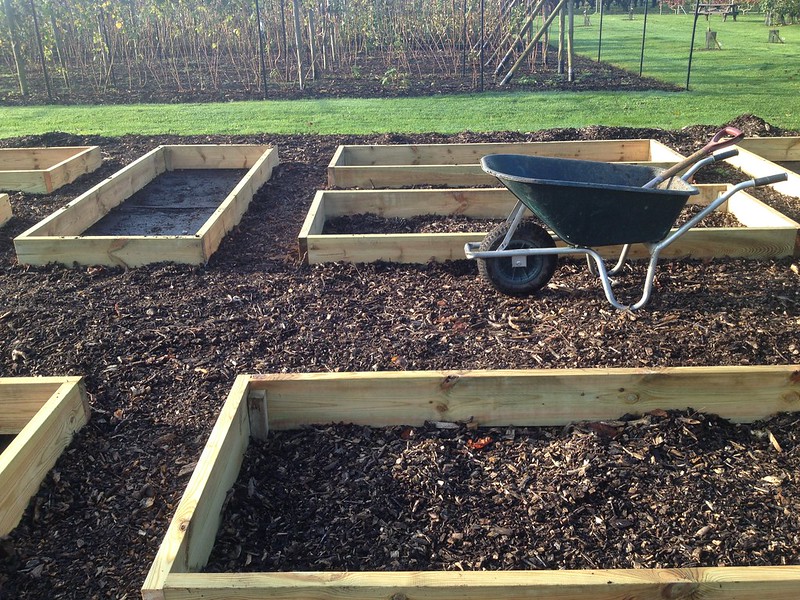
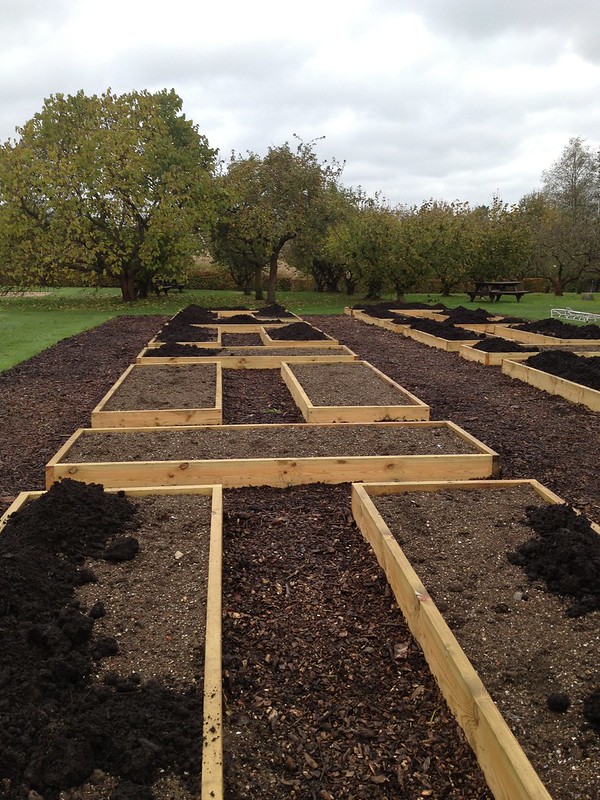
    As part of the continuous improvement and renovation of the Fruit Gardens, the strawberry area beside the fruit stock beds has been transformed, and new permanent raised beds have replaced the metal benches and compost bags. I have helped in this development over the last couple of monhts.

    The design was agreed before my arrival, and the beds were put in place for us, but we had to do the clearing of the area and filling of the beds.

    We removed, first of all, all the compost bags and spent crops, followed by the frames.

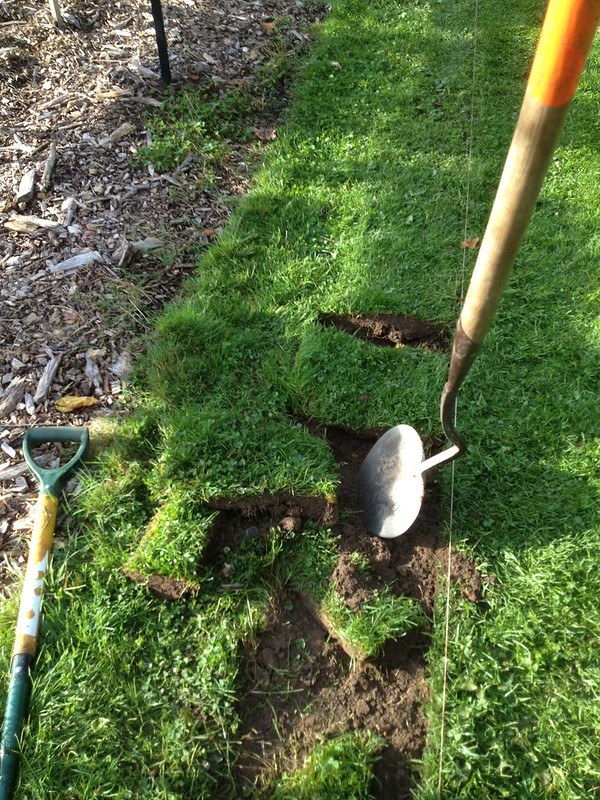
    Lifting turf previously sliced with a half moon
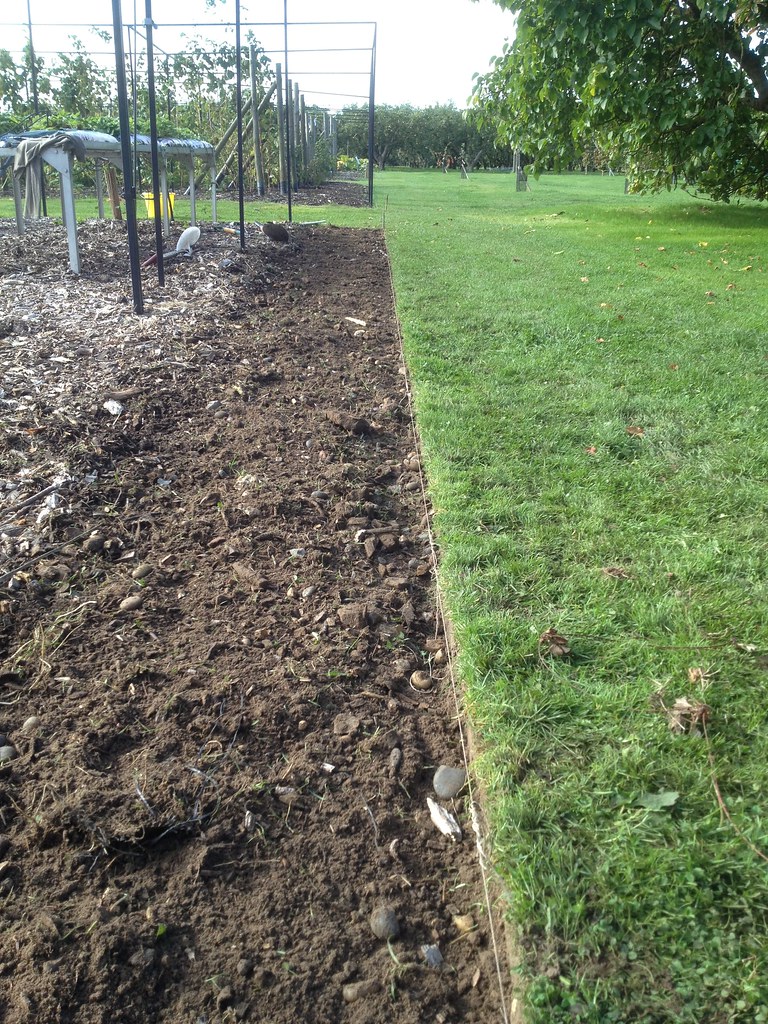
    New edge
    Then we edged the area - which was previously laid with
    plastic membrane and covered in woodchips to keep weeds at bay -  and aligned its perimeter to the other structures nearby, which meant cutting out a slice of turf (half moons and turf lifters do make such a difference as compared to using spades!)


    Once the beds were in place, we cleared the woodchips from the bottom, filled them with topsoil (two large lorries of it!), which was then left to settle for a while. Finally, we mixed in some compost that we produce from our garden waste.

    Making room for the compost
    Top soil settled,
    compost being added
    As the operation was spread over time, I can only make a rough guess: 8-9 FTE were required to complete this new area.  But when we finished today, it look very good and tidy, such an improvement on the previous arrangement.
    Working in the compost
    Structure of the beds

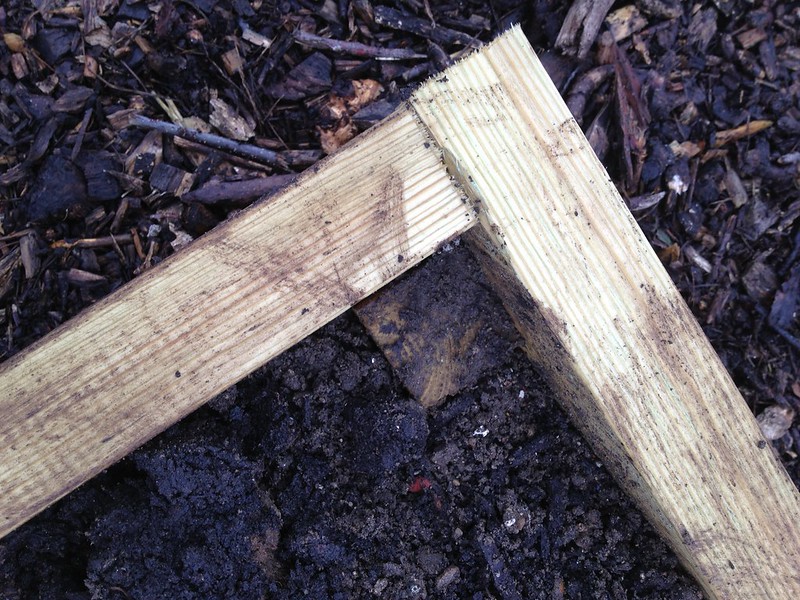
    I have often wondered which is the best structure for raised beds, and I like these, they look sturdy, so I want to take inspiration formy own on the plot. The wooden planks are fixed around four posts in the corner, which were driven through the plastic membrane.

    Now waiting for the spring to plant the strawberries!

    Post scriptum

    When you design a new planting area, it is a good idea to consider watering in some detail, possibly consulting an expert.

    The strawberry beds were supposed to be watered with driplines, on the soil surface, and a plan was in place. However, come the spring, and ready to put the strawberries in, the plan had to be revised for health and safety reasons: the dripline was considered a trip hazard because the paths between the beds are relatively small.

    Trenches: 2 parallel and 1 joining
    the two, in a H shape in between beds

    So it was decided that the driplines would be connected to the mains through underground piping and we had to spend 1.5 FTE digging trenches to bury the pipes in. To be honest, it was quite quick and a less daunting task than it looked to start with, but doing this ahead of laying the beds, would have been more efficient with the help of a digger.

    In any case it was extremely interesting for me to take part in this exercise, as I had never worked with watering before, and we had the opportunity to question the irrigation specialist.

    Holes for dripline connectors in the raised beds


    Depth gage
    32 mm pipes would be buried at a 40 cm depth (measured with a gage), in a H shape in between the beds, so that each could have its own dripline connector.

    If the pipes had been mains, they would have been buried at 60 cm to avoid freezing over, or accidental damage from digging.


    But because this is a secondary connection, and the beds are raised, so no digging is planned, it was possible to keep the pipes more shallow.

    The beds will be planted with two rows of 8 strawberries each, a cultivar per row; cropping should start this year and pick next year. It is forecasted that plants will be replaced every other year (depending how the cultivars perform) with stock grown on site, in the nursery, from specially devoted plants. These will not be allowed to flower or fruit, so that the energy of the plant goes into producing sturdier runners.


    And as of the 1st of April, the irrigation is in and so are some strawberries!