Orto di Casa Cecconi

My first allotment, and then one thing leading to another…

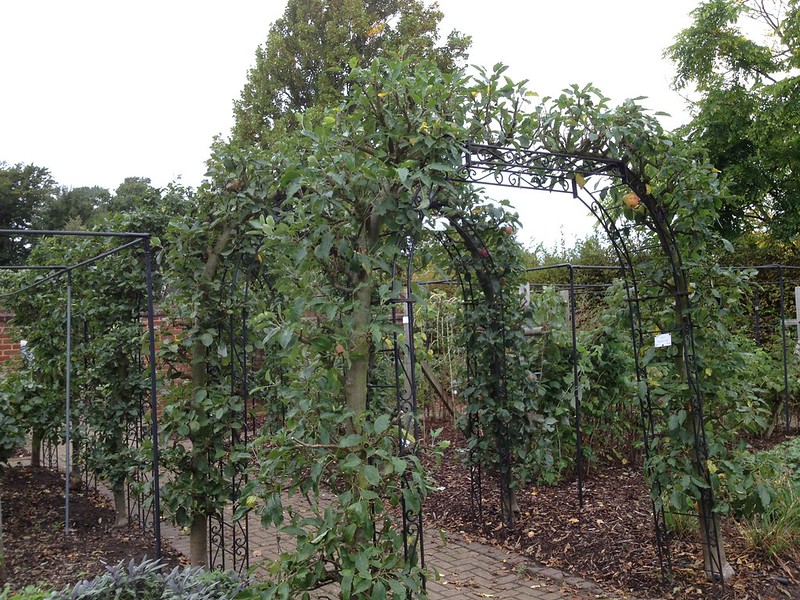
  • What a worthwhile pursuit to restore an orchard!

    It was Twitter that brought that to my attention: volunteers required for an orchard restoration project.

    Restoring an orchards is such a worthwhile project.

    Appeals against the disappearance of the traditional British orchard have gone on for a while now, the NT and Natural England have long campaigned to save orchards as a  matter of conservation: they are a wildlife heaven, besides providing us with healthy, local food. Don’t you think it’s crazy that most of the apples we eat nowadays come from the other side of the world, when Britan has such a rich history of cultivating our own, a country that in Victorian times had more varieties than anywhere else?

    There’s that, and then you know I love pruning: there is nothing I enjoy more than restoring a badly pruned tree to a dignified shape. I had no professional experience of fruit trees though, so this sounded like a good opportunity to learn more, and it was indeed.

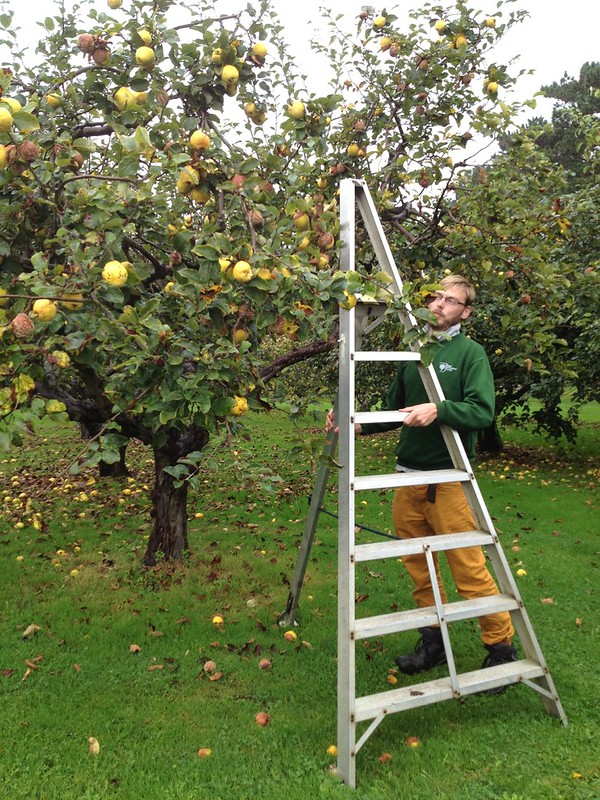
    Our very generous trainer was Bob Lever, orchard expert from Norfolk. The site Stanmore Hospital. The organisers: local Hoi Polloi project with the Urban Orchard Project.

    The old orchard, just behind the hospital restaurant, has gone neglected over the years and, as part of a community project, it is going to be brought back to life for the enjoyment of all (and to make delicious juice and cider, which we had the pleasure to taste).

    “A tree on top of a tree”

    At some stage, all the lower branches of the apple trees – originally goblet-shaped – had been cut, and the plants had responded by pushing towards the sky, in some case creating what Bob called “a tree on top of a tree”. That results in apples growing high up, and  in productivity of lower branches going down.

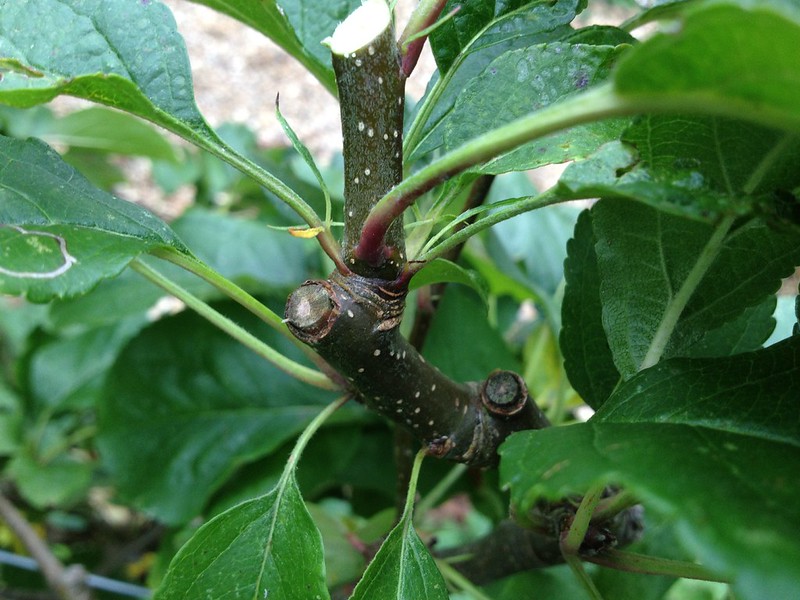
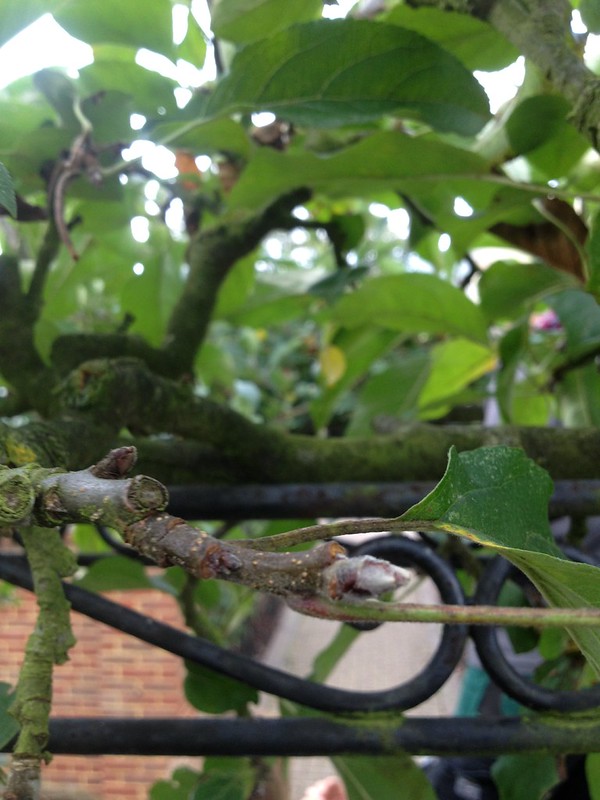
    Besides, unmanaged trees tend to produce smaller, poorer quality fruits, but pruning can re-invigorate them. You can tell a branch has been left too long when there is lichen growing on the tips: as lichen is very slow growing, it means it had plenty of time to get established. Also, in this season, the fruiting buds should be rather big and plump (the leaf ones much smaller), but that was not always the case on the trees in that orchard, that had tiny buds.

    Larger fruiting bud
    Smaller fruiting bud

    Our mission, as the first stage of restoration, was not so much to get rid of dead wood – which can be a good wildlife habitat (unless is obviously causing a problem to the plant or enabling access of pest and diseases) – but to start pushing the energy of the plant slowly backwards towards the lower branches, freeing the centre of the tree, so that more light could reach lower, and to relieve some of the trees – which, at their respectable age, start to get hollow in the trunk – of some excessive weight.
    The fascinating thing is that the hollow inside the trees is actually quite beneficial to their longevity, as it makes the wood more flexible to the tensions of growth. And most fungi growing on apple trees feed on rotting heartwood, so they pose no threat to healthy trees. But too much weight is too much.

    Bob suggested we take no more than 20% of the branches (plus any dead wood in the way), as trees that are pruned too hard push out vigorous vegetative growth at the expense of fruiting, and usually send it up almost vertically, at awkward angles that make the union rather weak. Incidentally, the most productive branches tend to have a 45° inclination.

    A phoenix tree

    “Phoenix trees” is another term we got to learn from Bob: it describes a tree that has fallen on its side, from which the side branches have taken over as a new tree – almost rising from the old tree’s ashes – to give it another lease of life.

    Phoenix trees only have part of the rootstock still in place, so they must not be left to grow too big, and they are actually sitting on the fallen trunk, so cutting it away is usually a bad idea (if anything, it should be propped, especially if there is a chance someone might be tempted to climb over it).

    Giving more space for the young, healthy branches, and clearing around the tree for easier maintenance were the suggested interventions.

    After such great introductions, we worked in groups on individual trees. I had a great time, teaming up with lovely volunteers Amy and Sue: we got to work on two trees, establishing a routine that got us quite far!

    In fact, one of the trees we worked on was the “tree on top of a tree” (in the picture above) from which we removed a large crossing branch, mostly dead, and an even larger vertical branch that was causing excessive weight on a tree that was already leaning.


    At the end of the day, and just before it started raining the usual torrents, we were proud to have pruned the apple tree to a much more proportionate, less top-heavy shape, that over the next three to four years can be restored to production and be enjoyed by the community.

    Before
    After
    Note: some more suggestions on how to prune apple trees on the Urban Orchard Project website

  • I’ve got seedy penpals… and musings

    January, that time of the year again.

    Forcing yourself out on a sunny, yet frosty, day to clean the greenhouse – your fingers numb – so it’s ready for the new sowing season…

    … and, of course, planning & scheming and getting all ready for sowing new seeds!

    That’s when the first round of the seed swapping scheme happens that goes by the Twitter name of #seedypenpals; it’s the brainchild of @carllegge and @ediblething and I wrote about this 2 years ago when I first joined.

    Two years on, and the 4th round of swapping underway, I have had some lovely pals and received a wide range of seeds…

    … from Lucy…
    … Suzy …
    … and Linda!

    Some of those I have grown and enjoyed already,


    while others are on my sowing plan for this year, but what is it I liked most of the scheme?

    I definitely loved best to receive home saved seeds. 

    It has made me reflect on the skill that saving and storing seeds is: you have to pick them at the right time, clean them (so you get rid of any possible weeds, pests, or diseased material), store them so they keep alive albeit in suspended animation (not too dry and hot: they would dessicate, not too humid: they would mould) … and you have to know your seeds, as not all are suited to be dried and stored. Yes indeed, some seeds are recalcitrant! There’s also the question of seeds coming true to type (if you are an RHS member there’s a very good article in The Garden November 2013 p.68, which incidentally does its best to put you off from trying to save your own).

    Prettiest of all, pond iris seed
    Acanthus seed an pod

    Over the summer I had the opportunity to visit the Wakehurst Millennium Seed Bank, and it really opened my eyes on what an effort it is to do the work properly, the patience that’s needed. It must be said, though, that it is such a pleasure to get to know all the various seeds and the engineering magic the seedheads employ to scatter them around.

    My revelation this year was Acanthus: it almost caused me a heart
    attack when the capsule exploded at midnight, the central rib gone stiff with drying, propelling the seed on my wooden floor with a loud thud.

    I also got thinking about the value of local seeds and locally adapted plants, which thrive on the local climate and you don’t have to fuss over them to keep them alive. Of the fact that seeds with scattered germination and uneven growth are more resilient: they don’t risk germinating all at the same time (think what would happen in case of a late frost if they were all out and at their weakest stage, the seedling!). That is also a good thing for home gardeners, who don’t normally love gluts followed by hungry gaps, but obviouly prefer a reasonable distribution of produce throughout the season – exactly the opposite of commercial growers, who need all the produce to look uniform and  be ready to pick at the same time… for so-called “efficiency”. You may have heard there’s a debate about a EU seed law touching just on that – I liked Lia Leendertz perspective on it most (on page 3 of 4).

    All of that thinking has no doubt combined with concerns related to my career change and much reduced income. Seeds have become for me less of a collectors’ item, purchasing which distracted me from a depressing London commuter’s routine, while growing engaged me physically to relieve the mental stress from office work, and more of a precious source of relatively cheap (you still have to work to grow them!) and nutritious food for my family.

    So… what have all those musings and reflections meant for me and my garden? 

    I had always picked as many seeds as I could lay my hands on, stuffed them into envelopes and mostly forgotten about them after the first excitement (though some I have grown on, often rather carelessly, with varied amount of success). But since #seedypenpals began, I have been much more diligent in picking, cleaning and storing seeds. 

    And, while I had always been shy to share them with others (as I thought they might not be viable) I have taken courage and spread some far and wide, even outside the swapping scheme, exchanging them with friends from Twitter. I have really enjoyed that. And the growing. And the eating.

    If you are curious, the highlights of my extra-#seedypenpals edible swaps have been: puntarelle, red kuri squash, and some purple perilla that should be on its way!

    And my first major crops from my new seed saving regime have been 10 delicious shark fin melons to cook in my soups (from seed saved last year after a Garden Organic member’s experiment) and abundant achocha for my antipasti (from Heritage Seed Library seeds).

    So, to the new seed sowing (and growing, and saving, and swapping) year! 

    I’m off to write to my new seedy penpal, whose contact details I have just received. If you feel inspired to start on your own seedy path, this is for you!

    seedy penpals

  • Cardoons

    Cardoons (Cynara cardunculus) is not a very common vegetable, either here in the UK or indeed in Italy, where, however, they make the occasional appearance in the shops.

    One of the odd and little known vegetables that are kept alive by elderly people eating them and that have seen better days, when they even had different regional names (while “cardi” is their Italian name, my mother-in-law from central Italy calls them “gobbi” or “hunchbacks” as they sometimes come in a bent shape) or maybe have ever only had primarily regional relevance (like the “bitter roots of Soncino”, Cichorium intybus, my auntie loves so much, or the “lampascioni”, Leopoldia comosum, my husband’s granny calls such a delicacy), and are slowly being forgotten in our globalised world.

    Cardoon is however a rather nice vegetable, and, what is more, it is available in the winter, when variety in the vegetable garden may be limited. C. cardunculus is a perennial, which makes it more interesting for me as less effort produces more crops. In particular, cardoon is a herbaceous perennial, which means it dies back after flowering in late summer and grows back in the new season.

    My cardoons have flowered beautifully every year, rising to 2+ metres high with their mighty purple thistle-like flower heads, covered in bees. As a plant, they also attract quite a lot of green and blackfly (possibly away from other crops) and with them plenty of ladybirds (mostly harlequins, but what can you do).


    Because of the flowering, they have then died back and I had no opportunity to taste them. I have been a bit downhearted because of that, until I found that Riverford the-professional-veg-growers themselves have tried and failed to grow them this year, so that cheered me up a little.

    Shortly after that, I spotted one of the plants had grown back straight after flowering. This was my opportunity!

    As you eat the stalks, like with rhubarb, and chlorophyll makes them rather bitter, you need to blanch them. I wrapped the leaves in some fleece and came back after a couple of months.

    The stalks looked rather miserable, as the slugs had obviously had a great time with them. But I decided to have a go anyway. Oh I was so glad I did!

    You need to strip the leaves and peel back any stringy fibers from the ribs (as you do with celery). Cut them in large chunks and keep them in acidic water (with lemon or vinegar) to prevent them from going black (as with artichokes). Even if you blanched them in the field, you will have to blanch them again in salty water until they are tender but not mushy.

    Here is how they looked after I took them out of the water. I can assure you they looked much better after they went into the oven with some butter, mozzarella and grated parmesan on top, and came out coated in a nice, crispy cheese layer. They tasted sweet, mildly artichokey: delicious! They did not last long enough for a picture. And the husband test never fails.

    Definitely something I will need to work on this year. I am going to grow more plants, and flowers buds may need to be removed, altogether, or maybe just cut back early in the season, so the plant has time to recover (I quite like the idea of the flowers). And I have to find the most suitable material for wrapping them and keep out the slugs. Unfortunately there is not much information that I could find either in books or online. Riverford went all the way to Italy to learn the tricks of growing cardoons – I tried asking them if they could share it, but I’ve never been too lucky getting answers from them on social media. I’ll try to investigate with my Italian network… I’ll get there somehow!

  • All the goodness in those lemons

    Citrus limon. I adore it. And lemons are so useful in the kitchen, in Italy we say you should always have at least one at hand.

    You can drink their juice, full of vitamin C (also containing vitamin A, calcium and phosphorus) and hot, sweet lemonade is an Italian traditional cure for indigestion; the same juice helps your jam set, and you can flavour dishes with both juice and zest. Drinks and dishes can be garnished with their pretty slices and you can use any leftover halves to de-grease pots and pans and take away the smell of fish; leaving them in the fridge is also said to prevent smells there. Adding their juice and leftover halves to water when washing vegetables that oxidise (i.e. artichokes) is the perfect way to prevent discolouring. And you can eat the peel, which, instead, I seem to waste most of the time.


    I thought of all the effort of growing and picking the lemons, packaging and transporting them all the way to my home. Making the most of them seemed the only reasonable thing to do.
    So, when Riverford sent me a particularly fresh, healthy (and untreated: unwaxed, no fungicides), juicy and thick-skinned lemons I decided I would use them whole: such a pity to waste a valuable and delicious edible.

    First thing, I juiced them, and made ice cubes with the juice. It has been very convenient and handy over the weeks I must say. It’s always there when needed and no mouldy or dessicated old lemons in the fridge!

    Then I decided to candy the peel. Which is very easy to do. You only have to slice every juiced half in half and peel away the translucent membrane (leaving the spongy white pith). It comes off easily.


    Then you slice as thick as you wish, and, to take away the bitterness of the white pith, you blanch in boiling water. I do it twice, throwing away the water once it has become yellow.

    After blanching them, and without further ado, you cover the peel with sugar and water (2:1) and bring it to a quiet boil – stir from time to time and do not let it stick: add more hot water if needed. 

    When the peel has turned translucent, it is ready. Drain, reserving the aromatic sugar syrup (keep it in the fridge, it might go solid) and let the peel dry for a couple of days (or as necessary) on a cooling grid.

    Candied lemon peel is gorgeous to eat as is (irresistible, but be careful to stop in time: after a while your tongue will start to fizz rather unpleasantly with the essential oil), or I find that I can use both the syrup and the peel in my muffins, replacing part of the sugar with the syrup (remove anything coconut and use the peel instead of the raspberries, all the rest is the same).

    P.S. The gorgeous cooks at @SchumacherColl also use cubed lemon peel, fresh, in salads. The one I tried was with blanched greens (i.e. leaf beet) in a salad with olives, lemon peel cubes and some lovely seeds. I tried at home making a sliced carrot salad with lemon peel cubes and seasoned with a pinch of salt, lemon juice and extra virgin olive oil, which won husband’s approval. Definitely a winner!

  • Finding the right recipe for your produce

    It is very important to find the right recipes for your produce, the ones that bring out the best of its qualities – if you want to enjoy it. I am pretty sure that everything edible can be enjoyed if prepared in the right way.

    Just a few minutes ago I was talking to someone that had tried eating dandelion raw; unsurprisingly, he had not enjoyed it: dandelion can be rather bitter and an acquired taste, but if you cook it in the right recipe… A few weeks back, an English friend told me that she had enjoyed cauliflower for the first time, raw or quickly blanched, and it did not compare at all to the mushy stuff she used to eat – and hate – as a kid.


    This discussion also came out on Twitter over the winter, with regards to mashua (Tropaeolum tuberosum). Much like marmite, mashua seems to split people into lovers and haters (proven by @rhizowen survey!). Mashua has a funny taste, and is very aromatic: the impression I got when tasting it for the first and only time was eating potatoes while smelling violets… and that is weird. But I am sure there is a recipe that does mashua justice, and therefore I have grown a few plants this year, to have a proper go at findingit. @carllegge is a master of that art, and he has inspired me no end.

    But this post, which I have been mulling over for a while, is about tree spinach. Another “unusual” plant that I grew for the first time two years ago as part of Garden Organic members experiments. It is a pretty weed, Chenopodium giganteum, prolific self-seeder with green leaves tinged with purple dust. However, I was not over excited about it at the time of the experiments: the texture is downy and tougher than ordinary spinach, definitely less moist. Not a success as a replacement for blanched spinach.


    This year, thought, two years on, tree spinach made a voluntary comeback in my plot. And I was desperate for self-seeders that might give me good crops without too much work. So I decided not to pull it out and have another go.

    And guess what? I found the perfect recipe, a recipe in which it replaces spinach but that is more suitable to its texture: curry.

    Referring back to my Indian food guru, Anjum Anand, I found a recipe for spinach pilaff in her book Indian Food Made Easy.
    Here is my adaptation of that recipe.

    Spinach pilaff

    • 2 tbsp oil
    • 1 bay leaf
    • 2 black cardamon pods
    • 6 black peppercorns
    • 1 tsp cumin seeds
    • 1-2 green chillies, forked but left whole
    • 1 small onion, peeled and chopped
    • 300g cooked Basmati rice
    • 200g tree spinach leaves, blanched then pureed
    • salt
    • 3 tsp lemon juice

    Cook the Basmati: I learnt from @pukkapaki. Rinse away the starch until the water is clear. Pour into a crock pot, cover (just) with cold water, add a squeeze of lemon and a tsp of salt. Bring to the boil then put a lid on it and let it simmer in its own steam until the water gets all soaked up. You might need to adjust the water level, depending on the rice and pan. It usually takes some 10 minutes to cook.

    Blanch the tree spinach in boiling, salted water (never put vegetable in non boiling, unsalted water: the colour will go dull) until tender. Puree.

    Heat the oil in a large saucepan (I find cast iron is best for curries), add the whole spices and green chillies and cook for 20 seconds. Add the onion and cook for about 4 minutes until translucent. Stir in the rice, spinach and salt and heat through. Just before serving, add a squeeze of lemon juice to taste.

    That is a quick recipe, not expensive, filling, nutritious. Even leftovers, reheated, are nice to eat.

    My tree spinach is going to seed now, and I am letting it do its thing.

    It will be very welcome next year, and I will try some new curry recipes with it.

    I guess the moral of the story is: do not give up on a so so vegetable, give it a second chance, talk to other people that might have used them, and be creative in the kitchen, it might turn out to be so worthwhile!

  • Dandelion (Taraxacum officinale)

    Taraxacum officinale are beautiful wild flowers, laden in pollen (I remember a spring in the mountains when everything was covered in yellow “dust” as dandelions all came into flower) and last year, after reading about someone having the largest botanic collection of them, I started noticing the different leaf shapes… I even considered devoting them a special patch on the plot. But for some reason I did not think of picking them for food.

    Dandelions are 100% edible: flowers, leaves and roots. According to PFAF:

    • the flowers buds can be used as fritters, or like capers, after preserving in vinegar; the flowers can be eaten either raw or cooked, with a rather bitter taste, or made into tea; with the petals you can make wine.
    • leaves can be eaten both raw and cooked, and are rather nutritious; they can also used to flavour beer and soft drinks, as well as
    • the roots, also used as flavouring, or as a coffee substitute (I remember my auntie using it, either on its own or to bulk up her arabica).
    Dandelion at the front, catalogna at the back

    The other day I was picking my chicory catalogna, and next to it was a dandelion head, lush as I had never seen one. 

    The differences between the two leaves were small (in fact in Italy we call dandelion “false chicory”: cicoria matta), they can be used in the same way. And they are for free.

    I though it would be silly not to pick them. Blanched them, and they were nice, not even the husband complained. 

    So I picked a bag full of dandelion the next time I was on the plot.

    And here is where my bread post from last night comes in. I decided to make a pie with the dandelion, using some bread dough I had ready.

    Focaccia ripiena with dandelion leaves

    The dough was made with 150 g wholemeal rice to 525 g plain white flour: I used 2/3 to make pizza for dinner, and the remaining 1/3 I decided to fill with the dandelion (perfect as packed lunch). 

    First of all, I added a tablespoon of extra virgin olive oil to the dough and let it rise a bit longer, while I prepared the greens (inspired by this Italian catalogna recipe).

    I blanched the dandelion, then light-fried some onion in extra virgin olive oil, with capers, olives and anchovies (those preserved in olive oil), and threw it in, giving a good stir until the flavours had soaked through.

    Two thirds of the dough I used as a base, in a cake tin, greased with some oil. The remaining third of the dough, rolled with a pin, made up the pie top.

    180°C, 40 mins in regular oven (20 or so in ventilated) and… VOILA! 

    The greens have a slightly bitter aftertaste that complements well the slightly sweet wheat and rice focaccia dough.

  • Because bread just goes beautifully with most homegrown produce…

    I have been making my own sourdough bread since Carl Legge taught me in beautiful North Wales then sent me home with a little bit of his starter to set me off. Over the months, I have learnt some more, among others from Sonia and Joanna. And, with time, I have come up with my reliable recipe and a process that is adapted to my lifestyle. As my lifestyle is busy busy tired tired, I have gone for the least folded sourdough bread ever. Still, we are happy with the results here at Casa Cecconi, so we stick with it.

    My starter’s name is Bruna. She started off as a wholemeal wet starter, but now she has turned white. I freshen it up once a week or up to 10 days with as much again water (that has been left for a while so that chlorine & other chemicals they use to make it drinkable evaporate) and as much again organic 0 flour from Italy***. So 1/3 starter, 1/3 water and 1/3 flour.

    After leaving the starter to bubble up (up to a day, so that is smells nice and sweet and milky), I take 200g for my bread and put the rest away in a Kilner jar in the fridge. She emerges again in one week or so (often sour and smelly of vinegar so much it takes your breath away) gets to room temperature, then I freshen it up.

    And here for my reliable recipe.

    Sourdough bread

    • 200 g starter
    • 675 g white flour (I use plain flour rather than strong, and up to 150 g of it I often replace with wholemeal rye, rye meal, wholemeal rice, wholemeal spelt or just wholemeal**)
    • 300-350 g lukewarm water (depending on how the dough feels, which depends on the flour)
    • 1 tbsp barley malt extract

    Mix all together in a glass bowl (using a spoon with rye, as it sticks to your hands like hell), knead a little bit and leave 20 minutes to hydrolize. Then I add

    • 15 g salt
    diluted in a little bit warm water, and knead it until it reaches the right texture again. This would be the time to add any seeds to the mixture ( I have done it only once, with chopped pistachios).

    Just untucked for you to have a peek…

    Then I leave it to rise for a day, or a night, covered with a plastic freezer bag I wash and reuse all the time, in a warm place. Inside the oven with the light on was suggested, or on a sunny windowsill, kitchen surface or my mother in law used to tuck in her pizza dough under the duvet (warning: danger of spilling!).

    My “lifestyle process” is so adapted that I can make bread around a fulltime job away from home. So if you freshen up the starter in the evening and make the dough in the morning then you can bake it in the evening. Or, conversely. if you freshen up the starter in the morning, then you can make the dough in the evening and bake in the morning. Easy peasy.

    I don’t bother kneading until my muscles ache, or bashing the dough around, as some TV presenter seems to think necessary. 

    When the dough has risen, I turn on the oven to 225 C (regular, not ventilated) with my stone in it. It requires about 40 minutes for the oven and the stone to heat up to the right temperature. At the start of that, I shape the loaf, after folding it a couple of times, and give it a nice sprinkling of flour. Then I cover it with the (upturned) glass bowl, the one I had mixed and let it rise in, and go about my business.

    Loaf in the oven
    When the oven alarm goes off, I score the loaf (with a razor blade wetted in cold water) and place it in the oven for 55 minutes, together with a little metal dish with a tbsp of water to improve the crust.

    Best to leave your bread to cool before slicing, but
    sometimes you just can’t resist…
    When the alarm goes off again, the loaf is out of the oven and put on a wire rack to cool. 

    I store it in a straw basket inside a towel, where it keeps well for a week or so.

    I can send you some starter if you wish to have a go: it’s not so difficult!

    Notes:
    *** the reason why I am using Italian white flour for my starter, is that one of the friends helping me is Italian and she knew best how to rescue an ailing starter (too vinegary for my liking) with Italian flour types, and that was the only Italian flour I could get. Since it worked, I stuck with it. If you use UK white flour for your starter, keep it mind it comes with additives (more about flour fortification on the RealBread Campaign website).
    ** two years on, I have tried with chestnut flour, 250 gr of it, the rest plain white. It goes with a tablespoon of honey instead of the malt, and one of cocoa. Does not rise much, but it really nice, and goes well with butter and smoked salmon too.