As a kid, I remember coming home from school and some plant or other in the garden that was lookin great in the morning would have been hacked horribly, its dignity lost, possibly at risk of never coming back. That would see me fuming with my father, the perpetrator. I knew nothing about plants back then, except generically liking them. I never asked why he did that.
I went on, living my life without knowing anything about plants pretty much until I came to the UK and got my first garden.
Five years ago I was thought how to prune at Kew (mainly by Rossana Porta and Tom Freeth) and by amazing Bob Lever for the London Orchard Project. That will stay with me forever.
It got me the best compliment I could wish for: I was asked to cut a Garrya by half that was shading windows on the side of a building. After I finished, my boss said you could not tell it had been pruned at all. Oh the satisfaction!
A little bit more I learnt at Wisley with the Fruit team. And after all I took from my teachers, I have been trying to spread the word. Of course I do it for the plants!
This year, the lovely people on my new plot, the Sunnyside Allotment Society, organised for me to give a couple of demonstrations. The first one was this afternoon, in the most annoying drizzle ever experienced on the British Isles… lovely participants nonetheless, and some braved it out till the very end, too!
 |
| Proof of the miserable weather
and the patience of the participants! Pics by Andy |

Anyway, for anyone that might be interested, here are the notes from the session, and a compendium of all the pruning posts on this blog.
Natural shape fruit pruning
The art and science of pruning
About containing a pyramid Prunus
Pole pruning for restoration, formative pruning in an orchard
Trained fruit
Gooseberry cordons pruning and propagation
Indoors trained vines part I, part II
Other
Putting the culture back into horticulture
As the coursework for my RHS Special Option Certificate in Fruit and Vegetable Cultivation included a dissertation, I took the opportunity to explore a topic that I had at heart:
Breeding for biodiversity and sustainability with the help of the public.
The case of Oxalis tuberosa.
For the last year in fact I have been supporting the launch of a collaborative breeding project for oca (Oxalis tuberosa) in the UK: the Guild of Oca Breeders. Oca is an Andean crop which starts tuberising when days get shorter at the end of the summer. However, in temperate climates, the underground growth of the tuber is checked by frost, which kills the leaves above the ground. The same was the case for potato when it was first introduced in Europe, before day-neutral varieties were bred. The Guild aims to breed oca, which is a delicious tuber, along the lines of potato breeding. Because breeding is a resource-intensive process, and since there is little or no commercial interest in sponsoring it for oca, the project wants to mobilise the help of volunteers.
As I engaged with the various aspects of the project, I realised that a great deal of interesting topics had to be touched upon:
- the relationship between culture and agriculture: people, plants and the land;
- the breeding requirements for small and sustainable growers: resilient, locally adapted varieties, rather than uniform crops suitable for shipping around the world (which are favoured by “conventional” industrial agriculture)
- the intricacies and costs related to plant breeding rights and their impact on access to seeds;
- issues of financial viability for small breeders and the opportunities from the “citizen science” movement.
With limited time on top of a full time job and plenty of other coursework, I could only scratch the surface, but I think my dissertation works as a very high level introduction to the topics above, referencing some rather interesting articles – so I decided to publish it here.
Here is the table of contents:
Introduction
Putting the culture back into horticulture
- Edible crops for the future
- Sustainability, knowledge and culture
- Biodiversity for resilience
Plant breeding and participatory models
- Issues with current breeding methods and legislation
- Breeding for low input and marginal lands
- Participatory Plant Breeding
- Citizen science, open source, open data
Oca breeding and the Guild of Oca Breeders
- Oca a crop for the future
- Small scale oca breeding
- The Guild of Oca Breeders
Conclusions
References
PD&D: pests, diseases and disorders
As part of my coursework for the certificate, I had to write a Pest and Disease project. I researched 15 of the most common pests (vertebrates and invertebrates that feed, inhabit or otherwise live off plants, damaging or killing them) and diseases (caused by microorganisms such as fungi, viruses and bacteria), choosing ones that I had the opportunity to see in person at Wisley. As knowledge is for sharing, I am sharing it below..
We were however not required to study disorders, which are the third issue affecting plant health and as such are included in the acronym “PD&D” that you might have read somewhere, so I want to touch on them here. Disorders are physiological conditions in which the plant behaves abnormally in response to environmental conditions (i.e. nutrient deficiencies, drought, heat, physical damage etc.) – they are very difficult to identify, as this excellent guide from Michigan State University explains.
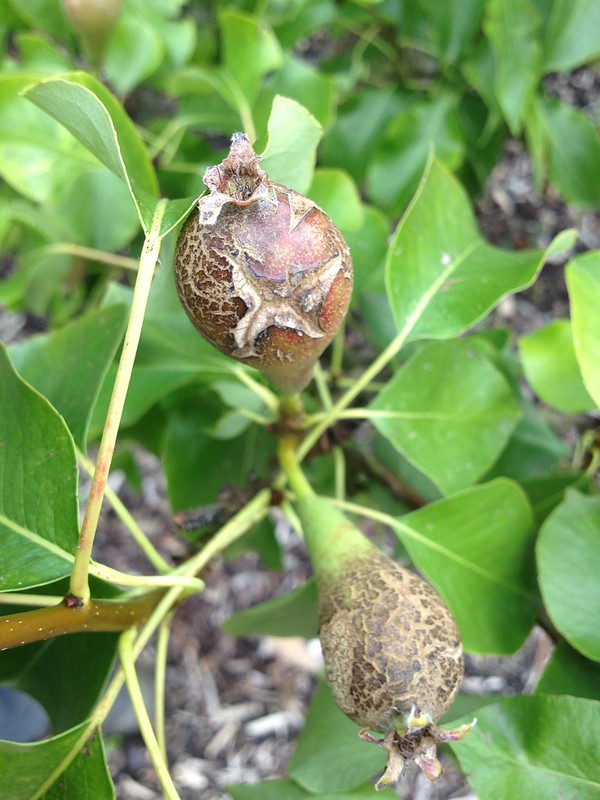
One such disorders I encountered at Wisley was on ‘Conference’ pears. In some years more than others, some pears develop corky lesions on their skin, maybe due to some nutrient deficiency and possibly facilitated by dry weather. These may on occasion be mistaken for fungal disease scab (Venturia pirina) but have been identified as a likely disorder. ‘Conference’ pears are particularly prone to them: not only did I received a good few questions from visitors that spotted it in the Fruit Garden, I had it on my tree at home. Dealing with it means simply removing the worst affected fruitlets, so that they do not take up the plant’s energy, but keeping in mind that most fruits grow out of it to become happy pears.
 |
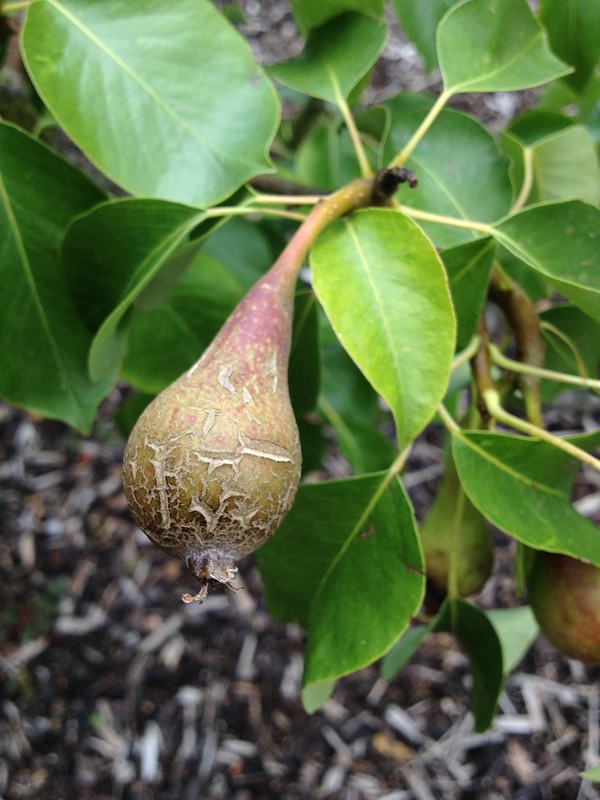 |
| Disorder, unspecified (badly affected fruitlets, left; mildly affected, right) | |
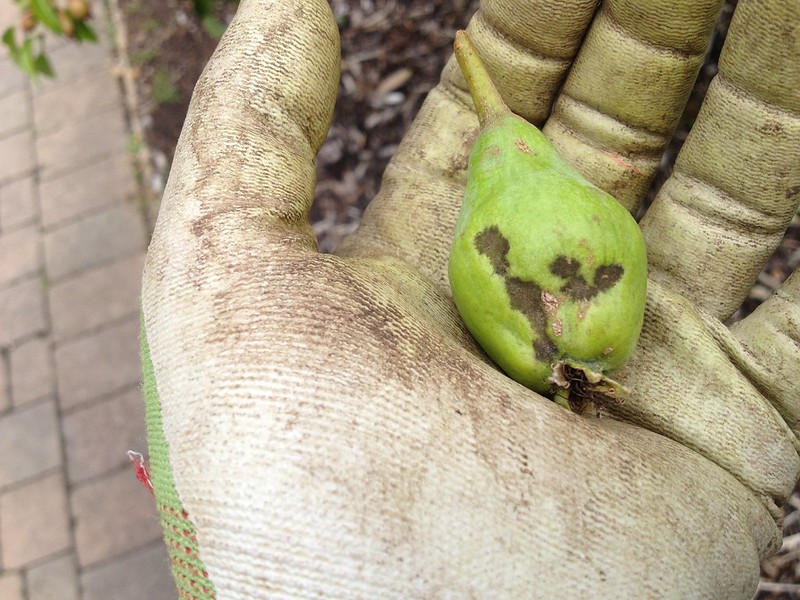 |
| Pear scab (Venturia pirina) damage |
together with the table of contents:
Fruit
Apple (Malus domestica) and pear (Pyrus communis)
Brown rot of apple and pears (Monilinia fructigena, M. laxa)
Apple and pear canker (Neonectria galligena)
Apple powdery mildew (Podosphaera leucotricha)
Rosy apple aphid (Dysaphis plantaginea)
Codling moth (Cydia pomonella)
Apple and pear scab (Venturia inaequalis, V. pirina)
Blackcurrant (Ribes nigrum)
Big bud mite (Cecidophyopsis ribis)
Gooseberries (Ribes uva-crispa)
Gooseberry sawfly (Nematus ribesii)
Grapes (Vitis spp)
Grey mould (Botrytis cinerea)
Raspberry (Rubus idaeus)
Raspberry beetle (Byturus tomentosus)
Cane blight (Leptosphaeria coniothyrium)
Vegetables
Cabbage (Brassica oleracea)
Cabbage root fly (Delia radicum)
Mealy cabbage aphid (Brevicoryne brassicae)
Leek (Allium porrum)
Leek rust (Puccinia allii)
Pea (Pisum sativum)
Wood pigeons (Columba palumbus)
Plum days
I have not written for a while, busy as I was with coursework deadlines, but in the last two days I have spent some time with plum trees, which I think is worth sharing.
Yesterday I helped the Plant Health and Seeds Inspectorate (PHSI) pick leaves from the orchard to be tested for plum pox virus, so that its spread can be monitored and contained. We picked 24 leaves each from 125 of the 127 trees that constitute the new plum orchard (2 of the trees did not have enough leaves on them to provide a full sample). To avoid cross-contamination of the samples, we used a new pair of gloves for every plant. The picked leaves were sealed in plastic bags and kept in a cool box until they were sent for testing. It was an interesting experience to make, as I had not realised the risks from plum pox before, but I must admit I was slightly uncomfortable with the amount of plastic gloves ending up in the waste bin.
Today, instead, I was helping our fruit specialist with chip budding plums, something I had been looking for. The process does not look too difficult, but of course it’s just because it’s done by a skilled person.
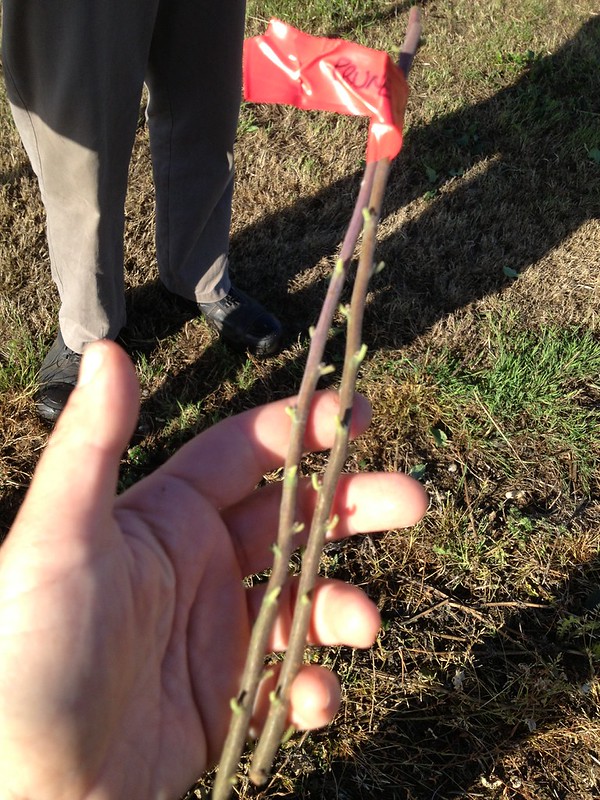
First, one has to collect the bud material: ripe new-year wood that has started changing colour. This is often found on the south facing side of a plant.
The stems are trimmed of the leaves, leaving a small part of the petiole (if we were doing T budding, we would leave a longer piece, as it would serve the purpose of a handle).
They are then labelled and kept in a cool place, preferably wrapped in moist towel until use.
Sometimes one cannot find first year wood, so it is possible to try with second year material (hardened wood).
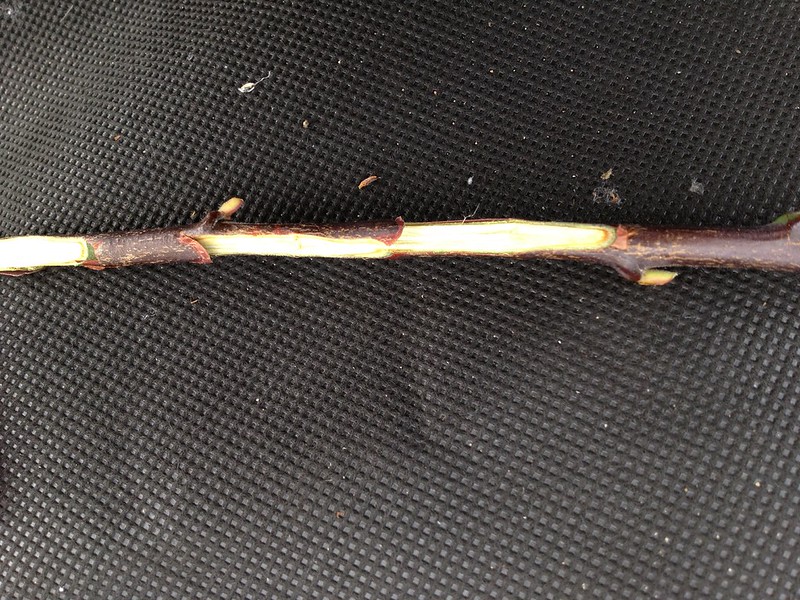 |
| Toe cut (the “lip” on the left), and buds removed |
The buds are removed, one by one, with some 3-4 cm of stem around them: practicing a “toe cut” at the bottom and then sliding the budding knife from the top of the bud down to the toe cut.
It is then the turn of the rootstock, which has to be previously cleared of any side branches at the base for 20-30 cm.
Then, standing astride over the plant,
- on the north side of the main stem (so that the bud
straightens up by growing towards the sun), - at a height
of 10-15 cm from the ground to avoid rain splashes (with possible fungal spores) and - possibly above a node (which will stop the knife from sliding
accidentally)
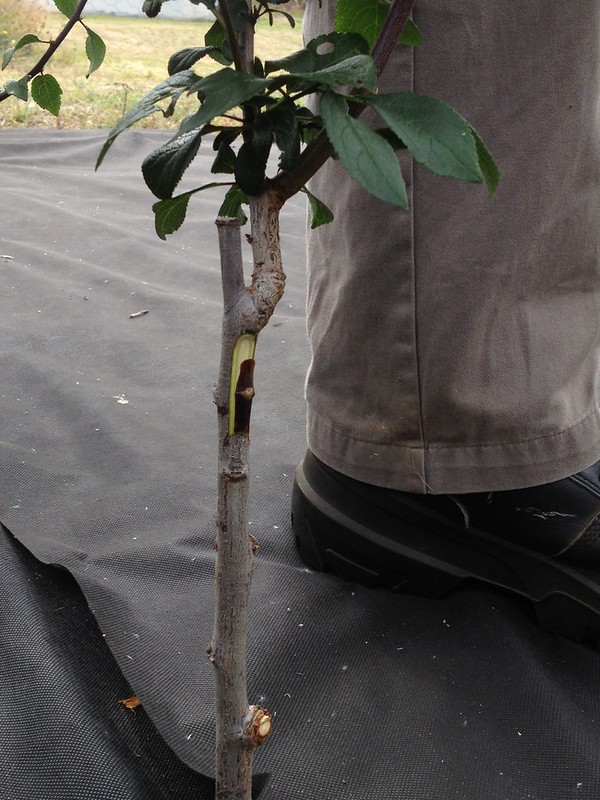
one makes another toe cut, then measures the length of the bud and cut a similarly sized superficial slice out of the stem. The bud is
then slid into the toe cut, ready for binding with grafting tape (a
clear plastic strip).
 |
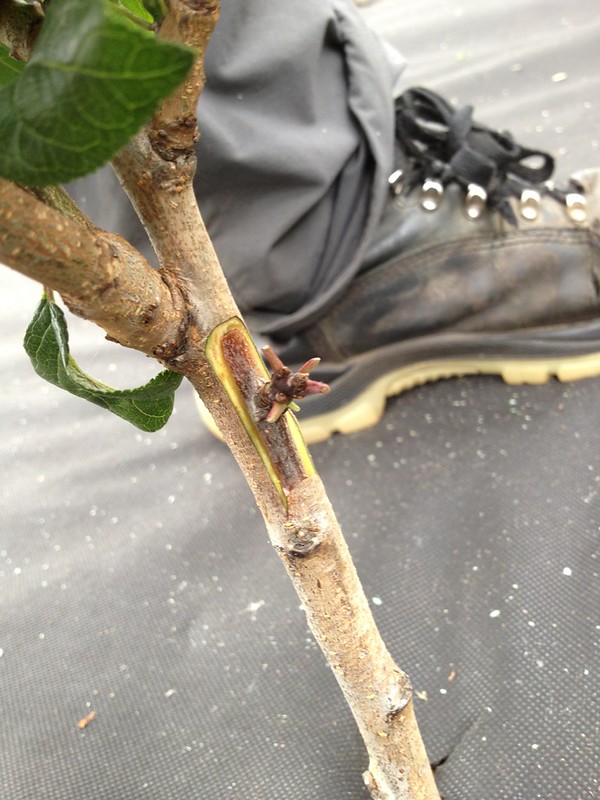 |
| Chip bud with first year bud | Chip bud with second year bud |
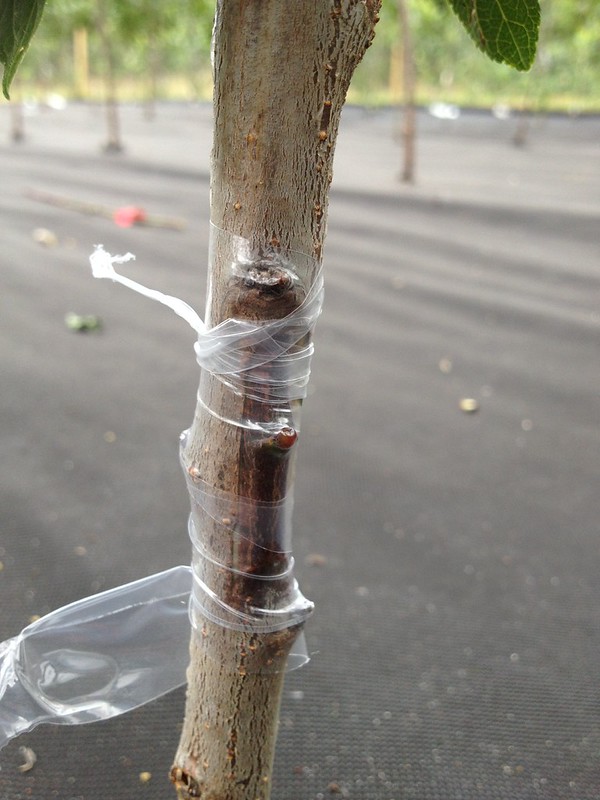
Binding needs to be tight: the fruit expert reckons that a good bud with
bad binding has less likelihood to succeed than a so-so bud with good
binding. The buds need to be covered with the tape too, unless it’s too
big to fit (i.e. on second year wood). The best way to bind is with
clear stretchy grafting tape. Starting from the bottom, this is tucked in, then wrapped upwards, and closed with a knot, pulling any hanging bits to finish.
 |
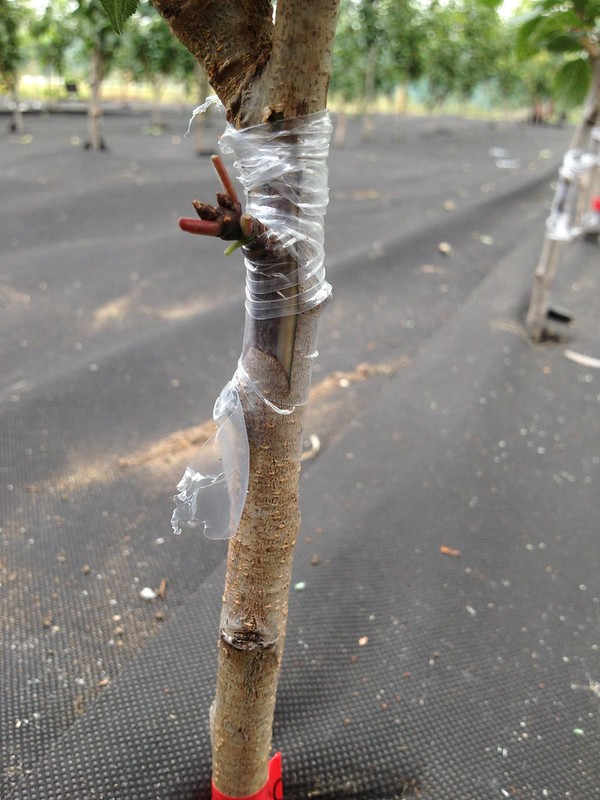 |
| Binding over new-wood bud | Binding around two year old bud |
I was in charge of the binding, and we went through some 90 rootstocks!
The tape will be on for 4-6 weeks until callusing of the wound is well underway. The fronds of the rootstock will be left on the whole season; cutting back will only take place next year in February (late February for apples), just when the sap start to rise, but before the pull is too strong, which may “flood” the bud and kill it.
Chelsea Flower Show 2015
It’s press day at Chelsea Flower Show and the RHS trainees flocked into London to lend a hand while getting some insider’s knowledge of the UK’s most famous display of plants and garden design.
I was assigned to assist one of the judging committees for the exhibits in the Great Pavilion: on a tight schedule for two and a half hours, we had to help the judges navigate their way through 17 exhibits, which they were to judge from the perspective of their specific expertise.
The displays are judged based on the brief submitted by the designers, and according to horticultural and design criteria such as:
- plants,
- overall impact;
- endeavour.
The best displays receive a medal: bronze, silver, silver-gilt and gold, but during the show garden and exhibits are also assigned special awards.
The judging process is very confidential as the stakes are high for the participants to such a high-profile show, and the results will not be announced until tomorrow. That is why trainees are asked to make room for the judges around the exhibition so that they can observe thoroughly and are allowed the privacy to and discuss their votes without prying eyes. In the process, we got first hand experience of what it means to judge an exhibit. Once the medals were assigned, a group of us also helped the judges on a further round of judging for the awards. The judges were then going to spend the rest of the day finalising the distribution of medals and awards, while we got time to spend visiting the Show.
While Chelsea is mainly a flower show, there were some fruit, vegetables and herbs exhibits and I was on the committee in charge of evaluating them, which was fascinating!
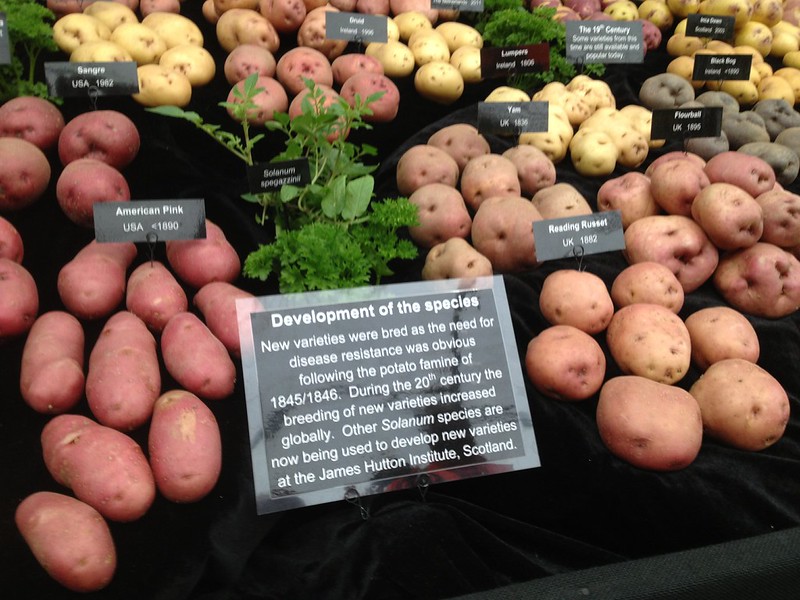 |
| Potatoes at Chelsea! |
My favourite edible exhibit was an educational potato display with some 140 varieties grouped by species: the colours and shapes really stood out, highlighted by the black background. Morrice and Ann Innes designed the display, which was sponsored by seed and plant company Thompson & Morgan.
For some people, the enormous variety of potatoes must be a novelty indeed… it was for me when I was first invited to join a Facebook group of potato breeders and growers called “Kenosha Potato Project” where I’ve seen the strangest, more colourful and interesting shaped tubers from across the world and learned that “papas” is the original name of these favourite of tubers. They come in such coloured and varied shapes as exemplified below!
(Posted by Edilberto Soto Tenorio on Sunday, 22 March 2015)
The Grenada’s ‘Pure Grenada’s Rainforest’ exhibit was also rather gorgeous, displaying lush green, bright colours, spices and fruits that are native to the island: one had to recognise that some places on earth are blessed with particularly show-worthy flora, such a Solanum mammosum or titty fruit, which is said to resemble a human nipple on one side and a cow’s udder on the other, and pink banana Musa velutina.
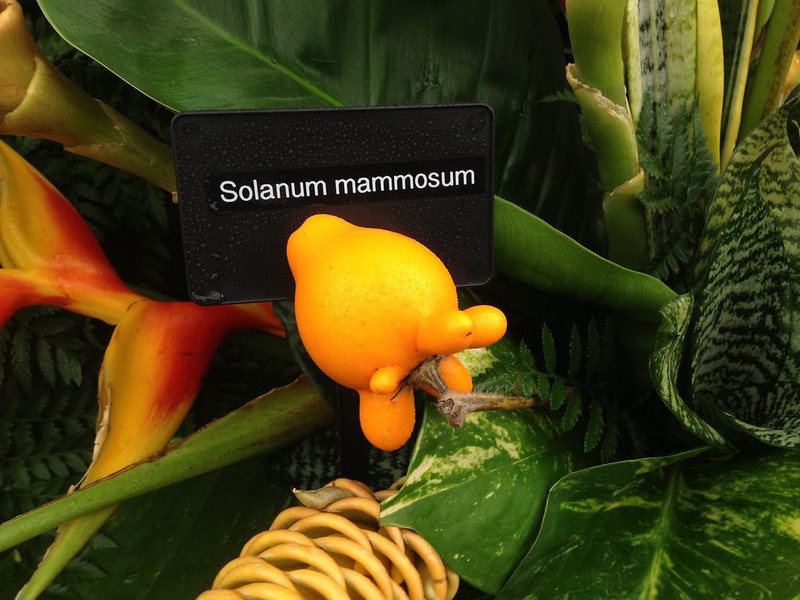 | 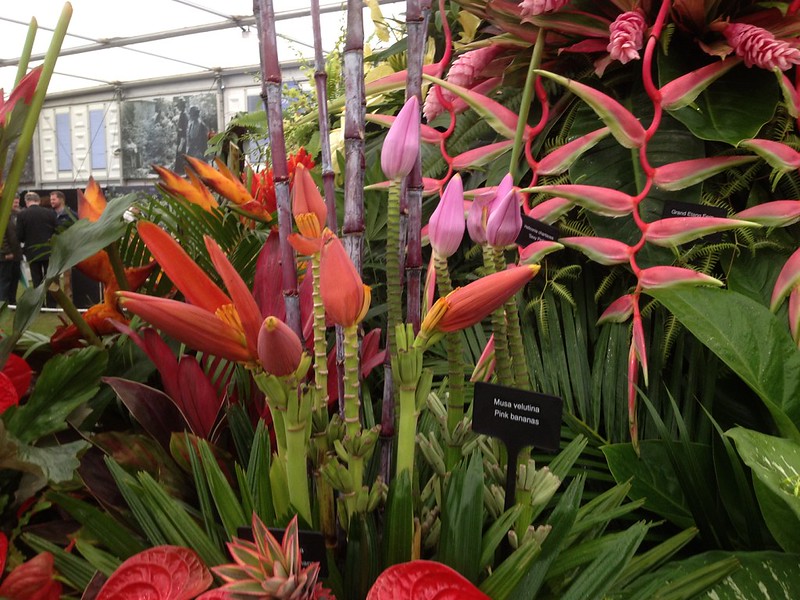 |
| Solanum mammosum | Musa velutina |
Delicious fruits, such as the colourful fruit of Theobroma cacao that gives us chocolate, or the versatile Zingiber zerumbet, with its edible tubers, juice, leaves that can be used as flavouring, and flower heads that are turned into shampoo!
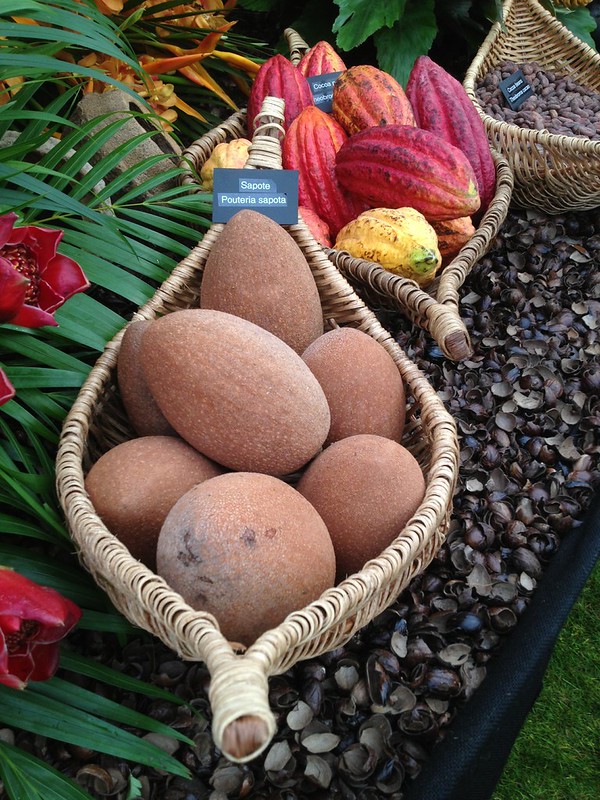 |  |
| Pouteria sapota and Theobroma cacao | Zingiber zerumbet |
I also found a delightful herb garden
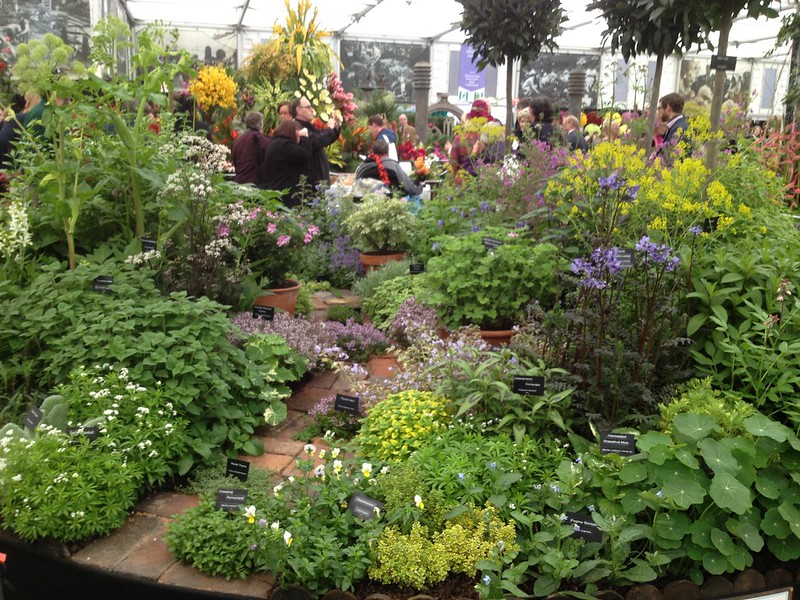 |
| Herbs exhibit |
where I was particularly attracted by 3 herbs: Galium odoratum with edible dainty leaves and white flowers, which I first saw in a garden I worked in last year and two non edibles: Polemonium caeruleum with dark leaves and blue flowers and Prostanthera rotundifolia a shrub with pink flowers.
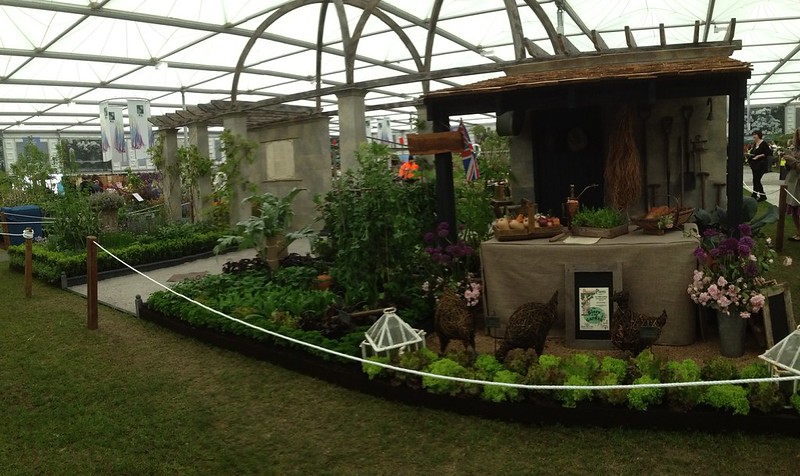 |
| Pennard Plants stand |
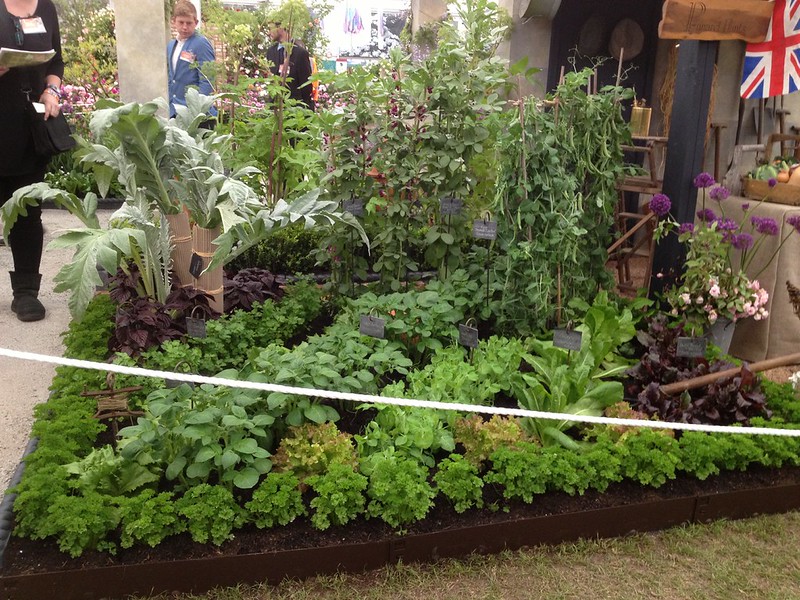 |
| Detail of vegetables at Pennard’s |
To conclude I will mention the rather glorious exhibit by Pennard Plants, inspired by a R. Kipling’s poem “The Glory of the Garden” in its 150th anniversary, with stunning vegetables.
P.S.: Glad to say the potatoes I helped being judged got a gold medal, the first of its kind! Grenada and Pennard Plants were also gold medallists.
In the veg garden
Sowing sowing everywhere, then thinning out, planting out, covering, watering… it’s a busy time in the veg garden where the spring rush is on to get the beds filled and looking lush! That is what I have been doing over the last two months in the veg garden particularly, and below is more information by technique and crop.
Sowing
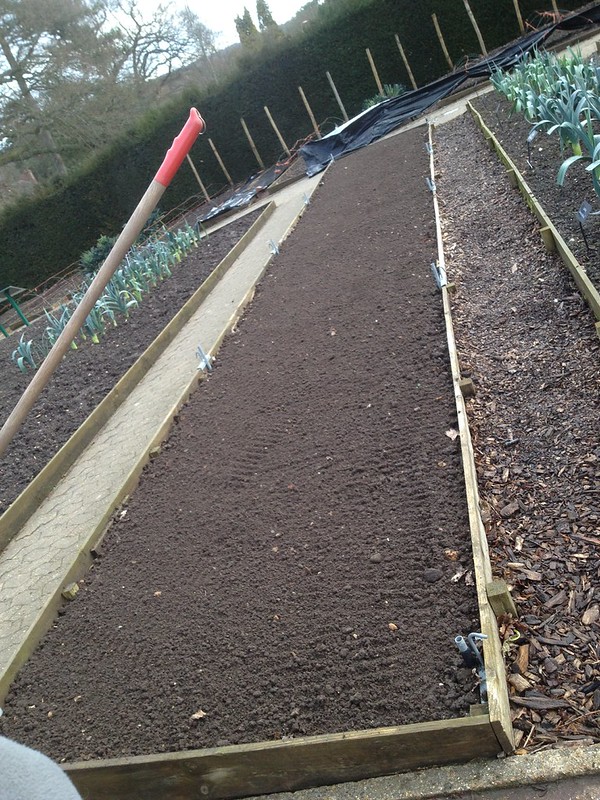
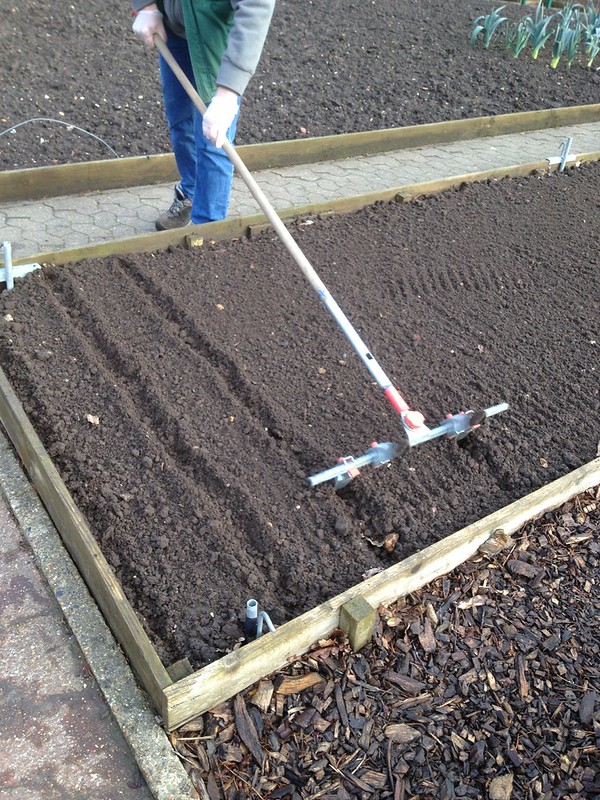
To get the perfect sowing, the beds need raking to a fine tilth.
Then, with the help of a row maker, you can draw straight lines at even, well calculated distances, and of course perfect grids (for planting out).
 |
 |
| Rows to sow | Grids to plant out |
Summer radishes are sown 1-1.5 cm deep, at 1 cm spacing (thinned to 5 cm), with and 20 between rows (15 in a greenhouse); one shouldn’t water seedbed until germination. In summer, if the soil is dry, water the drill before sowing the seeds to create a microclimate for them to germinate but not the surrounding soils.
There are two type of summer radishes: rosette leaves (ideal for early sowing, require
lower light levels) for example ‘Rudi’, ‘Scarlet Globe’ and tuft leaves (ie ‘French Breakfast’) which are best sown towards the end of March. If you sow them too late they go straight to flower; the same happens if you don’t thin them out.
Winter radishes you sow beginning of summer to Aug, they are ready Sep to
Nov, some like mooli, also know as daikon, overwinter but require wider spacing, at least 30 cm and 30 cm between rows.
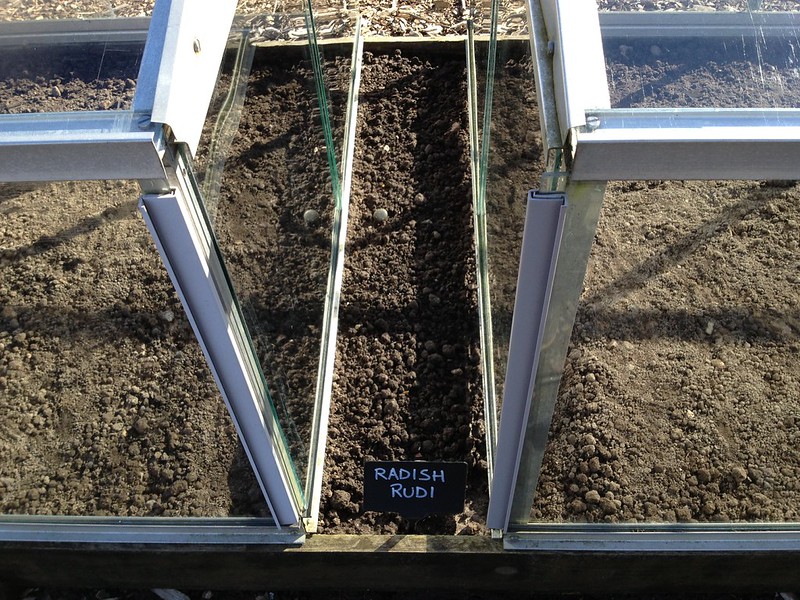 |
| 2 March |
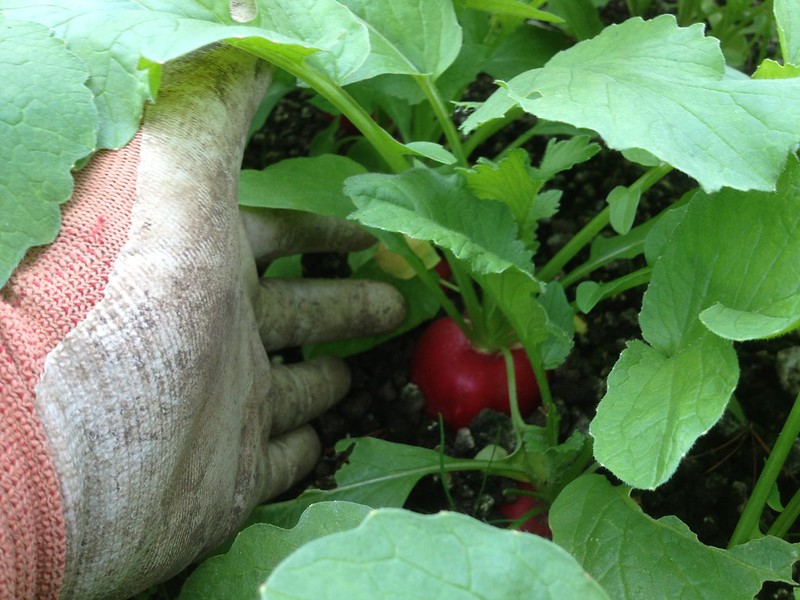
 |
| 13 March, thinning out |
 |
| 13 April |
 |
| 30 April |
Spinach
Spinach is sown at 2.5-3 cm, then thinned straight away to 5 cm. Depending how big you want your plants, you can also decide to harvest one in every two plants as baby leaf. Mind you leave 30 cm between rows.
Spinach is very sensitive to day length so pay attention: there are early sowing (flowering on longer days) and late sowing varieties (that can be sown both spring and autumn, as they are flowering on shorter days).
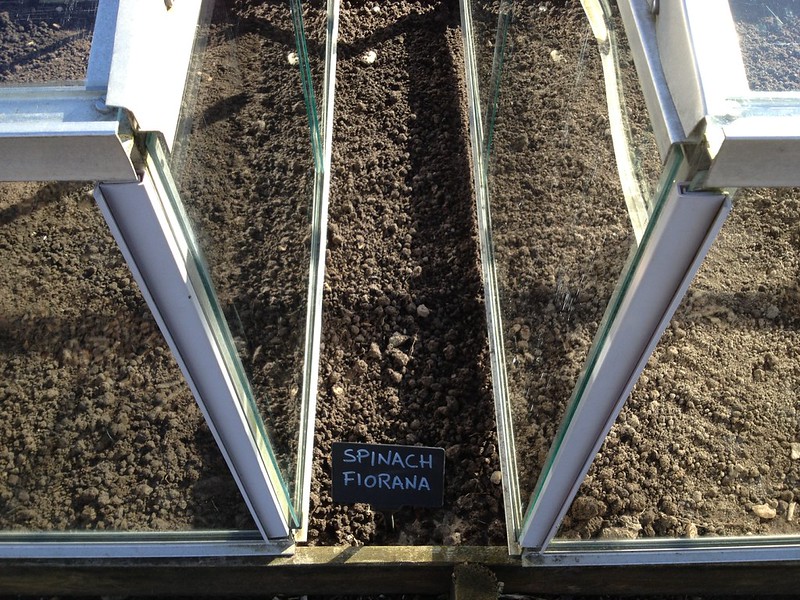 |
| 2 March |
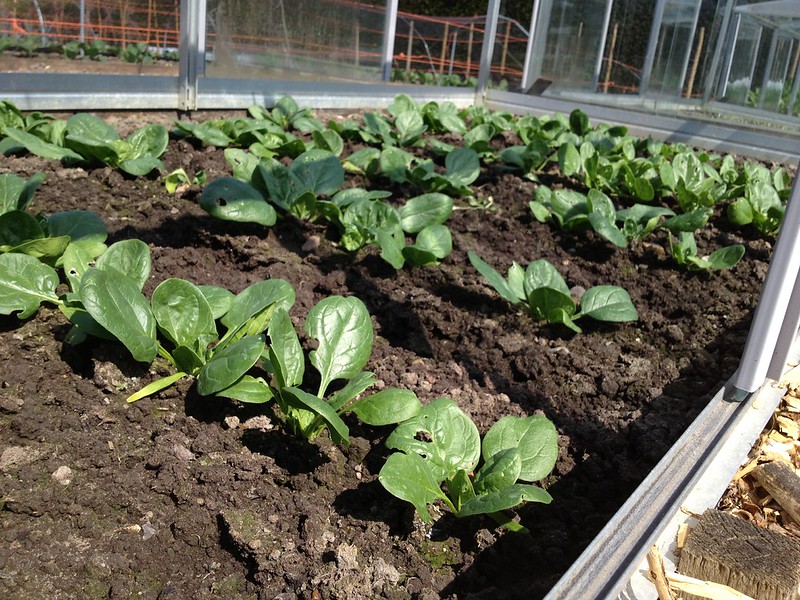 |
| 20 April, thinning out |
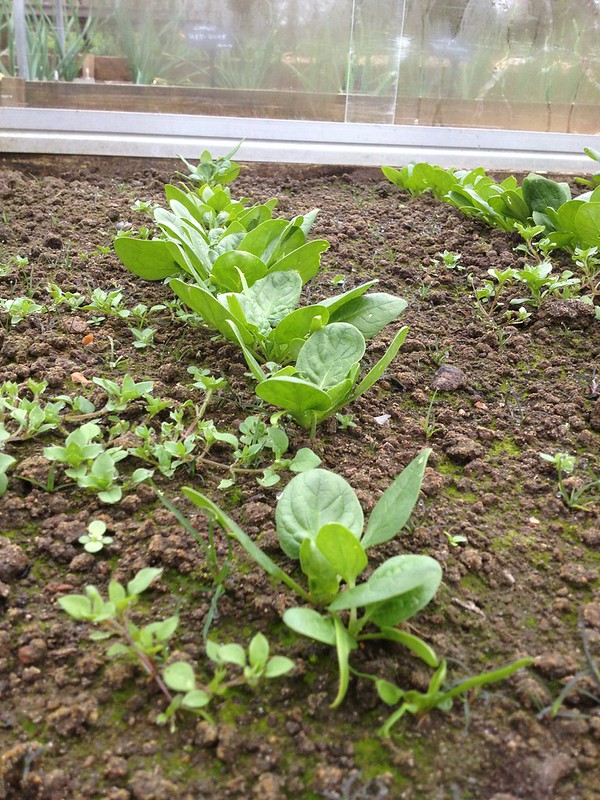 |
| 13 April |
Beetroot
Beetroot is for sowing April to June, but a few varieties that do not bolt if they get cold (ie ‘Boltardy’) can be sown earlier.
Spacing: 5 cm (seeds are in a cluster) and 30 cm in between rows. They require
thinning by snipping off any extra seed in the cluster that germinates.
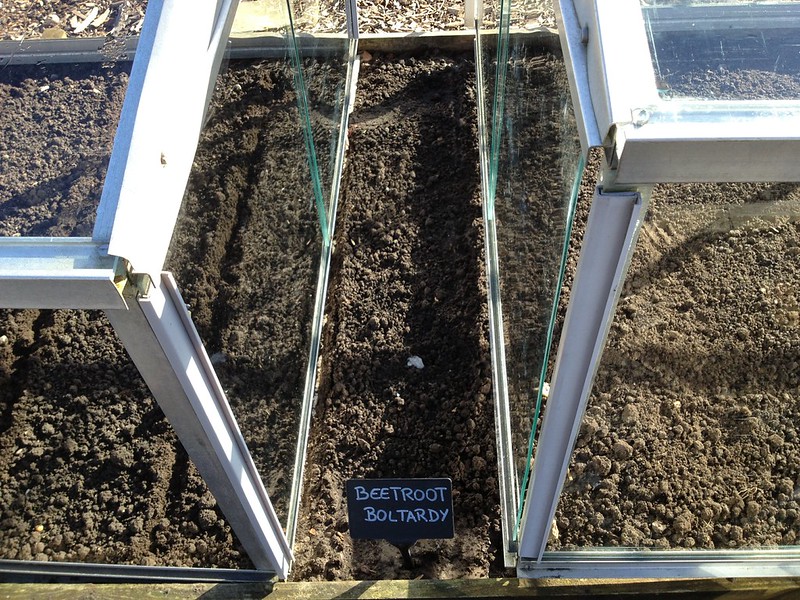 |
| 2 March |
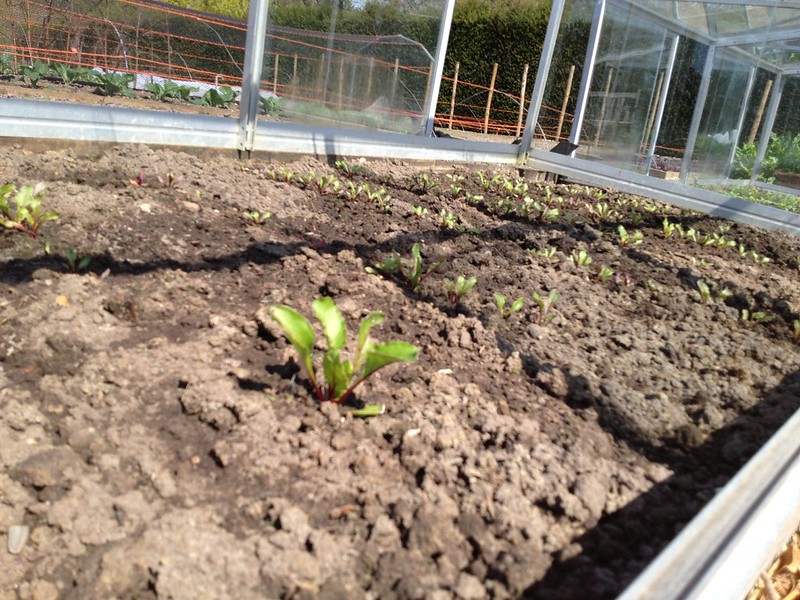 |
| 20 April, thinning out, poor germination |
 |
| 13 April |
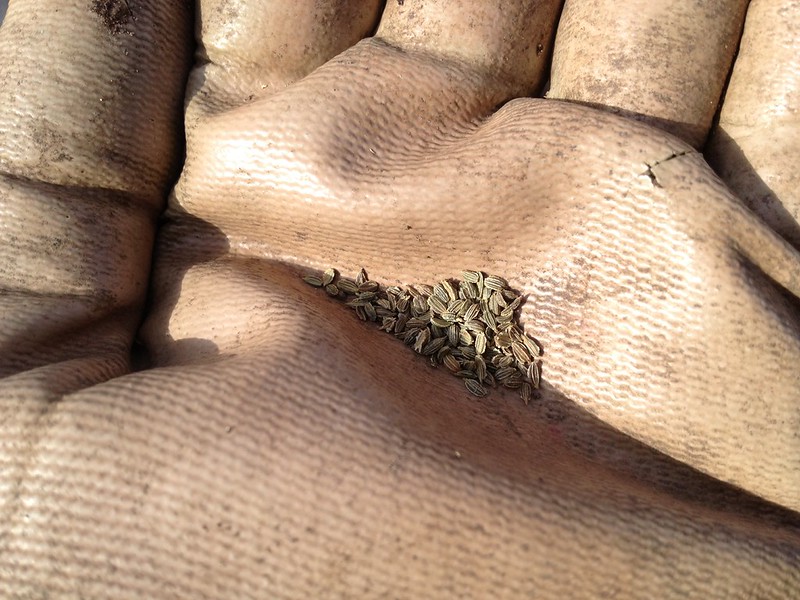
Carrots
Carrot ‘Marion’ is very good for growing all year round even if its flavour is not perfect, but aside from that variety carrots are either early maincrop or late.
Carrots seeds are very thin, and difficult to handle. Taking only a small pinch at the time helps with getting the right sowing spacing, which is 1 cm by 30 cm.
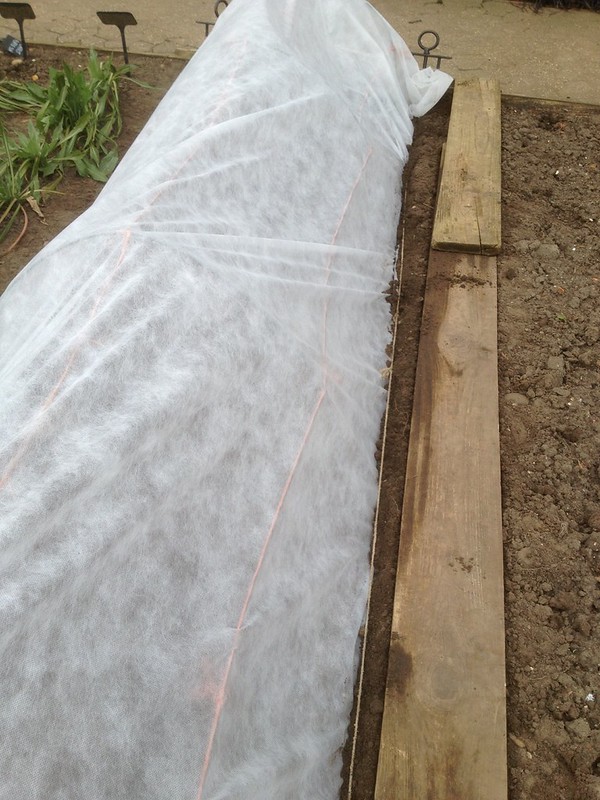
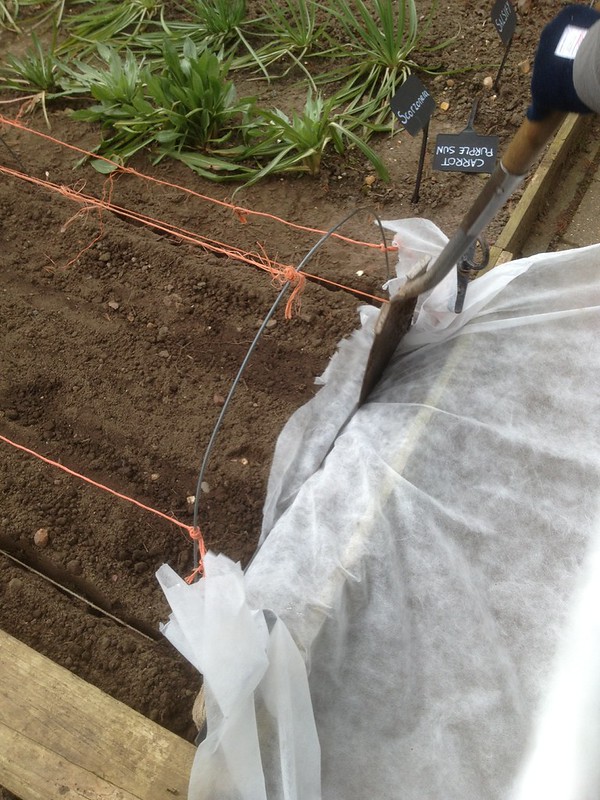
Because of the risk of carrot fly (Psila rosae) attack, early maincrop carrots are covered at sowing, only uncovered once for thinning out, then covered again until picking, which is done in one go. However, since the carrot fly is not around in autumn,
overwintering carrot can be picked as needed.
 |
| 19 March |
 |
|
|
 |
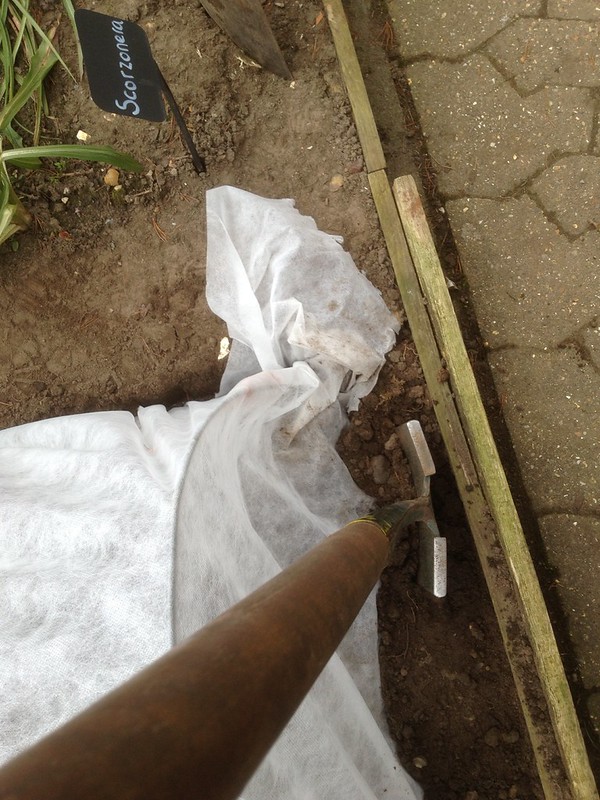
||
| Fleecing the carrots against carrot fly | ||
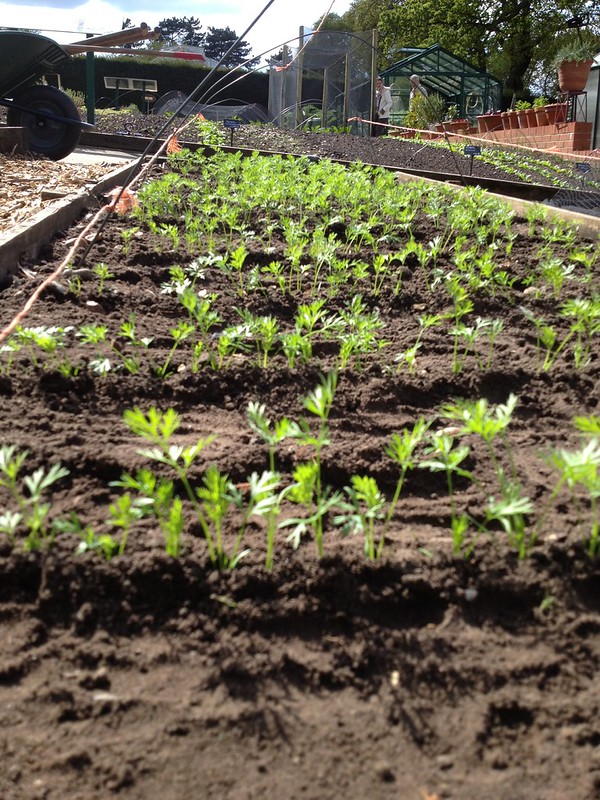 |
| 30 April thinning out, uncovering |
Broad beans
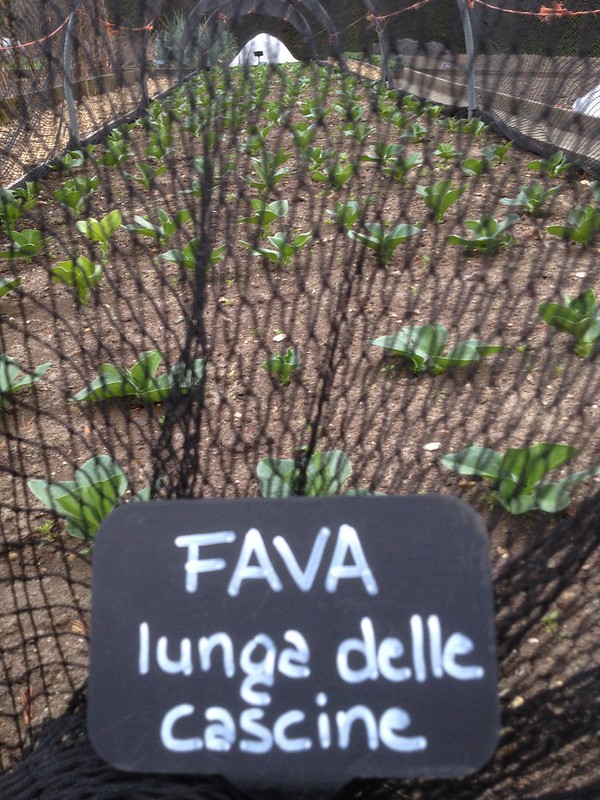 |
| Sown in the first week of March, took about a month to germinate |
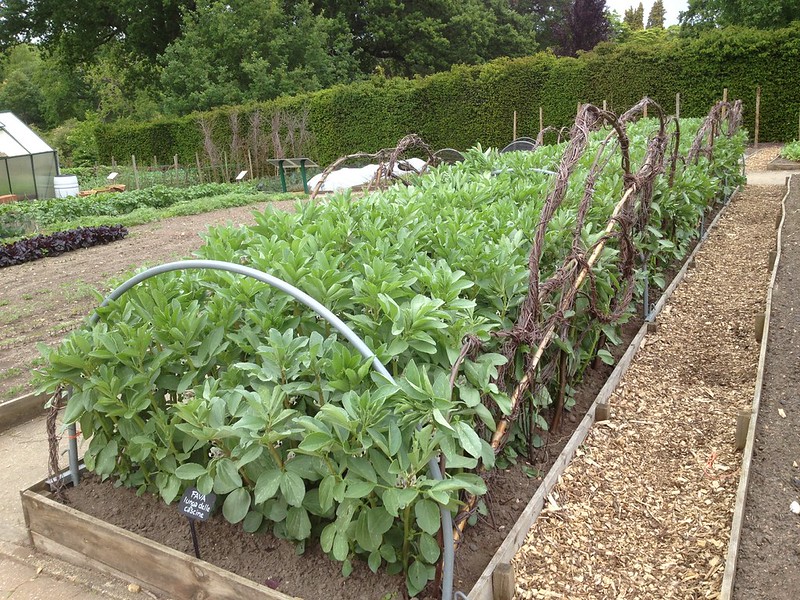 |
| 25 May |
Thinning out
Once you have done your thinning, it is best practice to firm the remaining seedlings in the row, by earthing them up slightly from the sides, then watering them well.
Planting out
Several crops are grown in the propagation facilities and then planted out, ie all the brassicas and the lettuces. Planting them out has its own requirements.
One of the most interesting things I learnt while here is that some crops like to be planted at the same level they were in the pot, even if they flop when planted (for example brassicas and lettuces). Others instead need firming in, for example celery, which is also planted close together to provide a minimum blanching effect, even though modern varieties are self-blanching and do not need to be earthed up or otherwise be covered.
Brassicas
Brassicas like firm soil around them, and the taller the brassica, the firmer the soil needs to be. Brassicas need cabbage collars to keep the cabbage root fly (Delia radicum) at bay (if kept soil free, they form a dry environment that desiccates any eggs laid on them, while in the process helping to slow down slugs).
Covering is also required from the cabbage white caterpillar (Pieris spp). However, brassicas requires a lot of light and netting shades them, so we used netting with large holes, pulled taut so that butterflies cannot squeeze in!
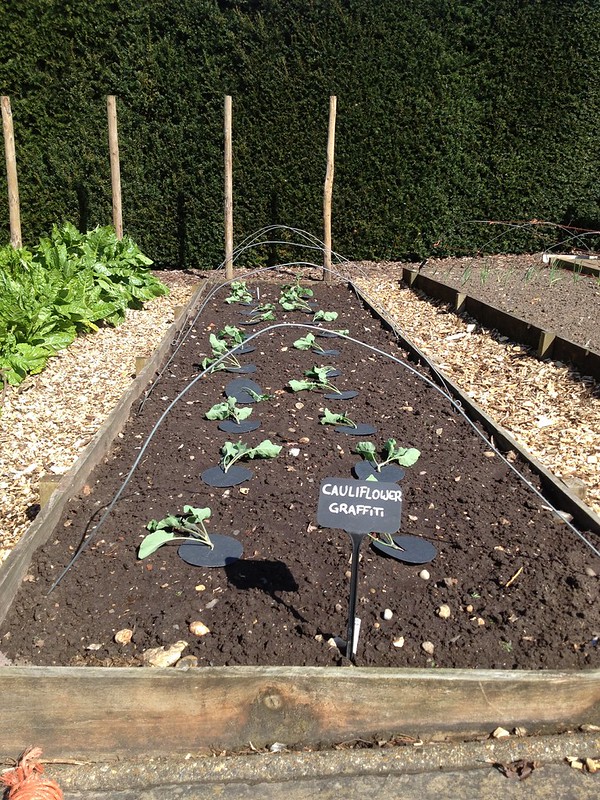 |
| 14 April, cauliflowers |
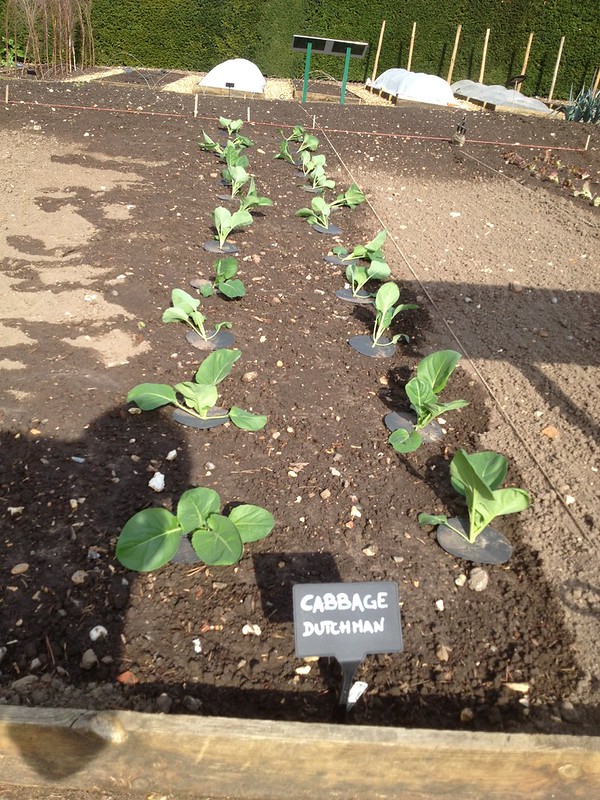 |
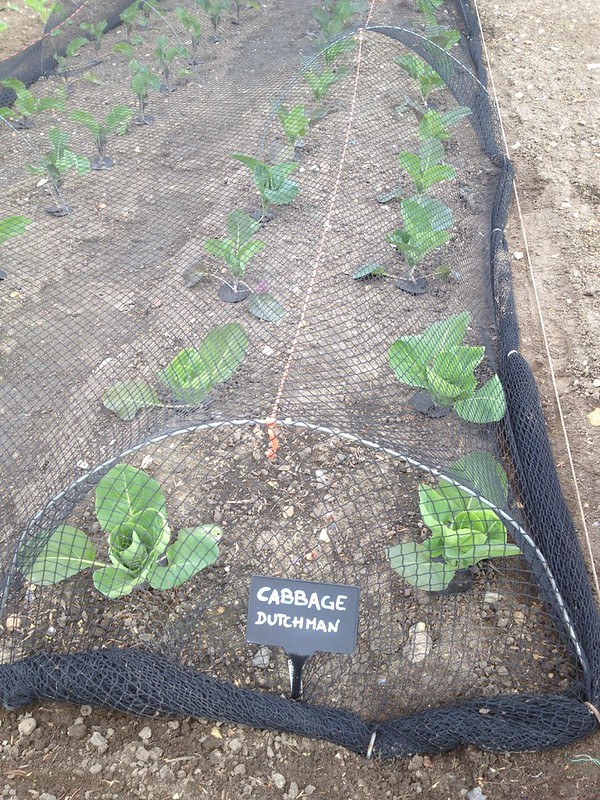 |
| 13 Apr, cabbages | 28 April, covered |
Lettuces
I did plant quite a lot of lettuce, so I now feel rather confident. It is generally grown in jiffy’s here, planted out when the seedlings are about 10 cm tall. You need to water them well to start with, peel off the ridge of the pot, then plan them at soil level, having loosened the soil well (for example with a bulb planter) before firming gently. As usual, then you finish with watering.
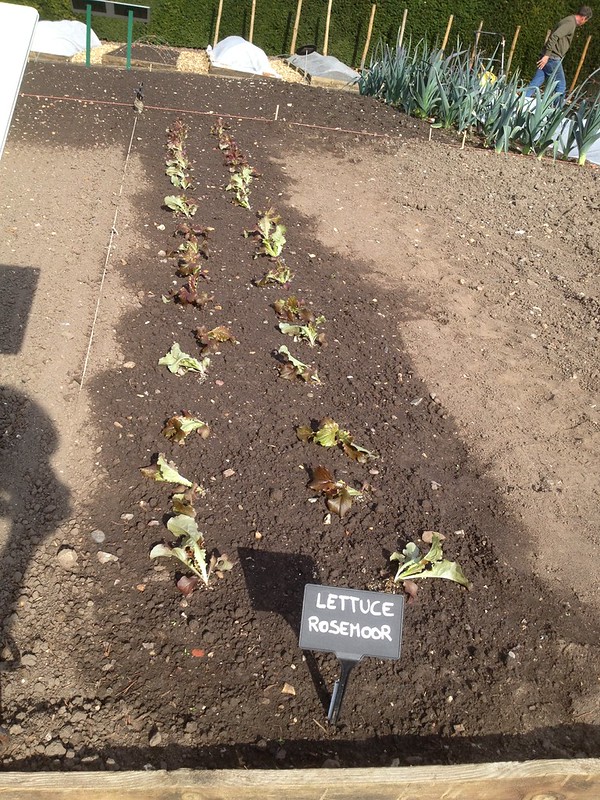 |
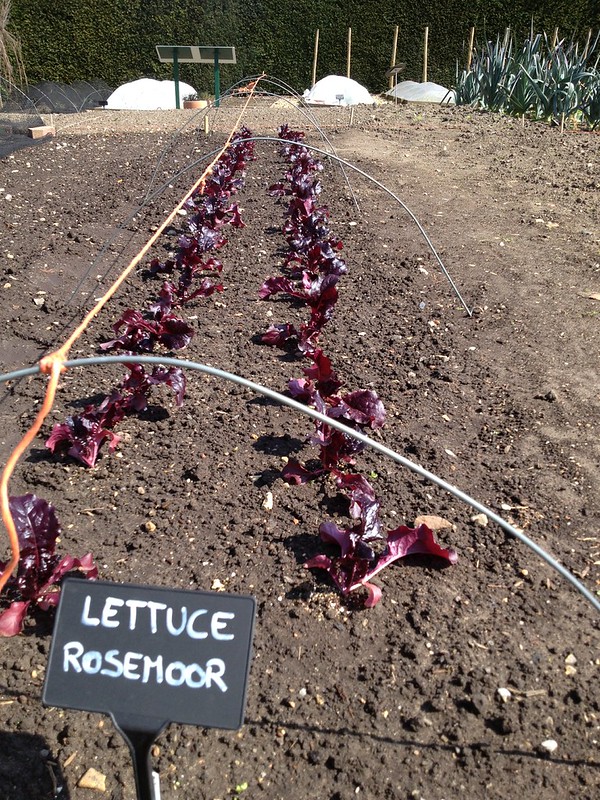 |
| 13 April | 20 April |
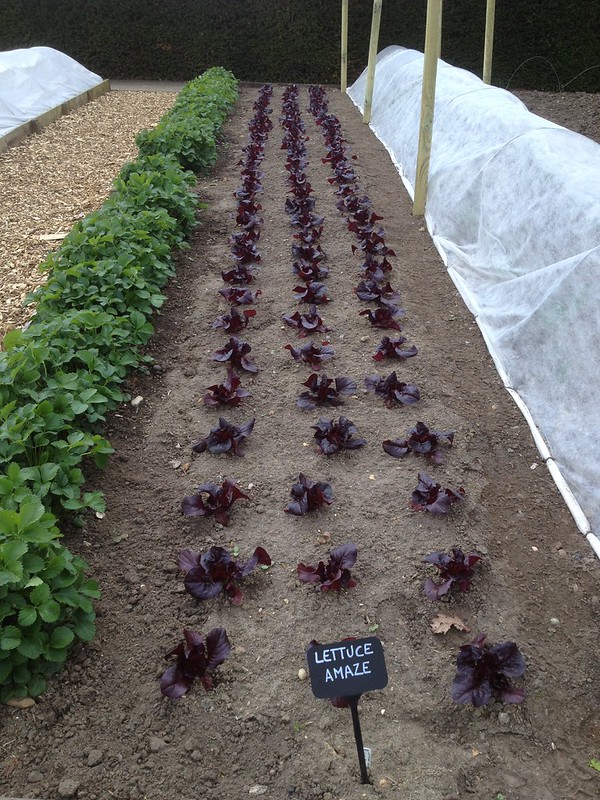 |
| 28 Apr |
Potato day(s)
With April I have started spending more time in the veg garden, up to 2 days a week, which is something I have worked to achieve, as I expect that veg growing will be a relevant part of my future involvement in horticulture.
One of the first crops that I’ve been involved with has been potatoes.
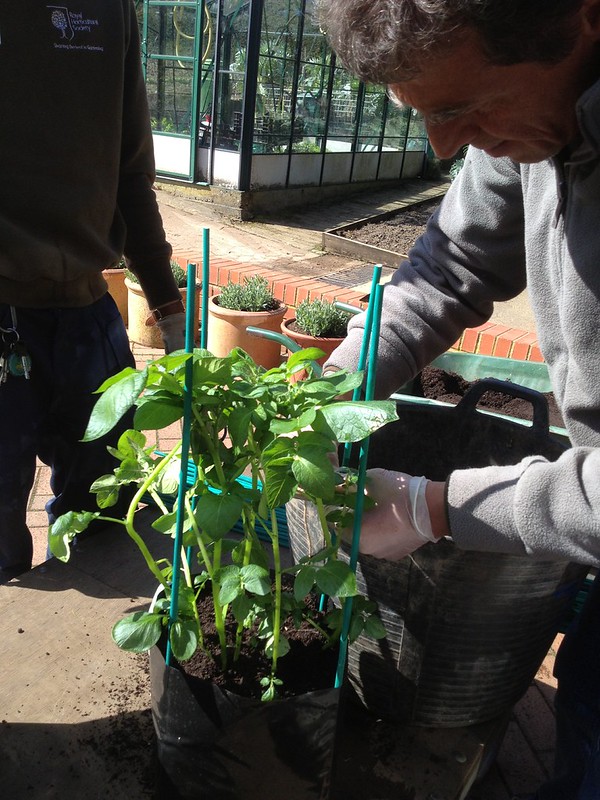
I staked some early potatoes ‘Jazzy’, which had been grown in bags after being started indoors in week
13, which we then displayed in the glasshouse in the veg garden.
 |
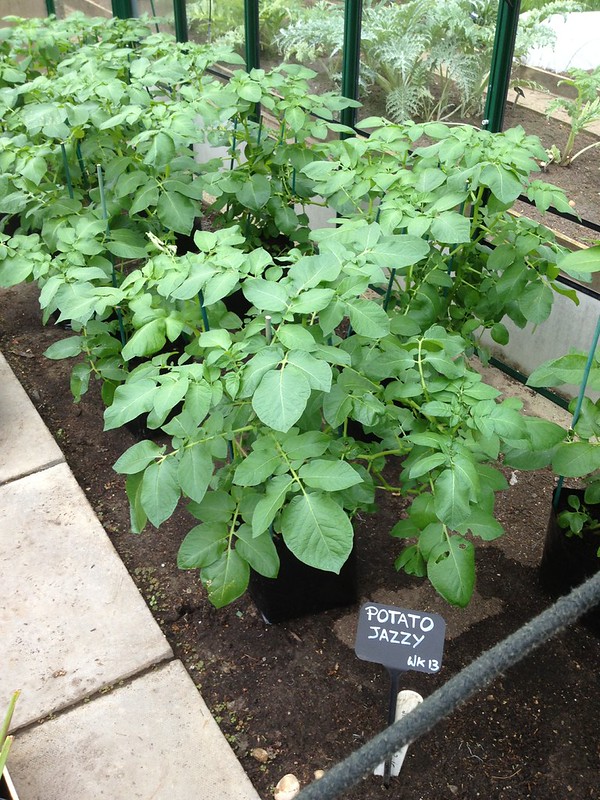 |
| Potato ‘Jazzy’ being staked | Potato ‘Jazzy’ in the glasshouse |
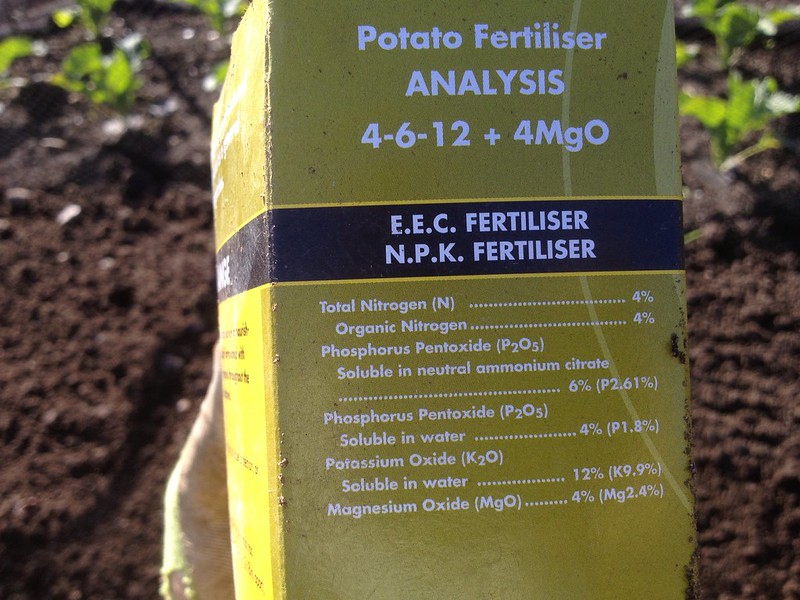 |
| Potato fertiliser |
I fertilised the soil where potatoes would go in in week 14 (end of
March) by top dressing it before the rain came. We used general
fertiliser at 10 g per sqm.
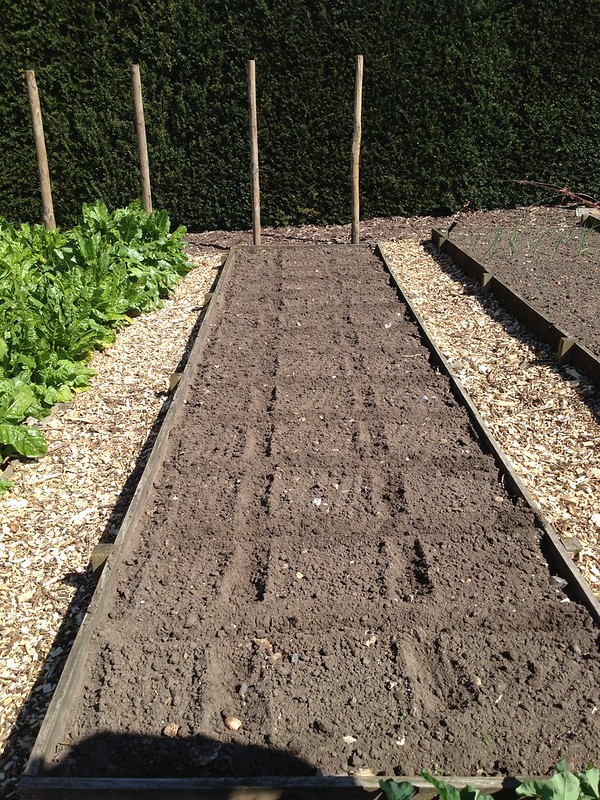
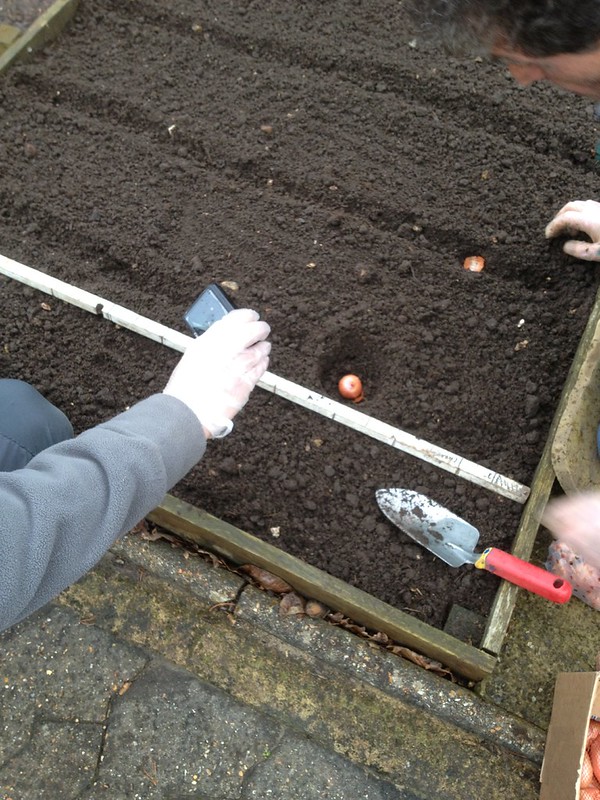
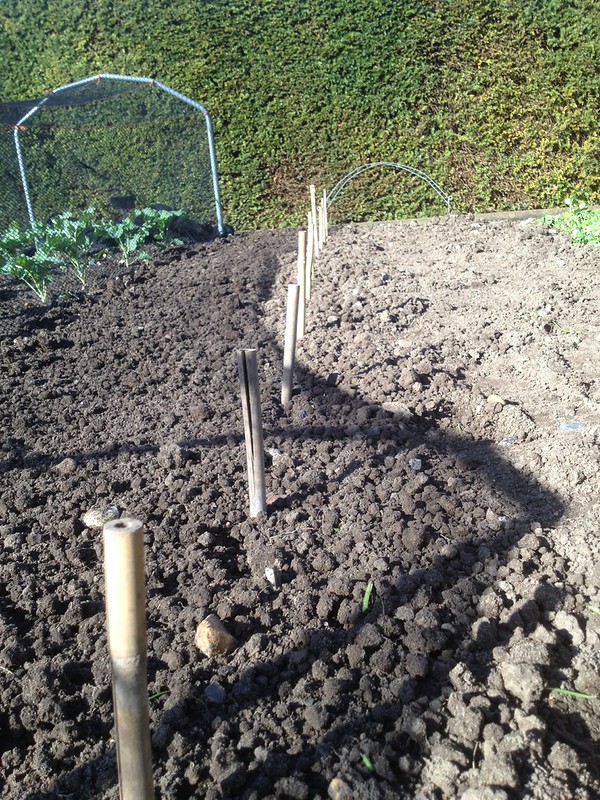
Today (week 18) I planted some second earlies. At 40 cm between them in rows 60 cm apart, we planted them at 10 cm depth, by using a marked stick and adding 50 g potato fertiliser per hole, well forked in (it will need another 50 gr as topdressing at emergence, in 2 weeks).
 |
 |
| Marking the spacing of potato | Planting at the right depth |
As we were expecting one of the last frosts, I was also asked to earth
up the other potatoes that had emerged. With soil from either side of
the row, we covered every single leaf to avoid it getting damaged.
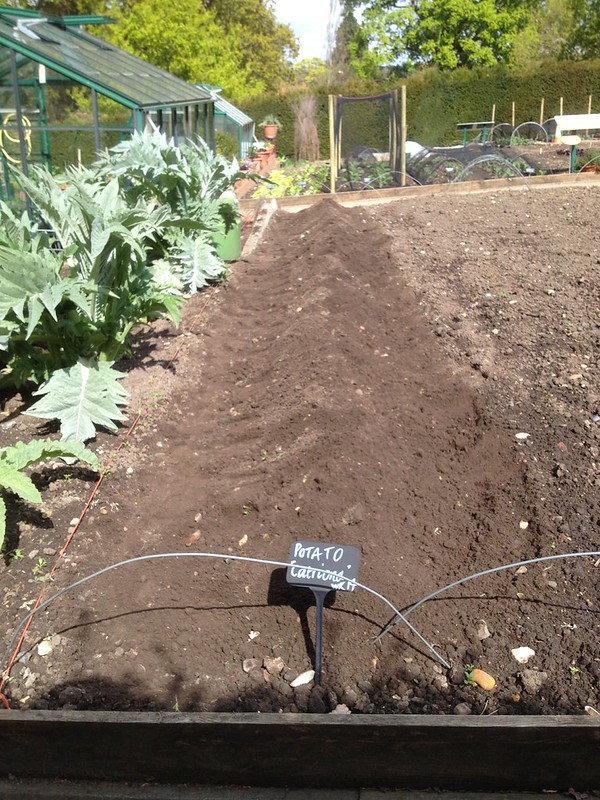 |
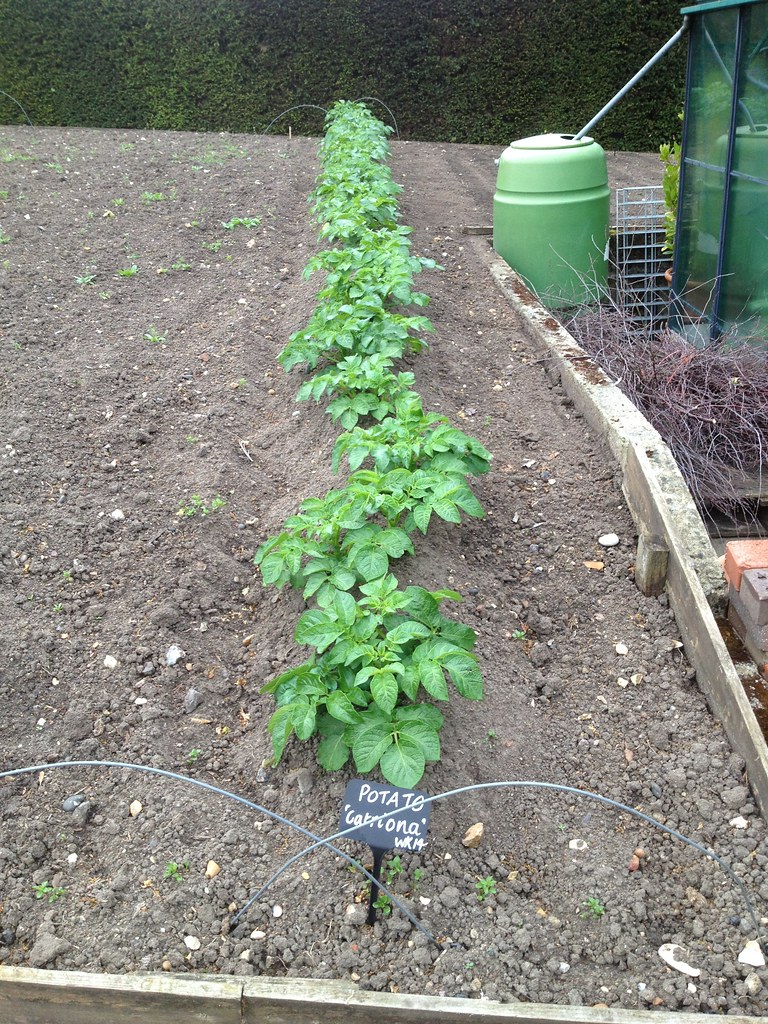 |
| Potato ‘Catriona’ earthed up | Week 20 and ‘Catriona’ has emerged again, safe from frosts now |
We had some sweet potato (Ipomoea batatas) slips too so I was shown how to root them in propagation, by laying them in a tray.
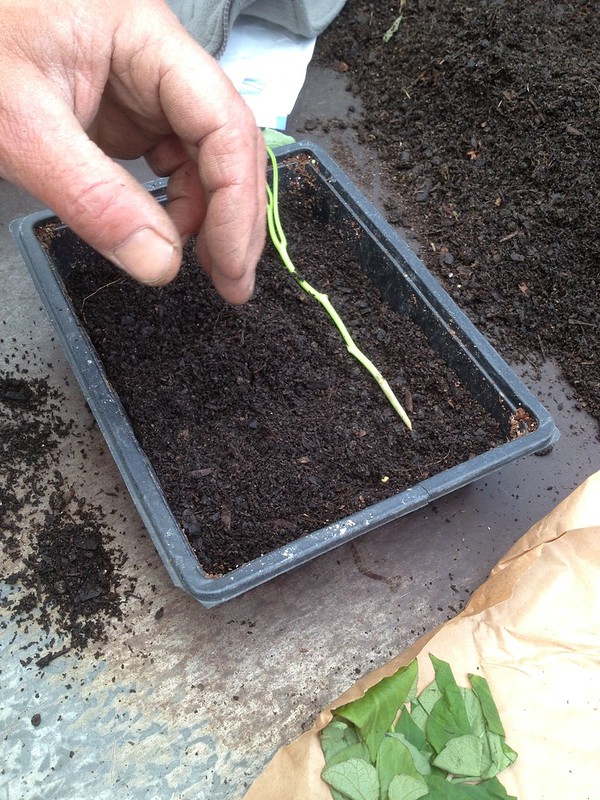 |
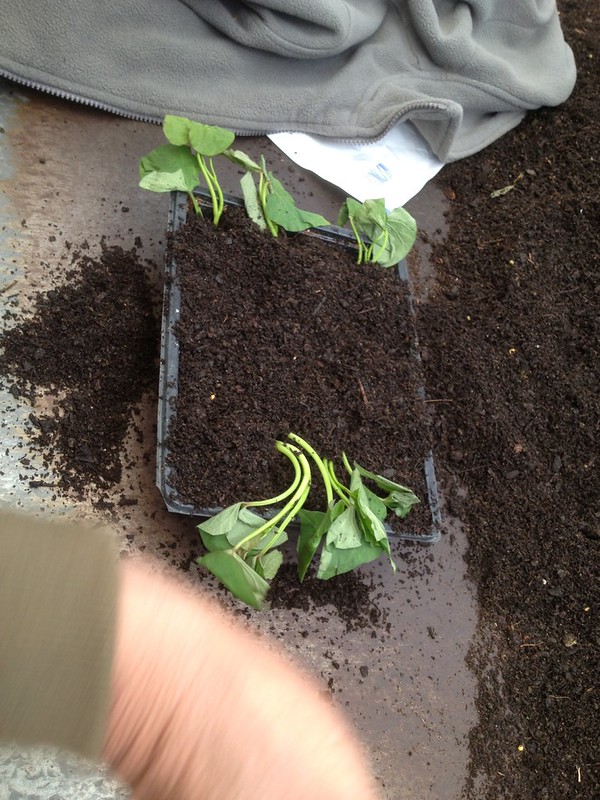 |
| Rooting Ipomoea batatas | |
About Me
 M.Paola, that’s me
I got my first allotment in the UK in 2007 and started growing my own food. Learning as I went along was not enough, so I studied horticulture. Faced with the horticultural warfare, I became a conscientious objector: I use no chemicals and support organic principles and regulations.
Brexit gave me a new life in the Netherlands, three new plots by a nature reserve and an MSc in sustainable food systems.
I write in my personal capacity and, as a language perfectionist and a non native speaker, I keep reviewing my entries’ text for clarity.
Some Rights Reserved

This work is licenced under a Creative Commons Licence.