It was the end of February when I helped in the herb garden to remove the mint from its bed for propagation purposes. I was struck at the time that you could count be so many different scents of mint, but there was not much left in the pots that we removed from the ground to sample them well (some mints had completely died back and there were only some rhizomes well hidden in the compost to be found) .
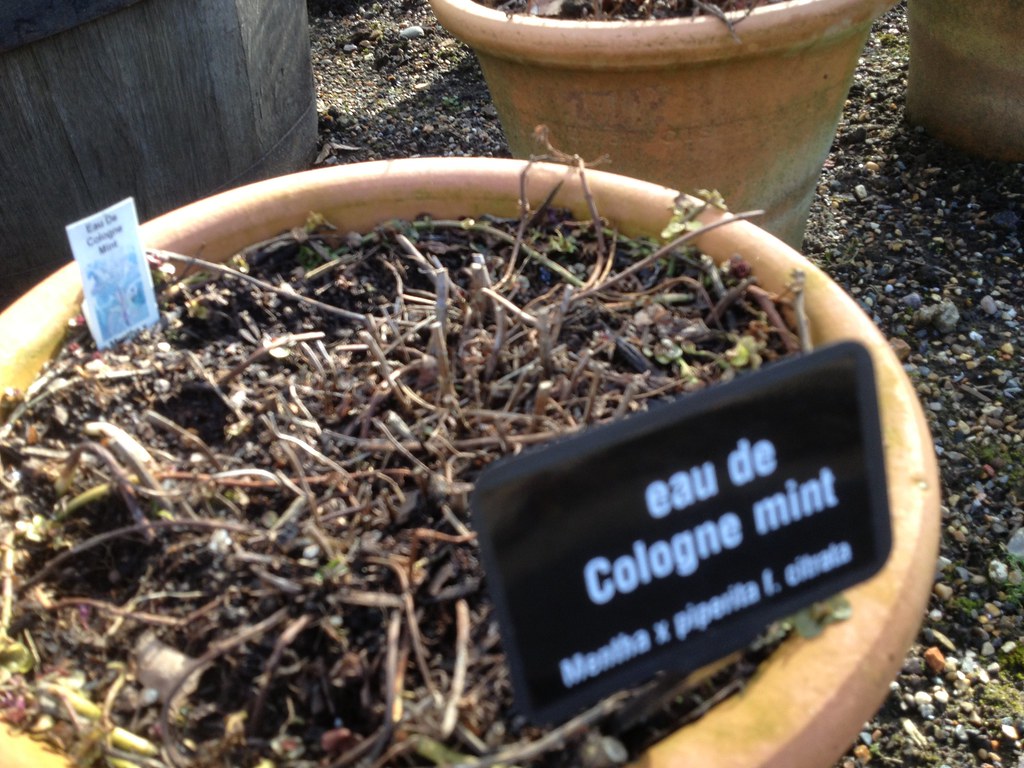
Today, however, I had the opportunity to help pot up the mint that had been propagated and to take it back to the display area in its new pots, so I could try and small a few of the cultivars, albeit by no means all of them.
There are no less than 25 species of Mentha* (22 are listed in PFAF database).
Mint, however, is quick to hybridize so identification is often difficult. To complicate matters further, in common language the word “mint” does not refer only to the genus Mentha, but often to other plants either within the family Lamiaceae (for example, Korean mint, Agastache rugosa, or mint bush, Prosthantera spp) or even in other families. In the latter case, it is the resemblance in the fragrance that promted to use the name (i.e. Vietnamese mint, Persicaria odorata is in the Polygonaceae family).
They main compounds that make of Mentha the economic plant it is are:
- menthol, an antiseptic, decongestant and analgesic, that is present in high concentrations in M. x piperita, peppermint but also in spearmint (M. spicata)
- pulegone, a neurotoxic, abortifacient substance, present mainly in M. pulegium: pennyroyal
- diosphenol, a diuretic, M. longifolia
- carvone, the substance that links M. spicata and Carum carvi (caraway)
Mints are used for culinary (sauces and drinks) and medicinal purposes, that range from antiseptic, antibacterial, antiinflammatory, antispaspodic and antiparasitic, to being a stimulant**. Oils are used in fragrances and for aromatherapy to increase concetration, and reduce headaches.
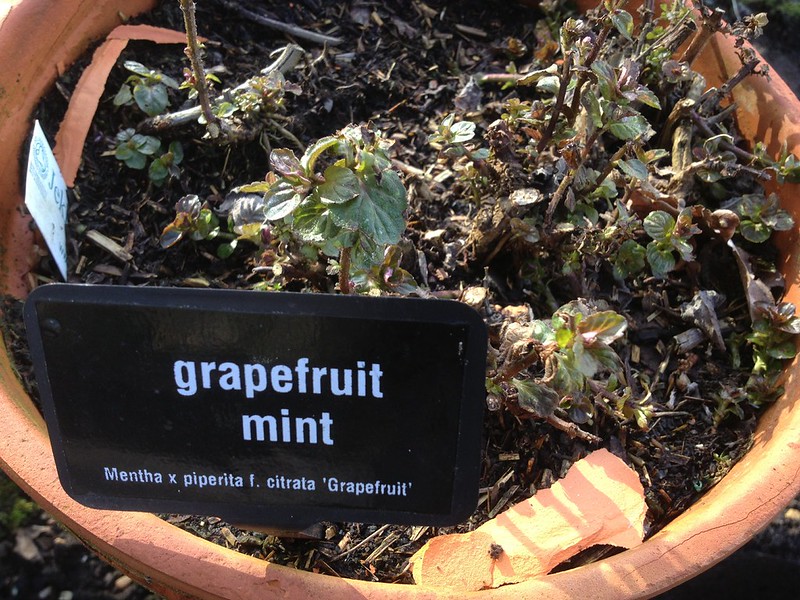
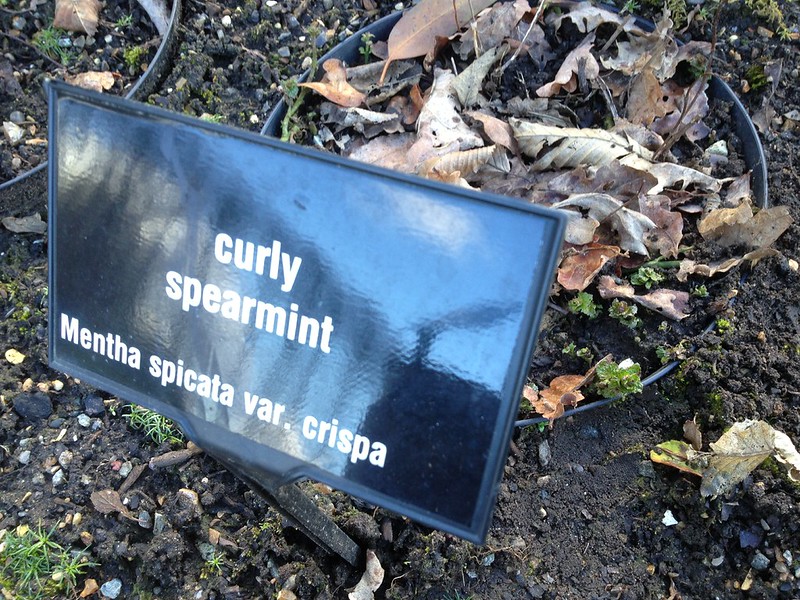
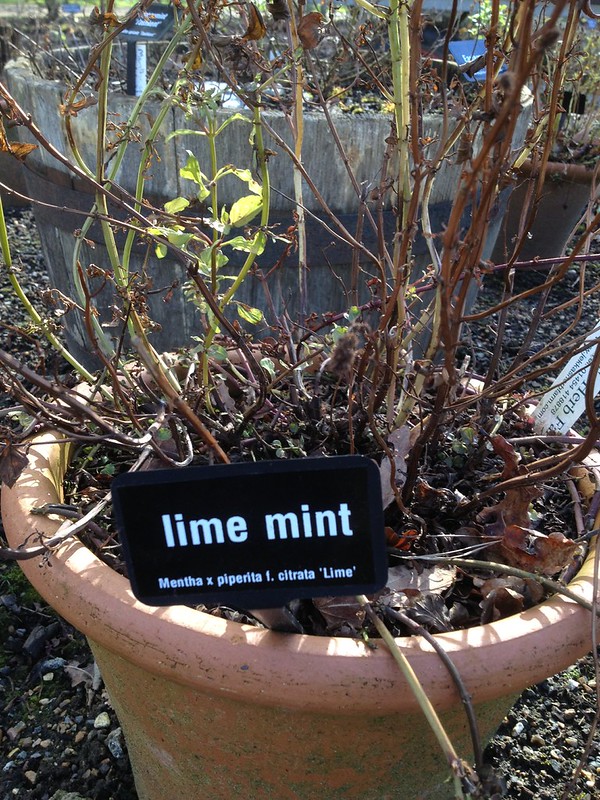
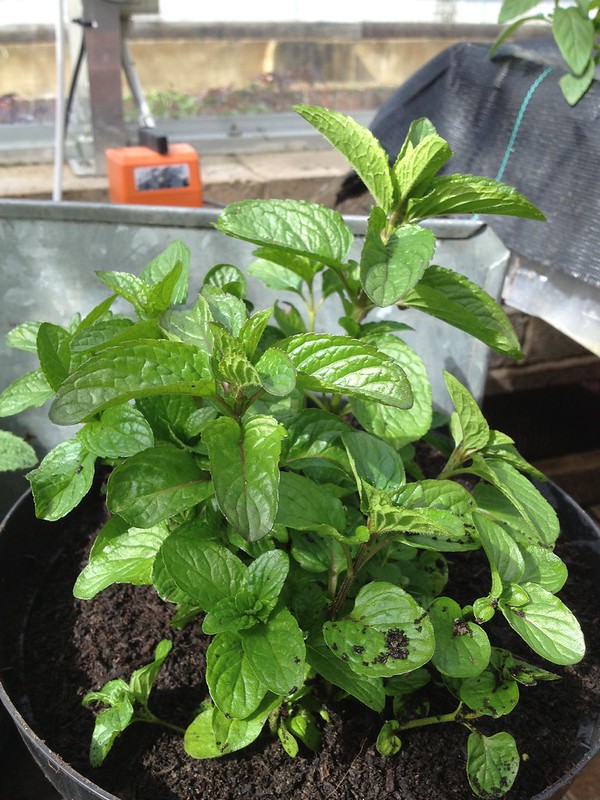
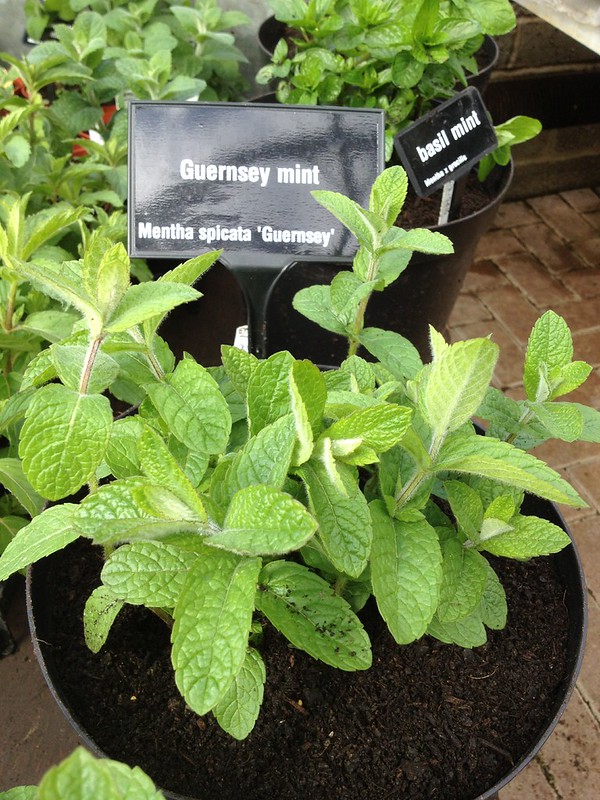
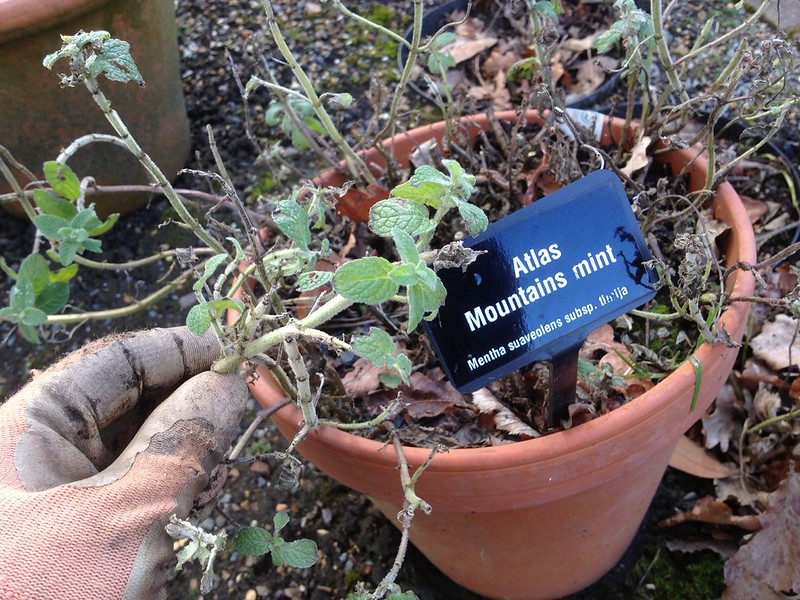 |
| Some of the mints in February |
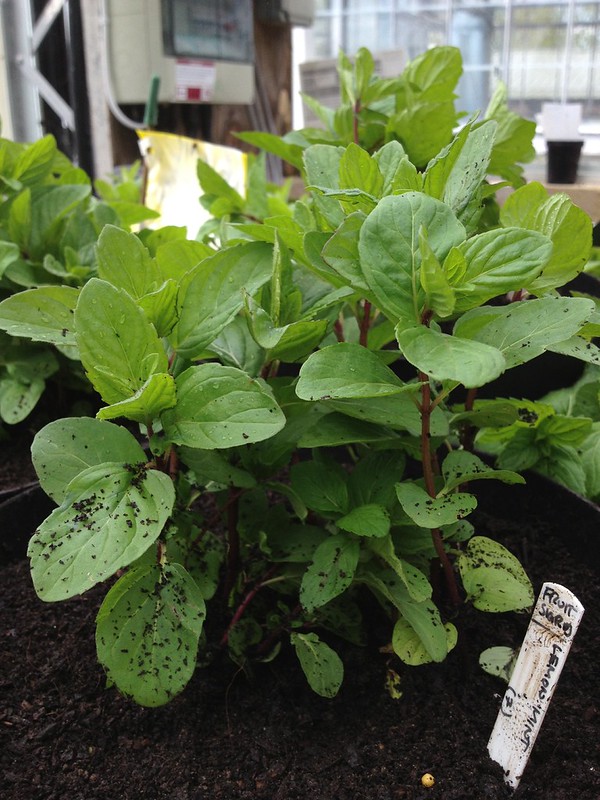
Mint, especially in pots, is prone to root aphids*** (possibly overwintering Ovatus crataegarius, the mint aphid) attack, so propagating plants and using fresh compost every year helps managing infestations.
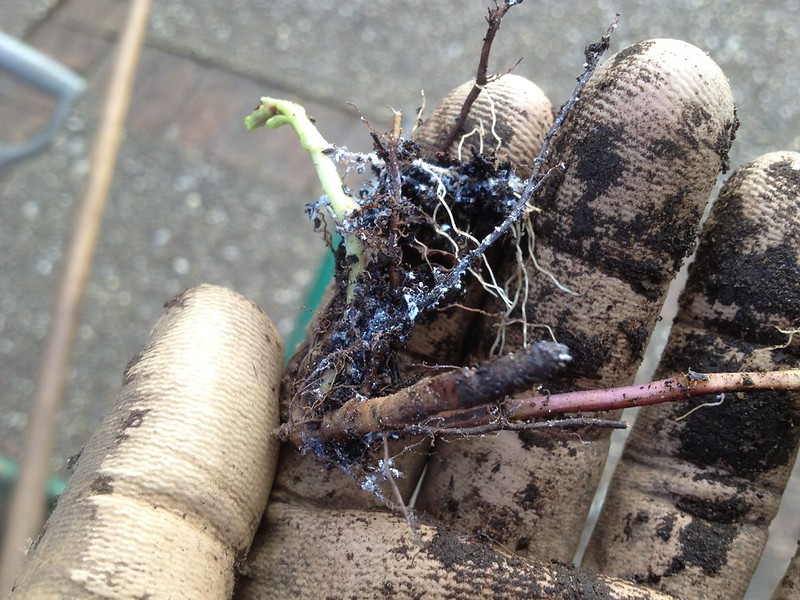 |
| Root aphid on mint |
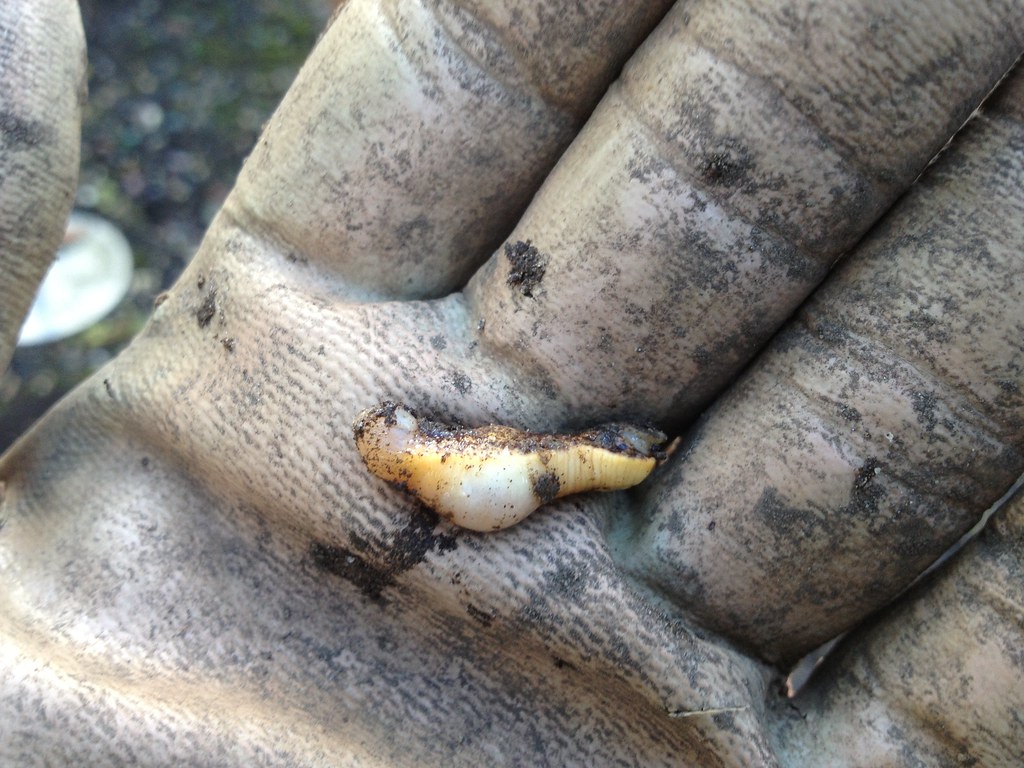
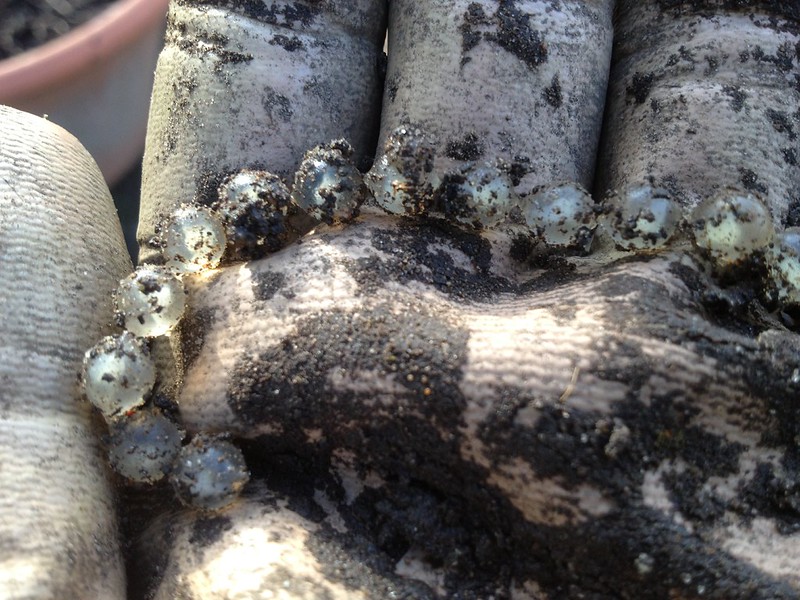
While digging the pots out, we also found a carnivorous slug, new to me, rubbery and engorged on something, likely Testacella scutulum, with a string of eggs. That was rather fascinating.
 |
 |
| Testacella sp slug | |
But, back to today, from 9 cm pots I planted the mint into the 7.5 l pots where it will spend all the season, limiting the risk that its roots will become invasive. We
used 2/3 plants per pot to get enough plant material for display (some people will pull the leaves to smell them), but one would be
enough if you are not in a hurry.
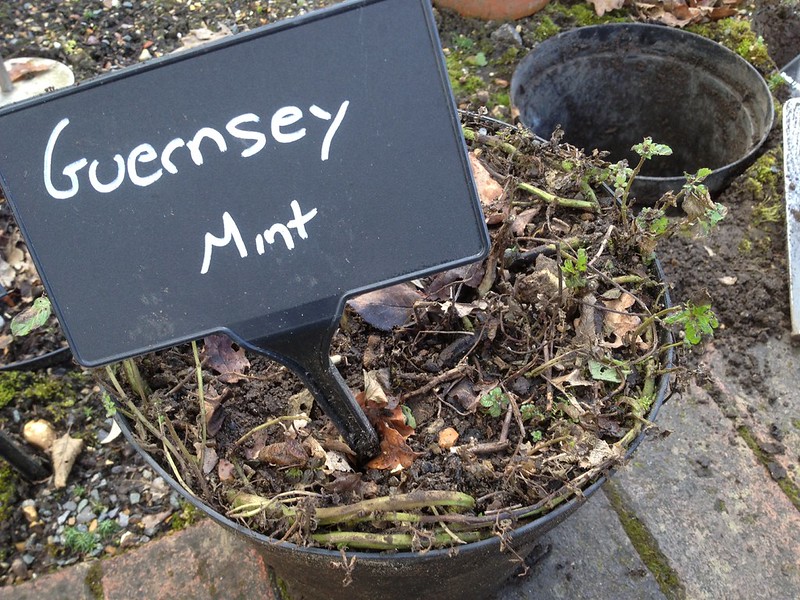 |
 |
| Some of the mints, before and after propagation | |

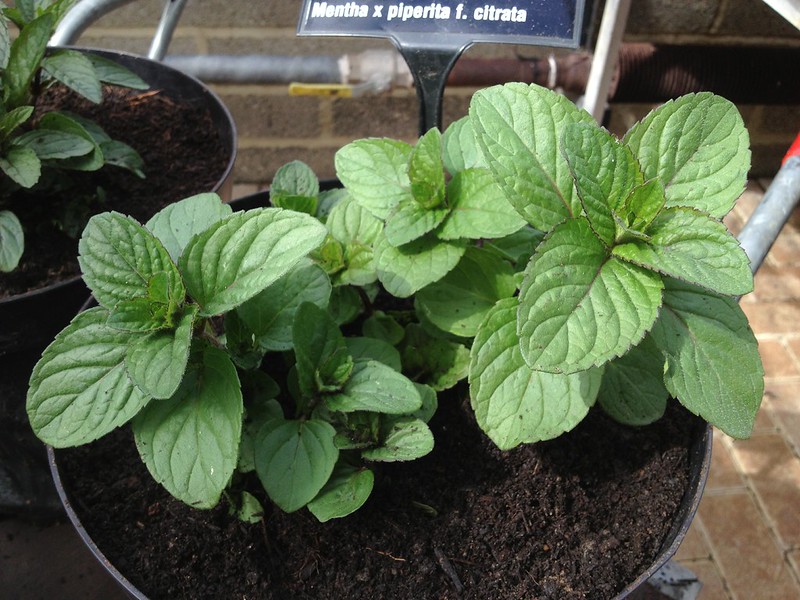
 |
| Some of the mints ready to go out in April |
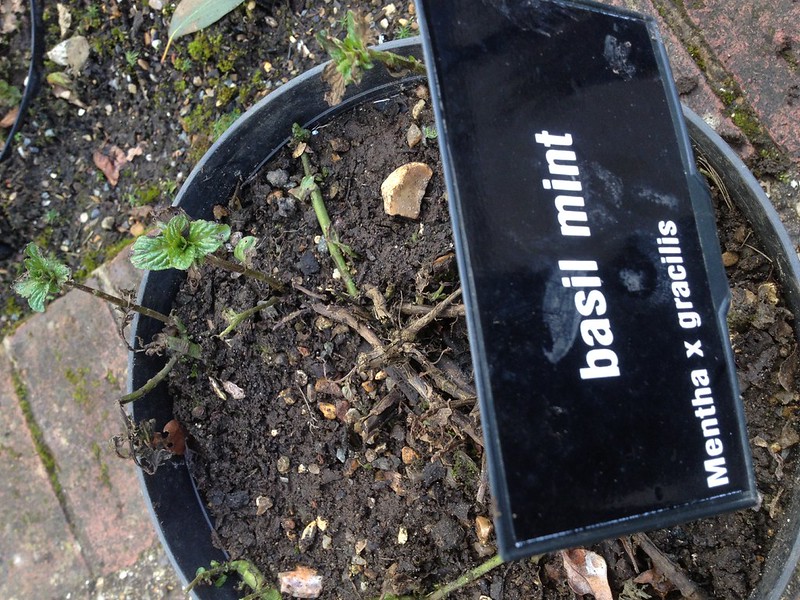
The scent I preferred, from all the mints I sampled, was “basil mint”, which smells of basil and, depending who you ask, is either M. x gracilis or M. piperita x citrata ‘Basil’.
My time in the herb garden after bringing the mints out, however, tells me the most popular, especially among the kids is the “chocolate peppermint”, it must be because of the name! It does really have chocolate undertones, but it’s very much menthol-scented, which I have always found gives me headache. Except in one case: a few years ago I loved a cosmetic product made with a very strong menthol mint, M. aquatica – which is incidentally quite pretty, with its globose flowerheads, but unfortunately is not in the collection, as it requires wet conditions to grow.
References:
*Bown, D (1995) The RHS Encyclopedia of Herbs and Their Uses, London, Dorling Kindersley, pp. 158-159 and 311-312
**McVicar, J (2007 revised ed) Jekka’s Complete Herb Book, London, Kyle Cathie LTD and The Royal Horticultural Society, pp. 154-157
*** Buczacki, S and Harris, K (2005 3rd ed) Pests, Diseases & Disordrs of Garden Plants, London, Harper Collins Publishers, p. 176
See also the website of the National Mentha Collection in Wales, at mentha.info/NationalMenthaCollection/ and the electronic version of Maud Grieve’s A Modern Herbal (1931) at www.botanical.com/botanical/mgmh/m/mints-39.html
Grafting
Back in January, I was asked one morning to join a colleague, who was going to collect scion material in the orchard.
Under the aegis of the fruit specialist at RHS garden Wisley, the collection gets regularly propagated to renew old plants and to replace sickly and dead ones (I helped before with the gooseberries). But material is also sent to other gardens and collections, and it is possible to request propagation material from the RHS on payment of a small fee.
So, armed with a list of required cultivars and their locations, a bucket, sticky tape, a Sharpie and sharpened secateurs, we trawled the orchard.
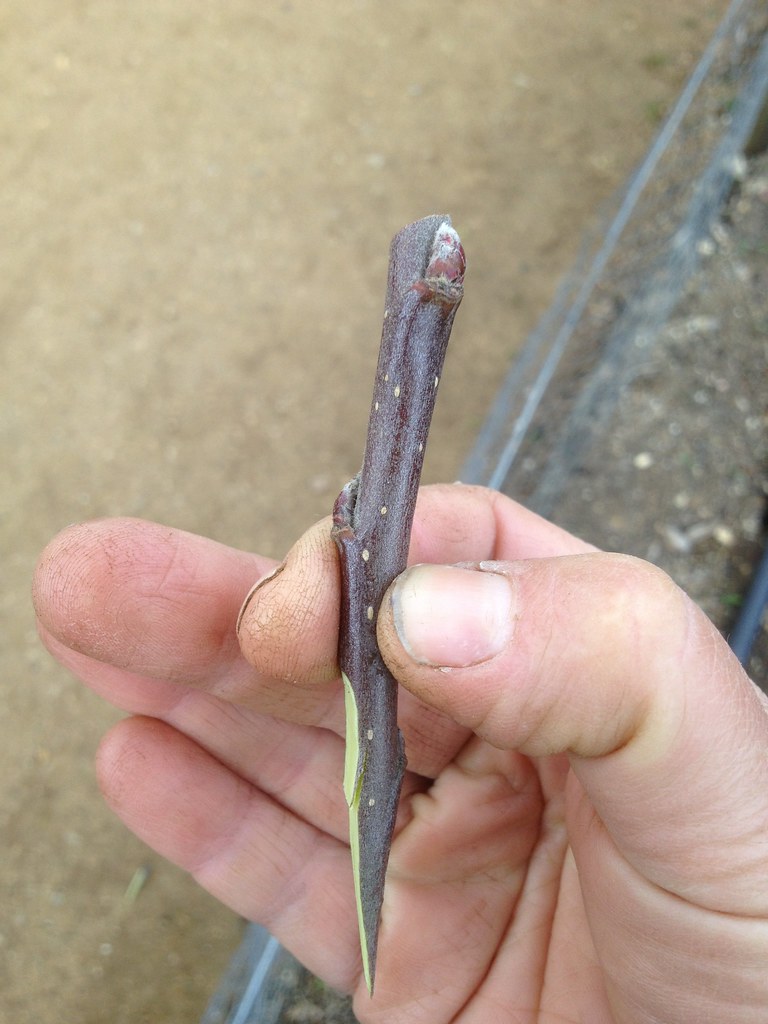
Scion needs to be pencil-thick, one year old well ripened wood (brown, not green), with relatively short internodes. Sometimes you can try and use two year old material if nothing else is available, but it’s usually better to plan in advance: cut back hard the plant you want to propagate in winter so than it will produce new shoots that you can then propagate a year after.
Checking that it was not affected by mildew, we took two-three cuttings from each cultivar (if available), we taped them together, marked them with their name, placed in the bucket, and so on.
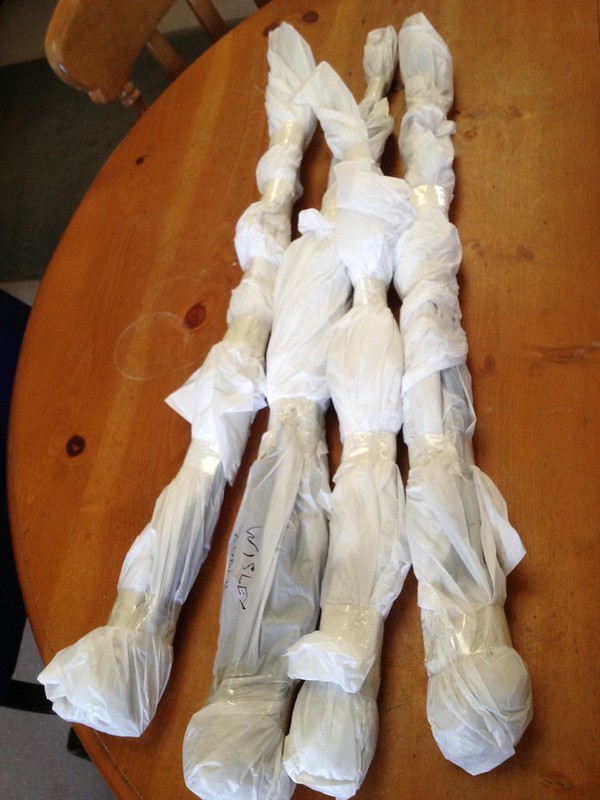 |
| Scion material, ready for storage |
Once back in the messroom, we shortened the cuttings to 60-70 cm for easier storage and posting, cutting from either the tip or the bottom to try and get the longest pencil-thick part. Then we wrapped the bottoms with 4 layers of wet but not soggy paper towel (wet then wrung) and sealed them into plastic bags, writing indications for retrieval. They were then stored in the fridge, awating their destiny.
… because grafting is best done in March (and into April), with dormant scion but awaking rootstock. Budding is however done in the summer, July to September (depending on the type of fruit, with a window that more or less follows the succession of flowering: Prunus, Pyrus, Malus) with dormant buds from plants that have started to slow down.
So fast forward to today, and I’ve finally had the opportunity to make use of that scion material I gathered almost 3 months ago (gee, time flies).
For the third time this year I had the fruit specialist all to myself, teaching me whip & tongue grafting. We performed it on M26 stock that was planted in the nursery, which was cut to anything between 15 and 30 cm. Too low, and the splashing from rain may contaminate the graft, besides, it might start to root.
The tools required today were: sharp secateurs, a *very* sharp knife (it
must be able to shave, and some steels are better at that than others, I’m told German brand Tina is good), white labels, Sharpie, grafting tape, hot wax.
After a brief demonstration, I was given some spare cuttings to practice on. I felt so hawkward!
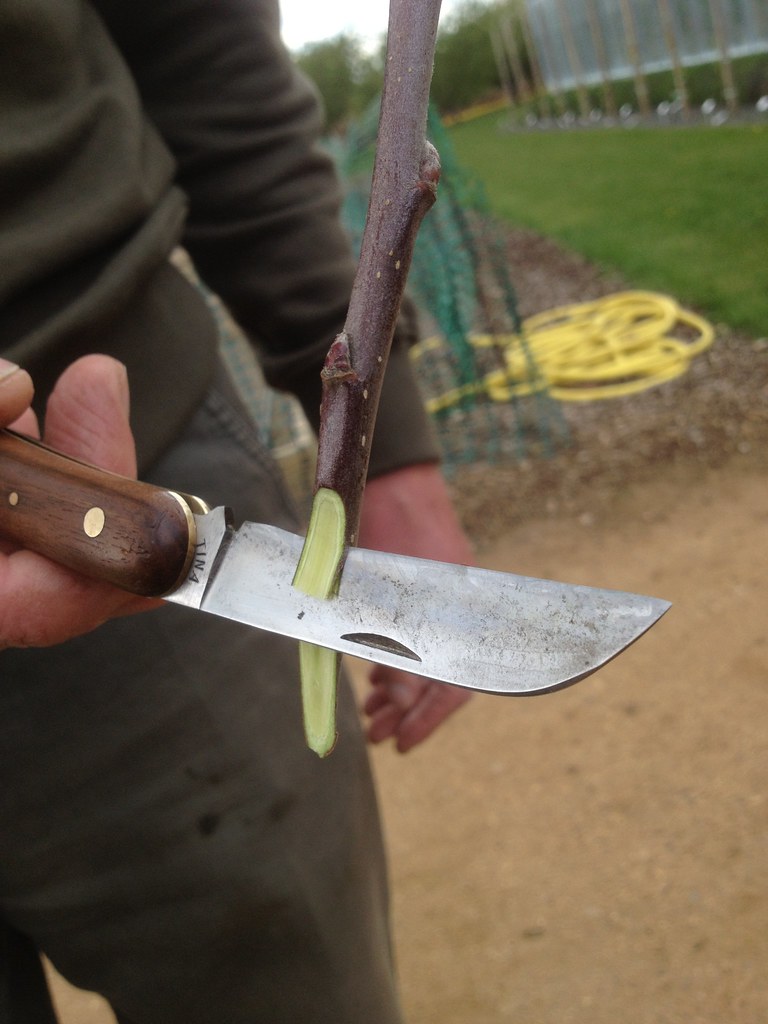 |
| Demonstration of cutting a whip |
Starting from the bottom of the scion, but having made sure to remove any wood that is too hard with tiny buds, one has to make a smooth, sloping 3-4 cm cut the other side of a bud (the stock bud). One has to pull the knife from the top to the bottom, towards oneself. I found that wearing a plaster on my thumb made me feel safer while I got used to the maneuvre, which starts with the bottom and uses the whole blade lenght to the tip.
Then, starting in the top third of the slice (above the stock bud) and rocking the knife upwards at an angle, one has to carve the whip that will lock the graft together. It is very easy to split a whole lenght of wood if one is not careful when doing that.
Last but not least, the scion is cut to 3 buds (4 if they are very close).
 |
| The scion is ready |
Usually, the top one (or any one) will start to grow, but if they all go, then one chooses 2 and shortens them to 3 leaves: they will photosynthesise and feed the new tree! They are then removed in August, if the main shoot has grown strong and sturdy.
Then one moves onto the stock. During the whole procedure, one has to be careful not to contaminate the tools or the material with soil, which may carry pathogens.
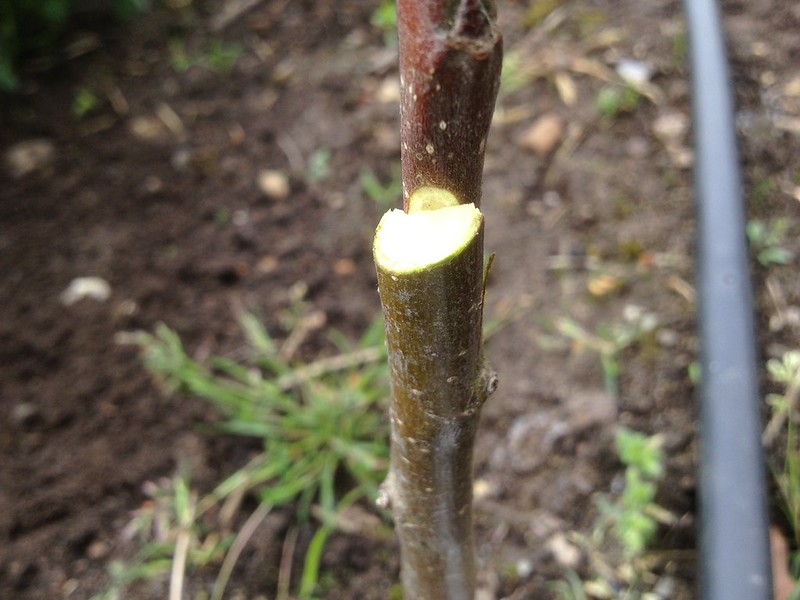
Measuring the scion cut onto the clear side of the stock (no buds, as they are hard), previoulsy cut to a slight slant, one then proceeds with the opposite maneuvre to the scion’s.
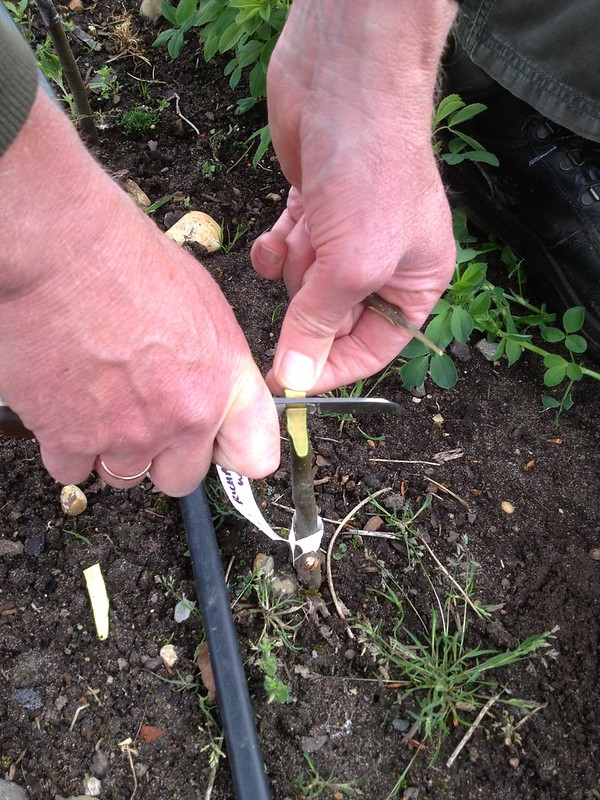 |
| Demonstration of cutting the stock |
Starting from the the bottom and slicing upwards (astride to the stock), one makes another smooth,
slanting cut, rather superficial, that is making sure one does not goes too deep into the wood. Then, just after the top, at an angle, one rocks the knife to cut a whip here too. I found it particularly difficult to find the right angle for this whip, as it came out too thin a couple of times.
 |
| “Church window” |
The scion and stock’s whips are then joined together, so that a “church window” remains visible: that is because if the bark of the stock were to touch the bark of the scion, they would not join together (as the bark has no cambium) and cause a weakness in the graft.
To complete the procedure, the graft is bound really tight with grafting tape (clear plastic, sometimes biodegradable) by wrapping it around, from the bottom of the graft towards the top, with a slight overlap to keep it in place and only making a fastening loop at the top. One has to make sure not to cover the cuts, because those will be treated with hot wax, so as to conserve moisture.
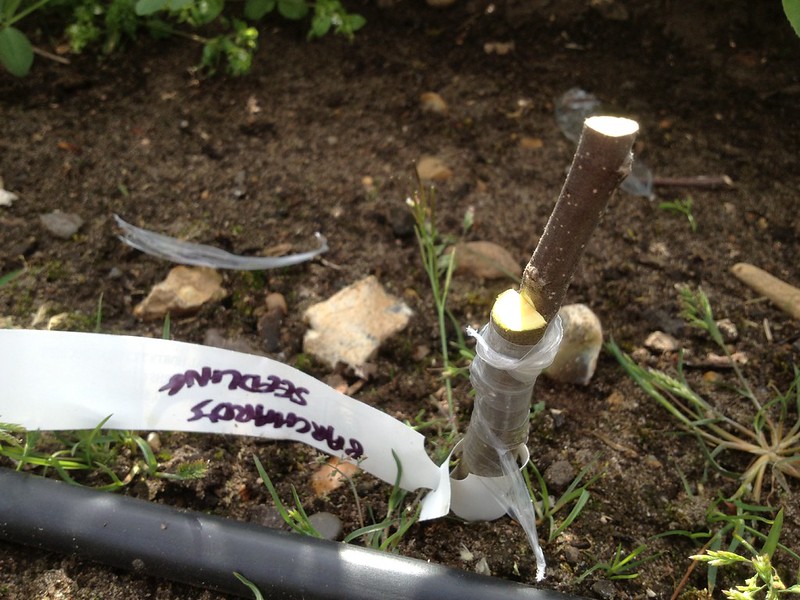 |
| My first decent graft! |
I started with 3 grafts of ‘Barnack Beauty’, feeling rather frustrated by the results, but fourth time lucky and my graft of ‘Barchard’s Seedling’ was satisfactory, and the next one made me proud: it was firm even before wrapping with the tape!
Of course the closer the size of the scion and the stock, the better the cambiums will align, but sometimes the scion is smaller, like in the picture.
It was rather interesting to have a go at waxing the cuts, and to try hot water melting pot kit.
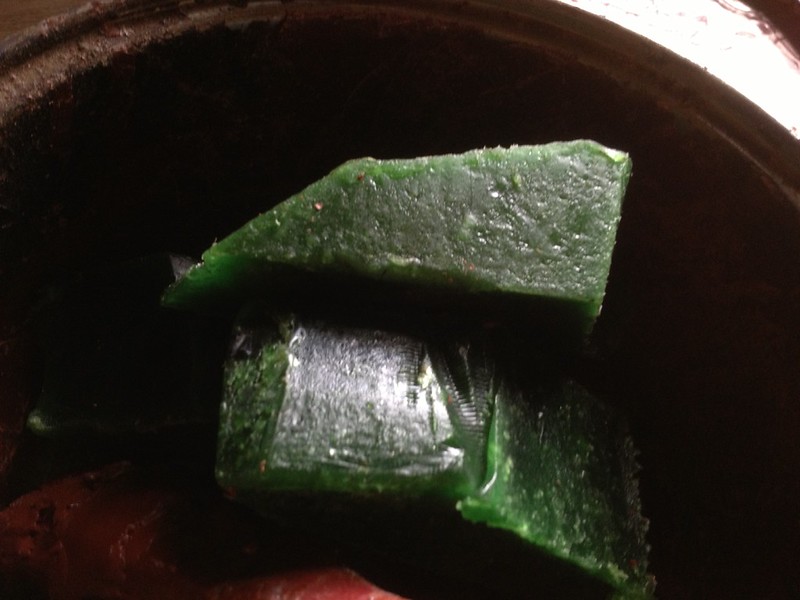 |
| Wax |
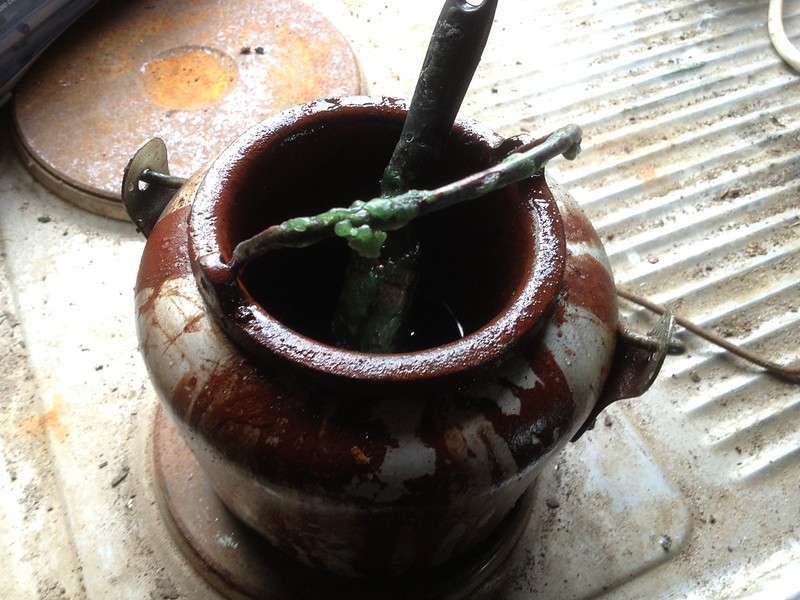 |
| Melting pot |
Oh, I had so looked forward to this day! And, as some scion wood went spare, I will have some more practice in the evenings.
Coppicing and Coppice Crafts
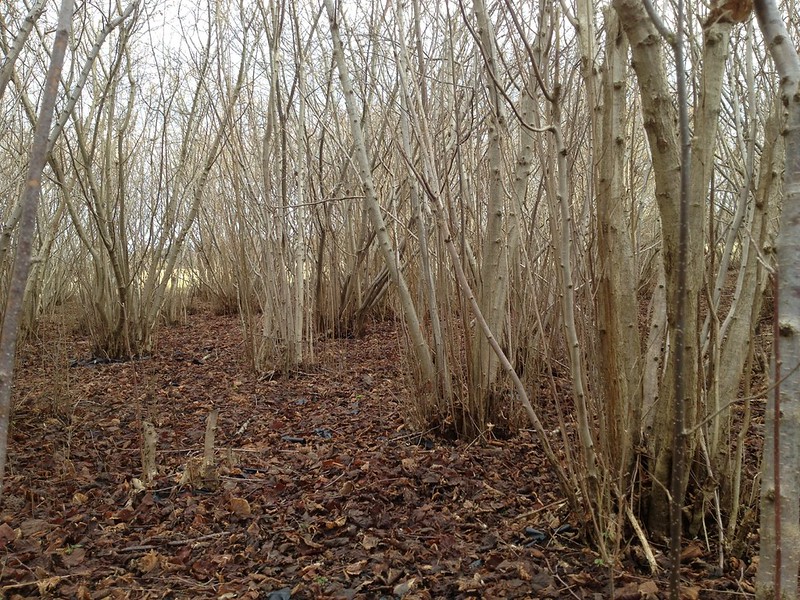
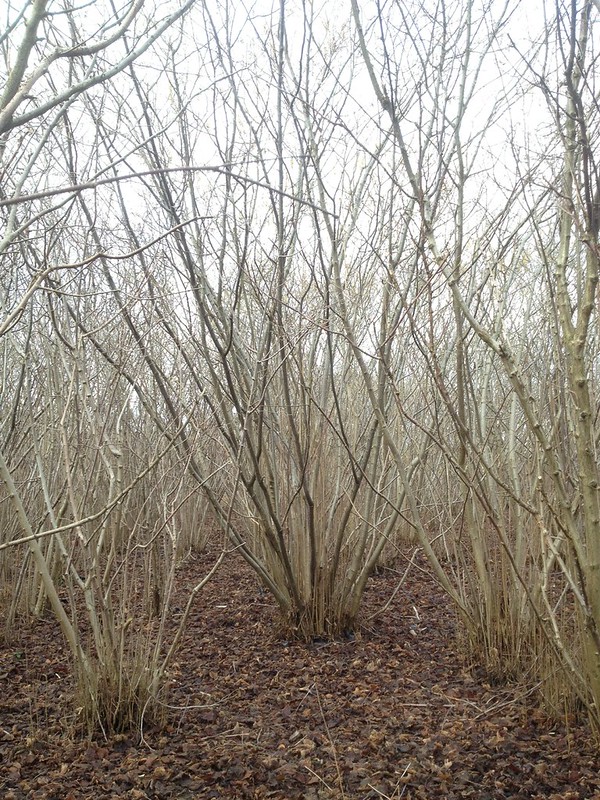
That is the title of a book I borrowed from the library to learn a bit more about coppicing, as back in February I joined my colleague on a trip to the RHS coppice in Wisley village to cut some hazel for sticks, and fell in love with the magic of the place, albeit slightly derelict as it is has not been actively managed for a while.
 |
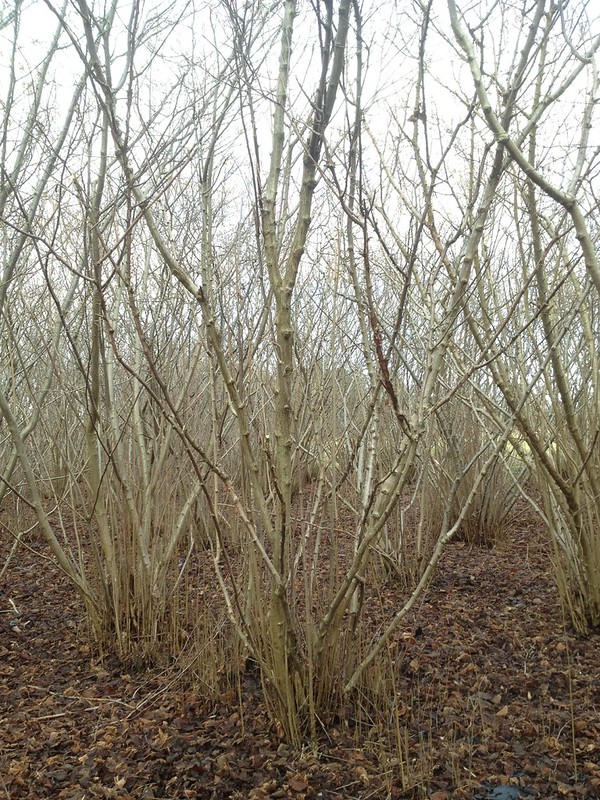 |
| The hazel coppice in Wisley village | |
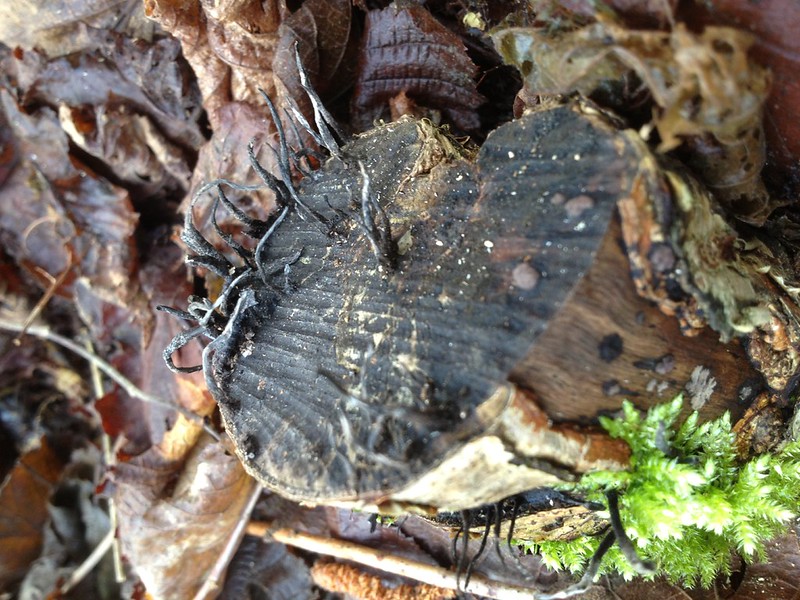 |
| Candlesnuff fungus (Xylaria hypoxylon) on rotting stump |
We cut just a few sticks, that were of the right size for our purpose of supporting sunflowers: 3 m long rods that were not too thick at the base. But what is the best way to coppice a stool? Some of the stools were cut higher than others, part of the stumps had died back and were rotting: how high does one cut a stool?
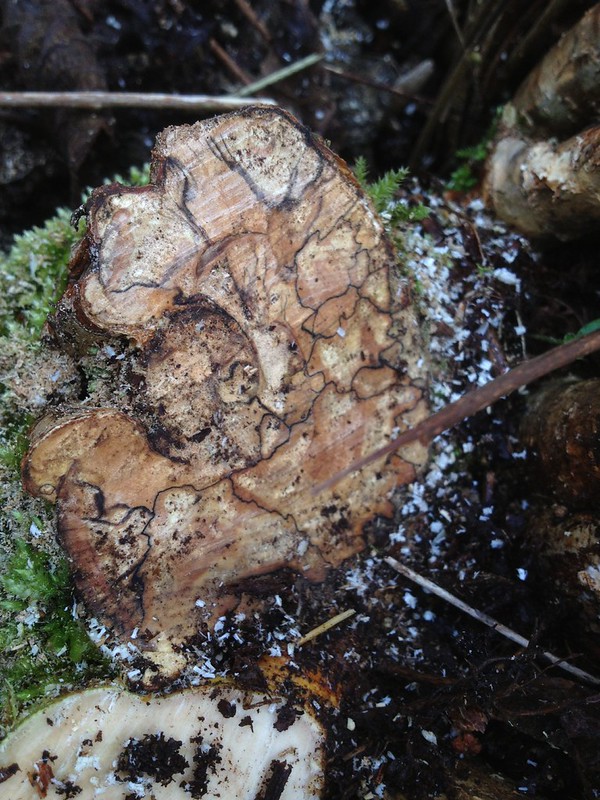 |
| Marbling effect in rotting stump |
I came away from the coppice with a lot of questions, and wishing I onwed a piece of woodland, I thought back once again with longing at all the ones that I always see up for sale in Devon, on my way to an holiday.
The book tells me that hazel coppices are usually managed in a 6-9 years rotation. In the UK, they are usually part of a coppice with standards silvicultural system, which means that the short-rotation coppice is interspersed with longer lived standard trees, that make up about 20-30% of the canopy, and are coppiced in turn on a longer rotation.
I also read that the most productive hazel coppices have a stool density of 1000/ha that is a 3 m x 3 m spacing.
I observed when I was on site that good spacing is essential for dragging the wood out the coppice, but apparently closer trees grow straighter rods as they compete for the light. And, in any case, coppicing should be done by area (or “coupe”, that should be no less that 50 sqm according to the authors) rather than picking the odd rod here and there, because the cycle of shading of the ground (at canopy closure, to get rid of all undergrowth and make for a safer working environment) and light (to stimulate growth in the coppiced stools) are all important for the coppice health and ecosystem, with all the attendant biodiversity.
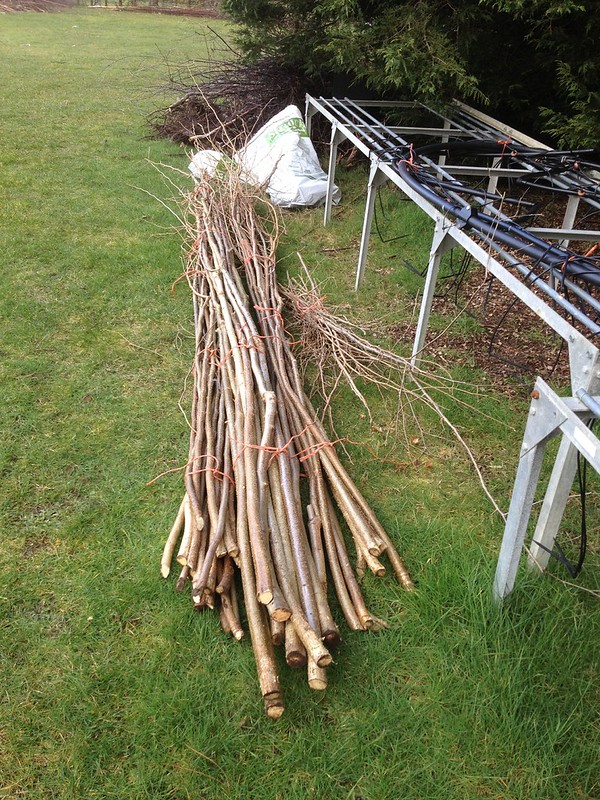 |
| The rods we gathered, graded and bundled |
Although historically coppicing has been done at different heights, a convincing explanation of which was not found by the authors (I was once told it was to protect the new shoots from rabbits and other grazing animals), cutting right down to the ground is the best practice, some say with a slant from the centre of the stool outwards.
Hazel is usually coppiced for clear rods, but here at Wisley they also coppice birch as a sustainable
alternative to bamboo canes (which are imported all the way from China), which can be woven into rather decorative plant supports. Birch coppices for sticks are shorter lived than hazel, as, at 20 or so, mature birch develops a droopy habit. Birch cycle is similar to hazel though, at 7-9 years.
While I’ve not seen the birch coppice myself, I did order two bundles of birch to support sweetpeas and Apios americana in the Cottage Garden, but had never woven it together. Therefore, I was delighted to be given the opportunity to develop the skill, when I was asked to come up with a suitable design (and implementation) of broad bean support for the vegetable garden.
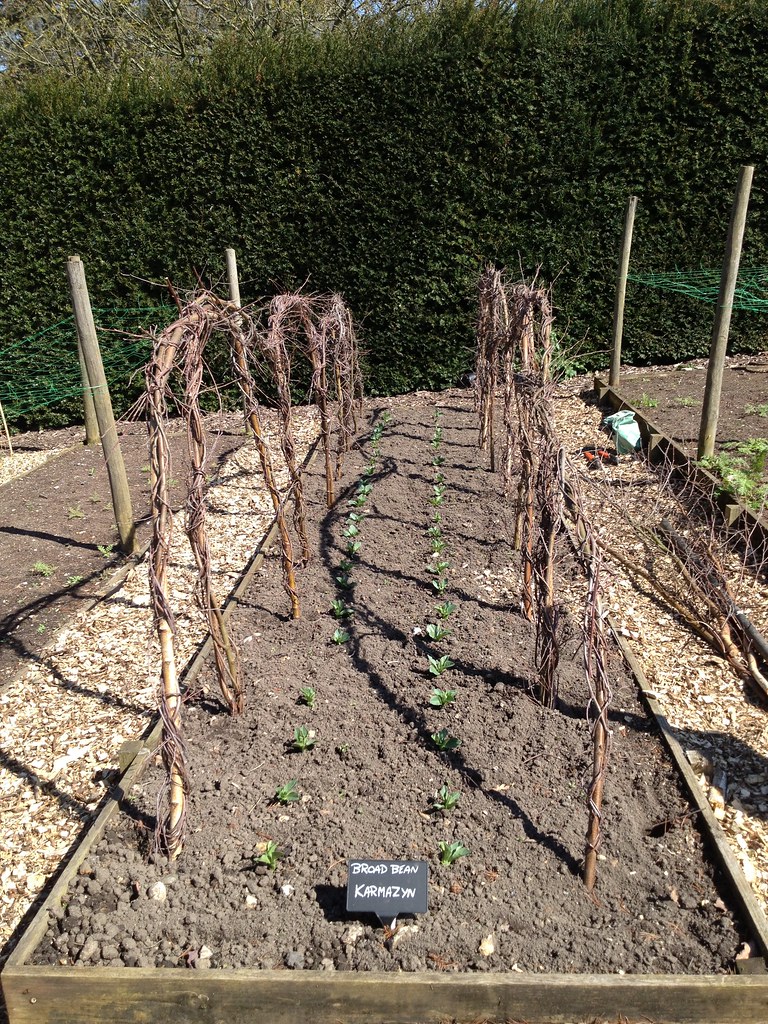 |
| Support no 1 |
I drew inspiration from a structure that had been in the Cottage Garden last year, to support raspberry canes, and between myself and Mario we came up with an structure that would be functional. It took me a whole morning to build the first one, but Mario was satisfied and I was rather proud.
 |
| Support no 2 |
One week later, it took me slightly less, at 3 hours, to build the second one.
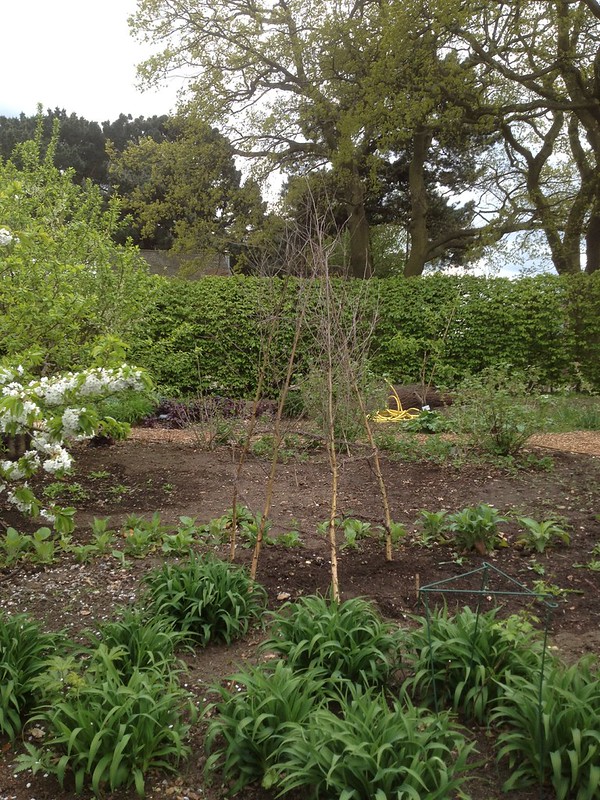
Made braver by the pleasant results, I have now started making a tepee for my Apios in the Cottage Garden too.
It is a rather satisfying job, with a very tangible outcome!
It’s because of the dry spell!
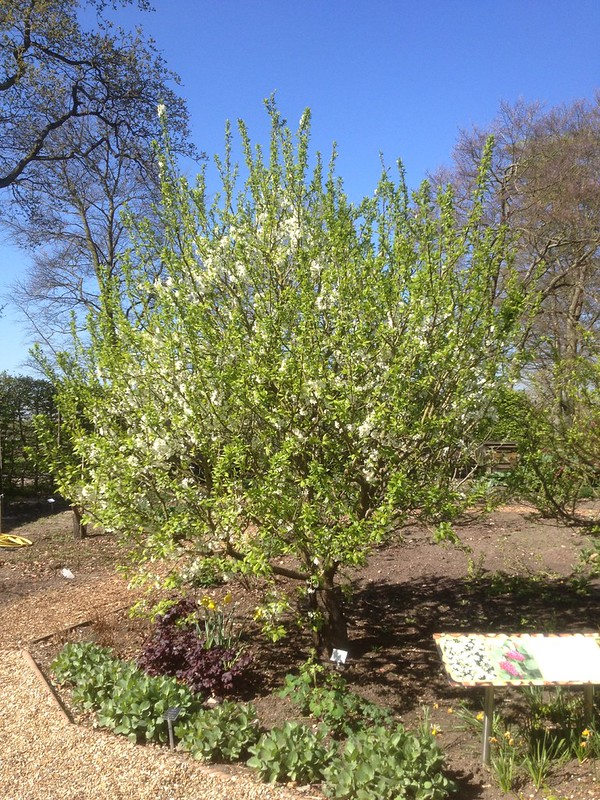
Today I’ve been pruning Prunus (plums and cherries) for the first time since I’ve been here.
To be precise, Prunus avium, or cherry trees, and P. domestica, the plums.
To be even more precise, the plants I’m referring to here are P. avium ‘Sunburst’, P. domestica ‘Opal’ and ‘Blue Tit’ ; and this last was flowering beautifully.
You don’t normally prune Prunus when it’s actually flowering, no – you either do it before or after, and that is generally for light formative pruning. That’s what I had to confirm to the dozens of visitors that rightfully wondered what I was up to!
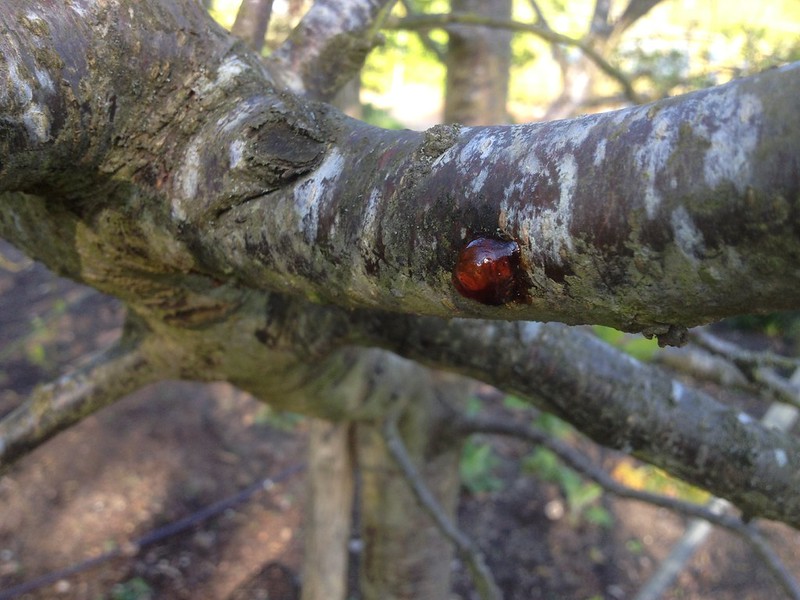 |
| Branch removed as oozing gum is one sign of bacterial canker |
But this is indeed a good time of the year for pruning plums and cherries. And the fact we have been having a dry spell makes it a particularly valuable time for pruning, because Prunus are prone to fungal diseases such as silverleaf (Chondrostereum purpureum) and bacterial cankers (Pseudomonas syringae), which are promoted by humidity.
The best time for pruning Prunus, would be indeed a good August, a dry one, that is. But, as always in gardening, there is the best practice, and there are very real constraints, that require compromising for the second best: for example August is one of the busiest time of the year in a veg and fruit garden, while early April may be quieter, so one may actually get down to do what should be done for the health and productivity of the plant.
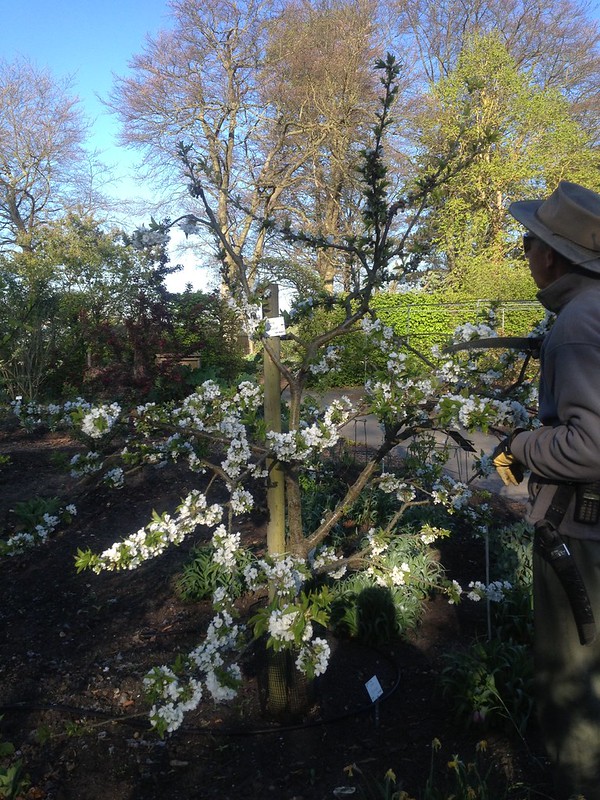 |
| Our fruit specialist teaching with P. avium |
So, after some training by our specialist, I started on the Cottage Garden trees that needed a haircut, mostly a quick one, to give a pyramid shape and keep the height in check, so that cherries can be covered, for example (as that’s the only way to save the fruits from birds) and picking is easier.
The principles being that you take big chunks, cutting back to a suitable branch (I was told in cherries you can sometimes leave stumps, much in the way of a Dutch cut but longer, to stimulate new growth): you cut back any new stems that are too long to 30 cm if they are leaders and some 20 cm if laterals. Keeping in as much flowers as possible is useful. Taking out any dead and diseased material to start with.
Acid cherries (P. cerasus) are slightly different in their growing habit, as they flower better on one year old wood, which (if left unmanaged for more than one year) causes long stems with flowers only at the top, that need replacement pruning to try and keep the shape compact.
But I did spend quite a while thinning out and taking some height out of the ‘Blue Tit’ tree, hence the opportunity for so many visitors to spot me on the ladder.
I am pretty satisfied with the result, there is a lot more air going through the plant, which should help with fungal diseases too. There are still a lot of flowers on, and the shape is pleasant from all sides.
 |
 |
| Plum ‘Blue Tit’ before | Plum ‘Blue Tit’ after |
It seems a pity to throw away beautiful cherry blossom, the visitors pointed that out, but we did not waste it: we put the flowers in vases in the messroom to cheer us up, and I got some spare for the student accomodation too.

To prove it, here’s me, once I got there, posing as “cherry blossom girl”, in a picture I sent as a joke to my husband, as he likes a song by that name… he may have enjoyed the flowers a little bit too! ;p
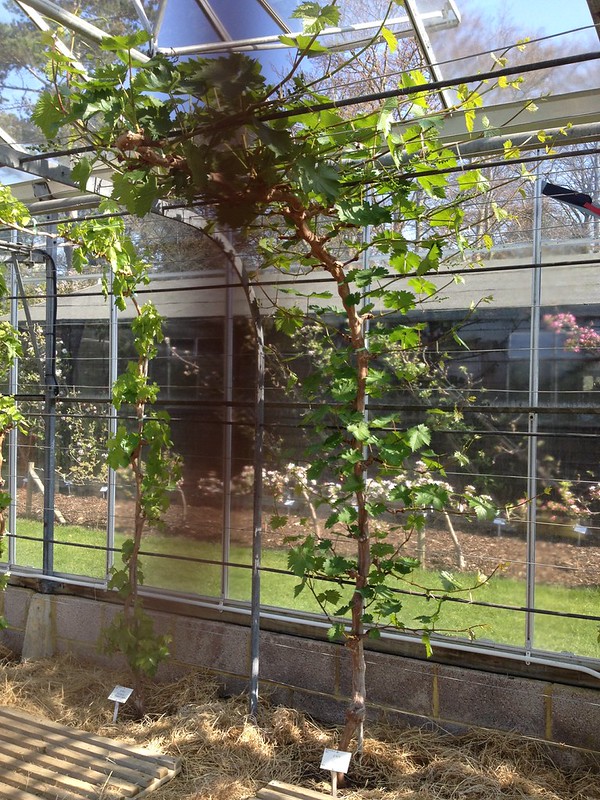
Indoors trained vines – part 2: spring
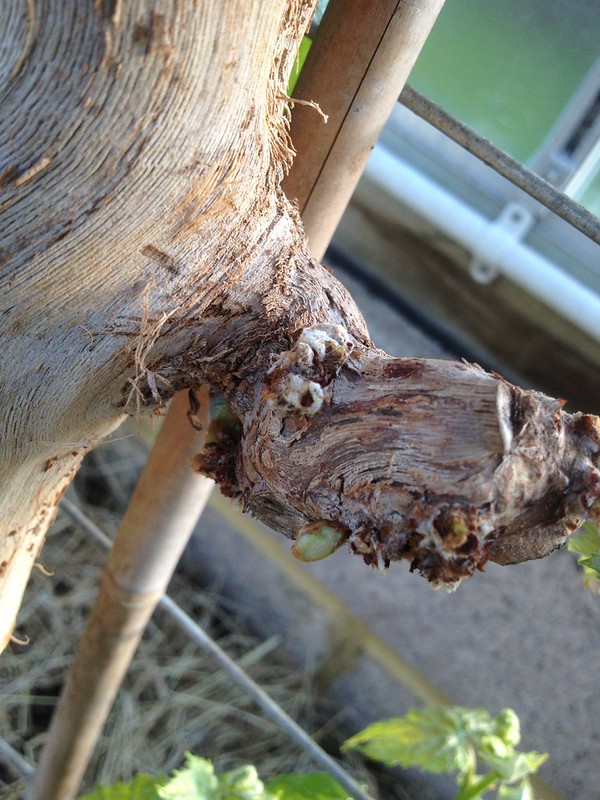 |
| Buds breaking on a spur |
As I was saying, now that’s spring, I have spent a couple of days training the new shoots, born out of the embryonic buds, to the wires that will help bear the weight of their large and perfect-looking grapes.
How can I impress into the minds of my readers the amount of grace needed to carry out this task? I have been rather terrified myself, but my colleague is in charge of the vines loves this task, and she is very graceful indeed.
Shoot training is a morning task. Because in the afternoon the shoots are more prone to snapping.
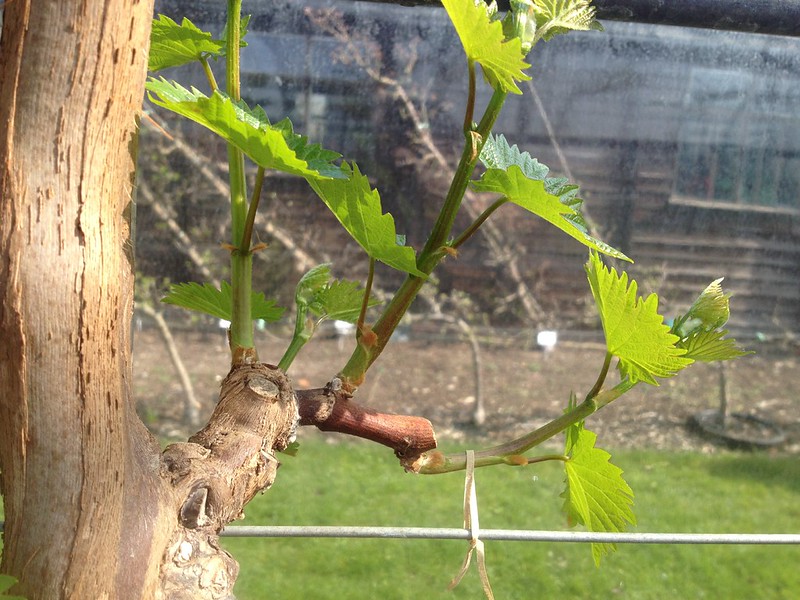 |
| Chosen shoot and reserves |
One of the shoots that have grown on the spurs is chosen
for training. Generally, it’s the vigorous one that is already pointing in the direction it has to grow, parallel to a wire. But sometimes you cannot find one, as they are all growing vertically upwards, for example.
There is a perfect stage for this shoot to be tied to the wire, and that’ s when the stem has toughened up a little and does not bend readily under the touch. You then take a narrow strip of wet rafia and tie it, with a figure of eight tie, trying to nudge it towards a horizontal position.
Shoot training is every morning’s task. In fact, next morning you come in and check your ties? Has any shoot snapped? If not, you encourage it a little bit further towards the horizontal wire. If they have snapped, and likely wilted, you mourn a little while, then you move on to choose another shoot to train. That is why no shoot that have grown on the spur are removed at this stage. Also, some of them may develop into a nice replacement spur, if they grow closer to the rod and in the right direction.
Grapes grow fast, and at all different speeds. When I did this job 10 days ago, there was only one vine that had sufficiently developed shoots for tying: grape ‘Nero’. Today, they were all more or less out, with ‘Nero’ almost having reached the end of its allotted space, halfway towards the next vine, or about 60 cm.
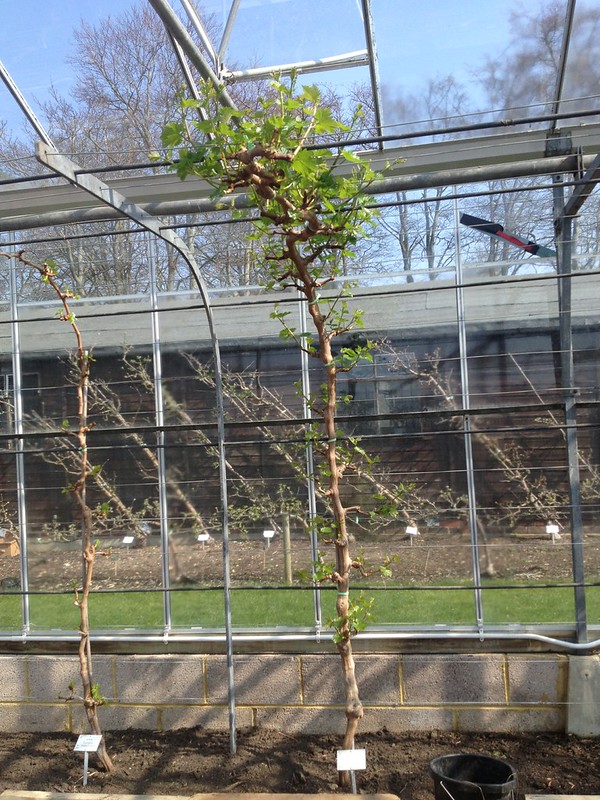 |
 |
| Vitis ‘Nero’ on 9th April | Vitis ‘Nero’ on 20th April |
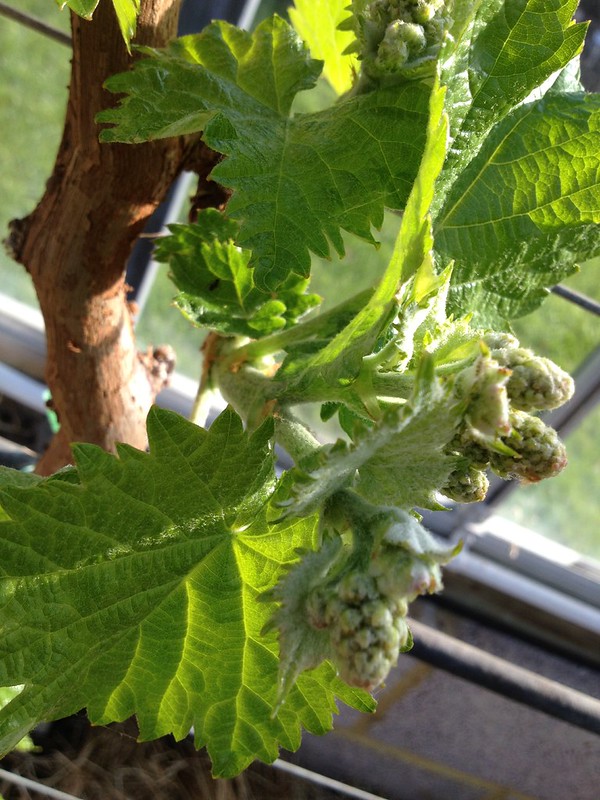 |
| V. ‘Lady Downe’s Seedling’ |
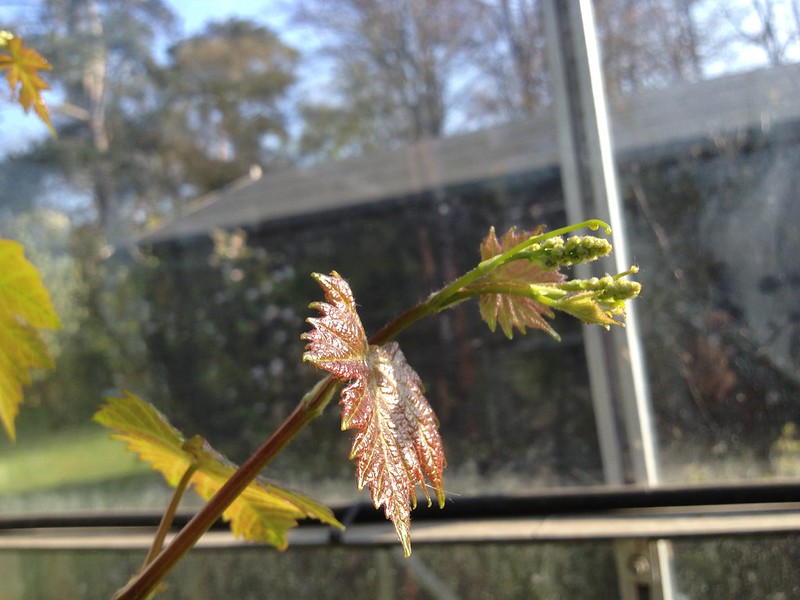
They all have a different way of growing, with some putting out solitary minute glabrous inflorescences on slender peduncles and others, like ‘Lady Downe’s Seedling’, pushing large, bunched downy panicles through.
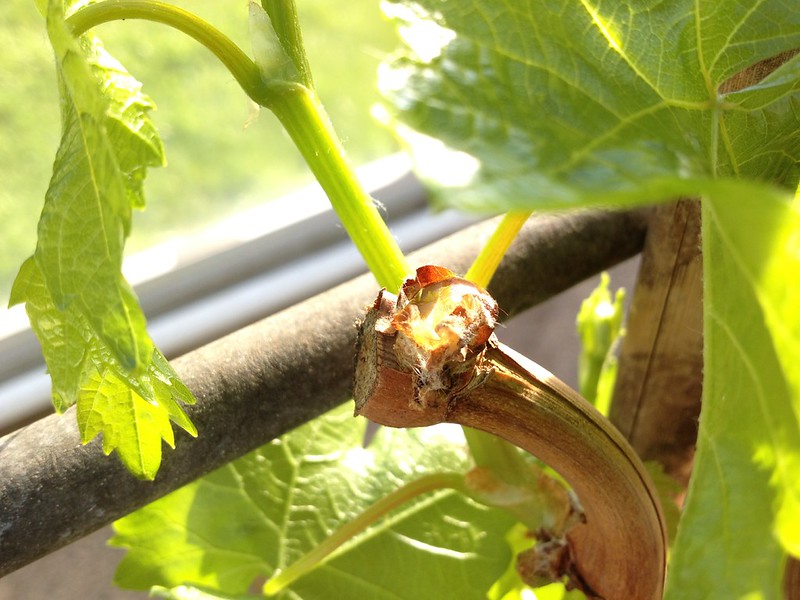 |
| V. ‘Sultana’: bleeding of snapped shoot |
Others are terribly prone to snapping, like grape ‘Sultana’.
Today, as the stage of development of the plants is further ahead, besides tying in new suitable shoots and nudging forward already tied ones, we were going to:
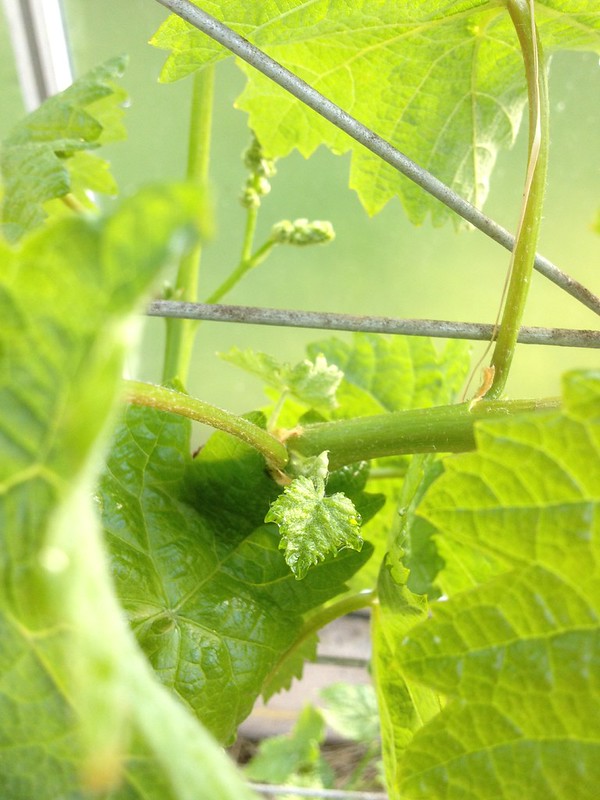 |
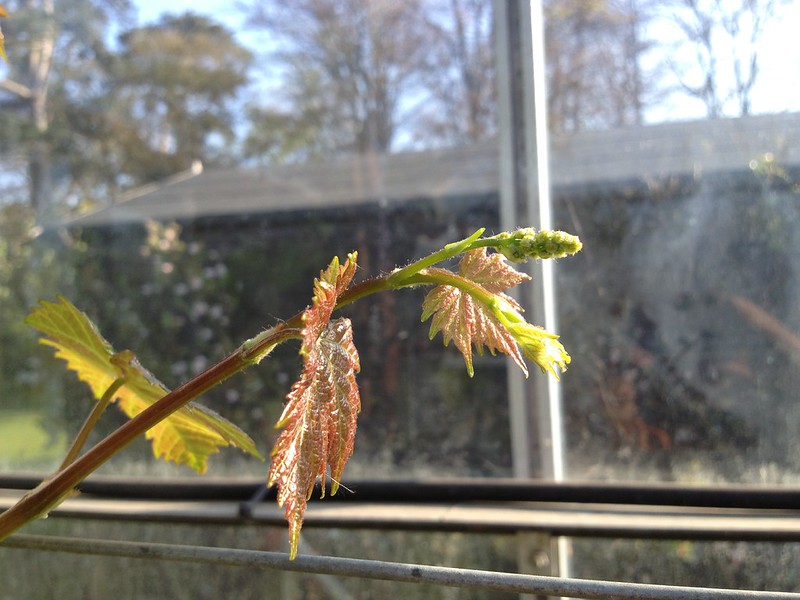
| Leaf axil: sublateral forming |
- snip off any developing sublaterals from the leaf axils
- snip off any tendrils (as they have a habit to attach in inconvenient places)
- snip off any inflorescences in excess of one, that were growing further from the rod (depending whether the closes inflorescence was good enough to develop successfully into the perfect bunch of grapes, of course).
-
One day in charge of the Model Fruit Garden
The team leader was away today, so I was left in charge of the whole of the Model Fruit Garden, with a long to-do list to keep me busy:
- pot up, in clay pot, a new pear tree (find pot and compost)
- water the trees pots and the strawberries in the polytunnel
- take the bracken off the fig
- dig out two dead gooseberries
- shop for strawberries and a new gooseberry in the garden centre (to prop reception)
- hand-pollinate the peach
- remove all the raspberry suckers beyond the rasperries’ allotted space
- fertilise the raspberries and blackcurrant (35 g/sqm or both sulphate of ammonia and of potash)
- weed to my heart’s content
- pick the forced rhubarb
At the end of another sunny and rather warm day, I was happy to have ticked off most of my list – I had almost done removing the rasperry suckers, weeding the areas I was working on as I went along, so the only task that remains to do is to fertilise once the suckers are all removed.
After we dressed the fig (‘Brown Turkey’) at the end of November, it was good to have the opportunity to take it out of its winter shelter, weed around it, and leave it in all its beauty for the visitors to see. I also found a frog in the process, hiding in the bracken at the feet of the tree.
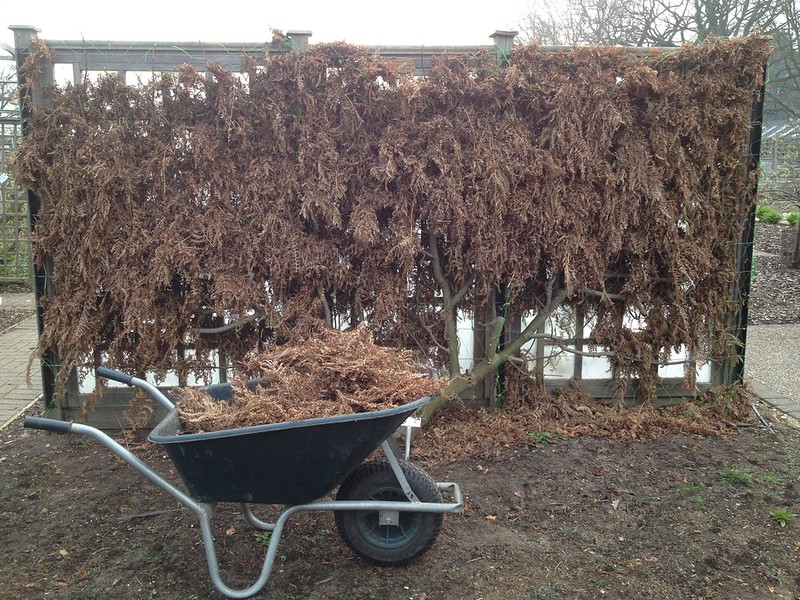
Fig: before 
Fig: after
I had never hand pollinated a tree. It is usually done for one of two reasons: breeding purposes (so as to control the parents of plants) or for lack of suitable pollinators
– for a variety of reasons, for example artificial growing conditions,
including under-cover crops (as is the case of our peach, protected from rain by a wood and polythene frame) or even in case of decline of natural pollinators compromising crops (as is happening in apple and pear orchards in China).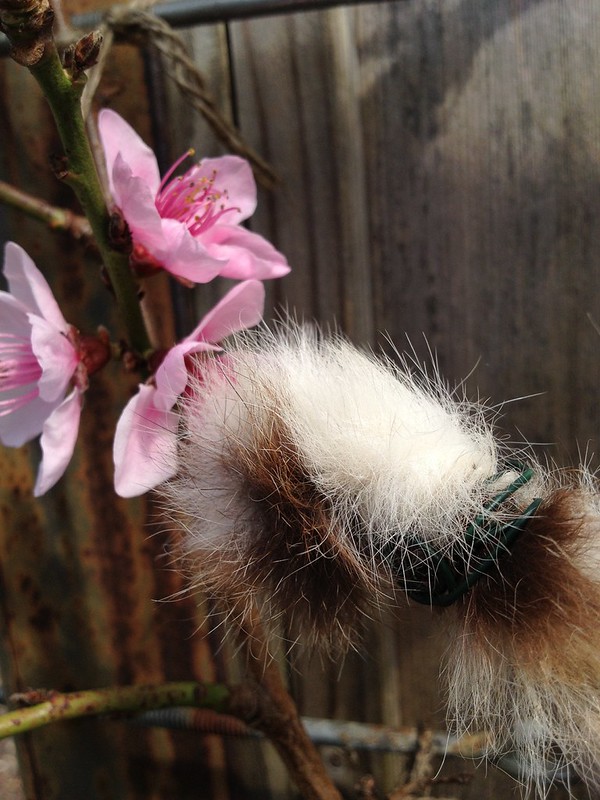
Hand pollinating peach flowers Armed with a rabbit’s tail on a stick (the source of some bemusement, even amusement, in passing visitors), I removed the frames and proceeded transferring pollen from one flower to the other.
The procedure has to take place on a warm, sunny day, and it was done before today: in fact, the flowers were mostly at petal fall stage, but we wanted to be sure that we got all the flower we possibly could. It is a laborious task!
The frames then went back on: they’ll stay until May.
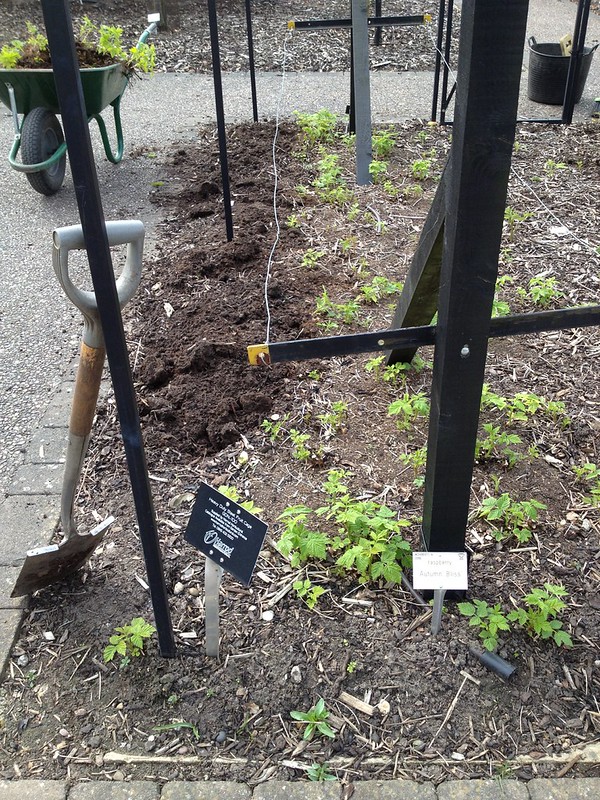
Taking back the raspberries I did finish the day digging out those pesky raspberry suckers, running away from supporting poles and wires. There is some left for me next week, but I could not go home before picking the forced rhubarb, as it is supposed to go into a cheesecake for the team, that I’m baking at the weekend!
This was another first for me: I have never forced rhubarb, mainly because those terracotta pots they use are rather gorgeous to look at, but awfully expensive.
So I removed the lid (it had been pushed up by the long stems!) and then the pot with some excitement: forced rhubarb is considered such a delicacy.
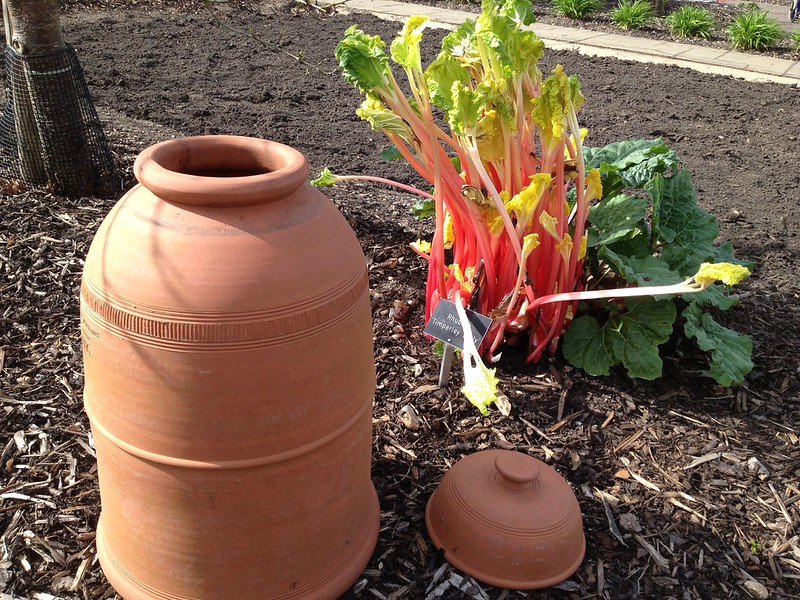
Forced rhubarb I then understood why they say that forcing rhubarb kills the plant, and (as you can see in the picture above), we never force more than half a plant here at Wisley. Or divide one in half first, then force only one of the two.
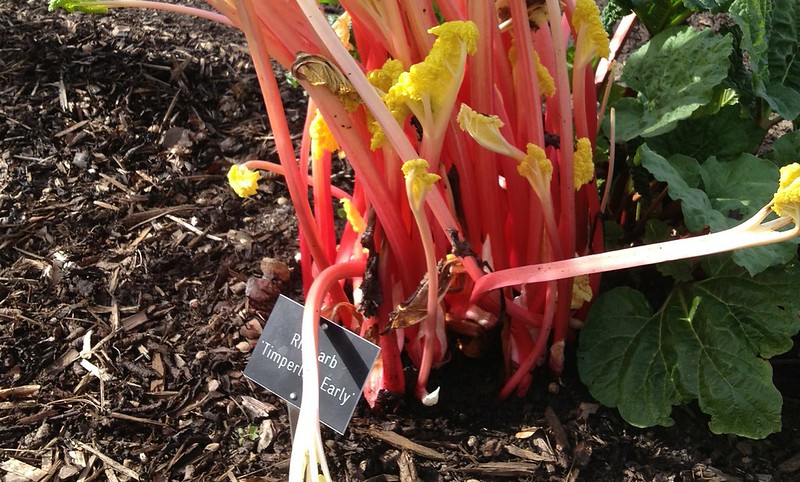
The stems were beautiful, but very delicate – as you would expect of etiolated plants. When you tried to pull them away at the base, they either broke or ripped away the whole of the bud, which was really slimy and soft, as if on the point of rotting.Some of the leaves were also starting to rot at the top: the enclosed environment is not ideal, you should not leave anything too long in such conditions.
Depending on the variety and the situation, in fact, forcing takes 5 to 10 weeks. This pot had probably been on just too long – but nothing that will spoil our enjoyment of the cheesecake!
By the way, I was told a plastic pot, surrounded by straw to keep the temperature more even inside would do just fine, although I suppose it would put it at bigger risk of rotting, because plastic is less porous than clay, so keep a closer eye if you do try.
-
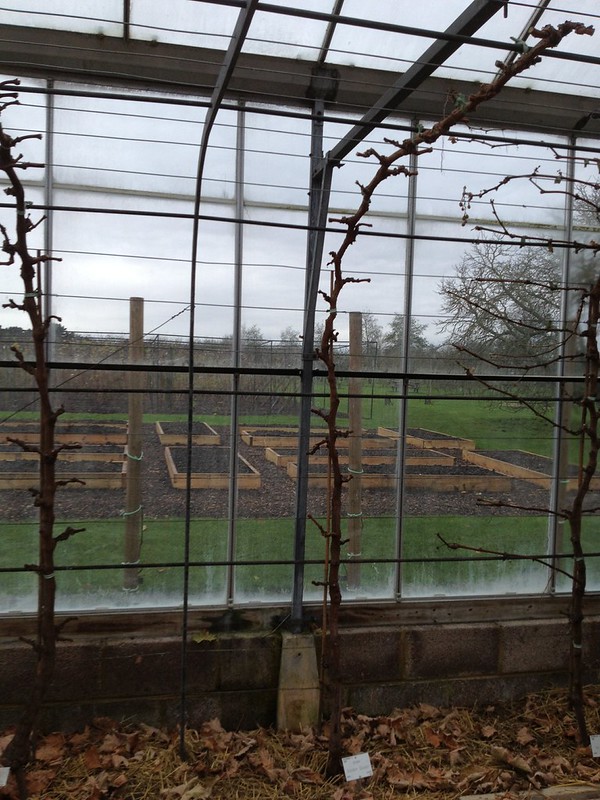
Indoors trained vines – part 1: winter
After tending to Vitis ‘Muscat of Alexadria’ as one of the first things when I arrived back in September, I have spent more time in the greenhouse, tending to the very demanding crops that indoors vines are.
After all grapes are picked, the greenhouse’s vents were opened, so the chill coming in stimulates leaf drop and the plants go into dormancy.
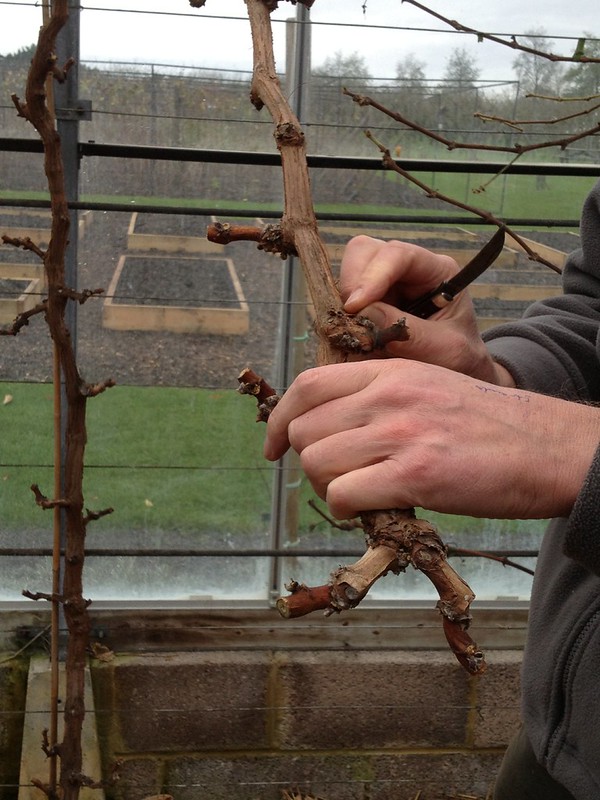
In December, it was time for pruning, and we got some training.
Our vines are grown with the “cordon rod and spurs” systems, which means that plants are planted 1-1.2 m apart, and trained as a cordon (only one main stem) tied to a frame; a fixed number of spurs (aligned with the wires) produce laterals that are then trained and tended meticolously to produce one, perfect-looking grape per branch.
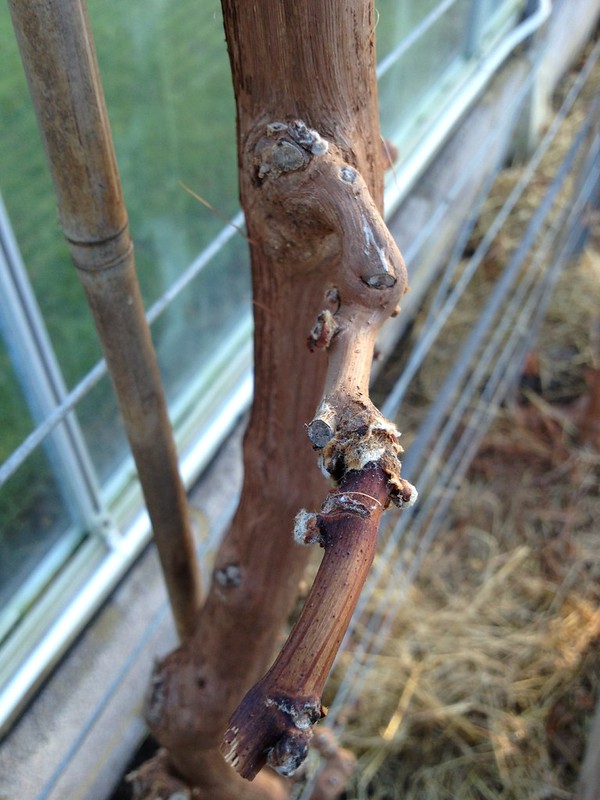
Pruned cordon In December, the spurs are cut back to one lateral per spur, 2 buds per lateral: the objective is to keep the spurs short, so every so often old spurs are replaced with new ones, where a suitable branch had been allowed to develop over the year, but only if the wood is well ripened – you always have to choose just one lateral.
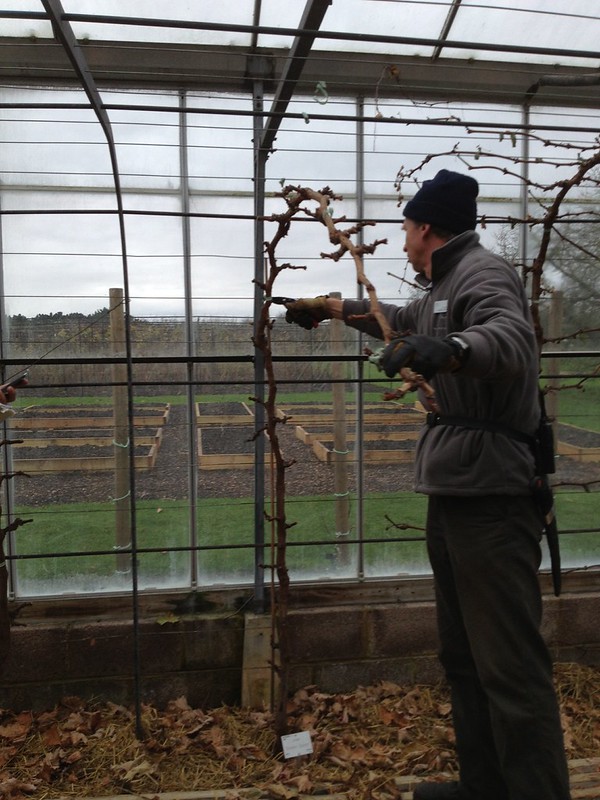
Cordon getting untied After that, the vines are untied from the frame, because buds break more evenly in the spring if they are not. Untying is also useful because winter is the time for bark scraping.
A rather serene image of the vines in January Bark scraping, or peeling of the bark, is something I spent a couple of rainy days in January and February doing, as it is the perfect task to keep one busy in such weather conditions! With the help of a (preferably not too sharp) knife, one peels the flaky bark of the vine off (it mostly comes away in long strips), so that pests cannot take residence that easily, and any that have are exposed and can be sprayed with a soap-based winter wash. Over the winter, the straw that is covering the soil, with a layer of compost, is also scraped away, removing some of the patogens it might host.
Demonstration of bark scraping The job is quite delicate, and time consuming as you have to remove only the bark, one strip at a time, never exposing the green phloem layer. Around the spurs, then, it gets even more delicate, as you have to make sure you don’t accidentally knock the embryonic buds that are waiting to grow under the bark (in the pictures below, they are the apparently dried, fluffy, white tips sticking out)
.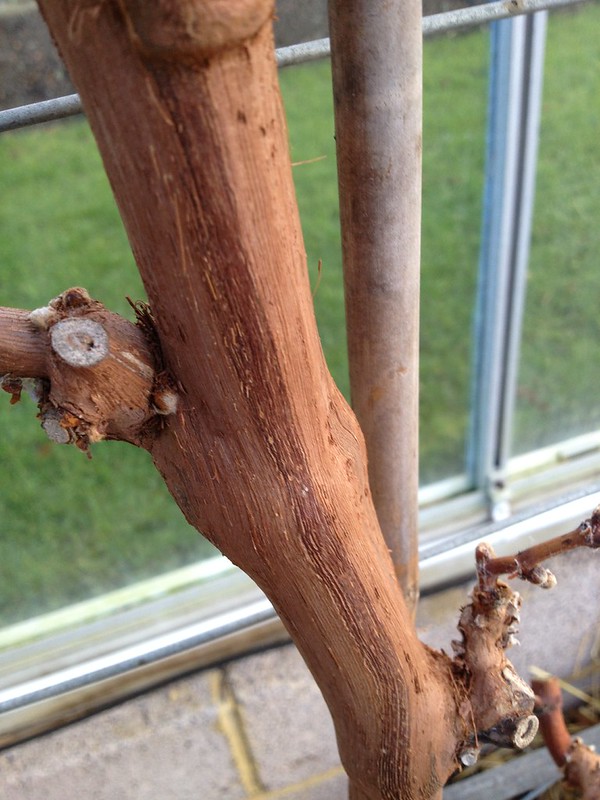
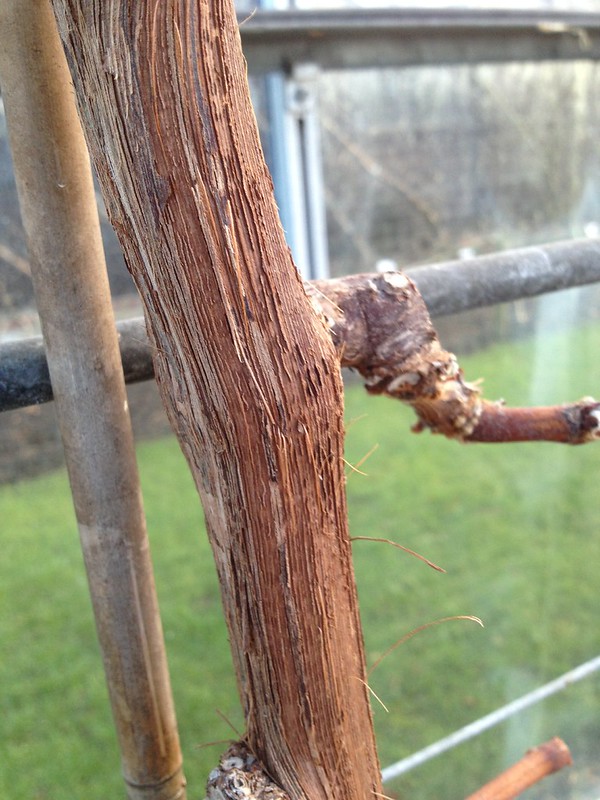
Main stem: before… … and after scraping 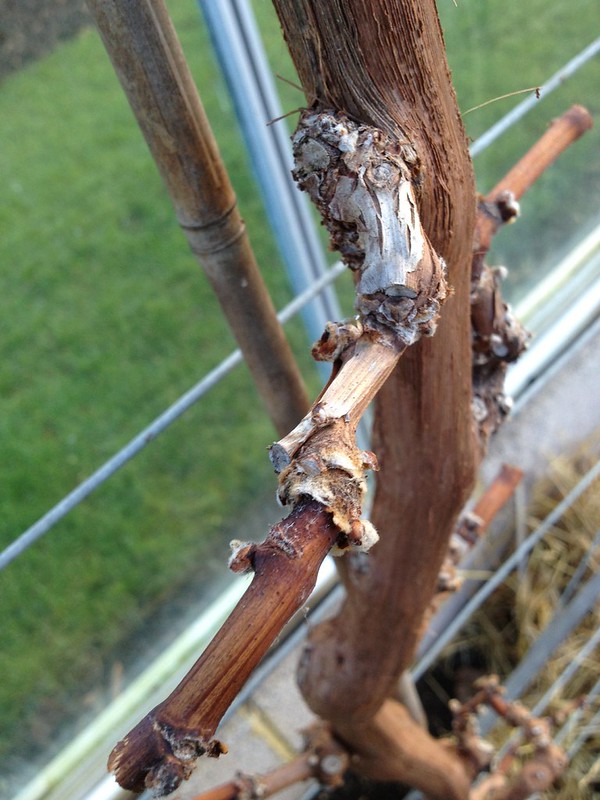
Spur: before… … and after scraping (note the bud initials) 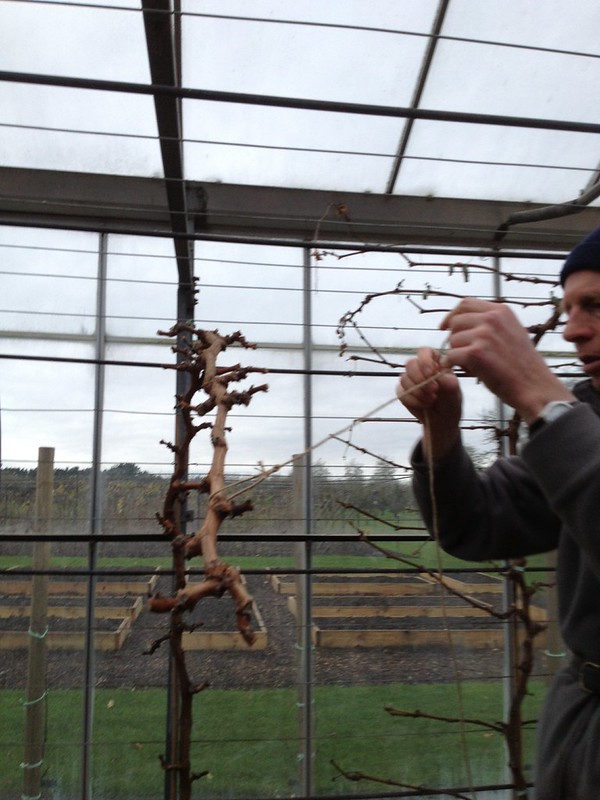
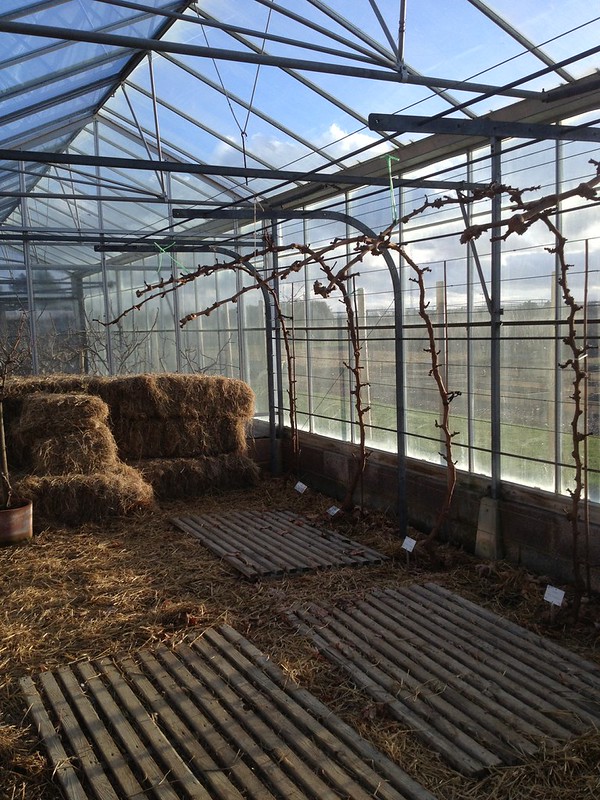
Tying of the rod demostration Because some of the cordons are rather heavy, and in any case to take the weight off and avoiding swinging and snapping, the rods are then tied loosely.
When they start to break bud, the rods are then tied close to the frame once again, and the new shoots are trained along the wires, which takes me neatly to the job I’ve been doing today: training of the new shoots.
 |
| Two inflorescences and tendrils |
 |
| One inflorescence and both tendrils removed |
Two observations from today: one struck me for its beauty, and that is the guttation on grapevines, on young stems and the underside of leaves, and even where a shoot snapped, some bleeding, like a chrystal tear drop.
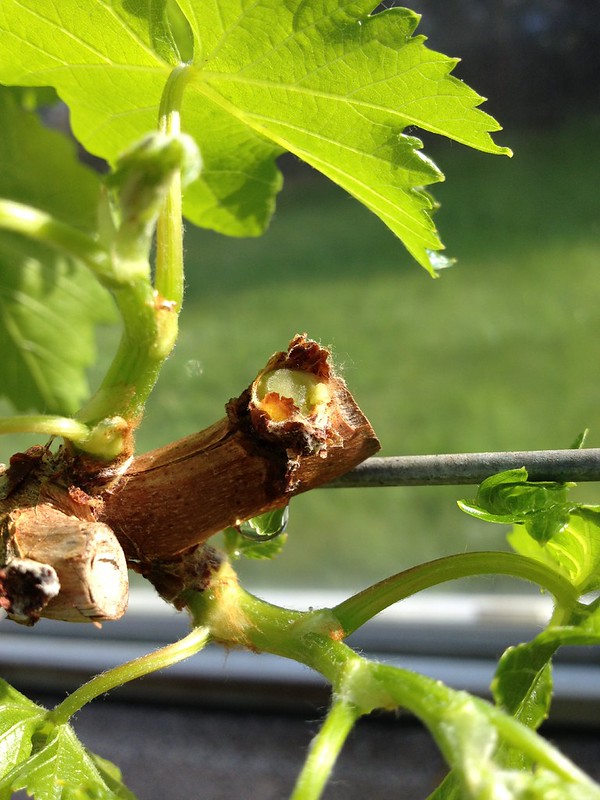 |
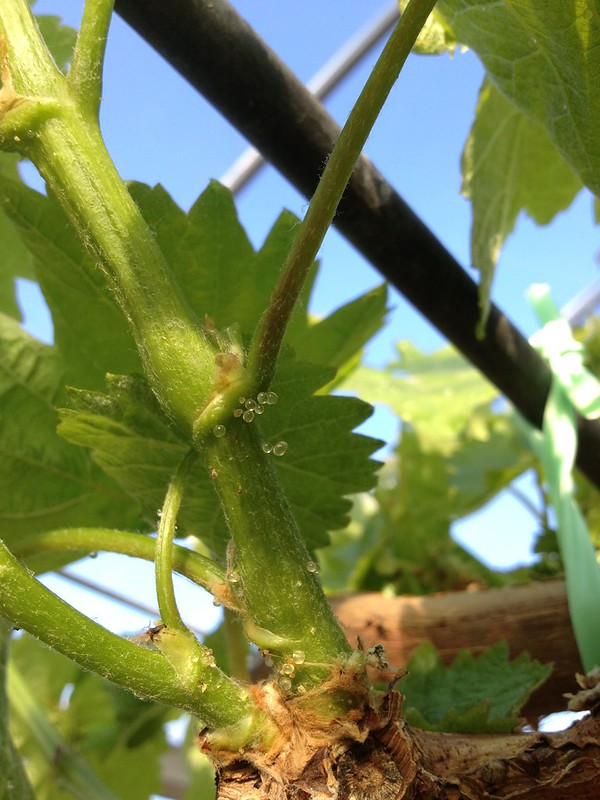 |
| Snapped shoot with bleeding | Guttation |
 |
| Guttation |
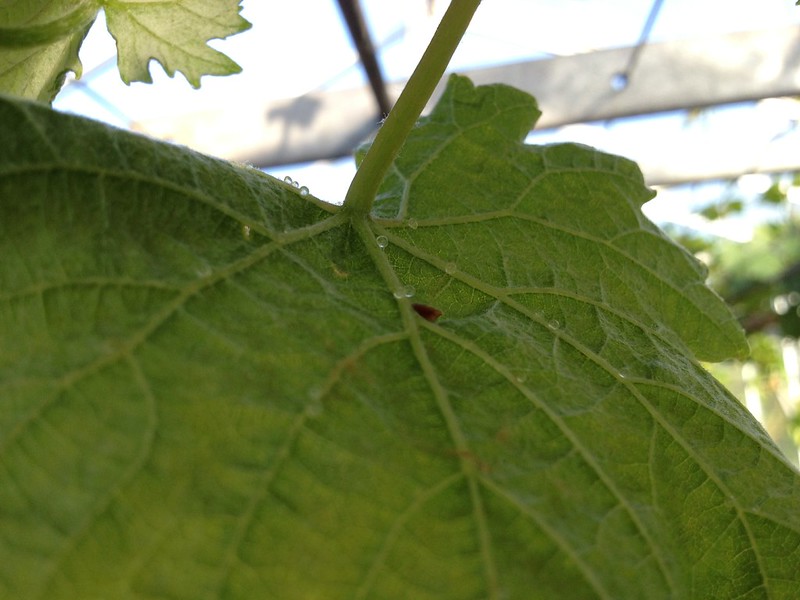
The other one is not very pleasant, as the scales are out in force despite the peeling. I squashed them, but the vines might undergo spraying soon.
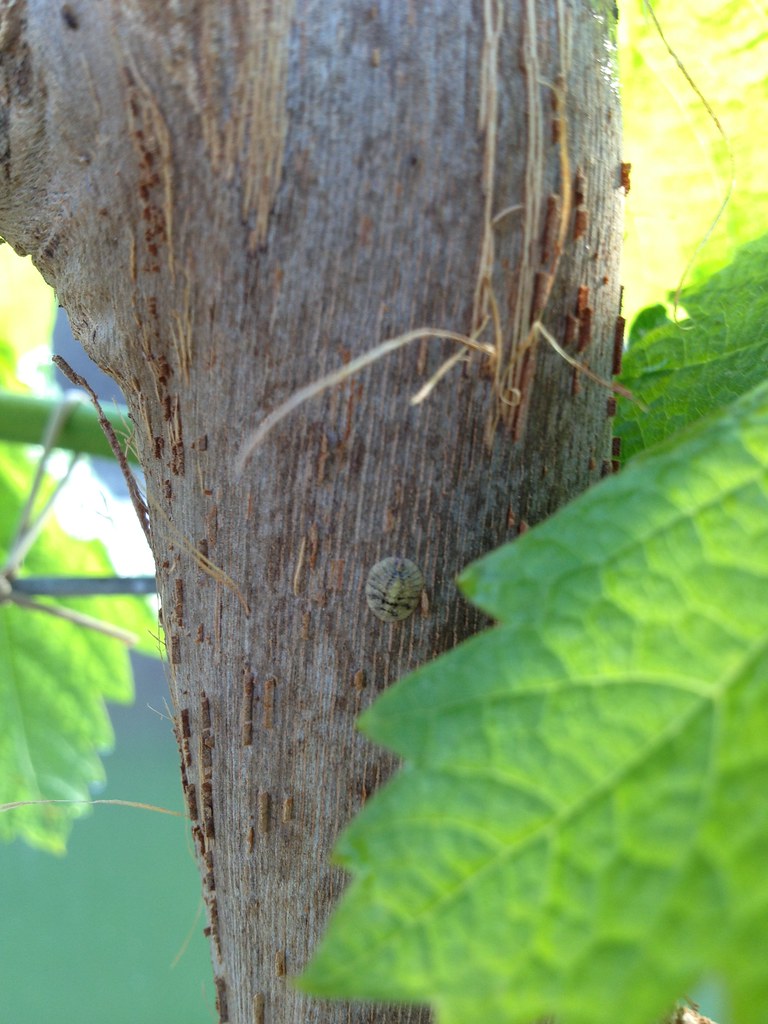 |
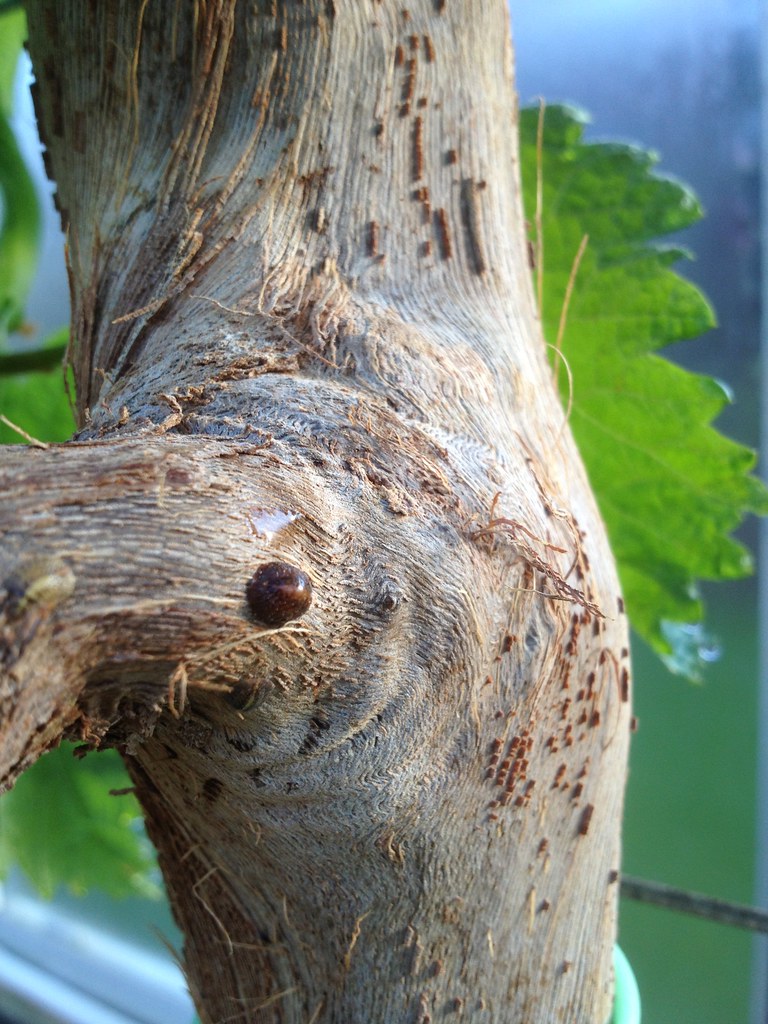 |
| Brown scale (Parthenolecanium corni) | |
Note: the University of California has a leaflet with plenty of pictures for identification of scale insects.
About Me
 M.Paola, that’s me
I got my first allotment in the UK in 2007 and started growing my own food. Learning as I went along was not enough, so I studied horticulture. Faced with the horticultural warfare, I became a conscientious objector: I use no chemicals and support organic principles and regulations.
Brexit gave me a new life in the Netherlands, three new plots by a nature reserve and an MSc in sustainable food systems.
I write in my personal capacity and, as a language perfectionist and a non native speaker, I keep reviewing my entries’ text for clarity.
Some Rights Reserved

This work is licenced under a Creative Commons Licence.