 |
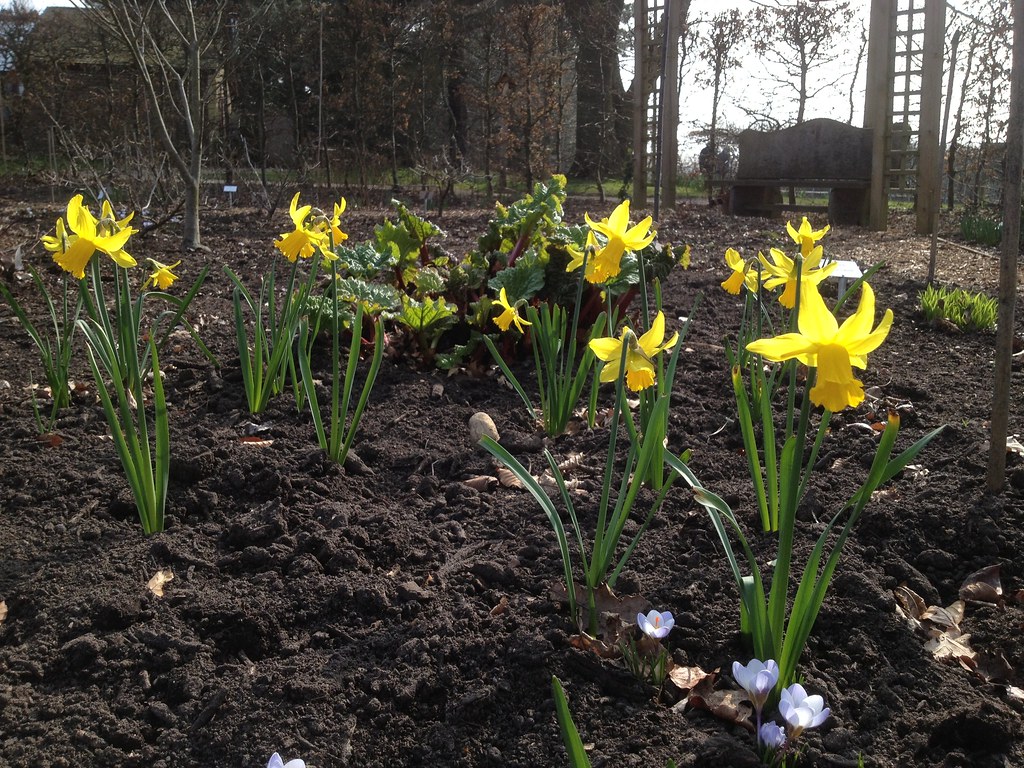
| Daffodils and crocuses (rhubarb at the back) |
I had not been in the Cottage Garden for over a month (time does fly!), and the last time I was there it was mainly about tidying up: picking leaves, cutting back herbaceous perennials’ stems, mulching.
I did keep an eye on it since, though, and albeit the ground is still rather bare, crocuses and daffodils have been putting up a nice show.
In particular, I have been monitoring the combination of rhubarb and daffodils, which has turned out rather satisfactory so far.
But today it was with a bit of anxiety that I started direct sowing in my area.
But let’s start from the beginning.
First thing this morning, I went into prop to check whether any of the plants they are growing for me was ready. Fritillaria persica ‘ Ivory Bells’, a treat I invested in last year, is about to flower. It’s gone into a polytunnel for hardening off a week or so. The next plants to come out, by the look of it, are going to be Malva silvestris and the chamomile lawn.
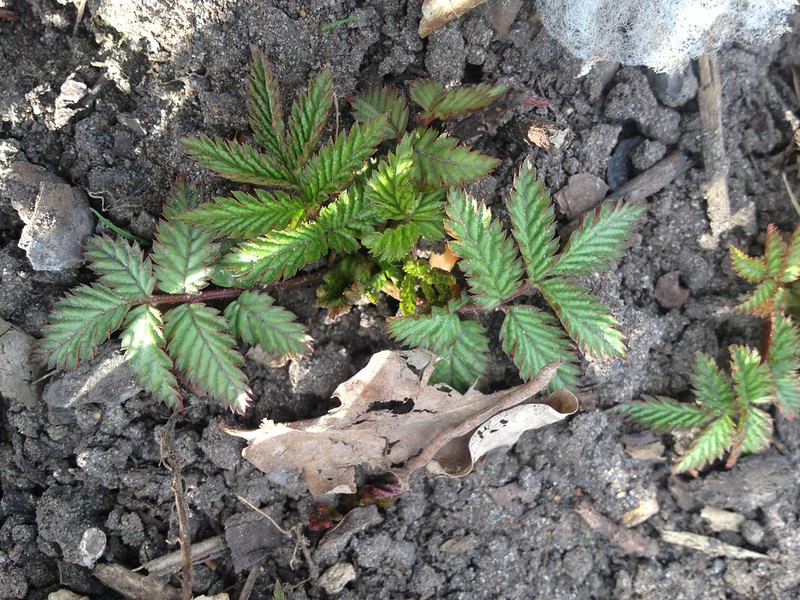 |
| Rubus illecebrosus |
In the area itself, there was still some tidying up to do, for example, Rubus illecebrosus, aka strawberry raspberry, has been sending out new growth for a while, so it was time to clear the old stems, and where raspberries were previosly planted, some roots left in the ground sent out suckers that had to be removed to the source.
And there is an invasion of Nothoscordum borbonicum, which I’m trying to eradicate by digging the tiny tuberlets out one by one.
Also, very much in my style, but made braver by my Great Dixter visit last month, I intensified my “selective weeding” and the reuse of self-seeders in the cottage garden. After all, I think it is very much in the spirit of a cottage garden to make use of those plants that show an inclination to grow of their own accord.
So I got the inspiration for a suitably ornamental use of all of the seedlings of Welsh poppy (Meconopsis cambrica), in the “yellows and reds” area by the East entrance, where I also planted red hot poker (preexisting), Aquilegia ‘Fire Cracker’ (preexisting) and Asphodeline lutea, with Jerusalem artichokes (Helianthus tuberosus) as the backdrop – we’ll see how that turns out.
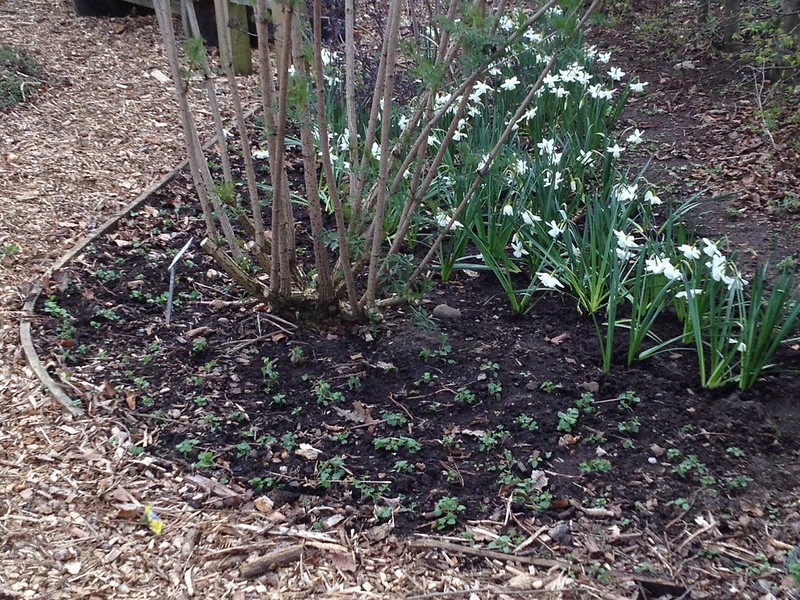 |
| Veronica as ground cover |
I also had a go at creating a Veronica ground cover under the elders, where the soil was rather bare, waiting for some Viola and Primula grown from seeds, that have been fussy germinators. If it gets to flower together, it should be a lovely sight. Veronica spp. are by no means less gorgeous than cultivated varieties. Does it look like a weed in the picture?
And then it was the time for the direct sowing. I am slightly nervous that they might not germinate and grow well, my plants. If it happens at home it is no big deal, but here it’s a display garden, and it is the first time I grow from seed for display – I’m much more comfortable with shrubs and pruning!
But anyway, it was time I tackled the potager.
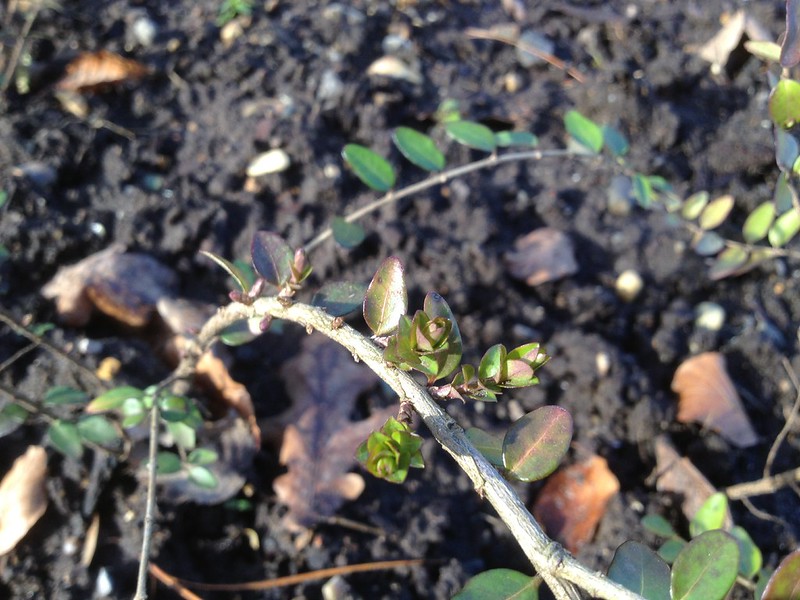
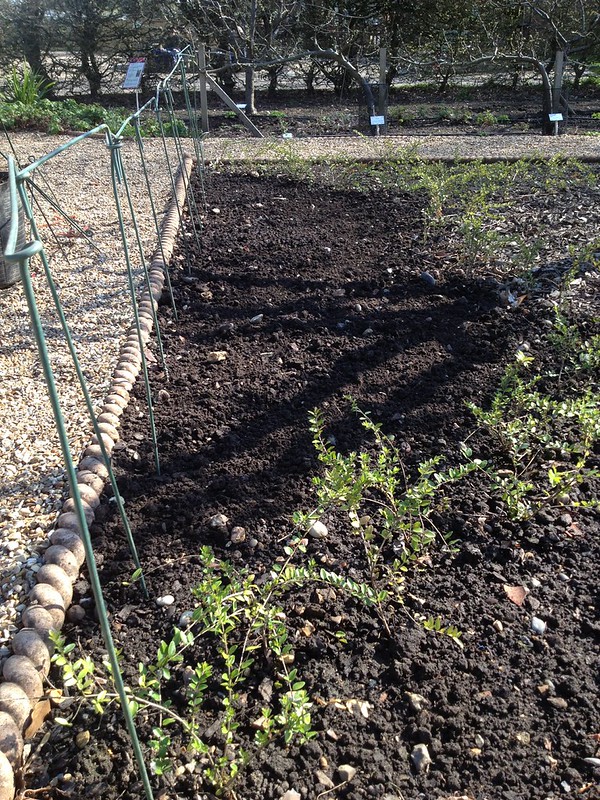
My buddying hedge of Lonicera nitida has been doing fine, has been filling up with new growth despite being bothered all winter by some pest (rabbits?) who have been nibbling at it, severing stems at the base. I wander what they find attractive in such tiny stems.
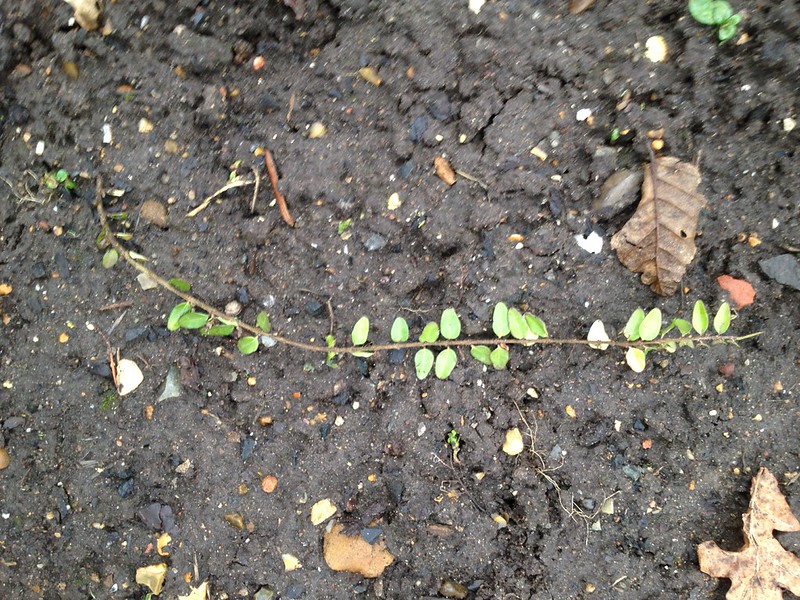 |
| Lonicera: a severed stem |
 |
| Lonicera: new growth |
 |
| Beetroot: sown |
The areas separated by the hedge need filling now, and with a 4 year rotation, sowing for the spring was planned as: spring onions, beetroot, chicory and Phacelia tanacetifolia (not very many Solanaceae or Cucurbitaceae ready to plant out now).
The chicory is being grown for me, but I did sow the Phacelia (scattered) and the beetroot (in drills, 2.5 cm deep of finely prepared soil, watered in advance, some 3 cm from each other and with 30 cm between the rows). I still hae to do the spring onion as I ran out of time.
Finger crossed now…
The orchard tree lifecycle, reversed
I started the day today by winching out an apple tree stump, and finished it by planting a perry pear.
Not in the same spot: planting similar trees in succession is not ideal, as they may suffer from what is known as “replant disease“, althought sometimes one does not have a choice in orchards. That apple tree will likely be replaced with another one of the same cultivar, as the collection at RHS Garden Wisley groups two trees of every cultivar together.
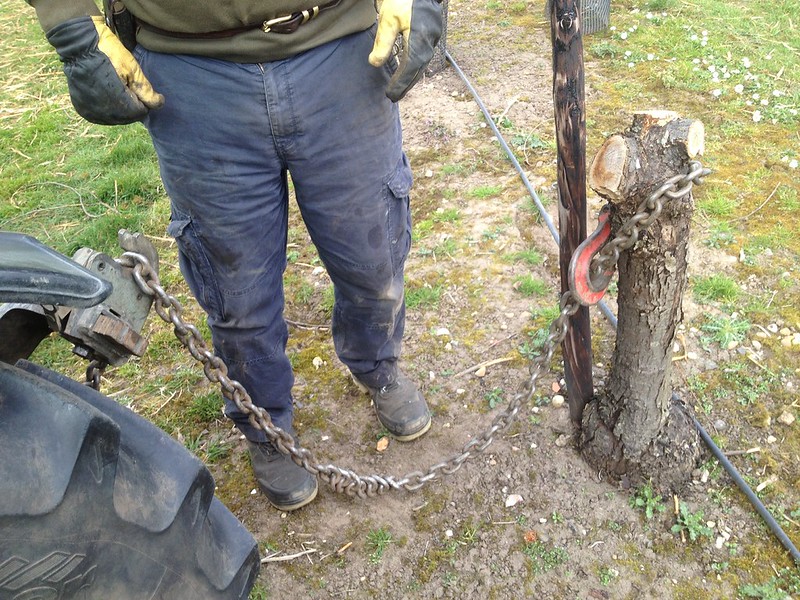 |
| Stump hooked |
We used a tractor and chain to pull out the tree, which had been previously sawed to a 50-60 cm stump. Reversing into the tree from one of the lanes, we wrapped the chain around the stump, fixing it with the hook.
 |
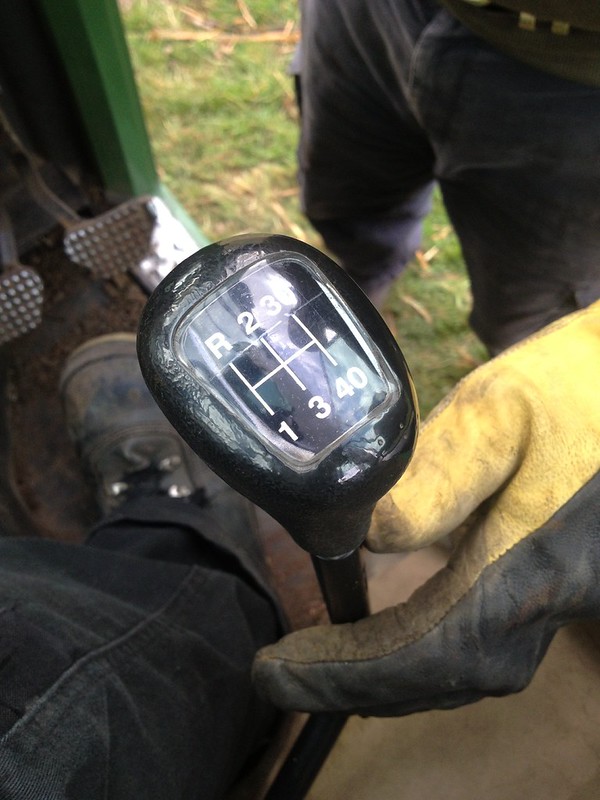 |
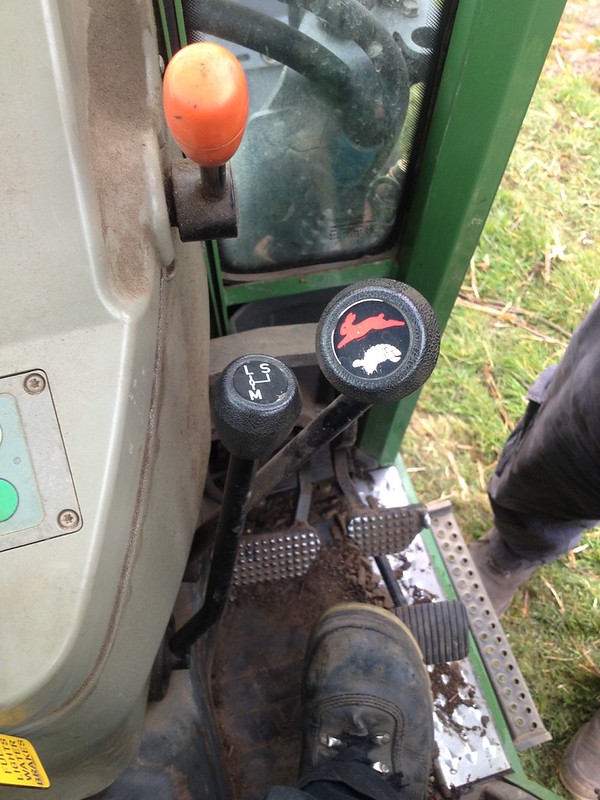
| Gears set on the lowest | |
Then, with the tractor ticking over (no hand throttle), in minimum gear (tortoise, low, 1 in our case) and just working the clutch (no accelerator) to avoid digging into the ground, we slowly pulled the stump out.
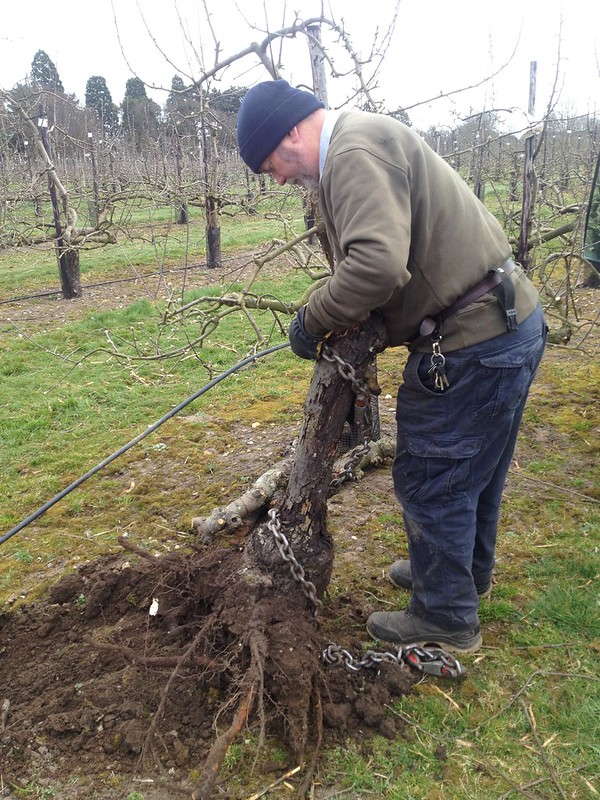 |
| Stump out |
To complete the job, we then dug the area clean of any roots that had remained in the soil.
It was a nice job (if we do not consider the poor tree), as I got to use the tractor, which is not something that happens very often here, and you know how much I enjoy it!
More driving of tractors took place in the afternoon when we shifted some compost to the planting area, then dug a pit and planted the first perry pear of the new perry orchard: a majestic tree, in excess of 3 meters tall already at 3 years old!
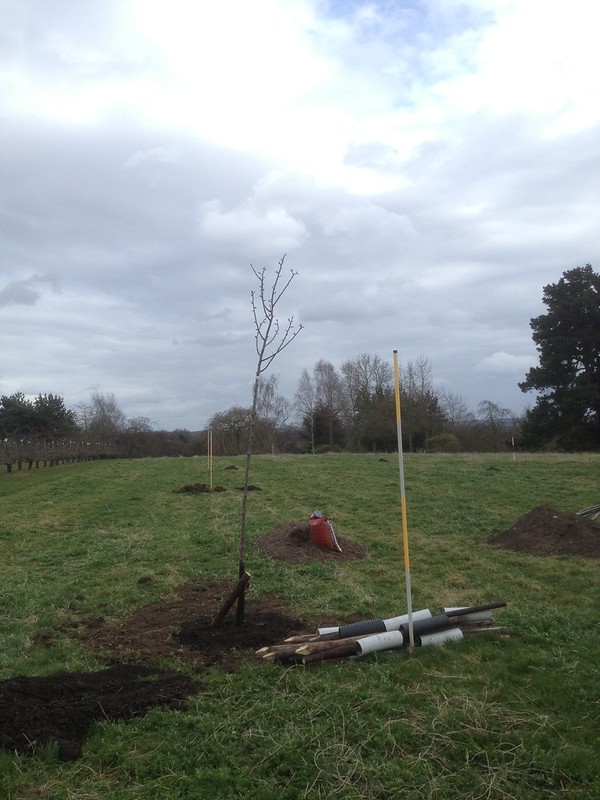 |
| The first perry pear in the ground |
The land had already been marked for the 9 new trees at 7 m each way between each other. We dug a pit, filled with some extra compost as the ground is very sandy here, planted and staked the tree, then mulched with more compost.
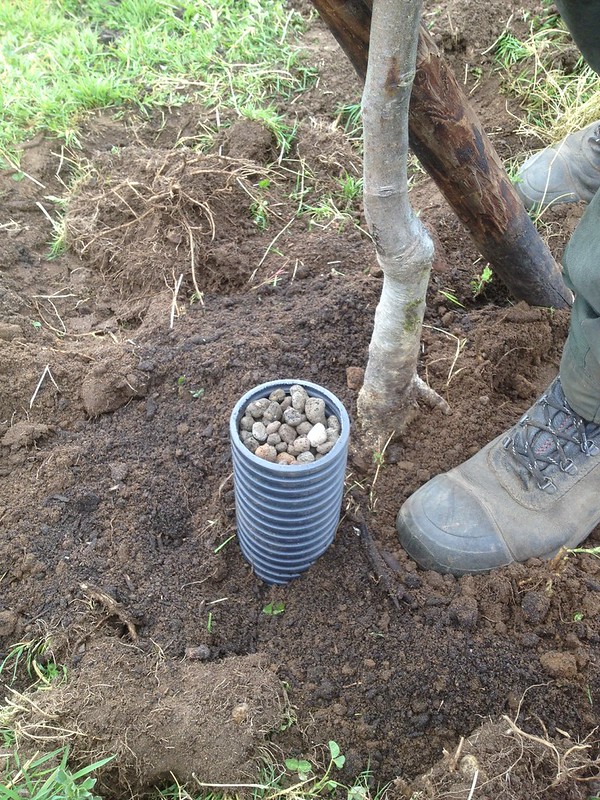 |
| Watering arrangements |
To make sure we water closer to the roots, because there will be no
irrigation in the perry orchard, we planted next to the tree a section
of pipe with holes throughout, 40 cm long by 10 wide, filled with
expanded clay aggregate.
 |
| Heeled in for tomorrow |
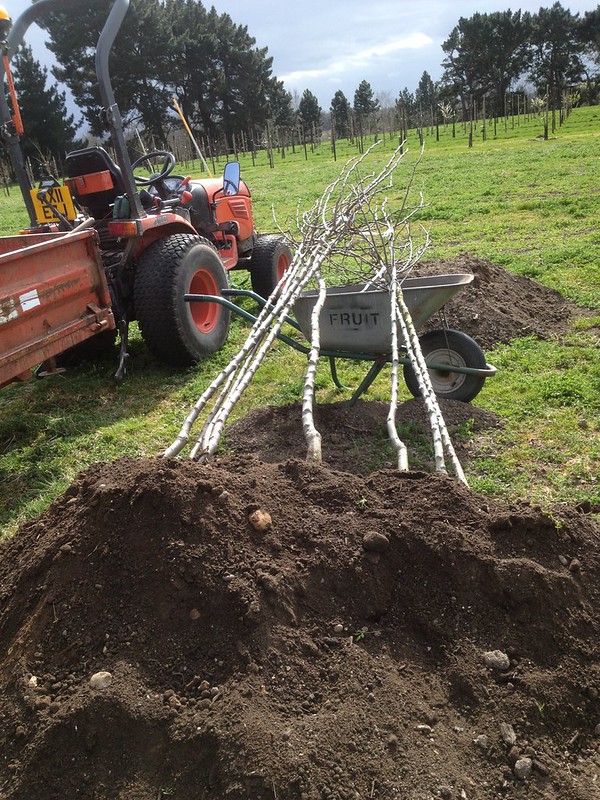
We heeled in the remaining 8 trees, to be planted tomorrow: some have rather interesting names, like ‘Gin’ and ‘Green Horse’, ‘Hendre Huffcap’ and ‘Judge Amphlett’!
Sowing salads in pots
Being early spring, the veg garden is still rather bare while seeds work their magic underground and indoors in the propagation houses.
My colleague in charge of the vegetable garden is very keen for it to look always at its best and interesting for the visitors, so at this time of the year he starts some salads in pots. I first noticed them in the little greenhouse back in February.
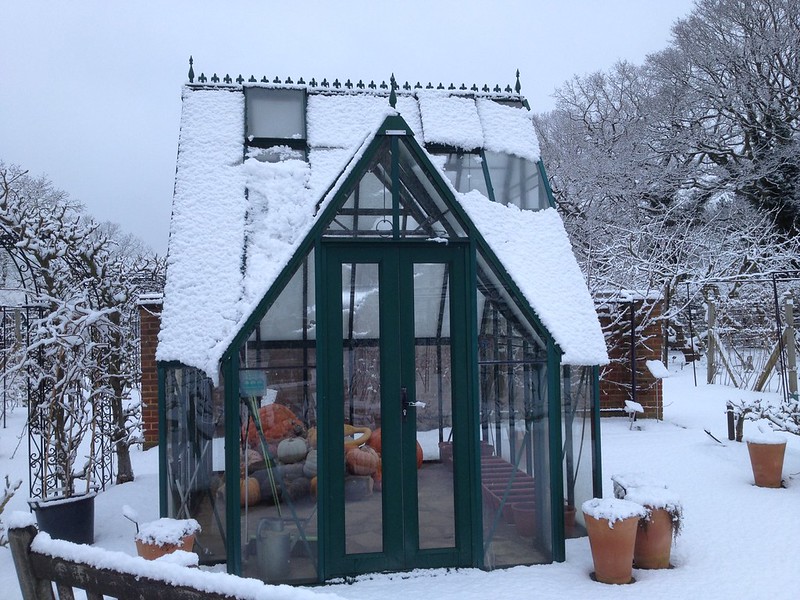 |
| 3 February, veg pots in the greenhouse |
I had never seen compost surface so smooth, pots so cleanly and perfectly sown. So I mentioned it to my colleague when I started working in the veg garden, and he eventually taught me how to make them look so beautiful.
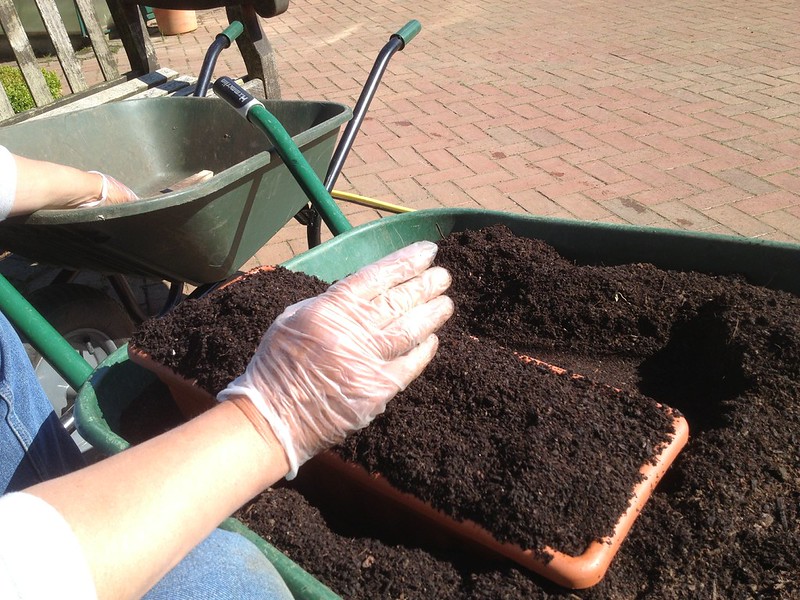
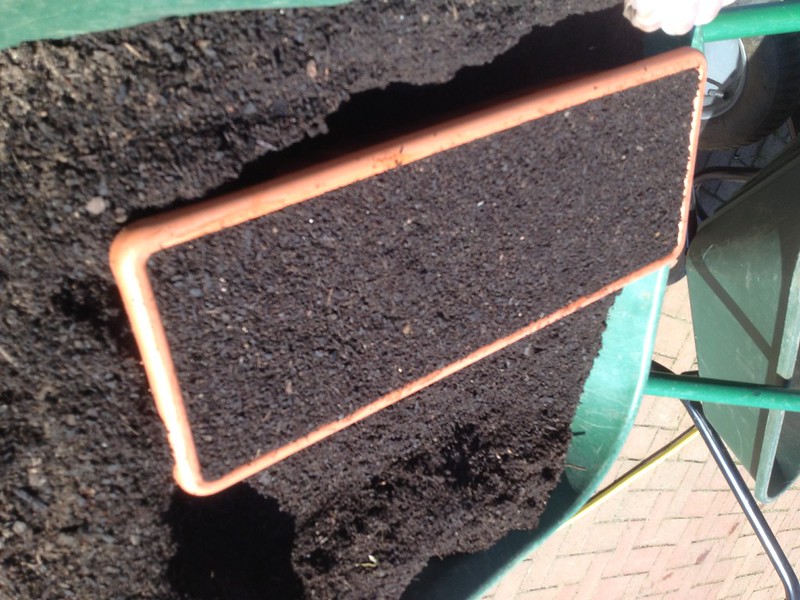
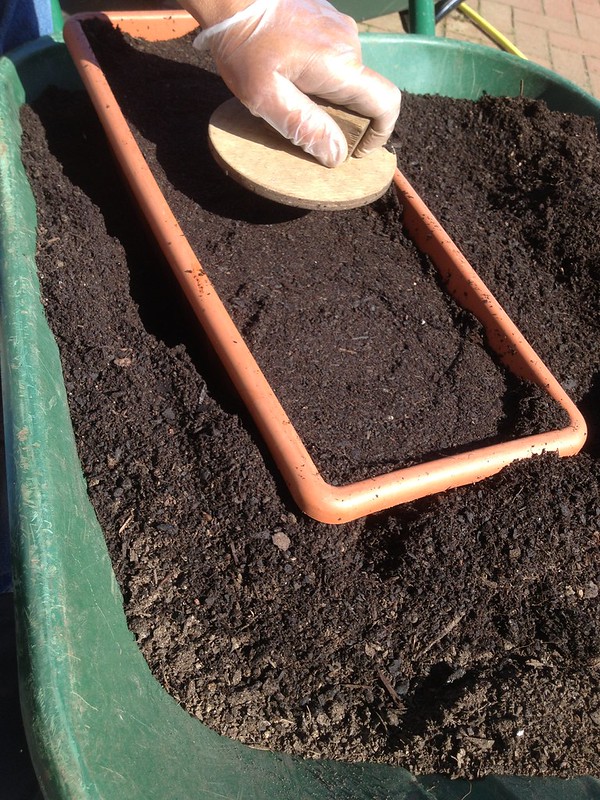
With compost in a barrow, he adds some fertilizer and mixes it in. Then he scoops the compost into the pots, scrapes away the extra compost with a flat stick, then presses the compost down slightly. At this point, he waters the pots thoroughly, until water runs from the bottom. Then he scatter-sows his salad seeds. Finally, he sieves 0.5 cm compost on top of the seeds, and leaves until germination.
When it gets warmer, you have to be careful that the surface does not dry out and cracks, because that is in the way of the seedlings to emerge. A spray bottle with a fine spray is used to keep the surface moist in such cases.
|
 |
 |
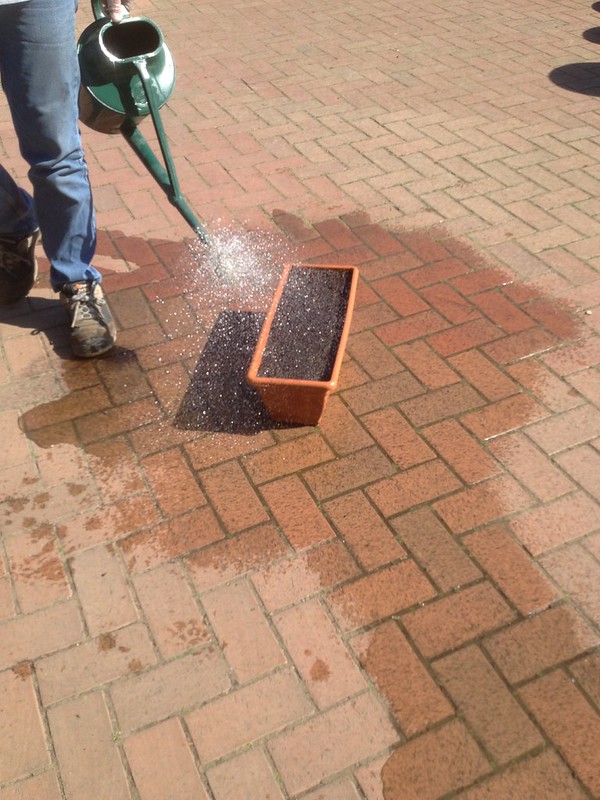 |
| The different phases of sowing in pots | |
On emptying the pots to make the new sowing, I got to take some of the previous sowing’s mustard home: that was a delicious stirfry…
… and, as predicted by my colleague, a few days later the brassica salad came out in the warm weather (the lettuce being a bit slower) and it was oh so exciting!
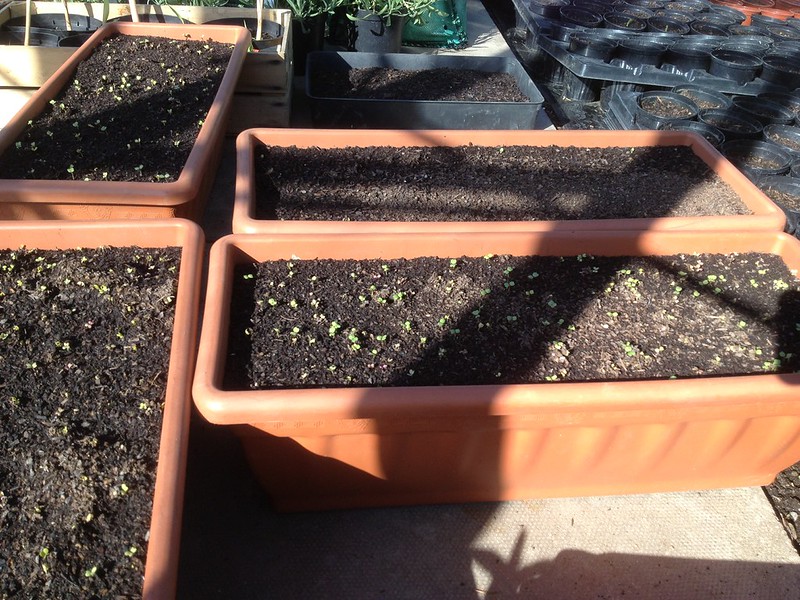 |
| New salads sowings |
This is the start of the new season
It is the start of the new season, and with it has come the joy of seed sowing. I love growing plants from seed, I will sow anything I can lay my hands on, and my seed database lists in excess of 300 different species. But most of what I have learnt has been by trial and error as I had never received training in propagation from seed. For example, it was only last year, working in a smallholding with a friend, that I learnt to plant tomato seedling deep, almost up to the cotyledons in fact, when pricking them out, to make them sturdier.
Anyway today I was thought seed sowing in pots, formally, for the first time. I have always found the glasshouse environment daunting, and so was having a go at seed sowing there, but the masterclass was very interesting and comprehensive.
Researching your seed requirements
You do have to know your plants, and their requirements, before sowing, so you have the best chance of getting a thriving plant at the end of your efforts.
There are several professional seed companies (i.e. Moles Seeds, Jelitto Seeds etc and other libraries such as virtualseeds.com) that give you a helping hand by publishing data online, but it is always good to have a booklet of your own, with annotations of what works for you and what does not, also because you will find contrasting information online. Always worth having a go at a method, but never making the same mistake twice!
For example, plants that do not like root disturbance, it would be better to sow direct, or in jiffy pots, or plugs. Or other plants, like Echinacea or some of the tropicals, won’t germinate if sown too early as it needs a minimum amount of light (for the tropicals you may need artificial lights on top). Delphinium needs 10 days of darkness. Some seedlings, like Ricinus, tend to get their cotyledons stuck in the seed coat: mist helps keeping the seed coat moist to avoid that (as well as protecting seeds that are surface sown from drying out).
Filling with compost
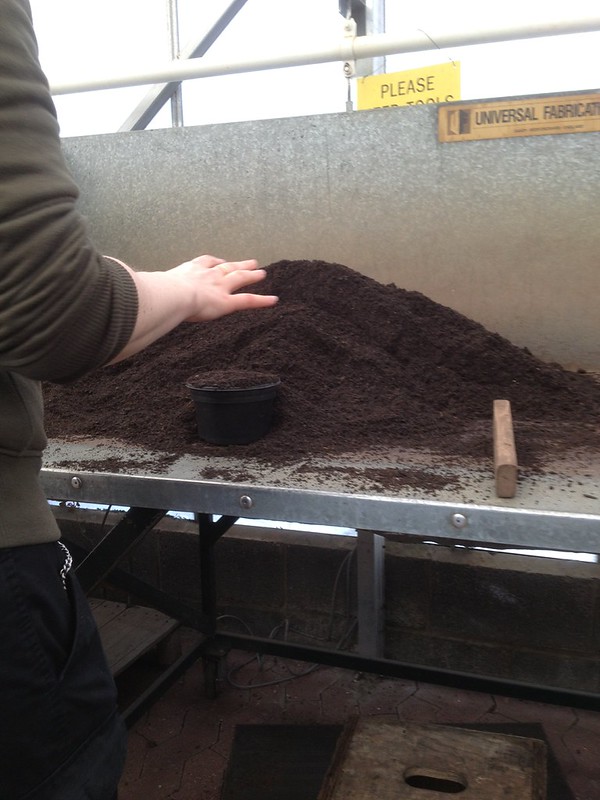
Top of all: the compost. At Wisley, like at Kew, they use peat free compost for most of their sowing. A 70/30 coir perlite proprietary mix for seed sowing (free draining, with a smooth surface finish) and a bark based one, with loam and coir, for pricking out and potting on. As a first thing, lumps are rubbed out of compost laid out on the bench, then compost is scooped up, overfilling the pot, that is then scored with a wood bar, from the middle toward the sides.
 |
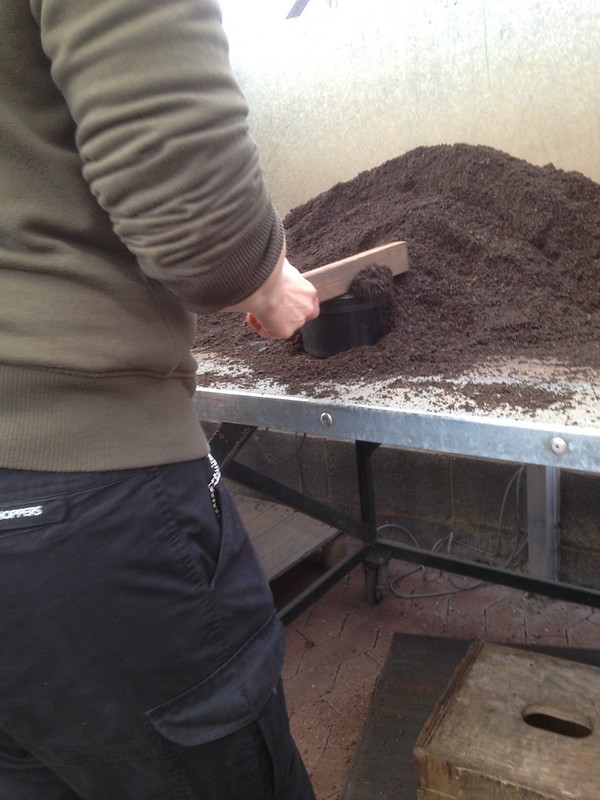 |
| Overfilling the pot (pan in this case), then scoring it to a smooth surface | |
After this, we were taught 2 different procedures, one for small seeds, and the other one for medium to large ones.
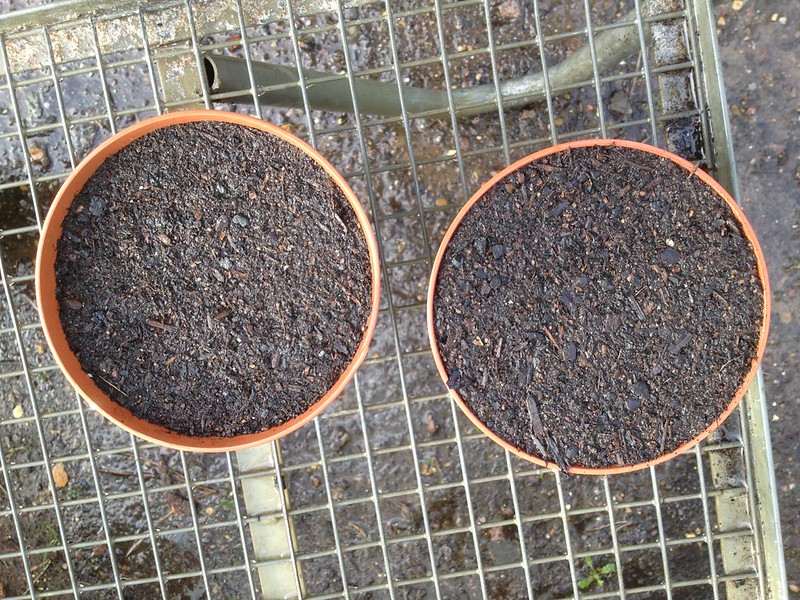 |
| Pots after watering, ready for medium and small seeds |
Small seeds
For small seed, one taps the pot gently, scores off the excess, then with a presser board one just tidies
the top – no need to press to get a high lip from the margin of the pot, as small seeds are not covered with vermiculite; besides, you don’t want the seedlings to go leggy trying to get out of the shade of the lip.
Medium and large seeds
For large seeds, which will be covered with vermiculite, you need a deep lip, at least 10 mm, to the margin of the pot, so you press the compost firmer with the presser board. No tapping is required.
Watering
The next step is watering, with a fine rose, upturned and with running
water (start and finishish away from the pot, so as not splash and spoil
the surface of the compost!). The compost will sink just enought to allow proper sowing.
You might have to go over the pot several times, depending on the type
of compost you are using and how water percolates through it. Lift the
pots to feels the weight and assess if they are watered through. This is
important, as you do not want to have to water too soon after sowing,
disturbing the germination process. If you have time, do leave to
percolate for half an hour.
Here they add biofungicide to the water to avoid damping off. One of these is Trichoderma spp, a genus of fungi commonly present in the ground, that thrive on roots so have developed ways to promote their growth, and to parasitise (or otherwise attack) other fungi that might damage those for them. There is an interesting article on Trichoderma and its uses on Cornell Univeristy website.
Sowing
Again, sowing is slightly different for small and other seeds. For everything applies however the principle: sow sensibly, meaning a sensible extra amount because not all the seeds one sows germinate, but not too thick, or the seedlings may get diseased (damping off), and will be difficult to prick out.
Another principle that applies to all is: don’t sow next to clean compost, as seeds have a tendency to find their way into places they shouldn’t get. So ideally one would want 2 potting benches, or at least one should clean up between using compost and sowing.
Professional seed packets indicate the number of seeds/g, so one can be precise. But a rule of thumb is that a pinch the size of 5p contains some 100 medium-sized seeds.
Small seeds
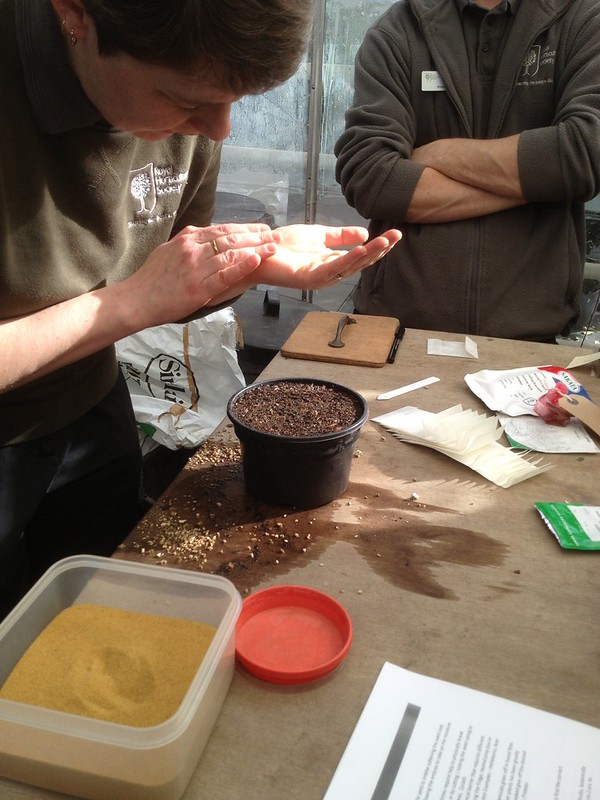
Small seeds are bulked out by adding horticultural grade sand, at a rate of 1:2 seeds to sand, so that it can be spread more evenly, and you can actually see on the compost what you have covered and what not. The best way to spread it is to keep in in the palm of your (dry) hand (or in a folded piece of paper), kept hight above the pot so one doesn’t get lines, then tapping the side of the said hand/piece of paper while one keeps moving, from the outside to the centre.One does not cover fine seed, unless it is a specific germination requirement.
Medium and large seeds
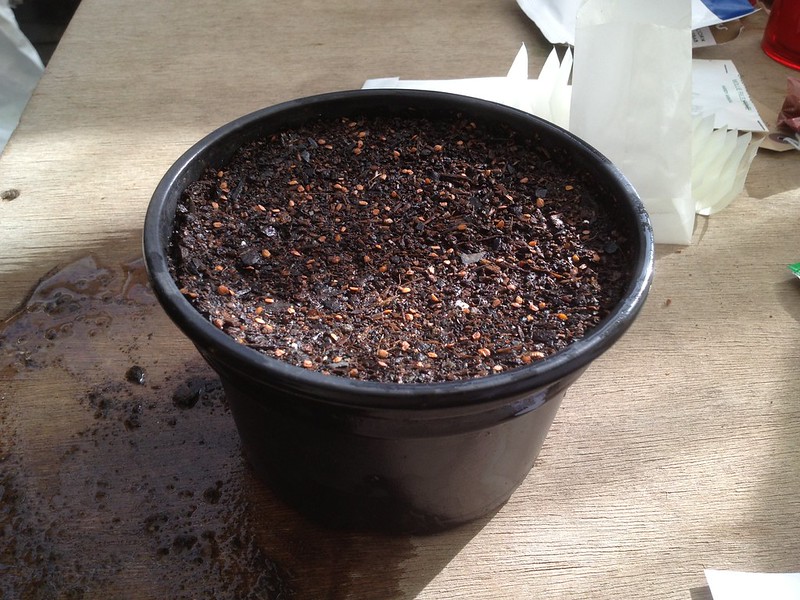
One takes a pinch and start sprinkling them evenly, from the outside of the pot towards the centre. If any seeds are accidentally spilled, in the pot (as a clump) or outside, they should be left there to minimise contamination with other accidental spillages etc. Seeds are then covered with up to 10 mm vermiculite, depending on the size of the seeds, levelled out if necessary by gentle tapping – never scraping as that might move the seeds around.
Writing labels and records
By the book, labels are then written from the blunt end down, indicating the genus and species in capitals for easier reading, the date of sowing (and your initials if in a shared environment). They are then placed at the back of the pot, in the centre, facing forward.
It is always useful to keep a record of the seeds sown, indicating dates of sowing and germination and any particular procedure followed. If you are growing for someone else, it is useful to know when they need the plant ready, and what size of plant (and pot) they require.
Watering
It is universally known that overwatering is the biggest killer. Here they use cells for slow growing seedlings, so there is less soil to hold on to moisture. It is also worth knowing that coir jiffys will suck water out of the compost if not soaked appropriately, including when planted out (so the rim of the pot is often removed, after copious watering, to avoid it acting as a wicker).
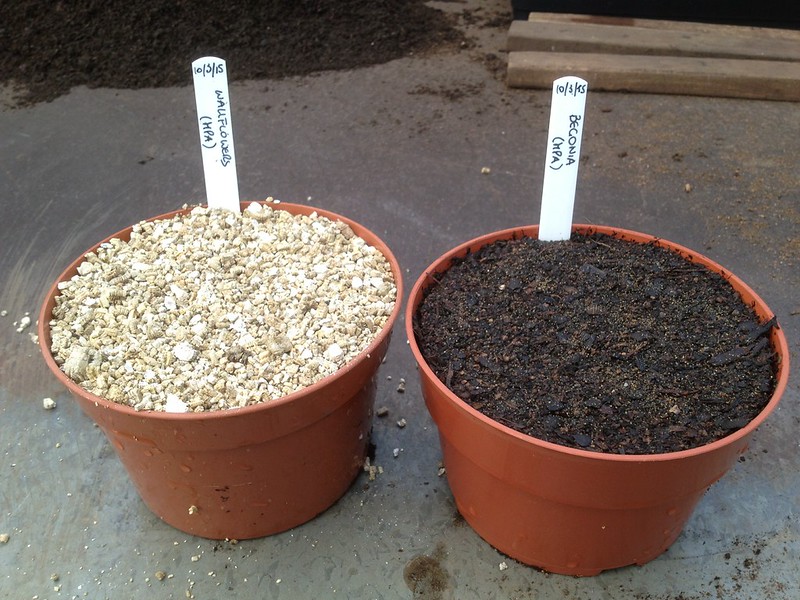 |
| And here’s what I sowed, labelled |
Pricking out
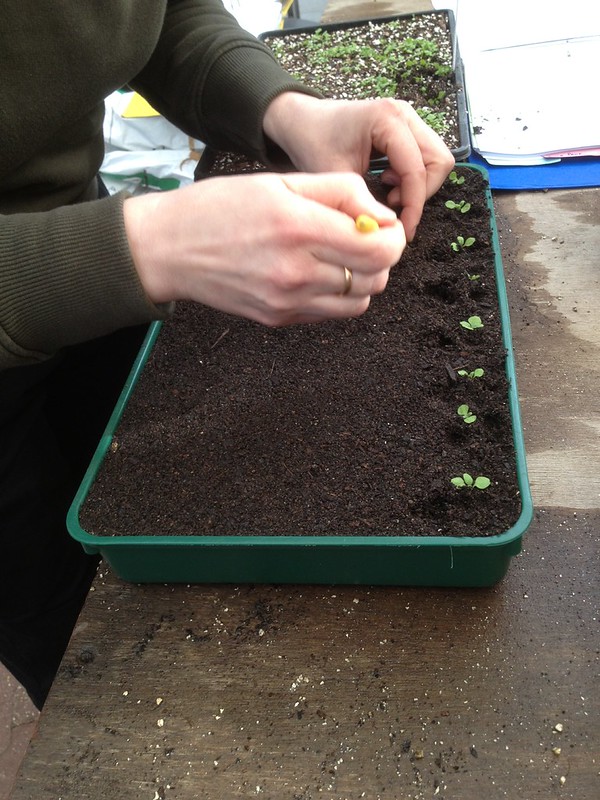
Seedlings need to be handled by the cotyledons, the seed leaves, as the stem is really delicate and
easily damaged. A dibber is useful at the pricking out stage, using the thin end to go in underneath the seedlings and lift them out of the tray. The fat end of the same dibber can be used to make a hole where you are planting the seedling, making sure one does not go too far down, creating a water pocket. The seedling can be dropped in the hole and the soil closed over it.
A tray will hold about 40 seedlings, unless otherwise dictated by the presence of cells inserts.
It is best to grade seedlings by size group in the new tray, and to plant at even depth, especially if burying the stems. If any seedlings are left behind in the original tray, they then need tidying up, with a bit of tapping.
Always end with watering.
The Great Dixter weekend
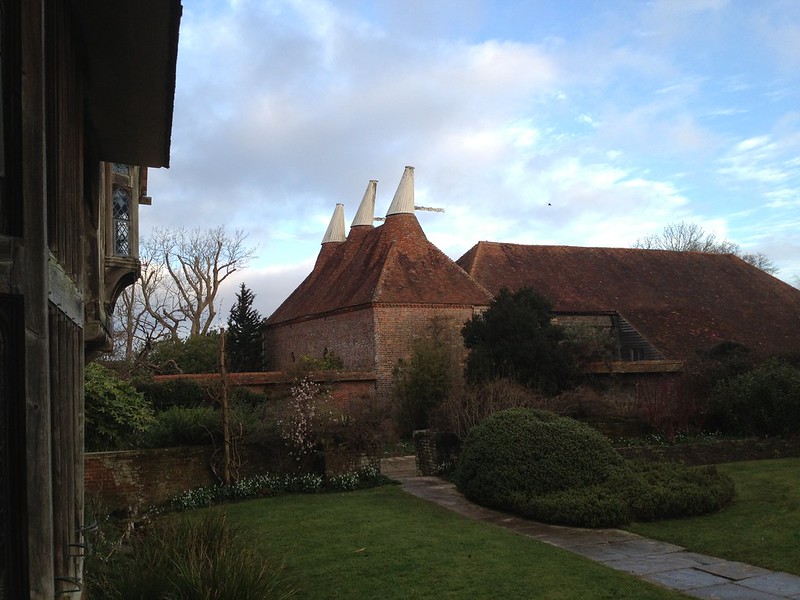
Fergus Garret and his lovely team at Great Dixter House and Gardens organise yearly working weekends for horticultural trainees, who flock from all over the country to experience the atmosphere and the ways at the famous garden, home of the late Christopher Lloyd.
Of course, like many, I had watched documentaries on Great Dixter, for example British Gardens in Time, but I seem to have always too many things to do to follow up in any detail on a lot of topics, for how interesting I may find them, including by visiting gardens. However, when the opportunity arose to take part in this experience, I was sold to giving up one of my precious weekends at home by my husband’s feedback from a visit: he rembered Great Dixter as rather beautiful, and “messy”.
I am not someone that goes crazy for socials, but messy I do rather well.
My husband of course referred to beds overflowing with plants and bursting out on the paths, the lush, almost overwhelming contours of swathes of flowers, grasses, leaves… which is what I found, but also a bit more. How can one not like a place where you selectively weed out self-sowers for aesthetic effect? As opposed to the (more traditional) weeding to bare soil, or weedkilling between paving slabs, I mean.
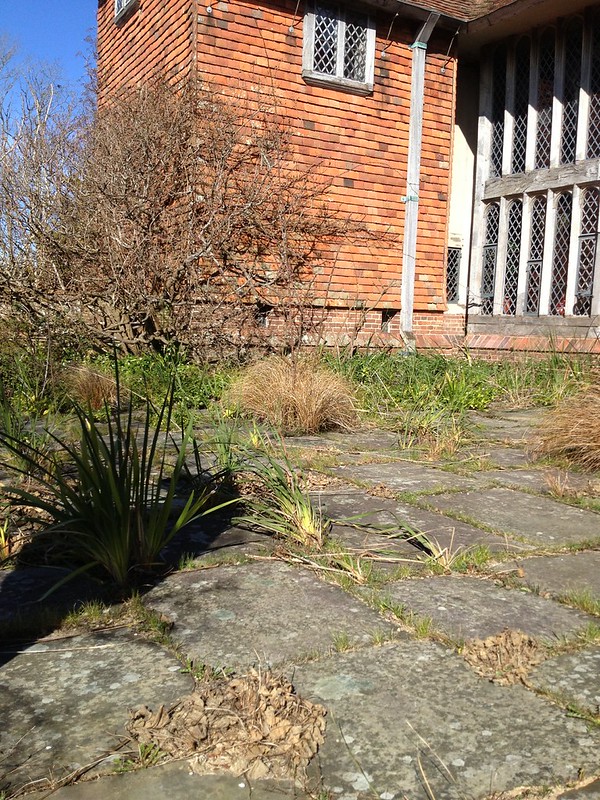 |
|
| The terrace, before weeding |
That is what we did on our first day (after being given a special tour of the house and gardens by spirited Rachael): selective weeding. It’s so much more rewarding, as you have to know your weeds. And you know that I couldn’t agree with that more. A skilled job, in which you get up close and personal with plants, and you exercise your aesthetic skills too.
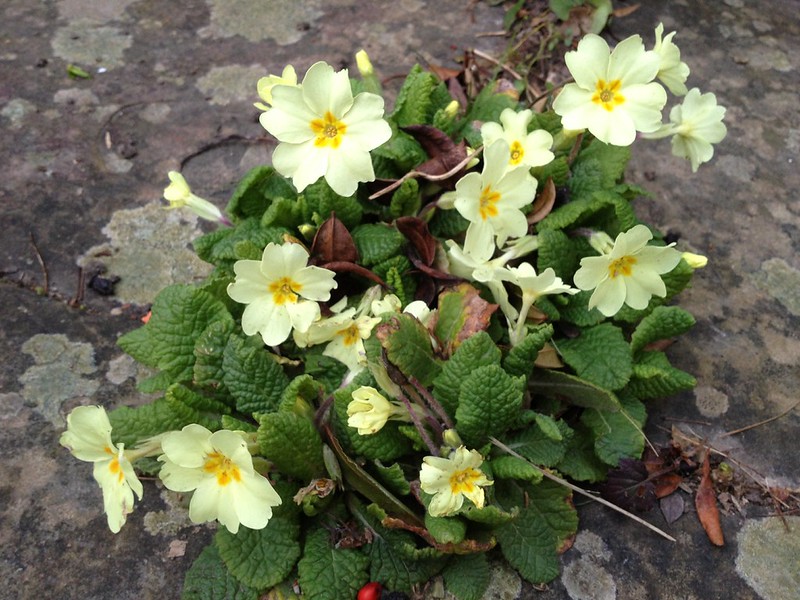 Fergus was at hand all day, providing directions and helping us to identify seedlings and plants, which surely is how one learns.
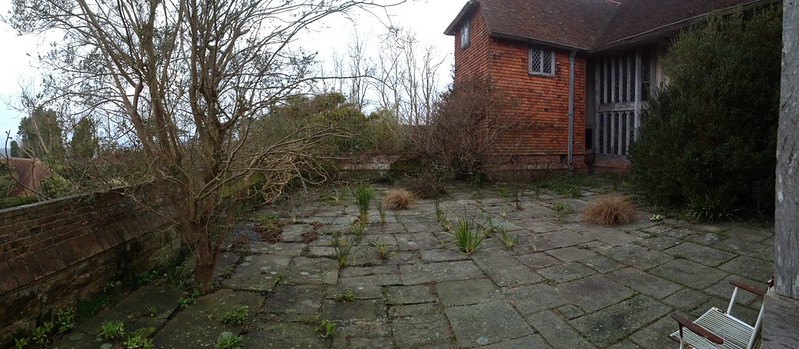 |
| After weeding, I went back for a picture |
Something was also said, with which I empathised immediately: a trainee mentioned seeing an interesting Ribes plant that she was interested in for her area back at work, and Rachael suggested they took some cuttings there and then. After all, Christopher Lloyd famously said that nine times out of ten the best time to do something is “When you’re thinking about it; when you’re in the mood.” He wrote that in his book “The Well-Tempered Garden“, which we were given as a gift and which I have here in front of me.
Plant propagation can be absurdly simple at times; even accidental, as when you put a bunch of flowering currant in a vase and find when preparing to throw it away that the branches have made roots in the water. Of all the fascinating sides there are to gardening, the making more of plants is what has given me the greatest pleasure and interest. […] After all, it is rather exciting, when you’ve pushed a dead-looking stick into the ground, to find, a few months later, that it is making leaves and shoots. It’s hard to resist the temptation to pull it out of the ground every few days to find out if any roots are forming.
That’s it, isn’t it? I wish I could put my love for plants and horticulture into words that way. Strangely, I never came across the man before, if not in passing. I read in his bio that he studied modern languages, like me to start with, then moved on to horticulture after the war. I have warmed to him and look forward to reading the book now.
The garden is still managed in line with Christopher’s directions, under the supervision of Fergus, who knew him so long and well, and who now heads the Great Dixter Charitable Trust. It is a little jewel born out of love and plantsmanship. The house is not half bad either, an agricultural property sensitively restored and expanded by Nathaniel Lloyd, with the Great Hall (where we spent the night, chatting away by a glowing fireplace) dating back to the 15th century.
Walking around at sunset and early morning gave me the opportunity to enjoy their quiet beauty on my own, with a sountrack of birdsong. It was a good time for me to reflect on my gardening experience of the last few months, what I have learnt and enjoyed, and to start considering what to do next, inspired by what I had seen and heard.

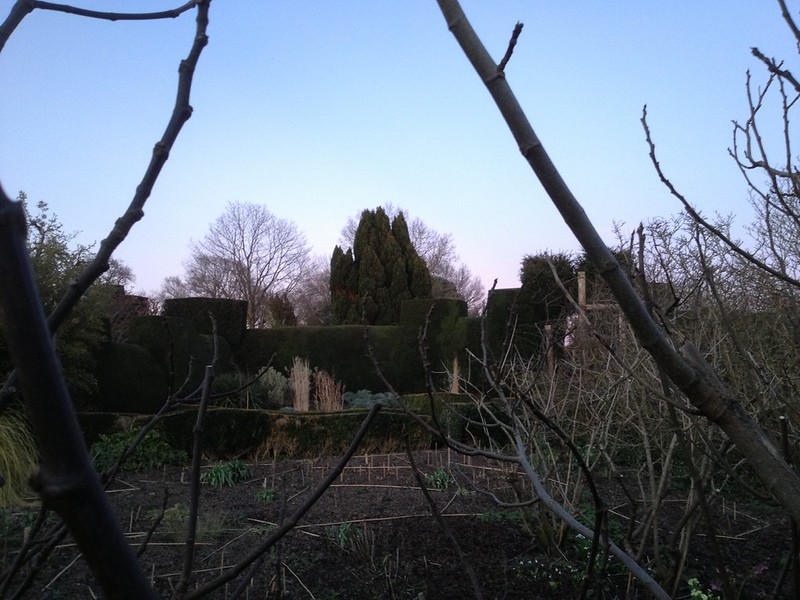
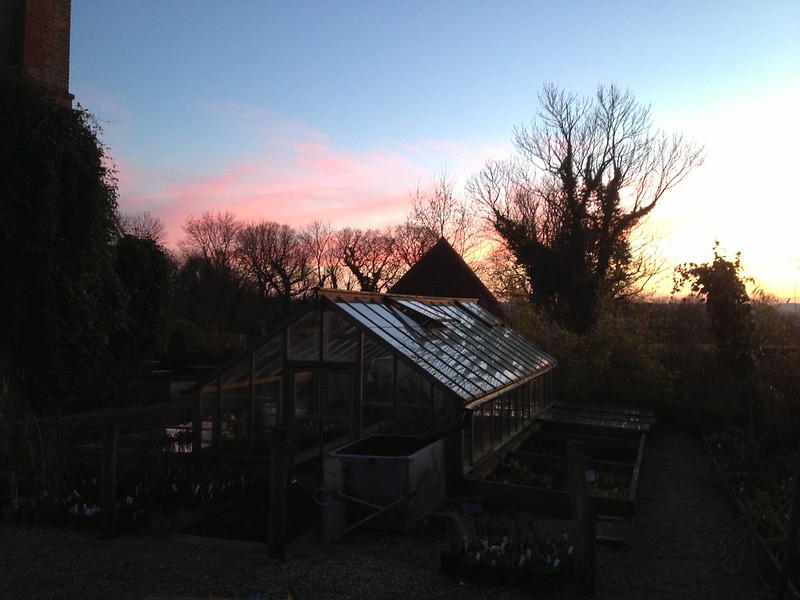
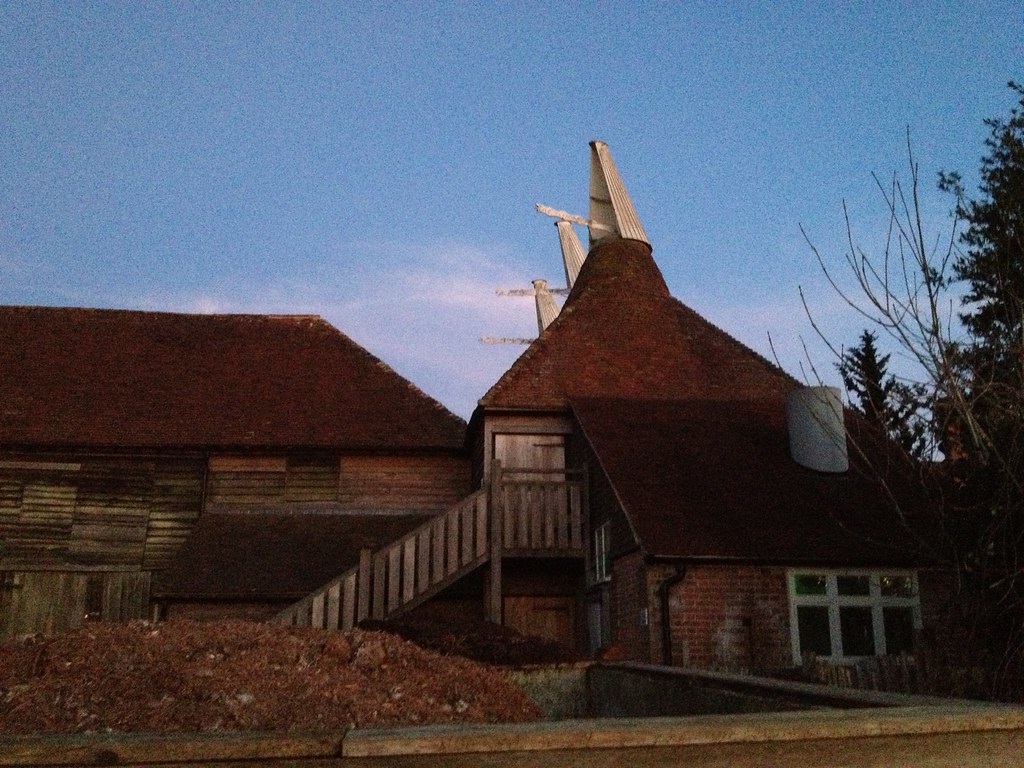
The following day, after freeing Gunnera of their winter cloaks, by the side of beautiful ponds,
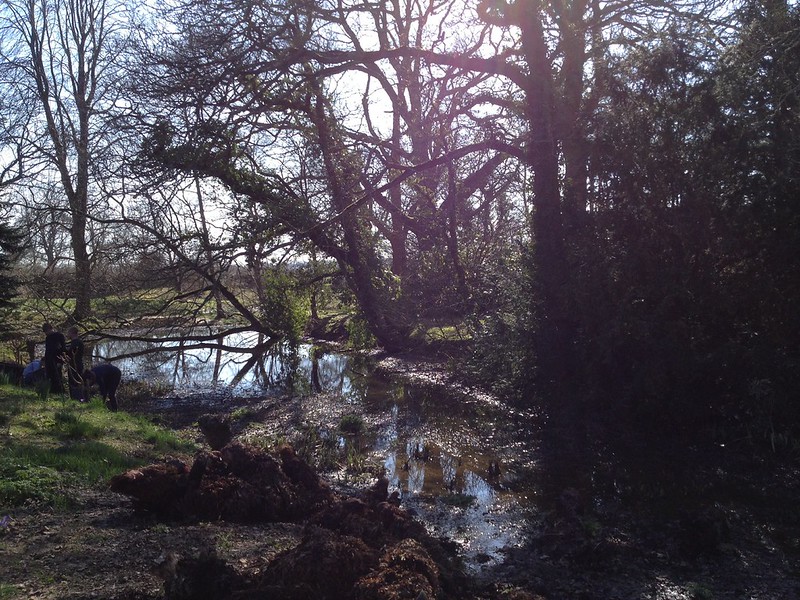 |
| One of the two ponds with Gunnera |
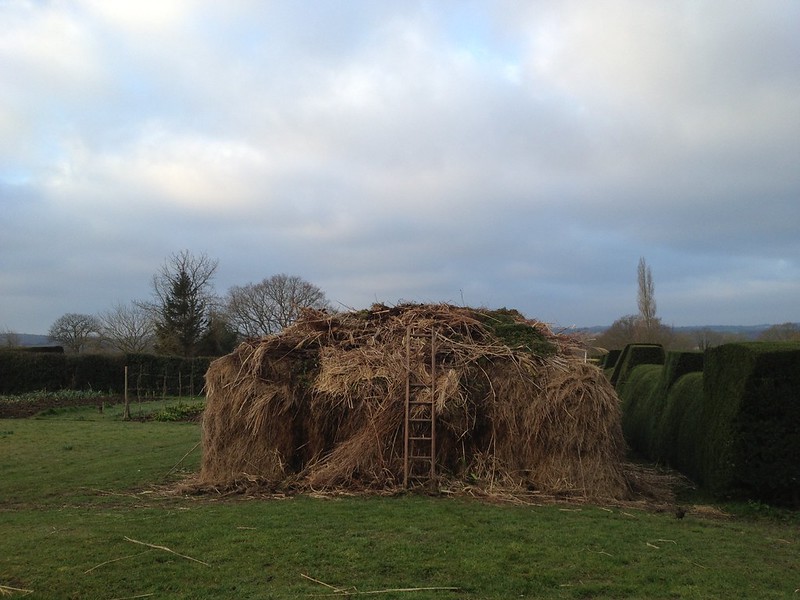
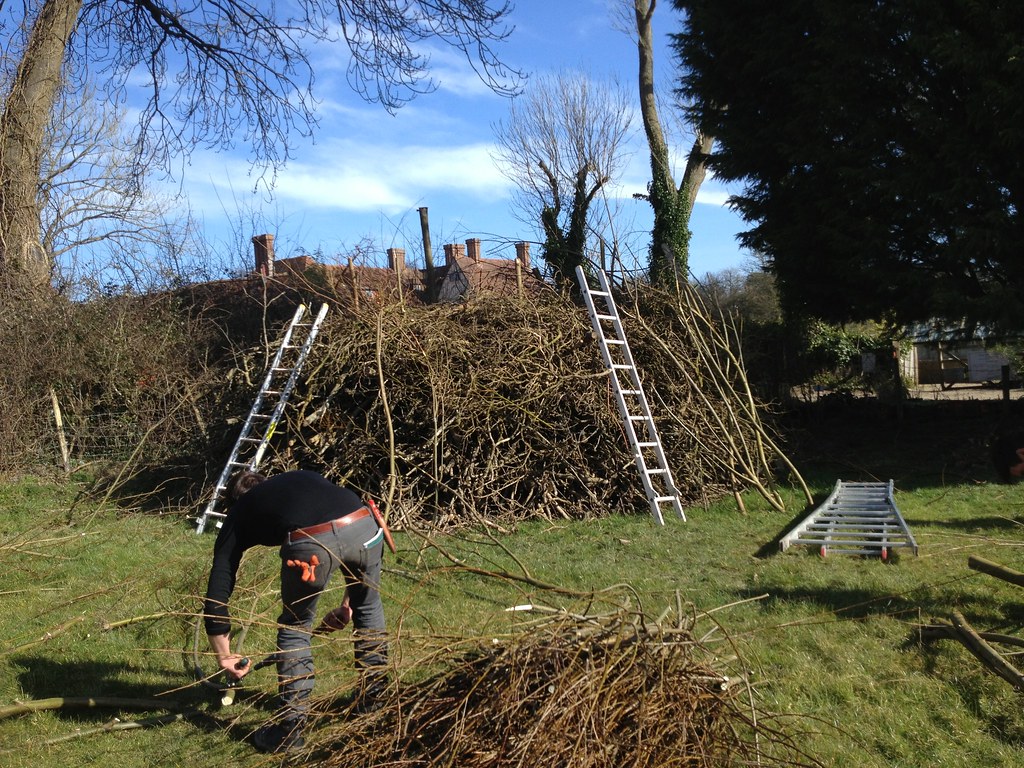
we spent the afternoon building a giant wildlife stack with logs and branches from the woods on the estate. A beautiful structure, it was great fun to build, and the cheerful labourers all gathered around (and on) a tractor, gave me a glimpse of what one must have felt post-harvest, at a time pre industrialisation of agriculture. It was a light hearted feeling of shared achievement, having made it to the end of hard work, facilitated by the attentive team: Rachael, Jonny, with Mike (from Germany) and the interns (from Sweden, China and Japan!): an international “family” headed by Fergus, which struck me not only as a knowledgeable gardener, keen to share and support us, but a warm and rather enthusiastic person.
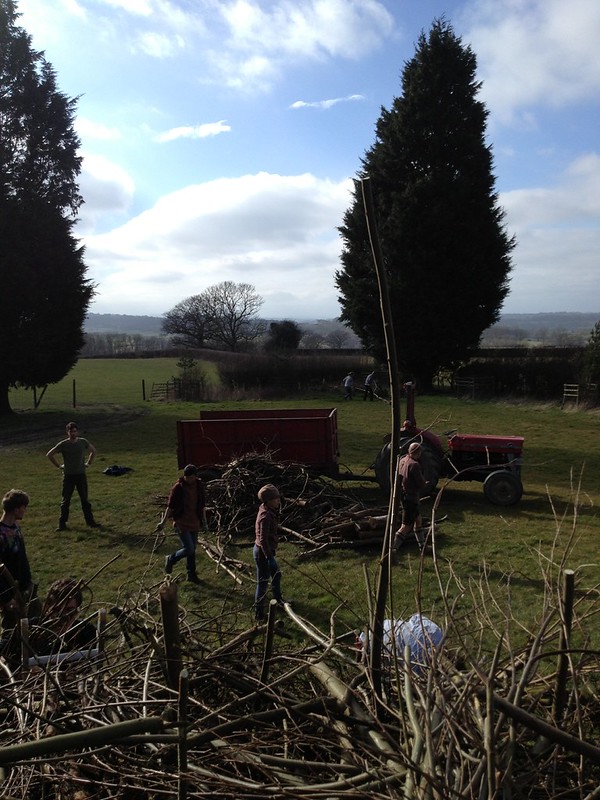
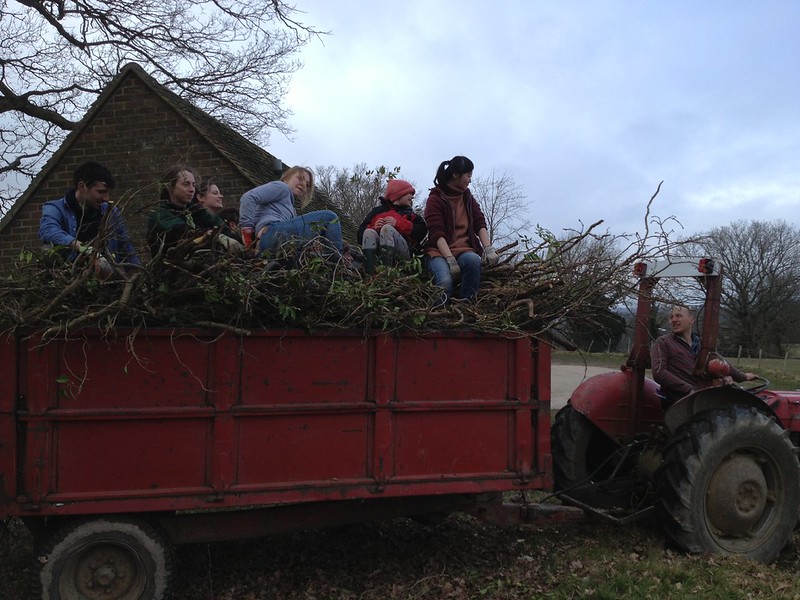
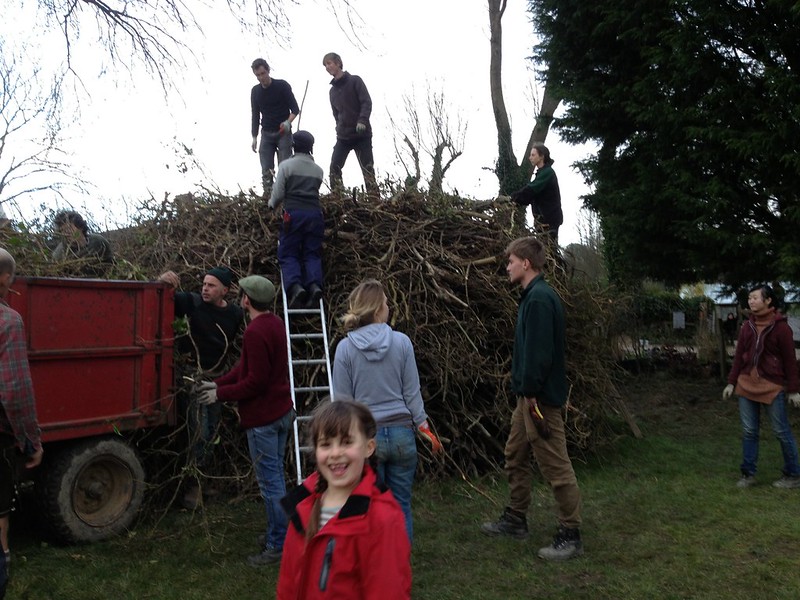
Well fed by Aaron throughout the weekend, we were very lucky with the weather too, as the forecasted rain never materialised.
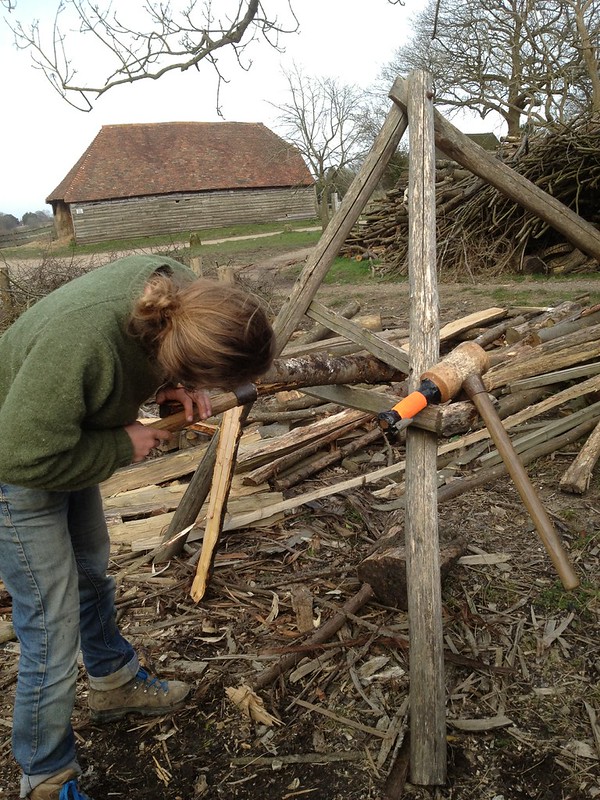 |
| Rachael splitting a log |
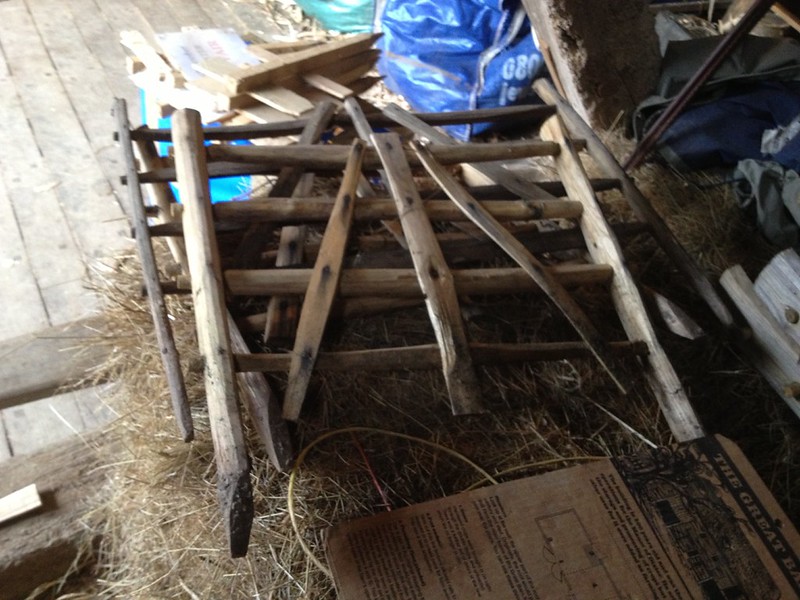
Before leaving, we even got a tour of the working barn, where sweet chestnut from the woods is turned into hurdles, benches and ladders (providing local employment for 3 people), followed by an amazing demonstration of wood splitting, by untiring Rachael!
 |
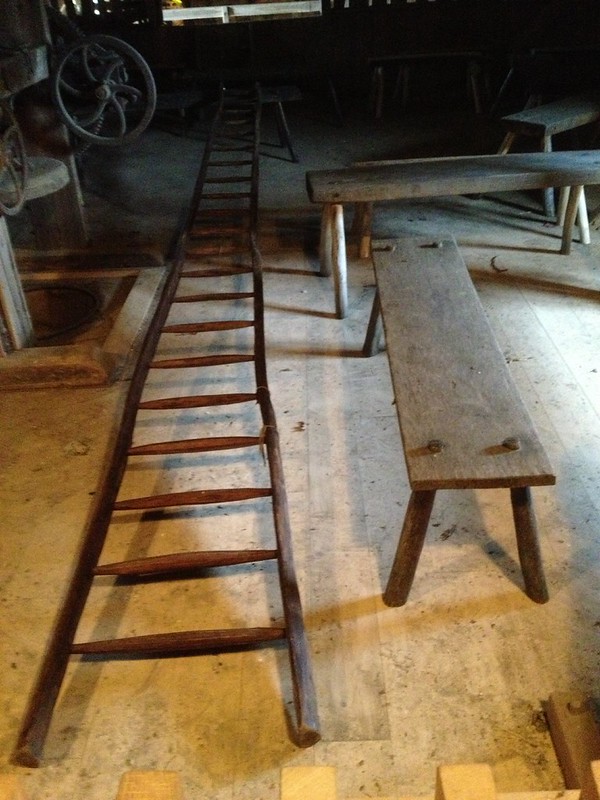 |
| Products of the working barn | |
I am glad I decided to take this opportunity: it was fun and well-spent time!
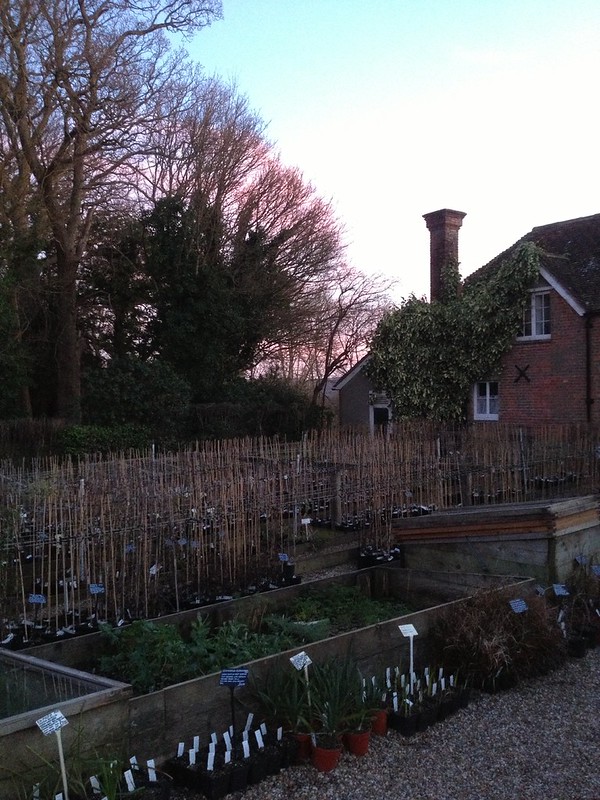 |
| Great Dixter nursery grounds |
Although we have been priviledged to engage so intimately with the gardens, Great Dixter is not only for the initiated.
The gardens will open to the public at the end of March, when the Spring Plant Fair kickstarts the season. I will have to go back with Gianfranco and experience the “messy” planting in all its glory (and how much caring and hard work goes into creating that “mess”, people need to know!).
There is also a nursery on site, with an online catalogue, bells and whistles, that also sells via mail order, all year round (she wrote, adding the link to her suppliers’ list).
A day in the veg garden
Spring is coming so it looks like I might be spending more time in the veg garden.
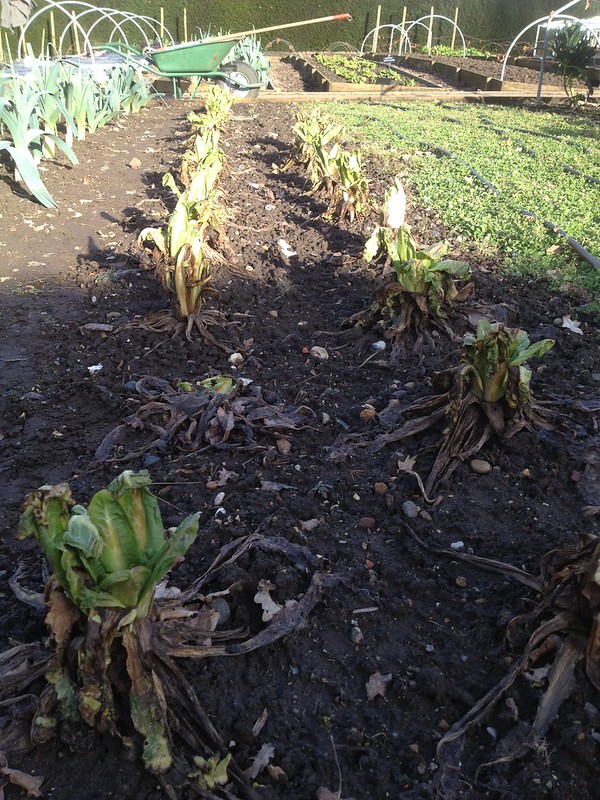
Today we did some clearing of spent crops (chicory and chard), covering beds so the soil warms up and new crop can be grown earlier and tidying up leeks.
 |
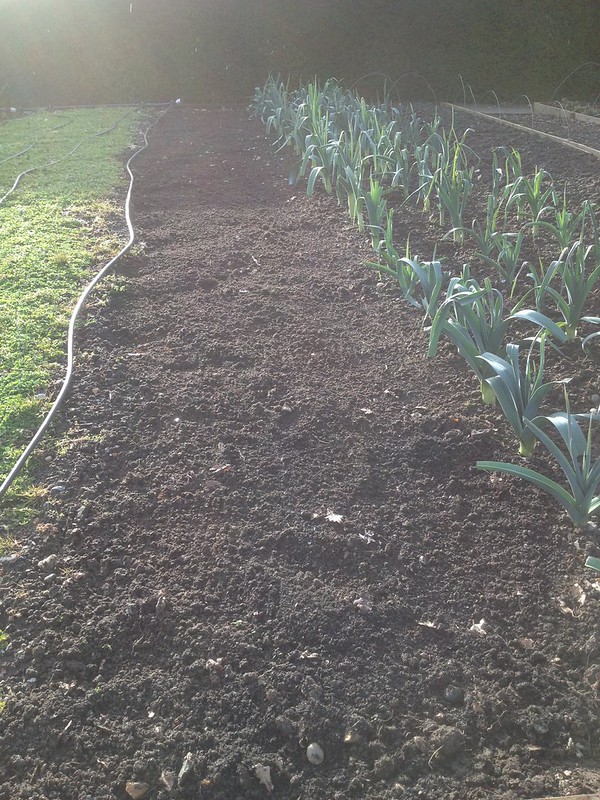 |
| Chicory ‘Charlotte’ | The bed after clearing |
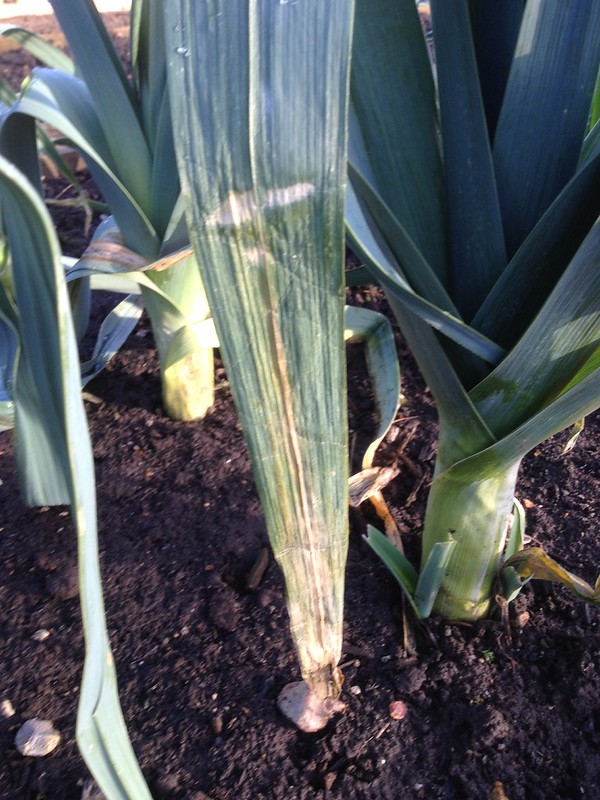
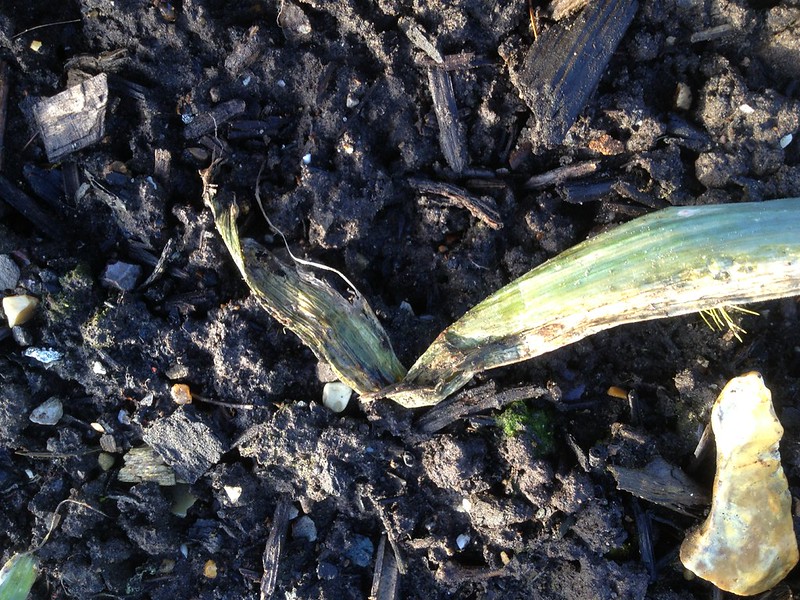
The reason for tidying the leeks was that some leaves were infected with rust (Puccinia allii, causing orange lesions on the leaves, which in this case were affected to a smaller extent) and white tip (Phytophthora porri causing white leasions, soft rot and wilted tips) which are both fungi whose spores are airborne and/or scattered by rain splashes.
 |
 |
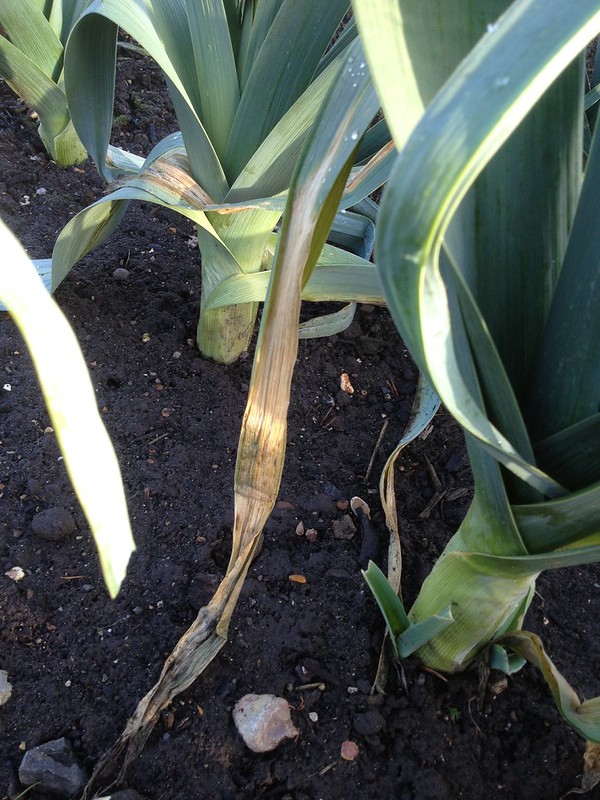 |
| White tip symptoms on leek leaves | ||
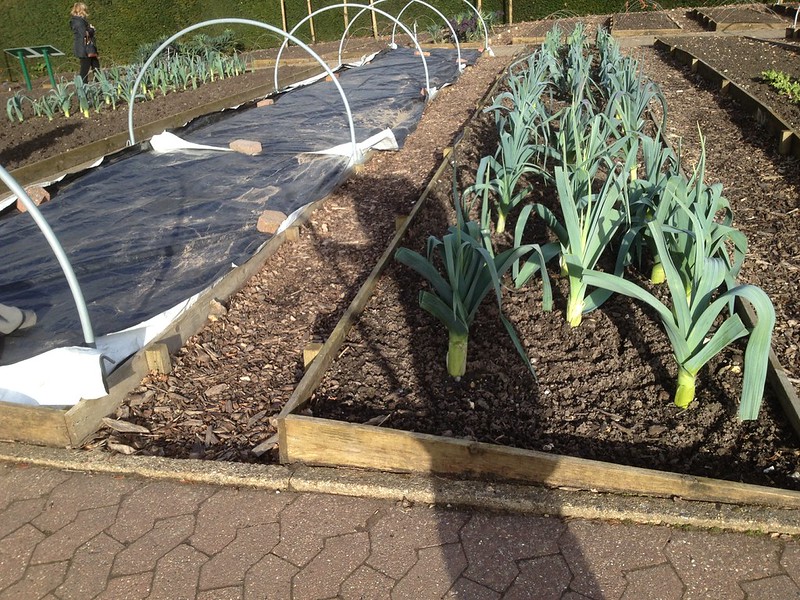 |
| A bed covered for warming the soil; leeks were tidied up |
As I was working on leeks, and they are a rather popular crop, several visitors asked me how we protect our crops from the leek moth (Acrolepiopsis assectella) and allium leaf miner (Phytomyza gymnostoma), which this year has made it to the top horticultural pests reported by members to the RHS advisory services. Both the white caterpillar of the leek moth, with its brown head and small legs, and the white headless and legless maggot larvae of the leaf miner tunnel into the stems of leeks, damaging them and making them susceptible to secondary infections.
Horticultural fleece (better still enviromesh/very fine netting, which allows better airflow around the plants and allows for more water penetration) protects the leeks from attack, which however are sprayed here (as chemicals are available for professional growers).
Visitors also asked when the leeks had been planted. The early ones, for planting out mid-April, can be sown indoors Jan-Feb. But the ones that overwinter are sown in April, ready to be transplanted June/July for cropping November and onwards. More info is available on the RHS Grow Your Own website.
As I had not been in the veg garden for a while, I had a look at the bed we dug back in November, and the difference between the one I dug that was rougher and the one that was done by someone with years of experience, which was smoother, is still quite apparent – my colleague was not joking when he said it will need raking before the new crops go in!
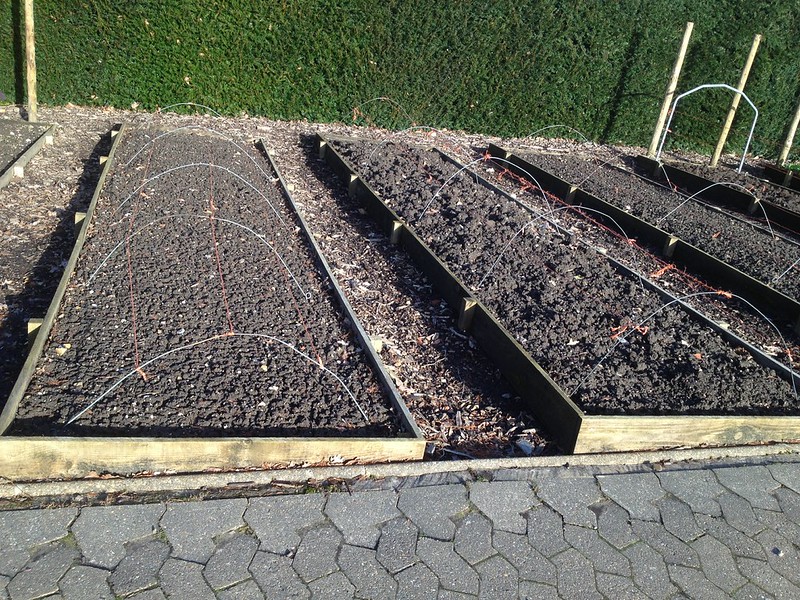 |
| Expertly dug bed (left), my first attempt (right) |
Little soldiers in a row…
… what am I saying, elders, little elders in a row.
Starting
on a sunny morning and ending with the afternoon rains, we spent the
whole day making treecircles around the little elders in between the fan
borders. These Sambucus nigra (and S. nigra f. porphyrophylla, the purple-leaved form) plants, some 30 –
two each of a cultivar, have been in place for a while now, but have
not thrived. They started off as weaklings, and risked to end up in the
compost heap a couple of times, as the very sandy soil on that
particular strip of land even with the occasional mulch has meant that
watering was never enough and the plants never really took off.
But
the arrival of a new colleague to take care of them, means that they
have been given another chance: they were protected with tree guards and
now it’s the turn of grass free circles that will be kept mulched, to
increase the organic matter in the soil and ensure better retention of
water around the roots.
I had not done tree circles since Kew (when it gave me the opportunity to observe trees from up close, like the collections of Fraxinus and Aesculus)
and had never done them around tiny shrubs that did not have a stem to
circle around, but my colleague had a plan. Because this particular row
of plants is very straight and very long, the circled needed to be all
aligned to avoid an unpleasant aesthetic effect.
At
Kew, where tree circling is part of the arboretum’s regular maintenance,
they used an ingenious round wooden plank, that split in two halves;
you could walk on it minimising the smudging of edges. In the Fruit team
here there’s no such regular need to do circles, so there’s no special gadget to help and
we used a lenght of pipe as a template, and string lines to keep the
circles aligned.
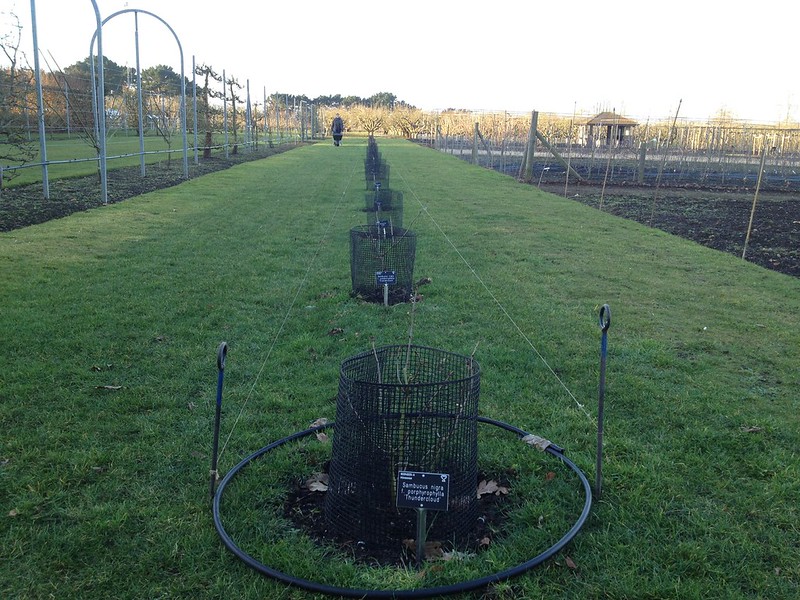 |
| Preparing to start |
As the wind rose at about lunchtime, we
had an opportunity to observe how quickly the newly exposed soil dried
up. There were however plenty of earthworms, which is a good sign. Most
of the elders were putting out leaves, which I had already seen in the
Cottage Garden; but some had flower buds already visible and half open,
which seemed rather early, so we snipped them off to let the plants
concentrate on their growth rather than fruiting.
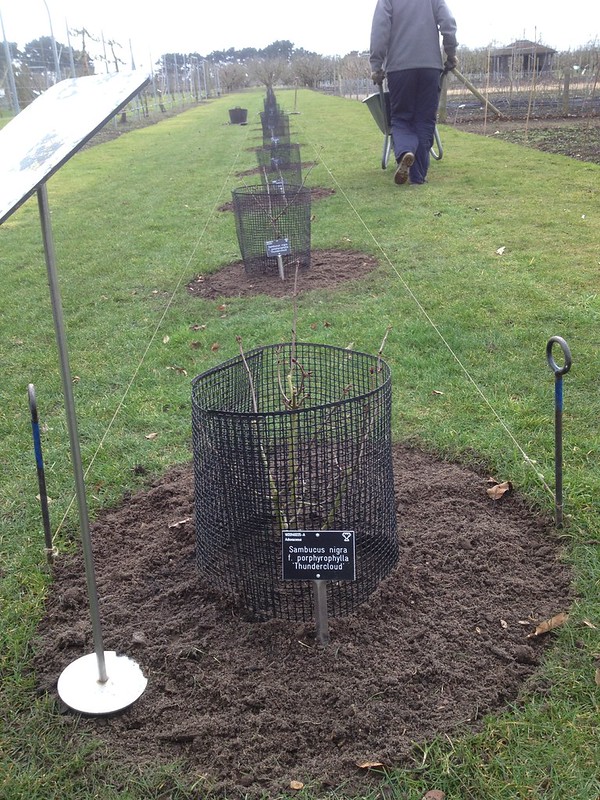 |
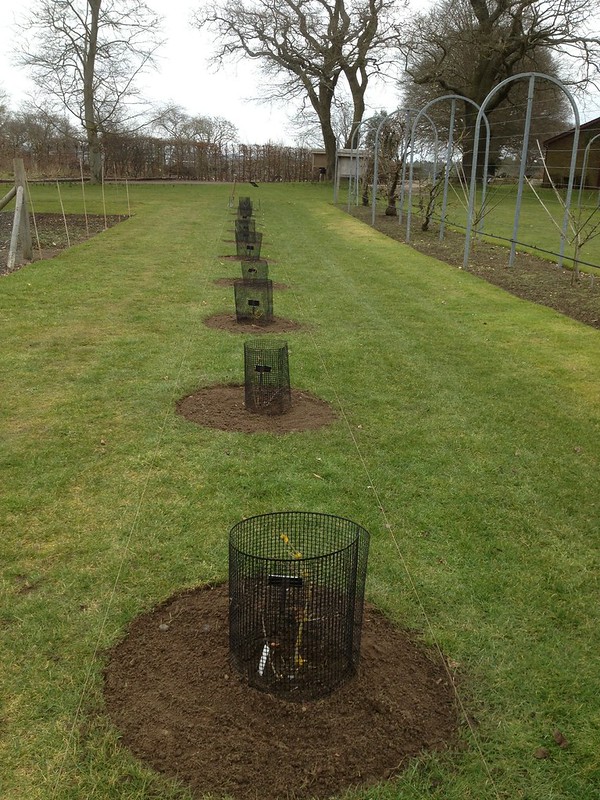 |
| View of the cicles from both sides – work in progress | |
At the end of the day only a handful of circle was left, and we were pleased to have come that far.