Orto di Casa Cecconi

My first allotment, and then one thing leading to another…

  • Gooseberry aplenty

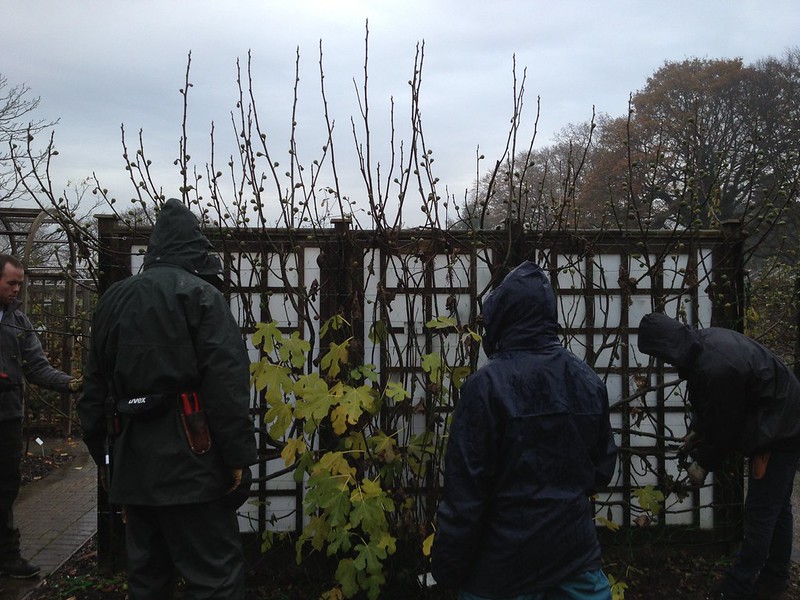
    … as over the last couple of months I have had several stints at pruning the cordon collection, and there are still a few to go. Cordon gooseberry pruning is, as of now, the only skill that I feel I really had time to practice long enough to master.

    I have also tried to time myself to see if I was getting any
    faster, clocking up 17 plants in 3/4 on a day earlier in the month, then
    10 in 1/4 of a day, then 25 in a day but because the plants were all
    different sizes, and in some instances we shared plants between us, that
    was not a particularly useful exercise.

    But now that they are largely done, what I am really interested now is to see how these plants will fare in the summer, how they will flower and fruit: whether the size of the fruits really makes this system worth the effort. Because these rows of plants so close together (30-45 cm between plants and about 1 m between rows) and pruned so hard all the time (lateral to 5 leaves in the summer and to 2 buds in winter), while supposedly producing bigger fruit, they need to be replaced more frequently.

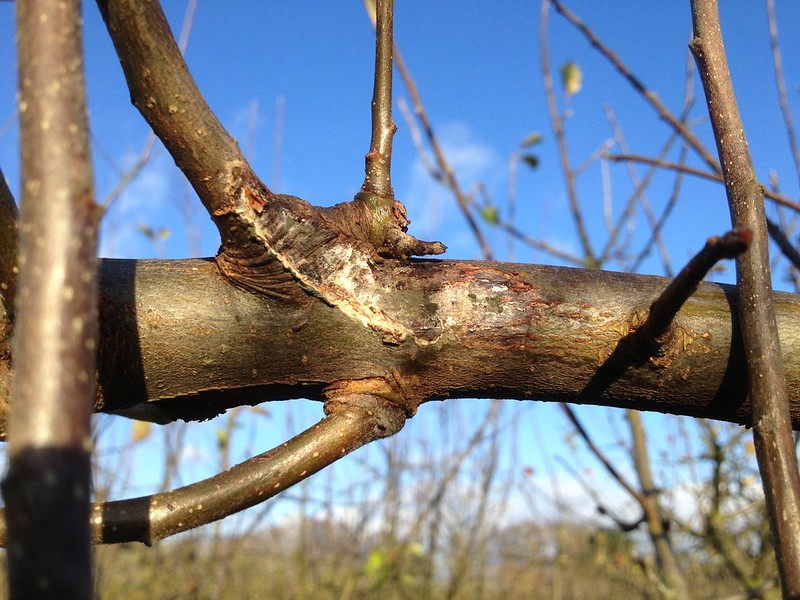
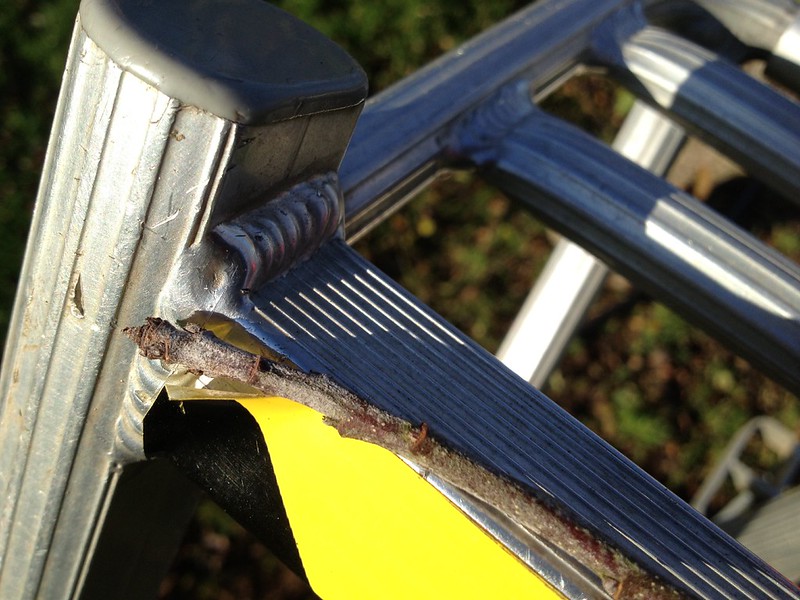
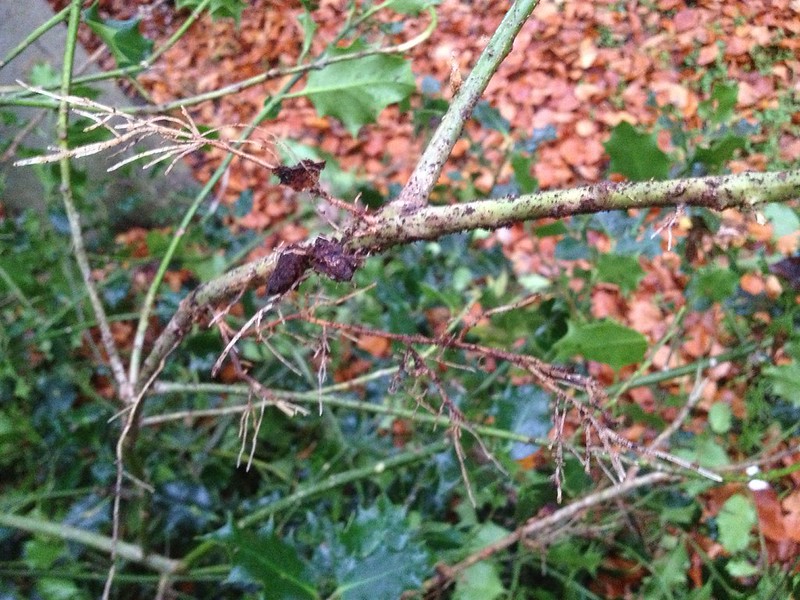
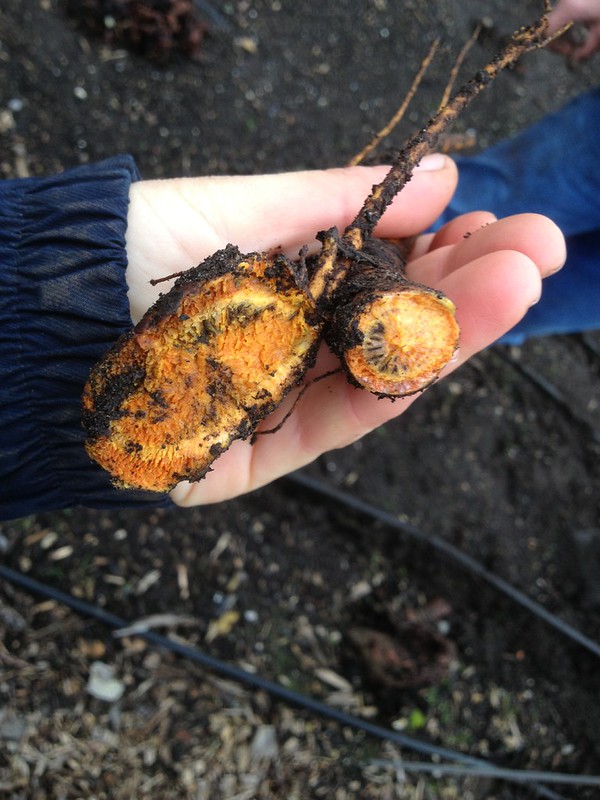
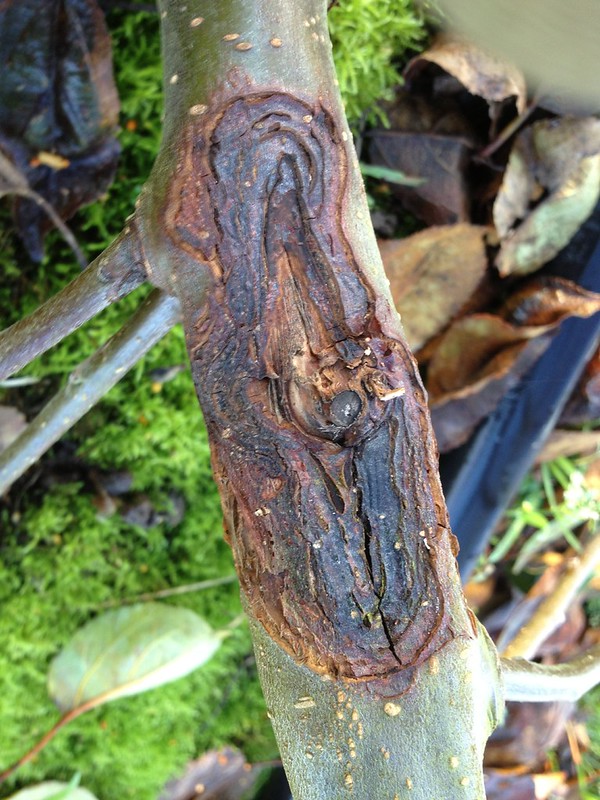
    Discolouration in stem, indication
    of fungal disease

    As a matter of fact, like a lot of the intensively grown gooseberries, they are affected by dieback (which I found out are caused not only by mildew – as mentioned in my previous entry – but also by a range of other air- and soil-borne pathogens, among which Eutypa fungus which also affects grapevines) and we have to be very careful when pruning to disinfect the tools between each plant with Propellar disinfectant. Wounds and stress cracks from tying to wires are likely to be the main entrance points of disease, according to the HDC study of gooseberry dieback, so pruning earlier in the season when wounds heal faster, and in dry weather when fewer spores are around, as well as good pruning (without fraying cuts or leaving snags) seem so far the best prevention strategy.


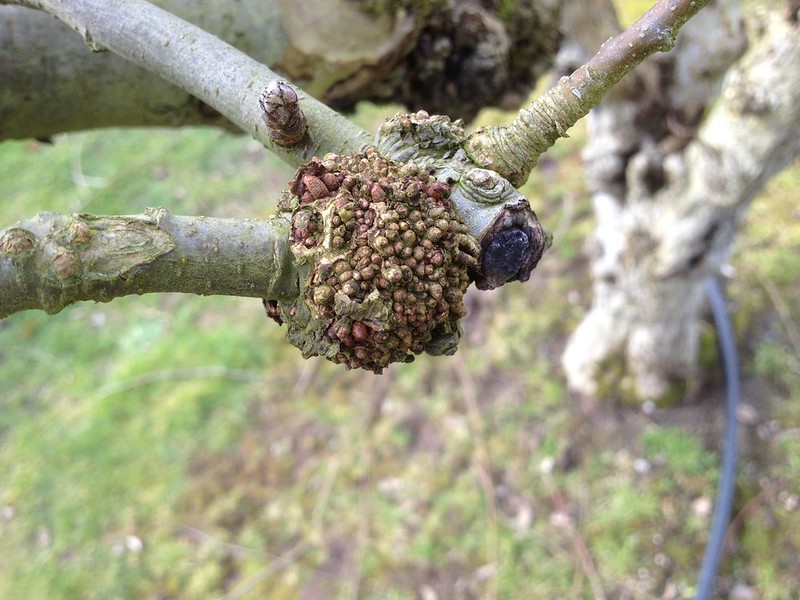
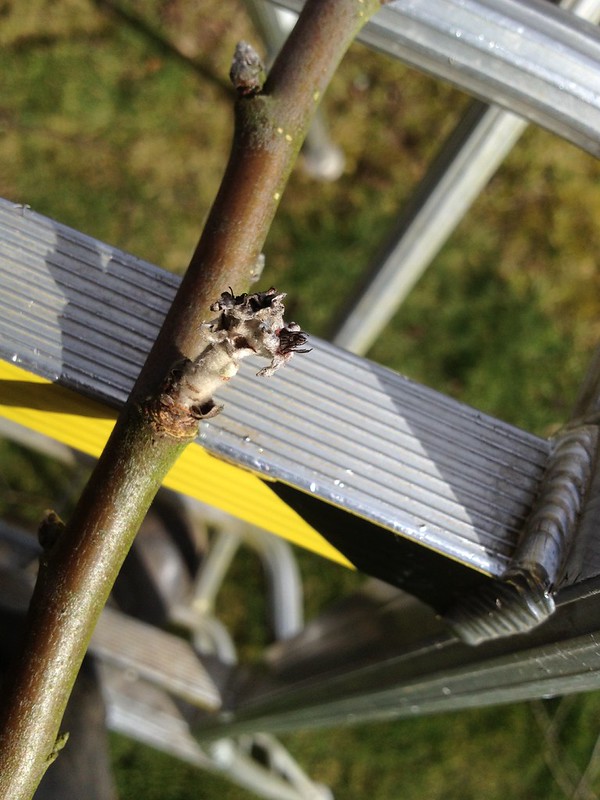
    Swelling of stem above a bud
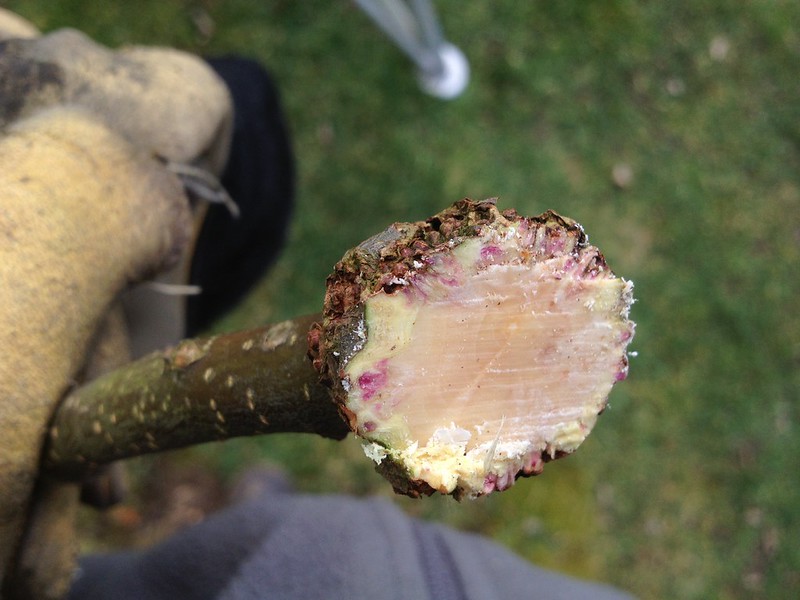
    Slicing through the swelling
    Localised nature of the discolouration

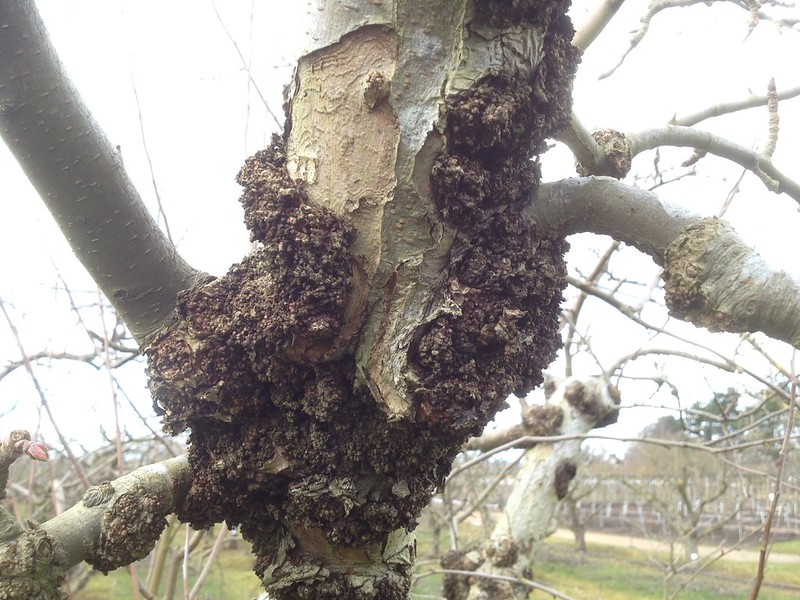
    While pruning this time I also found swellings above some of the buds, which I’d like to investigate further as my colleague had not seen them before, as she is also relatively new to managing the collection. When sliced through, they show a healthy phloem around a swelling of the xylem, with localised brown discolouration.

    The collection is being renewed and moved to a new site to try and improve its vigour, and I will be probably be able to take part in part of the renovation before I leave the Garden, which is quite exciting, really.

    And for a change from just pruning, I have also helped propagate some of the cuttings we took for the purpose. The ones we had cut off last month had been heeled in in a pot, as we did not have time to deal with them straight away. When we went to fetch them we were rather surprised to find some of them had callused, or even already rooted quite well, thanks to the mild weather: very promising indeed (although we were told that sometimes you need to scratch away callus, as it prevents proper rooting in some cuttings, but it should not be the case with gooseberry)!

    We used the propagation facilities to pot them properly.

    Scooping up compost
    If topping up needed,hand
    scooping avoided compacting

    Light compost (pre-prepared coir mix with added perlite) was scooped up in the pots and levelled with a brief shake and tap on the bench, so as not to compact it.

    Cutting to size

    Unless they had taken already (in which case they were potted whole) cuttings were cut to secateur’s length to a bud (with slanting cut, to remember which side is which, as the bottom is cut flat)

     
    Potted

    Five to a pot were they plunged into the compost (after dipping into hormone rooting powder, and leaving just the top 5-10 cm out), then labelled…

    … and off were they wisked into the magic world of the propagation houses, where they will be taken care of so their chances of taking and thriving are maximised.

    We did not remove any buds from the lower part of the cutting (which is done to avoid suckering and grow the bush on a leg) to help maximise rooting and minimise wounding to the cuttings. Once the cuttings are rooted, if you want to grow your shrubs on a leg (which is what we do with cordons, and which produces bigger fruits), you will disbud some 15-20 cm of the lower stem, keeping only 4 or 5 buds, which you will use for the framework of your shrub.

    If you grow them as cordons, you encourage the leader to grow, up to the topmost wire, by cutting it to half its size, still encouraging upright growth, while keeping the other branches short (2 buds in winter).

    If you grow them as shrubs on a leg, you keep a framework of four of five outward and upward growing branches, treating them all as different leaders (shortening them to half as you develop the framework) – we grow shrubs as if every framework branch was a cordon of its own in the Garden.

    You can also grow your gooseberries as stools, by encouraging growth from the base and regularly renewing the structure: the fruits will be smaller, but the plants longer-lived. I found this leaflet provides useful propagation guidance.

  • Preparing for winter

    It is late indeed as the season has been so mild, but the time has come to puts plants to rest for winter while cheering the place up with some winter bedding.

    Today we put up the lean-to frames, made of wood battens and clear plastic sheeting, to cover the fan-trained peaches and apricots and keep them dry to prevent peach leaf curl (Taphrina deformans), a fungal disease that may weaken the plants and infection from which is promped by wet conditions in spring. 

    Peach leaf curl on leaf

    Peach leaf curl on underside of leaf

    There is a very convenient leaflet with instructions on how to make lean-to frames, like the ones we put up today, on the RHS website.

    The fan-trained plants… … with frames on

    After that, I learnt the use of a new tool as we filled some empty raised beds with wallflowers (Erysimum) that will overwinter and flower for some early cheer.

    The row maker is like a rake with ruler markings and adjustable tines, so that you can space rows evenly, and draw a grid on the soil before you start planting – you can plant where the rows meet, or in the space between the rows. A convenient tool for extensive formal planting, or when you need accuracy in spacing rows, like in plant trials.

    Drawing rows…
    … and a grid
    Bed planted
  • Learning, weeding and improvising

    The Herb Garden at Wisley is a lovely little area that opened back in 2003 and where my colleague experiments with planting of old and novel herbs, some of which are used in the restaurants on site (they share some of the recipes online that might be interesting).

    The area is divided by use of the herbs, and we were there today weeding the “herbs for infusion” area to start with: a display of, among other plants, tea (Camellia sinensis), liquorice (Glycyrrhiza glabra, which needed lifting for the winter) and a range of mints (Mentha spp).

    Herbs for infusion area

    While I was there, I took the opportunity to check on the chervil in the “herbs for condiment” area that we planted back in October. I have been keeping an eye on it to see whether it made a difference whether the roots were disturbed or not at planting, and – a month and a half on, I must conclude it does. The plants I did plant, which I mistakenly disturbed the roots of, have grown rather smaller than the undisturbed plugs my colleague planted, as is clear in the pictures below:

    Undisturbed roots, planted 3/10
    Disturbed roots, planted 3/10

    Of course there are other conditions that might have impacted on growth, such as the fact that the area my colleague planted her plugs is shadier and more sheltered, but the root disturbance must have had a part, and I will keep that well in mind in the future.

    The next area we moved on to weed was covered in self-seeded Digitalis, which I was instructed to remove thoroughly. It was while pulling the first plant that it suddenly dawned on me that one of my dilemmas for the new year was solved!

    I had planned to have foxgloves in my area, but – on a small budget that makes seeds more appealing than fully grown plants, especially as the area is quite big – and with the fact that Digitalis is a biennial, I was wondering how to proceed, and here was the answer.

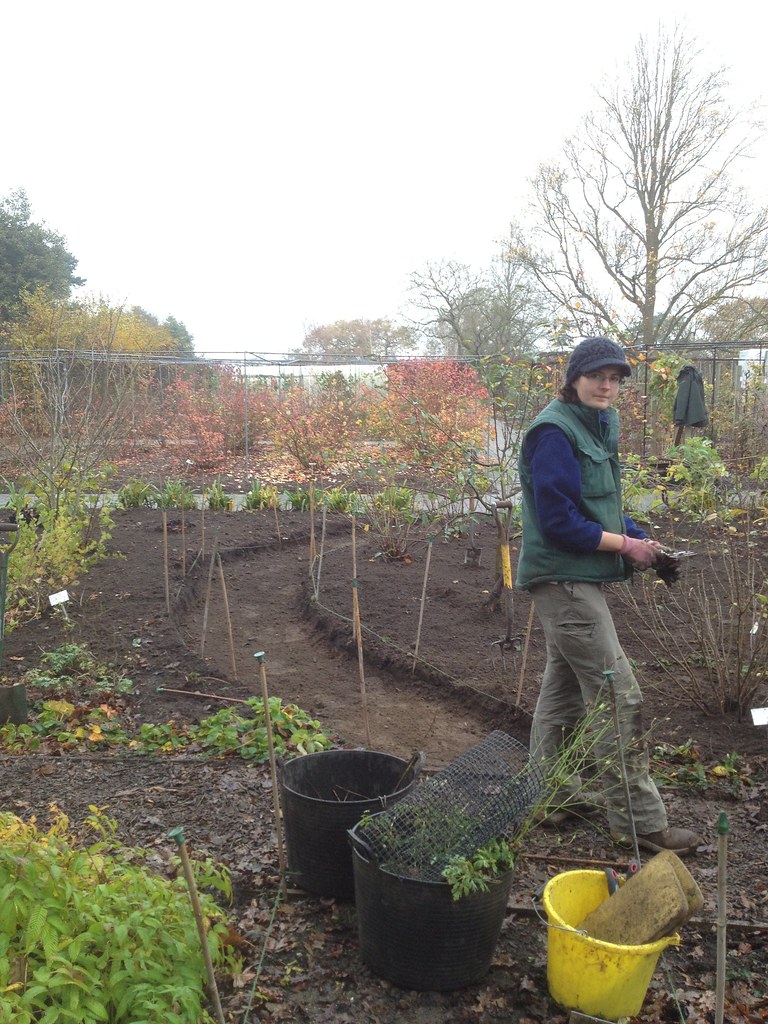
    So, with a bit of luck and improvisation, and my colleague’s collaboration, I came into possession of some 35 plants, which are now adorning the Cottage Garden, a graceful curve, the first new planting in my area, and oh I love them!

    Cottage garden: foxgloves planting
  • Three Counties Orchard Conference

    As my dissertation for this year’s traineeship will be on orchards, my colleagues suggested I attend the Three Counties Orchard Conference with them, and a very interesting day it was as a range of stakeholders in top fruit production, from conservation to commercial, presented to us.

    An introduction to the UK orchard scene by John Edgeley of Pershore College started the days. John briefly outlined the three main orchards types out there:

    1. Commercial fresh fruit 
      • emphasis on fruit “quality” (and I write that in inverted commas, as it is in my opinion debatable what is intended by the word)
      • cone shaped trees most light efficient
      • reduced amount of pesticide linked to increase concern about wildlife conservation
      • crop cover (among other things to enhance pollination)
      • trials of mechanised tree trimming, windbrakes to increase temperature & pollination
      • monitoring of fruit ripeness (iodine for starch etc)
      • harvesting by hand but increased mechanisation (picking platforms and bulk bin trays)
      • cold and controlled atmosphere (CA) storage
    2. Commercial processed fruit
      • emphasis on fruit yield
      • increased tree height (means more shade and shedding of bottom branches)
      • new varieties to improve tree shape
      • increase in sales has meant more plantings and new training opportunities
      • harvesting: hand picked, allowed to fall, shaken from trees (shake and catch harvester)
      • mechanisation means increased potential amage to soil structure
      • soiling of fruit penalised by processors (grass for clean samples, washing impacts longevity)
      • bruised fruit needs processing within 48 hrs
    3. Conservation orchards
      • emphasis on conservation of landscape feature/genetic resource/wildlife habitat (i.e. Noble Chafer)
      • new planting needed to fill gaps but finances a problem
      • some income from sales of fruit; Heritage Lottery and Landfill Community Funds
      • several projects ongoing

    Sarah-Jayne Dunsby, recent graduate of the Royal Agricultural University, presented briefly her academic research on the “Future of Top Fruit Industry in the West Midlands”, mentioning a issue I have heard from several other young farmers before: succession planning. She also mentioned that availability of (seasonal) labour is getting scarcer, a concern expressed by other speakers as well.

    A commercial producer, Michael Bentley of Castle Fruit Farms, introduced us to his recently created orchard where he grows trees for maximum efficiency by growing trees with double leaders, in order to maximise cropping and minimise labour (which takes up 2/3 of his costs – fuel electricity and fertiliser only adding up to 3% but pesticides costs running into the 20k/yr).

    His key issues are:

    • soil fertility (green waste at 3% N and fertigation to get the trees to full production within 5 yrs)
    • mild winters causing poor vernalisation and pollination
    • seasonal labour (he needs 30-35 people during the fruit season)
    • pollination (he called bees “lazy pollinators” and is more keen to encourage moths, bumbles and hoverflies)
    • pest control (pesticides kill the beneficial insects as well as the pests!)
    • biodiversity

    For the last 3 reasons above he manages headlands. Someone from the participants asked him whether, given his is an intensively managed orchard, he could not leave the odd tree to senesce as wildlife habitat, but apparently it would not be commercially feasible. The accepted practice is to rip out any dead tree, as they would cast shade (and light is a limiting factor to growth in the UK, in fact he can only grow his trees to 3 m high instead of the 4 m that are customary on the Continent) and reduce productivity: it costs 20-25k GBP to plant an orchard to last 15 yrs within which it has to yield a profit.

      We then got to hear from Dave Kaspar of  Day’s Cottage Farm, who restored with his partner the traditional orchard on their family farm under a no-spray, no artificial fertiliser system: 100 acres with widely spaced trees on a ridge & furrow land that creates a suitable microclimate. The trees are set in permanent pasture and the business produces juice, cider and perry, besides running the orchard as a skills centre.
      With the great enthusiasm of the trainer and evangelist, Dave pointed out that traditional orchards were planted by hard-nosed farmers, not just for the environmental reasons we value them today, so restoring and operating them should come with a profit, and it does for them. Last year they managed to sell fruit for 7 months of the year, but they are also training the community to accept the fact that fruit – like all agricultural products – is naturally not there all year round.
      And he finds his orchard is “fantastically biodiverse” (9 species of bat, 30 species of birds, 70 species of plant and 120 species of insects in his uninproved grassland) and that beekeepers are keen to take hives to his land because of the no-spray regime that is best for bees. Some funding he receives from Countryside Stewardship and Natural England schemes, and he got a grant from the Gloucestershire Environment Trust.

      The day was concluded by a presentation of Adrian Barlow, English Apples and Pears Ltd, the trade association, who run through the recent and prospective developments of the Industry:

      • 1970s competition from Europe
      • 1980s greengrocers and wholesalers model change
      • 1990s causing a 36% reduction in hectarage
      • 2000s consumer concerns about locally grown food and traceability, as well as chemical residues; “plant protection products” expensive for growers too; large investment in packhouses and coldstores about efficiency and more precise grading

      A modern orchard contains about 4000 trees/ha and new varieties are yielding up to 70 tonnes/ha! I cannot quite picture such huge numbers in my mind: is that how people think of orchards?
      But what really struck me is the amount of work that is placed in sensory and appearance research to decide which cultivars will be popular and on finding the right name to market them successfully… isn’t it a curious world where only the apples with the right balance of colours on their skin get eaten? The current fad seems to be bi-colour and vibrant; green is off, being associated with acidity and so is yellow, thought to indicate over-ripeness!

      Investment at the moment is stifled by concerns about recouping it on the market, and Russia has been a major importer, so when it closed to imports the market became really unbalanced. The market for apples and pears in the UK (dessert, culinary, cider etc) is just over 700,000 tonnes – I have tried to double check that on the Government’s Basic Horticultural Statistics but groupings of fruit are not entirely clear; in any case, we import about 2/3 of the apples we use (although there seem to be some support by the “multiples” for British products, that can fetch a 25% premium).

      As this week I need to research apple cultivars for our Crop of the Week exercise, I have summarised below the considerations made about common and future cultivars as they were mentioned (together with some research I did myself for the homegrown market).

      Most popular cultivars
      Homegrown
      Flavour, good storage quality,
      Specific season (early, late), disease resistance, reliable cropping
      Commercial
      Sweet taste, firm and juicy texture, vibrant skin colour, no russeting/marks

      ‘Gala’ 26% of the market (up from 16% in 2003)
      ‘Braeburn’ 18% (up from 1% in 2003)
      ‘Rubens’ (earlyish)
      ‘Jazz’
      ‘Kanzi’ (NZ)
      ‘Zari’ (early, Sept apple)

      ‘Egremont Russet’ 35k tonnes/yr (of some 750k market) best sold traditional UK cultivar
      ‘Cox’s Orange Pippin’ 23k tonnes/yr
      There is a marketing campaign on in UK for ‘Bramley’ organised by the

      New cultivars
      Homegrown 
      Novelty, local and traditional
      T&M  Apple ‘Isaac Newton’ (Malus domestica, Apple ‘Flower of Kent’) hefty cooking apples with an old-fashioned, bumpy shape
      Frank P. Matthews ‘Little Pax®’ stunning spring flowers, from 19th century St. Cecilia’s Abbey on Isle of Wight
      ‘Rosette®’ sport or seedling of ‘Discovery’ red-fleshed from Worcestershire
      Commercial 
      Good taste and flavour, free of defects and russeting, skin colour vibrant, rapid fruit production (within 5 yrs), fruit size (not too big) and consistency (80% at least of the fruit being class 1) at higher yields (up to 70 tonnes/ha); replace imports, new early varieties and sell later ones even later (i.e. ‘Cameo’ has potential). ‘Sweet Sensation’ new cultivar being tested; ‘Opal’ to get into the ‘Golden Delicious’ market.

      Viscum album

      There were some stalls in the margins of the conference; the most interesting one for me was one about mistletoe (Viscum album). Is it a welcome niche habitat or a threat to orchards? An opportunity for a side crop or a threat for the main one? It is endemic in the Three Counties and there is a project trying to find out.

    • The strawberry beds

      As part of the continuous improvement and renovation of the Fruit Gardens, the strawberry area beside the fruit stock beds has been transformed, and new permanent raised beds have replaced the metal benches and compost bags. I have helped in this development over the last couple of monhts.

      The design was agreed before my arrival, and the beds were put in place for us, but we had to do the clearing of the area and filling of the beds.

      We removed, first of all, all the compost bags and spent crops, followed by the frames.

      Lifting turf previously sliced with a half moon
      New edge

      Then we edged the area – which was previously laid with
      plastic membrane and covered in woodchips to keep weeds at bay –  and aligned its perimeter to the other structures nearby, which meant cutting out a slice of turf (half moons and turf lifters do make such a difference as compared to using spades!)

      Once the beds were in place, we cleared the woodchips from the bottom,
      filled them with topsoil (two large lorries of it!), which was then left to settle for a while. Finally, we mixed in
      some compost that we produce from our garden waste.

      Making room for the compost
      Top soil settled,
      compost being added

      As the operation was spread over time, I can only make a rough guess:
      8-9 FTE were required to complete this new area.  But when we finished
      today, it look very good and tidy, such an improvement on the previous
      arrangement.

      Working in the compost
      Structure of the beds

      I have often wondered which is the best structure for raised beds, and I like these, they look sturdy, so I want to take inspiration formy own on the plot. The wooden planks are fixed around four posts in the corner, which were driven through the plastic membrane.

      Now waiting for the spring to plant the strawberries!

      Post scriptum

      When you design a new planting area, it is a good idea to consider watering in some detail, possibly consulting an expert.

      The strawberry beds were supposed to be watered with driplines, on the soil surface, and a plan was in place. However, come the spring, and ready to put the strawberries in, the plan had to be revised for health and safety reasons: the dripline was considered a trip hazard because the paths between the beds are relatively small.

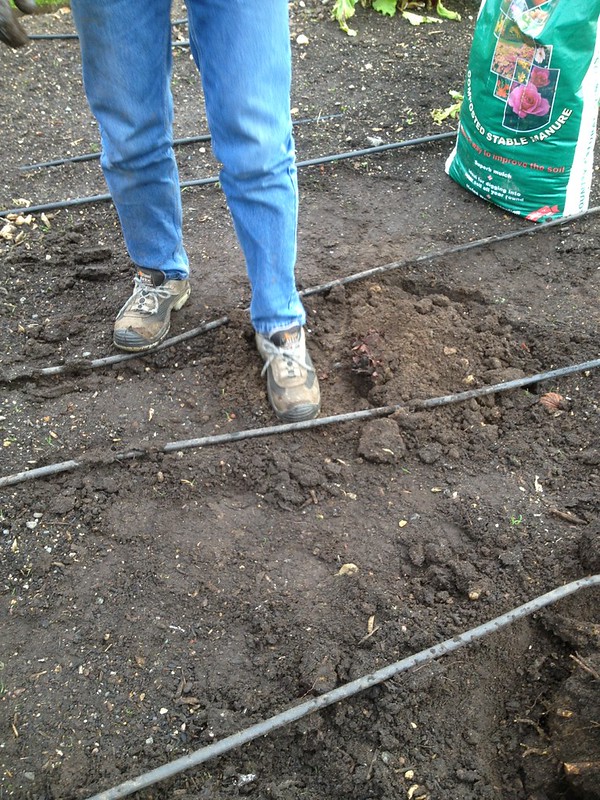
      Trenches: 2 parallel and 1 joining
      the two, in a H shape in between beds

      So it was decided that the driplines would be connected to the mains through underground piping and we had to spend 1.5 FTE digging trenches to bury the pipes in. To be honest, it was quite quick and a less daunting task than it looked to start with, but doing this ahead of laying the beds, would have been more efficient with the help of a digger.

      In any case it was extremely interesting for me to take part in this exercise, as I had never worked with watering before, and we had the opportunity to question the irrigation specialist.

      Holes for dripline connectors in the raised beds

      Depth gage

      32 mm pipes would be buried at a 40 cm depth (measured with a gage), in a H shape in between the beds, so that each could have its own dripline connector.

      If the pipes had been mains, they would have been buried at 60 cm to avoid freezing over, or accidental damage from digging.

      But because this is a secondary connection, and the beds are raised, so no digging is planned, it was possible to keep the pipes more shallow.

      The beds will be planted with two rows of 8 strawberries each, a cultivar per row; cropping should start this year and pick next year. It is forecasted that plants will be replaced every other year (depending how the cultivars perform) with stock grown on site, in the nursery, from specially devoted plants. These will not be allowed to flower or fruit, so that the energy of the plant goes into producing sturdier runners.


      And as of the 1st of April, the irrigation is in and so are some strawberries! 

    • Tractors!

      /tractor-driving/
      My first tractor and  trailer

      I first drove a tractor, with a trailer, on 24th May 2013. And, for some curious reason, I really really loved it.

      Since then, I have driven two other tractors: a middle sized one with trailer, and (quite a lot of) a ride-on mower.

      Compact Kubota with mowing deck

      Old mid-size agricultural John Deere

      Over the last 3 days (1.5 years from first mounting on a tractor) I have – with much delight – attended a course leading to a NPTC qualification in “Agricultural Tractor Driving & Related Operations”.


      Agricultural tractor; manual gear & hydrostatic compact tractors

      There would be so much to write about what I learnt, by working with 3 different tractors at the same time: so what do tractors have in common?

      • Safe practices

      • Forward movement

      • Fore-end implements

      • Mounted attachments


      Safe practices


      These can be summarised as:

      • know your tractor and implements;
      • know the area you are working in;
      • maintain your machinery (i.e. greasing) & perform regular safety checks (fluids, external appearance, air intake, wheels & bolts, belts etc);
      • always use a safe stop and make implements safe (when the tractor is stationary and off, lower them to the ground; when working on them, support any hydraulic or unstable equipment with ram stops, axel stands etc);
      • never be around a moving tractor or in between tractor and implements; make sure nobody else is either;
      • anything that rotates, is hot or belt-driven is particularly dangerous: guards serve an important function;
      • the tractor is more stable the lowest you keep your implements and loads.

      Agricultural and horticultural work causes some 50 deaths a year in the UK, so it’s rather dangerous and the HSE has issued several guidelines, among them one on working with tractors and on working with machinery and several pieces of legislation apply:

      • COSHH, Noise at Work (protection over 85 dB), Vibration at Work, Manual Handling, PPE, RIDDOR, First Aid at Work – in terms of health
      • H&S at Work (safety  is everyone’s job), Management of H&S at Work (risk assessments),  PUWER (regular checks & maintenance), LOLER (fore-end loaders and lifting attachments, not the three point linkage though), Corporate Homicide & Manslaughter Act – in terms of safety
      • and, of course, the Countryside and Wildlife Act (avoid disturbance to wildlife).

      Forward movement


      Orange is the colour (or at least there is an attempt to standardise forward movement levers and buttons on tractors).


      Forward movement is determined by at least four (not always separate) controls, once you have started the engine (remember tractors are diesel engines so they have cold start key positions too and manual gear ones need the clutch pressed down to start):

      • hand throttle, controls the power of the engine in the form of revolutions, which sometimes


        need to be fixed to use implements; it is linked to the controls’ panel tachometer where you can monitor the rpms. In the tractor we used, implements on a 540 PTO shaft needed 2300 rpms to work;

      • gear range: usually marked as N (for neutral), tortoise and hare(s), it set the overall engine speed;
      • gears (and clutch): allow a further layer of detailing the engine speed, forward and reverse (the
        big tractor we used had A-D 1-4 combination of gears and a lever to choose between forward and reverse movement; the clutch was not needed to change gear but was essential for starting and braking); my favourite tractors are the hydrostatic ones (automatic) that do not have gears or clutch, but an accelerator pedal for forward movement and one for reversing (they may have cruise control, as in the picture above);

      • accelerator pedal (sometimes one for forward movement and one for reversing; or the same
        pedal pushed forward or backward with the heel to reverse).

      Of course brakes come in under forward movement: when a clutch is fitted, it has to be used together with the braking pedal. And of course the parking break needs always to be used in a safe stop.


      Agricultural tractors often have extra features that allow for nimbler and safer movement of the wheels:

      • 4 wheel drive, to be engaged only on uneven and steep ground rather than on hard surfaces, it gives grip to the front wheels (in addition to the rear wheels that pushes forward);
      • differential lock: it engages both rear wheels in traction, to be used when badly stuck, it is in the way of turning (as that is what the differential is for);
      • independent breaks allow the operator to break on a single rear wheel at a time to perform very
        tight turnings. However, pedals should always be locked together when such feature is not needed, and breaks should be tested regularly to check they break in a straight line (as using them separately causes the wheels to wear out at different rates)

       
      Fore-end loaders


      Fore-end loaders are covered by the LOLER regulations and are manoeuvred with a joystick with the following functionalities:
      – 12 o’clock position: arm down
      –  6 o’clock position: arm up
      –  9 o’clock position: arm curling upwards
      –  3 o’clock position: tipping

      Mounting equipment on the loader arm is quite straightforward, once you learn how. I filmed a little video while we were practising with a bucket: aligning the arm with it, hooking it up, then curling the arm to swing it into position.


      In the small tractor, one would need to lock the bucket in place manually (which requires a safe stop), to complete the procedure, while, in the bigger one, it would lock itself automatically in place. In both cases, the lock needed manual undoing to release the bucket.

      Mounted attachments

      I had previous experience of mounted attachments: hydraulically powered ones, both towed (trailers with hydraulic tipping) and hitched (a hydraulic grass collector), and a PTO-powered mowing deck mounted underneath a tractor, but never of rear-mounted and PTO-driven implements.

      A PTO (Power Take-Off) – the shaft that distributes power from the engine to the attached implements and sticks out at the back of the tractor where attachments can make use of it – is one of the most dangerous part of a tractor. It can turn at 540 rpms (6 splines) or 1000 rpms (21 splines), depending on the tractor set up, but in either case it can cause serious harm (so much so it deserved a specific HSE leaflet) so it needs to be protected with a guard, like the other rotating parts in the tractor. It is activated by levers/buttons: yellow is their colour and the clutch (if fitted) is involved.

      Handle to adjust hydraulic response (left) 

      Implements that get powered by the PTO are usually mounted on the 3-point linkage for safety and traction and the response of the hydraulic arms can be adjusted to cope with differing weights (position control); however, the weight of the implement needs to be appropriate for the tractor not to roll over (with or without ballast) and for the lifting arms to support: the tractor we used was fitted with category 1 linkage balls so the implement needed category 1 hitch pins, which are only 22 mm in diameter and therefore can only support a certain weight. Category 2 pins are 25 mm in diameter and there is also a category 3.

      3 point linkage and drawbar

      Depending on the hitched implement, one may or may not have to remove the drawbar to avoid fouling the PTO shaft or other parts of the implement. In the case of towed implements that use the PTO shaft, one has to make sure the drawbar or pin do not interfere with it.

      On one of the tractors we used, ballast was hitched on the back to counterbalance the fore-end loader, but it did not interfere with the drawbar so the latter was left in. But when we practice mounting the fertiliser spreader, we had to remove the drawbar as the first thing.

      Then we proceeded as follows:
      

      Fertiliser spreader on the ground
      • reversing the tractor to the implement;
      • lowering the hydraulic lower links;
      • attaching the implement to the fixed link by way of a lynchpin;
      • attaching the implement to the adjustable lower link by way of a lynchpin;
      • attaching and fixing the implement rotating shaft and guard to the PTO with a pin and restraining device (chain), to avoid that the guard rotates with the shaft;
      • attaching the top link to the implement;
      • raising the lifting arms so that the implement shaft was on a straight line with the PTO for optimal use of power;
      • adjusting the top link so the implement was parallel to the ground (even thread uncovered, locked);
      • tightening the adjustable stabilisers so that the implement did not sway side to side;
      Fertiliser spreader mounted

      Once the implement was up, we tested it would work:

    • turning the tractor on, and, with the clutch pressed, engaging the PTO; some PTOs are very noisy and 80dB is the maximum accepted noise level without ear protection, so appropriate PPE might be needed;
    • bringing the rpms to the required level (in our case 2300 – indicated on the control panel tachometer).
    • It is of course dismounted by following the same procedure, in the inverse order.

      Some modern tractors, especially the bigger ones, have sensors on the top link for a feature called “draft control”: this applies to soil engaging implements, and is designed to adapt the depth of the tool around obstacles so the implement is not damaged or the tractor is not jackknifed. If there is no draft control, one can only use shallow soil engaging implements.

      Oh well, now I just have to put all of the above into practice in my exam… wish me good luck!

  • Two women and a Cottage Garden

    I was fortunate enough to have our intern working with me today again on the Cottage Garden, so the two of us managed to go through a lot of weeding and we took up two bigger tasks that had revealed themselves by spending more time in the area: tender Pelargonium needed lifting and the existing patch of raspberries (Rubus idaeus) considerable downsizing (and possibly moving).

    As this time of the year is just late for propagation, we set to work on the numerous specimen of Pelargonium without delay, even if some of them were still trying to flower. All the tender Pelargonium planted in the area (and some of the hardy ones too) have scented foliage, from citrussy to rose scented through a minty aroma: quite a riot of scent, it was, digging them out!

    We got cultivars:

    • ‘Citronella’
    • ‘Attar of Roses’
    • ‘Lady Plymouth’
    • ‘Blandfordianum’
    • ‘Frensham’
    • ‘Sweet Mimosa’
    • ‘Lord Bude’

    The options were either potting them up for overwintering and take cuttings in the spring, or risking with cuttings straight away, given that the season has been mild and Pelargonium take easily. The Prop Department – which are going to take care of them – suggested that we go for an intermediate solution: taking cuttings straight away, while overwintering some plants in case they won’t take.

    Of the seven cultivars we digged out, next year I will need five plants each for six of them, and ten plants of the other one, P. ‘Lord Bude’, the only one with darker flowers. So we took in two-three plants of each cultivar, a couple more of ‘Lord Bude’, and composted the rest. My lovely colleague in the Prop Department helped me with the paperwork required, and now it’s just a matter for me to wait for spring.

    Before the day came to an end, we also managed to remove half the raspberries (I will later move the other half, I think I will train them on a post and wire frame) and to tidy up the whole area, thanks also to the help of the manager that joined us later in the day. A good day’s work.

    After tidying up

    PS And it was perfect timing as we got frost overnight!

    The frosty morning after