We visited the Pagoda today, such a symbol of Kew gardens!
I remember a few years ago the Pagoda was open to the public for a short period of time and I wanted to go but then did not manage to… but today we had our very own special tour.
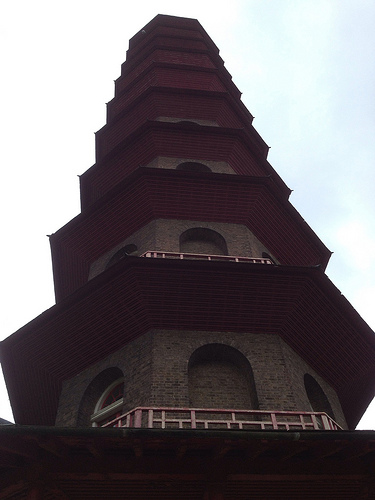
The reason why the Pagoda is not open to the public is that the wooden structure may not support the flow of visitors, but there are plans to renovate it.
It was first built as a folly in the seventeen hundreds for princess Augusta, who wanted to make of Kew a paradise on earth, so commissioned various buildings to adorn it.
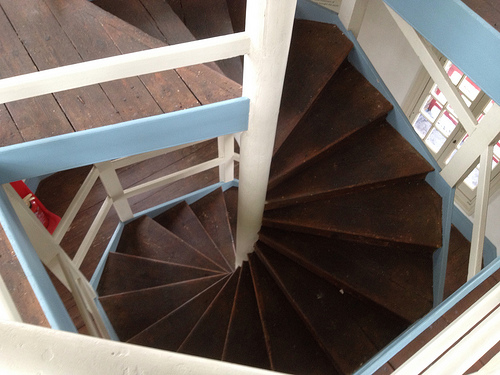

The Pagoda used to have golden dragons at its corners, and it costed the equivalent of £17,000 in today’s money. It was the tallest reconstruction of a Chinese building in Europe but, with its 10 storeys, it is architecturally inaccurate: pagodas always have an odd number of floors.
For me the biggest treat was to see the South Canal beds from up high: they look so gorgeous! And I could spot some of my most recent work even from there.
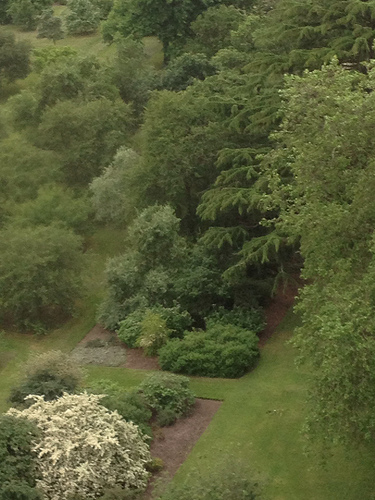
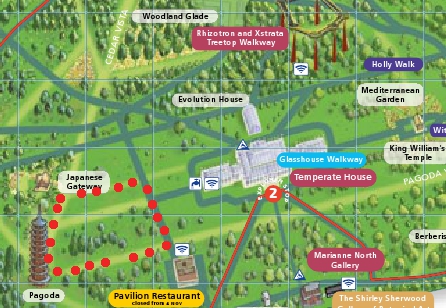 and from the Pagoda vista (the grassed walkway that connects the Pagoda to the Palm House) to the grassed path that flanks the western side of the Temperate House. It’s a trapezoidal area with 6 beds, tree each long side, with the ones on the corners V-shaped, that enclose an area with individually planted trees (Pyrus spp, Malus spp and Crataegus spp).
It’s a large area, seen from up the Pagoda! No wonder I get tired walking around it, and I am losing so much weight 🙂
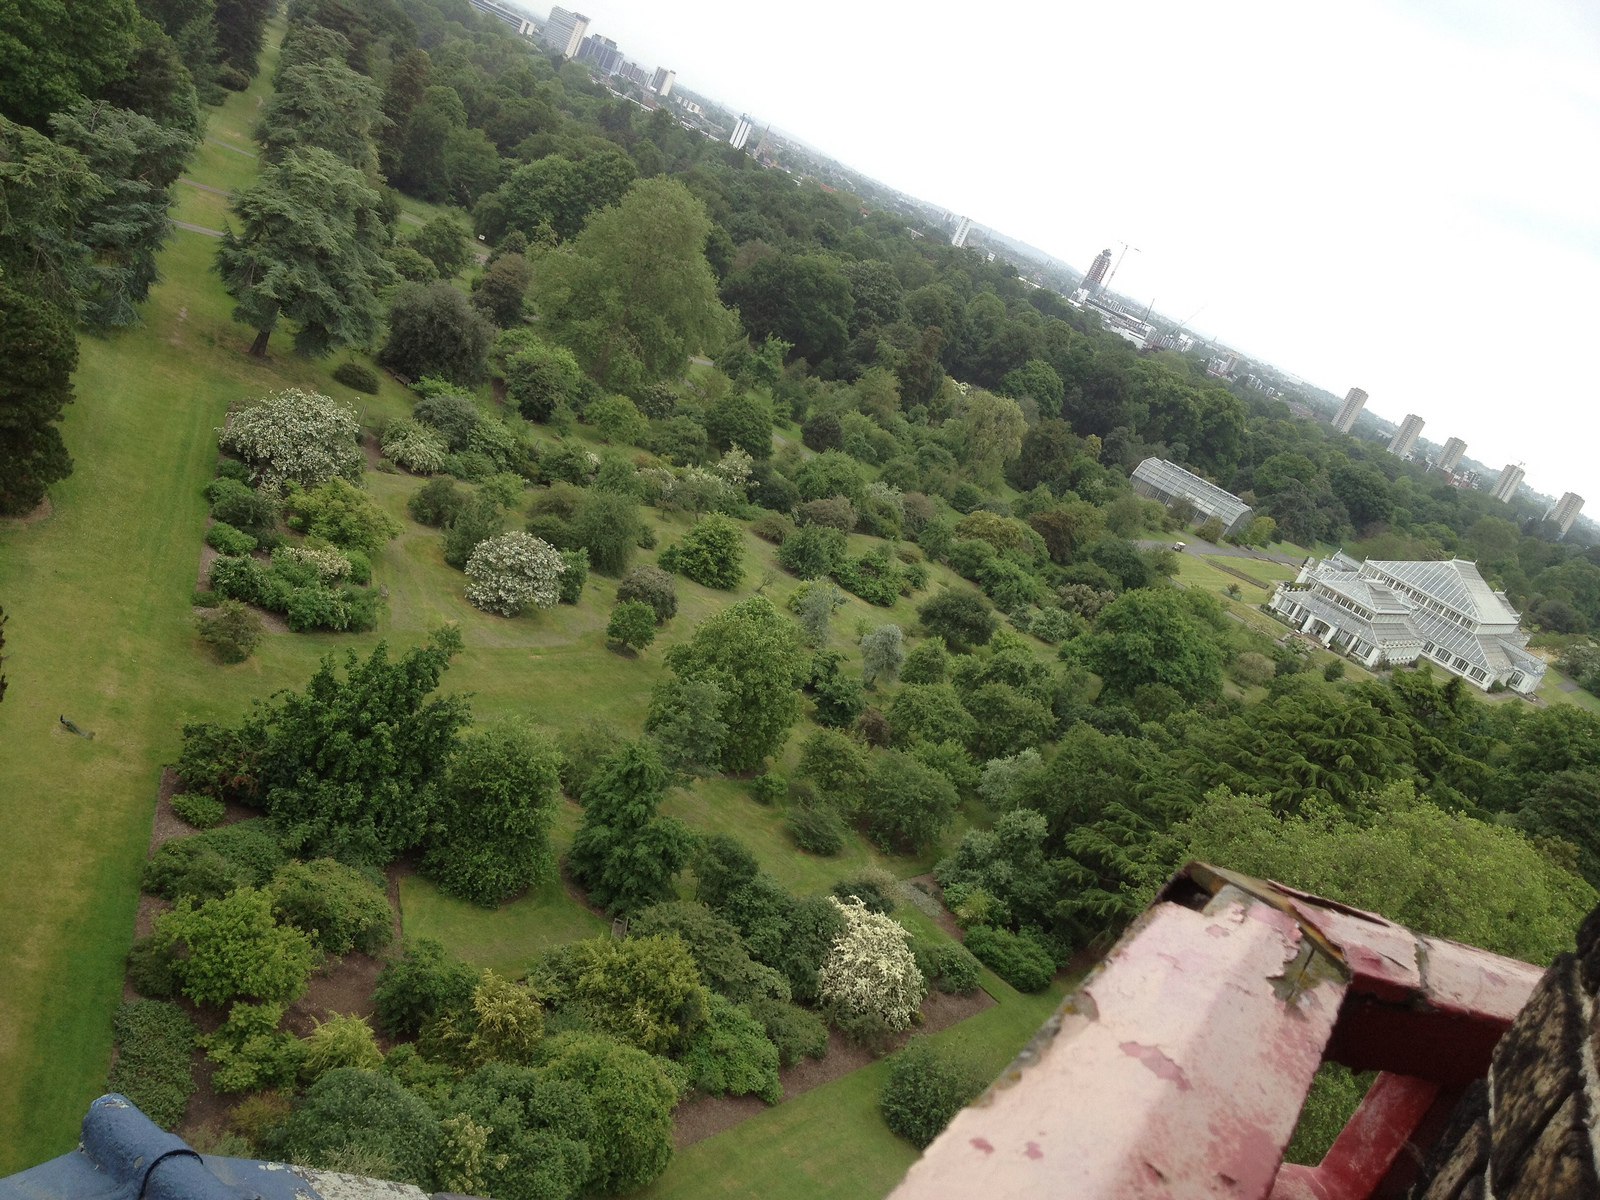 |
| The South Canal beds |
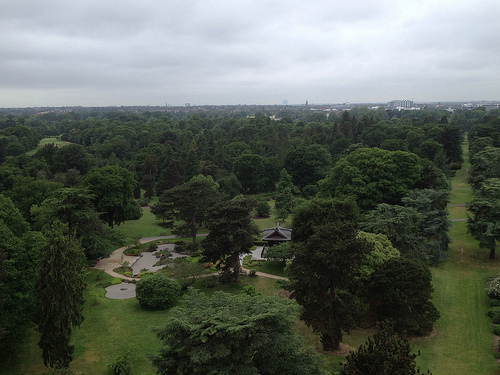 |
| The Japanese gateway |
Neillia (Week 10, Thursday)
I was not familiar with the genus Neillia before I spent a whole afternoon digging ground elder from under one. That was an opportunity to become closely acquainted; I took the pictures below.
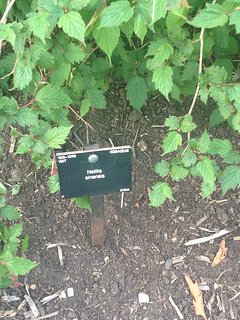
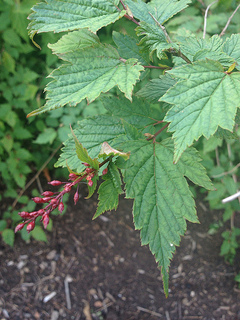
There is probably a reason why I did not know Neillia, and it’s because there doesn’t seem to be much information around about them.
Originally from China, there are 16 species whose name has been accepted in the genus. As it is in the Rosaceae family, there are quite a few specimens in the South Canal beds. Deciduous shrubs, originally from Asia, with arched branches; some of the species are suckering. Leaves are alternate, lobed, ovate to ovate-oblong and toothed, which may turn yellow to red in autumn. Flowers are various shades of pink, borne on racemes, and bloom in late spring to early summer.
After my first encounter with the species, when stock-checking, I came across a label Rhodotypos scandens that was not apparently associated with a plant of that name. I researched online on the Missouri Botanical Garden website and there was definitely no Rhodotypos around. I was pretty sure there was an unlabelled Neillia there, though…
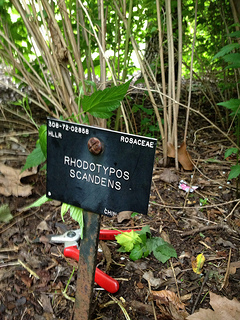
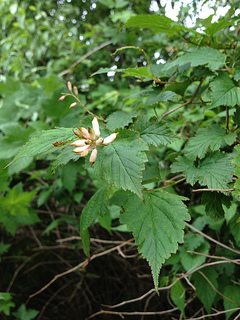
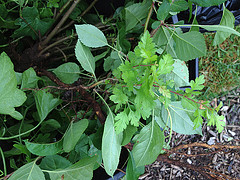
… and, again when stock-checking another day, I came across another Neillia, a puny rubiflora that looked surrounded by weeds. On closer look, there was a Prunus of some sort poking out from its back… given that I always have my secateurs on me and that I cannot stand stumps I cut the Prunus so it stood out as an eyesore for me to notice next time I was doing weeding.
By the way, stumps are not only ugly from an aesthetic point of view: it is bad horticultural practice to leave random bits of wood when pruning, as they will die back and possibly act as the entrance point for diseases and fungi such as coral spot.
- close to – just above – a node (where leaves and buds are located on a stem); you should make sure there is strong and healthy outward-facing bud that will grow without congesting the plant; nodes are a region of the stem where healing is easier for the plant;
- next to a branch collar*, making sure not to cut into it, because collars are natural protection areas of the plants and callus forms quicker there;
- right down to the ground**.
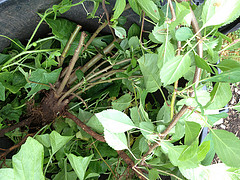
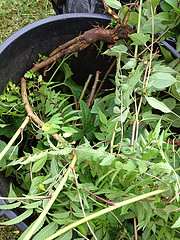
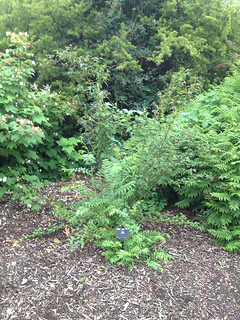 Anyway, my devious strategem worked, and, today, while weeding I spotted the stump straight away and set about to free the poor Neillia of the intruder… well, actually, it turned out to be intruders – plural…
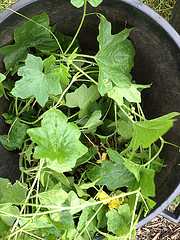 |
| a Bryonia dioica |
 |
| the Prunus |
 |
| a Crataegus |
 |
| … and a Sorbaria |
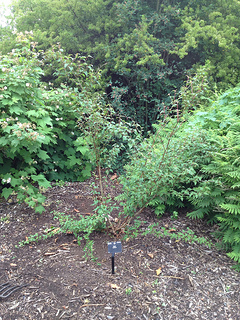
… a red bryony, Prunus, Crataegus and Sorbaria later… it became apparent it had become a bit overcrowded around there, as the Neillia had obviously escaped attention. Anyway, all sorted now, we should have a happier plant!
NOTES
*A branch collar is the ridge that a branch forms where it joins the stem. A fantastic colleague taught us that the collar is still part of the main stem, from which the branch emerges (it originates where a bud was sited, fed by a branch in the vascular system deep inside the stem). When you cut the branch, you should not cut into the main stem: that way, the wound will heal quicker, and, ideally, in a number of years, be completely covered by the stem’s bark. Below a few pictures:
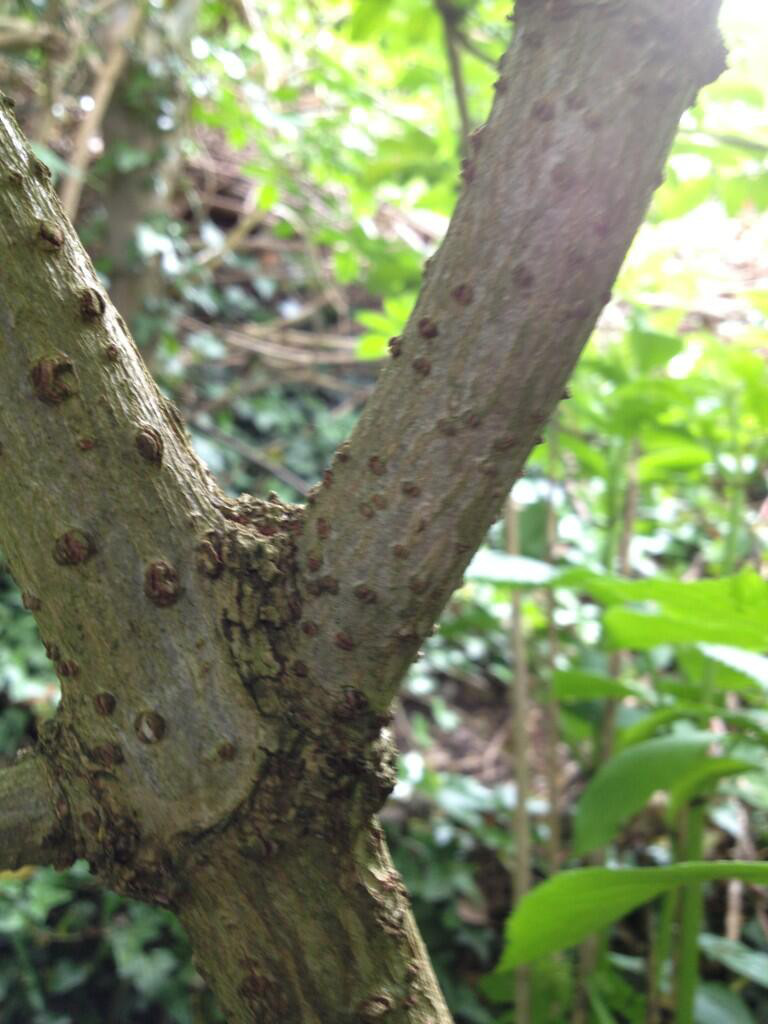 |
| A branch collar: the ridge is visible from which the branch emerges |
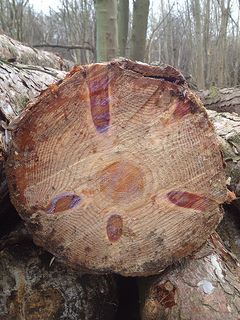 |
| Branches originating from inside the stem |
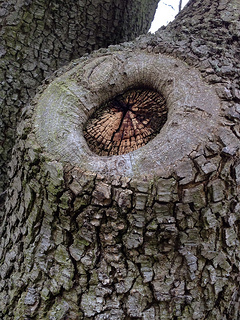 |
| A good pruning wound being covered by bark |
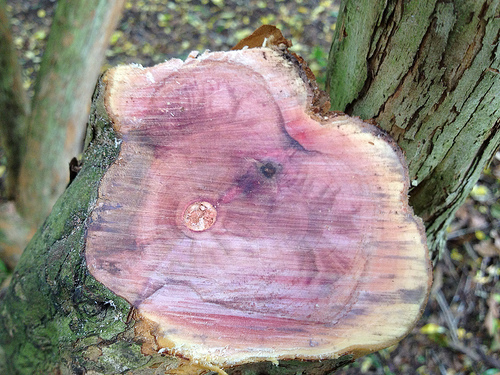 |
| The black stain in the section shows where a branch was not correctly pruned: the stem did not find it easy to heal the wound |
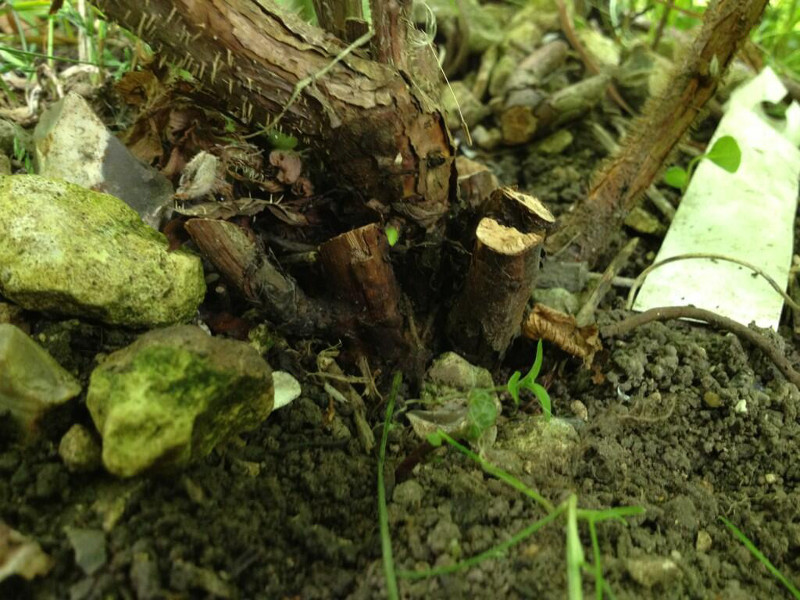
** If a branch or stem is cut in the wrong position, the stump will die back and possibly congest the plant/be in the way of new growth; the same is true when the stem is cut at the soil level. A plant should be planted at the depth of its root flare, but I guess the exact spot where to cut is a matter of experience and observation. As Rossana would say: look at the plant and the way it grows; and, in the case of pruning, feel the bark, the collar, look at how the branch emerges from the stem, clear the soil all around the plant base and find the root flare. In the picture below, you can see some stumps that died back and are in the way of a new bud: not a good cut.
Lawn-mowing for beginners (Week 10, Tuesday)
Tuesday team-working day today, we are weeding and mowing the lawn around the so-called “holly walk” – an area that has no dedicated gardener to it so is managed during team days. By the way, if you were wondering: how many gardeners in Kew? (a question several visitors ask me) The figure I got was some 50 gardeners (there are employees, the school of horticulture students, apprentices and trainees), with around as many volunteers (including interns). And we did have volunteer with us today, well, and myself.
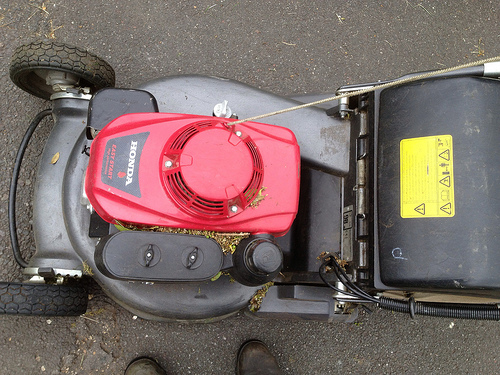
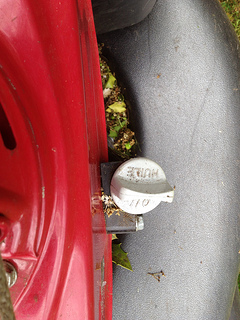
As I had not used the mower for a while, and it was only my third time anyway (first and second) I checked I remembered all about how to operate it, and took a few pictures in the process. For a full description of what pre-start checks to do on a mower, I found this video rather useful.
 |
| Oil |
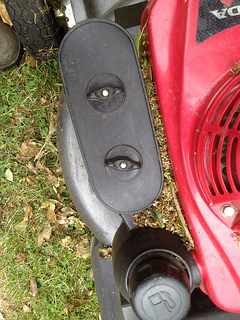 |
| Filter and petrol |
The first general checks are: oil, petrol (full) and air filter (clean).
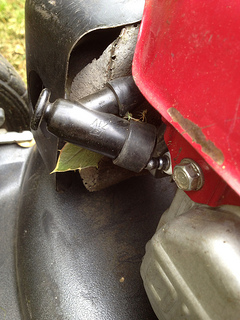 |
| Spark plug cap removed |
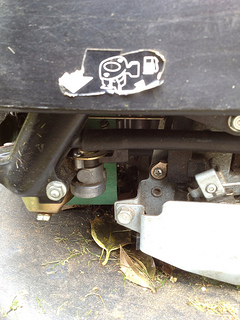 |
| Fuel switch |
The next check is the spark plug; it is usually disconnected when the mower is not in use.
Then, it’s the turn of the fuel switch. I was told the easy rule is that all power tools’ switches are on when in line with the pipe they are connected to, and off when at right angles.
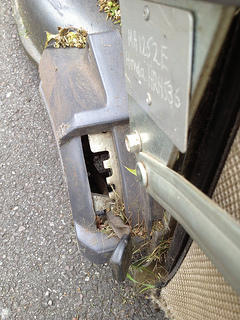 |
| Mowing height (back) |
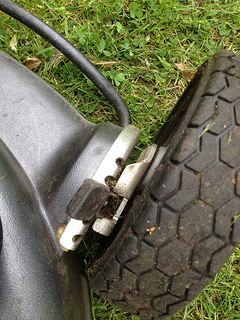 |
| Mowing height (front) |
The mowing height is the next check: when the grass is long, you start by mowing with a high cut, then you progressively reduce it. You want a lush green sward, you do not want to cut into the thatch. There are height controls both on the front wheels (2 of them) and on the back (one only).
You are now ready to start the engine. Our equipment has international symbols:
- stop (self explanatory)
- turtle (slow)
- hare (fast)
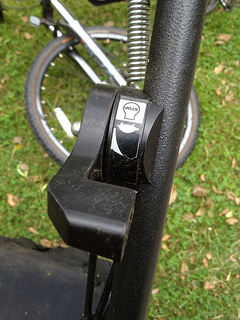
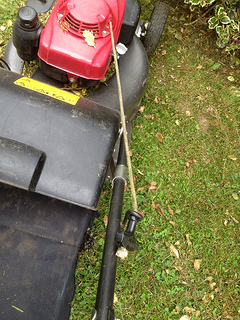
You don’t start on a turtle, otherwise the engine might struggle. So you push the lever towards the hare. Then you pull the string, until the engine starts. If it were a two-stroke engine (like the leafblower and the bowser) you would need a choke to help with cold start. But four-strike like the mower are ok as is.
The mower is ready but has to be pushed (quite heavy, but useful for doing difficult spots). And the blades are not engaged yet, so even when pushed it does not cut.
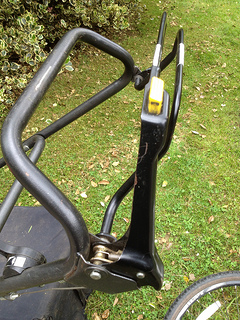
The controls of the blades and the self-propeller are the thinner handles. Pushing down the yellow button and the handle forward engages the blades (I find that the engine struggles if it’s on slow when you engage the blades). The outermost handle is the self-propeller. The speed to which the mower goes forward is linked to the engine power, so the slower the engine, the slower the propelling.
If you are not used to a self-propelled mower, it can run away with you, especially on tight turns, so it is always best to disengage the self-propeller before turning, and only re-engage it when the mower is again in a straight line with wherever you wish to go.
I found the most difficult bits are under tree branches when you are mowing around tree circles and you have to be careful that the branches don’t rebound on you if pushed apart (best if someone is around and holds on to the biggest branches) and that, having to bend under branches, the handles are released carefully when turning, because they are on a spring!
If your mower has a roller at the back, like ours, it will leave stripes on the lawn, that you have to try and keep even and straight. Sometimes it is difficult in particular light situations to see which stripe is which, but generally you know that the light stripe is in the same direction you are going now (because the grass blades were pushed down and you see the back of them), while the dark stripe is against you (because you are looking at the shaded bottom of the blades that were pushed down)… does that make sense? I particularly enjoyed making big stripes, which is when multiple mowers go side by side… but that is advanced skills, and I only tried once! 🙂
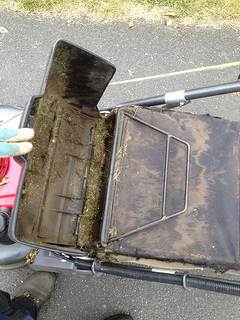
The last thing to do with a mower, is to check and empty the collector: when it is too full it leaves an unsightly trail of grass clippings as it goes!
Et voila… the perfect lawn-mowing…
The Palm House (Week 10, Monday)
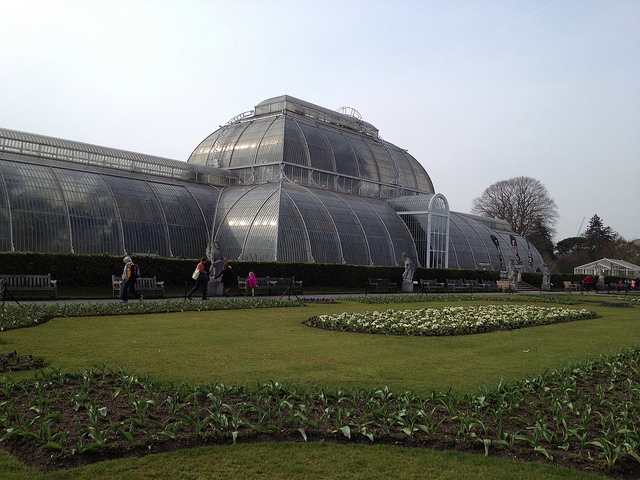
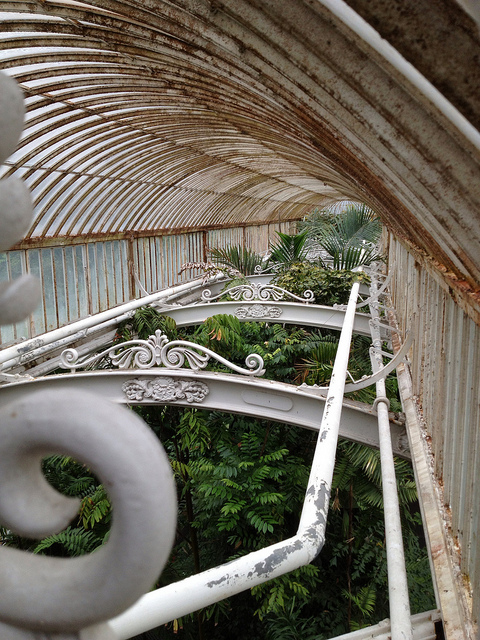
We had a tour of the Palm House today, one of the few remaining greenhouses that were built with wrought iron, a revolutionary technique of its time, thanks to which the arcs of metal could span more distance.
It dates back to the 1840s, and sits next to the later Waterlily House that is managed together with it.
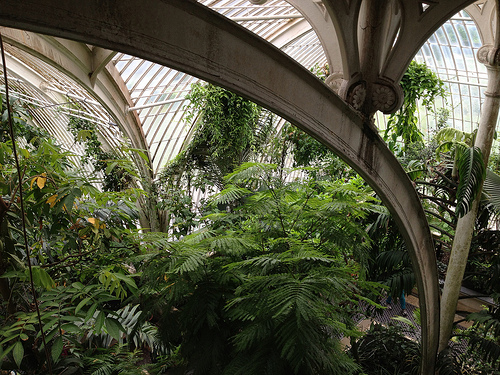
Besides the palms that give it its name, the collection covers the tropical rainforest, from north to south respectively: Asia, Americas & Africa (with some allowance made for the tallest plants to sit in the highest part).

At the moment a lot of emphasis is given to food crops as part of the IncrEdibles festival running this summer. We saw:
- Theobroma cacao the cocoa tree
- Coffea spp the coffee plant which has recently been in the Kew news because of its threatened status in the wild (caused by land use and climate change) and whose family, Rubiaceae, despite being one of the least well-known contains quite a few economically important plants), and
- the oil palm Elaeis sp. (did you know the oil comes from seeds?)
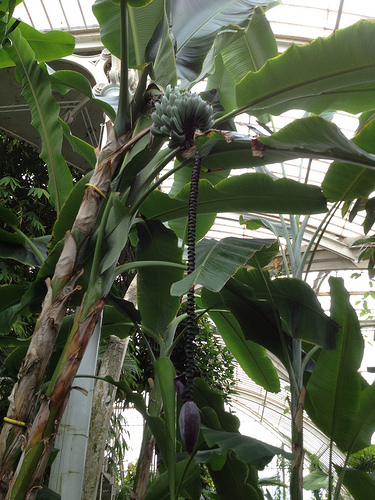
- bananas (Musa spp), with its dangling purple male flowers that serve more of an aesthetic purpose than anything else – as they do not often fertilise the female ones, at the top, which turn into bananas.
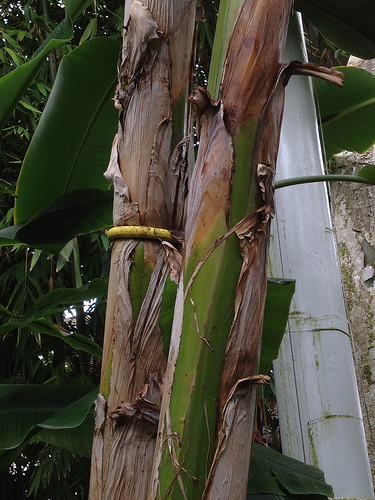 |
| Pseudostem |
 |
| Flowers and bananas |
We manage to get fruit nonetheless, because bananas are parthenocarpic, and that is an advantage from the commercial point of view because they do not contain viable seeds, but certainly not from an evolutionary one!. Interestingly, banans are not trees as such, they are herbs, and their stems are not woody stems, but soft and formed by the leaf sheets that are closely packed together. In the picture below, you can see it is sometimes necessary to keep them together with support bands!
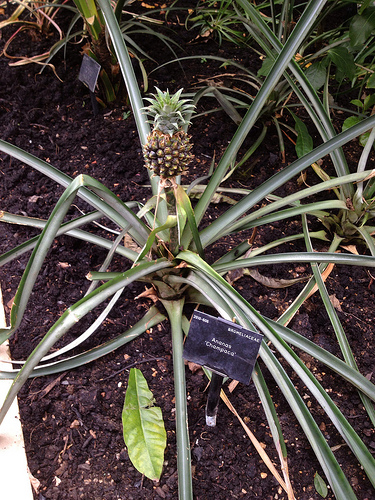
- pineapples, Ananas spp, which are very much the icon of this summer’s festival
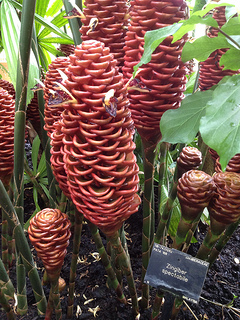
- various Zingiber, edible and non-edible ginger
 |
| Pineapple |
 |
| Non-edible Zingiber |
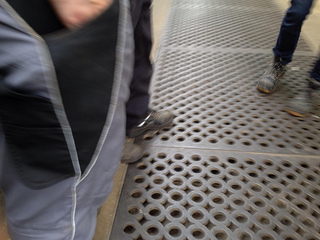
Back to the fascinating history of the Palm House, we learnt that it was originally heated through burning coal in the Campanile at Victoria gate, which heated water that then ran in pipes in a tunnel to the House and then through the iron grating in the floor that are still visible today.
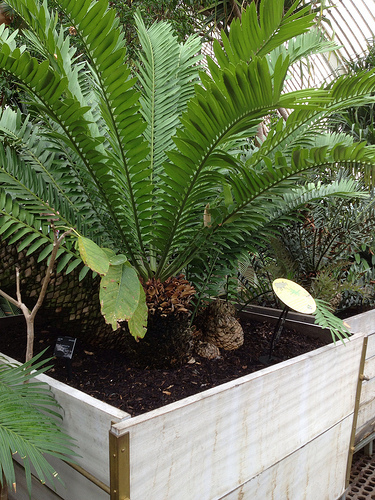
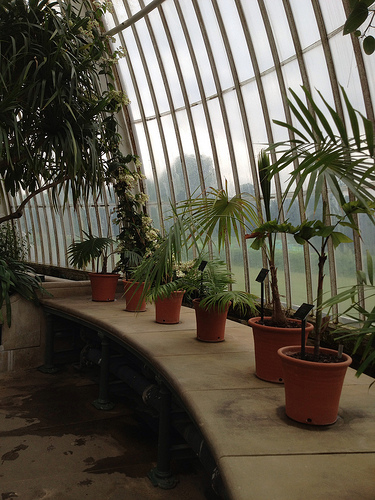
At the extremities of the house there are benches that were originally used for potting on, but now are display areas, plants are kept in pots to remind us of their original purpose. Some of the palms in those area, you will notice, are also planted in crates, which – besides being very convenient for potting on – are the way in which plants were originally displayed in the Palm House.
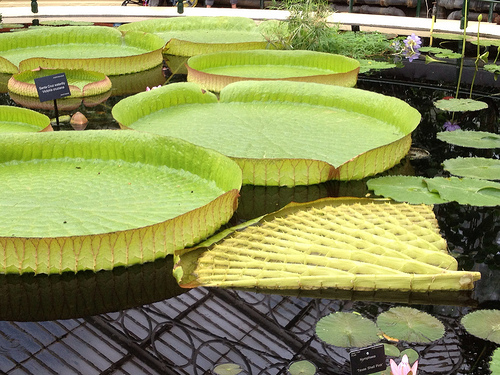
I must say I did love the Waterlily House in particular, because it was so cosy and planted with more foodcrops: ones I love in my own garden, like chilli and shark fin melons. It was also really exciting to see the underside of the leaves of Victoria cruziana, the giant waterlily, which have ribs that trap air to help them float and are spiny to fend off the attacks of fish: amazing plants…

Watering with a bowser (Week 9, Tuesday)
Today I was trained in using a watering bowser, and then set off with a map of the gardens and a list of the recently planted trees to water. We only water those small trees that need to establish, generally the ones planted in the last two years.
I simply loved the experience, for two main reasons:
- While the plant was being watered, I could observe it, and the plants around it. In fact, it is better to give a good soak to plants every so often than a quick watering all the time. So it takes 5-15 minutes depending on rate of water, size of tree circle and previous state of the soil, to give the plant a thorough watering and you only need to move the hose around at suitable intervals
- I got to know the geography of the gardens and which plants are in which area (which, giving my precedents for getting lost, has been extremely useful!)


A Larix laricina, or tamarack, which I had never seen before, and whose cones left me gobsmacked: as beautiful as the best deep red rosebuds.
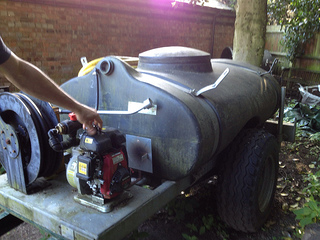
Then you have to do general checks:
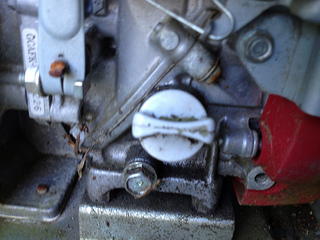 |
| Oil |
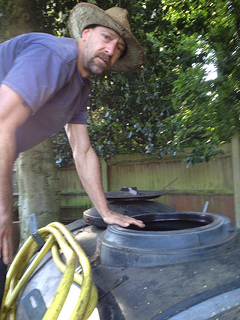 |
| Water tank |
- Is the water tank full?
- Is the petrol tank full?
- Is there enough oil in it?
Having checked everything is ok, you have to take some fuel with you in a safe storage box and then set off to your daily duties.
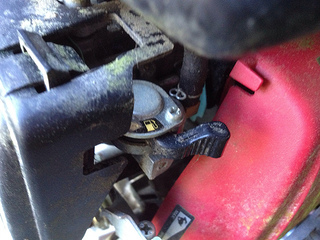 |
| Fuel switch |
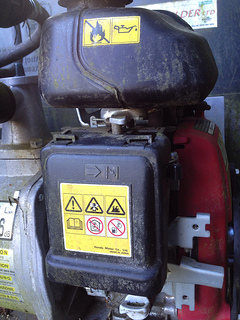 |
| Fuel tank and choke |
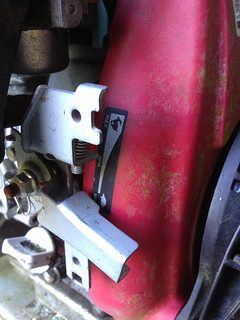 |
| RPMs lever |
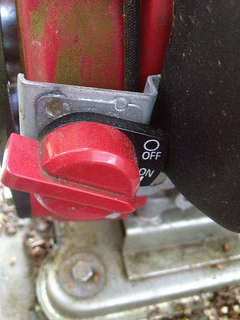 |
| On/off switch |
To stretch the hosepipe to the length you need, you unroll it from the wheel and stop when you hear the cogwheel mechanism click into place. The water is released into the hosepipe when the lever is flush with the pipe.
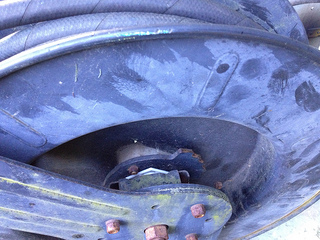 |
| Hosepipe release wheel |
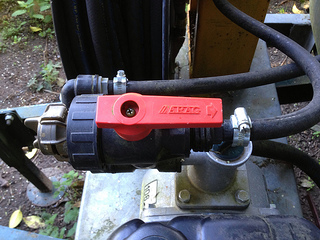 |
| Water on/off lever |
Well, that’s the techie bit sorted, and you get the rest of the time to enjoy the plants and the gardens: I’m really looking forward to the next time I have to water again!
Ethically bound (Week 8, Friday and Week 9, Monday)
Today, after a bit of tractor practice, which involved removing a trailer with a flat tire and getting a sound one instead, I spent the rest of the day clearing bindweed from around some Pyracantha and Physocarpus shrubs.
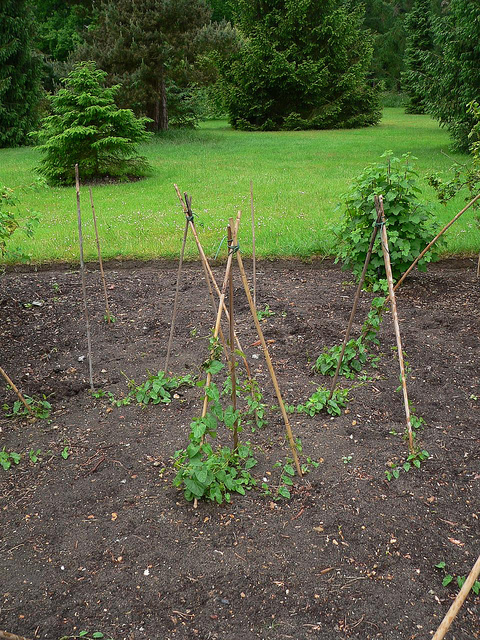 |
| Growing bindweed on canes |
The accepted way of getting rid of established bindweed is to make it grow around a cane and then spray it with glyphosate.
However, left to myself as I am at the moment, I would always choose cultural, rather than chemical methods of dealing with pests and diseases. And that is what I did today, giving it a good dig and engaging in a bit of root archaeology… ;p
Mine is of course an ethical choice.
I always assume there will be unwanted and unexpected consequences in using chemicals. A child of the 70’s I have grown up with the debates on the effects of dioxins and DDT… then a couple of years ago my rather undefined feelings about the topic had the opportunity to take shape more clearly after reading an interesting article by Karl Erik Sveiby on unintended and unexpected consequences (of innovation). Incidentally the same author had first planted a “seed” in my mind that was going to challenge my assumptions on food production and sustainability, a few years earlier, with his co-authored book “Treading lightly“.
And glyphosate’s unwanted and unexpected consequence seem to be disruption of the endocrine system… scientific studies on its effects are popping up more and more frequently, on both the environment more generally, including invertebrates, and humans, so I do not get too excited about it, despite the claims that it is one of the least toxic herbicides…
I do not really see the point of herbicides at all, to be fair, as most weeds can be relatively easily got rid of with a just a bit of work and patience.
As my interest in ethics and the environment grew, I took a course on environmental responsibility last year and I have just received my results, which is probably why today I spent all the weeding time thinking about the ethics of spraying. I passed my exam with merit, but it looks like I might have got a distinction if I had considered other stakeholders’ points of view in more detail in my final project, so that is what I tried to do while digging out all that bindweed.
I identified three main stakeholders, who might have reasons in favour of spraying.
First, I considered the students from the diploma course. They are on a management course and want to do “management” in the garden; most of them find weeding boring and I have a feeling that spraying is instead considered by some a more managerial thing to do, probably because it is perceived as a more “skilled” job. They have no problem in taking out the sprayer, even though most of the time, when asked, they say they had rather not do it. Mind you, I know at least one that, like me, has repeatedly spoke up against spraying.
If I look at it from the point of view of a manager with limited resources, on the other hand, I may think that spraying is quicker and I will get my resources freed up for more “important” jobs to do. I would have to take into account the cost of the chemicals and the safety issues involved, but glyphosate is marketed as safe and there are no special restrictions on its use. But is it really quicker? How long does an application last?
I would like to carry out some experiments and see how long my bindweed, carefully pulled out from the roots as deep as I could reach, takes to come back, as opposed to the one that has been staked and is going to be sprayed.
As the third group of stakeholders, I thought of the curators of a collection. If a specimen was fragile and rare, you might not want to have a rummage around its root, or even to move it around. Spraying might be the best option to keep it free of competition, provided it does not do any damage to the plant itself. But the plant I was working under was a Pyracantha coccinea, so I took the decision it would be allright.
It is all theoretical because I never had the opportunity to ask the question to anyone in those categories, except for the students. I have not made a strong case for them, have I? In fact, at the end of my assessment, I am still convinced the cultural method is the most effective, least damaging way to the environment and the people that work with the plants, and in the soil, all day. I do not think a small patch of weeds in ornamental horticulture justifies the pollution to the soil and water table, and any kind of health risks even if “just” to frogs. What goes around comes around. But that is because my ethics values the health of people and the environment most than the cost of resources, including my own energies, and because the plant I was working around was not a rare or endangered specimen.
It would be interesting if anyone belonging to those stakeholder groups would comment on this post.
Anyway, it took me two half days to clear that rather large patch.
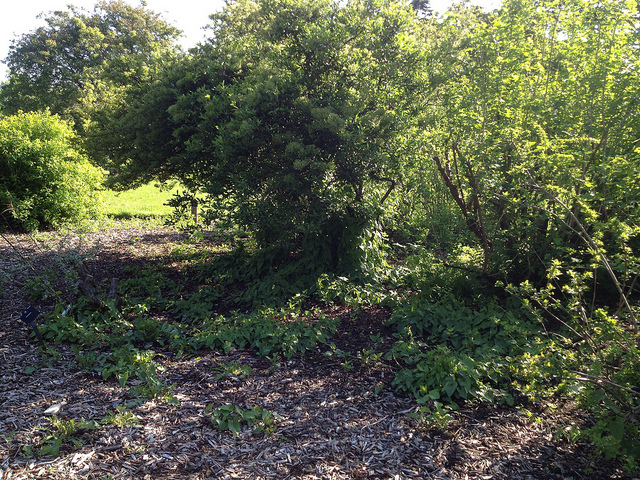 |
| The patch of bindweed |
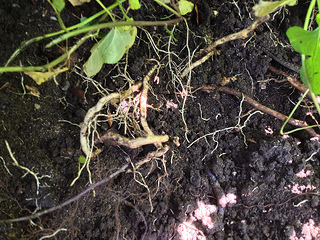 |
| A sample of thick roots |
Some roots were rather thick. Thicker than I have ever seen on my plot back at home, so they must have been growing for a while. I carefully pulled them out (how easy it is in the sand, compared to chalky soil!) without snapping them, from as deep as I could reach, with the help of a hand fork. I made sure I cleared the ones around the Pyracantha stems at the base too.
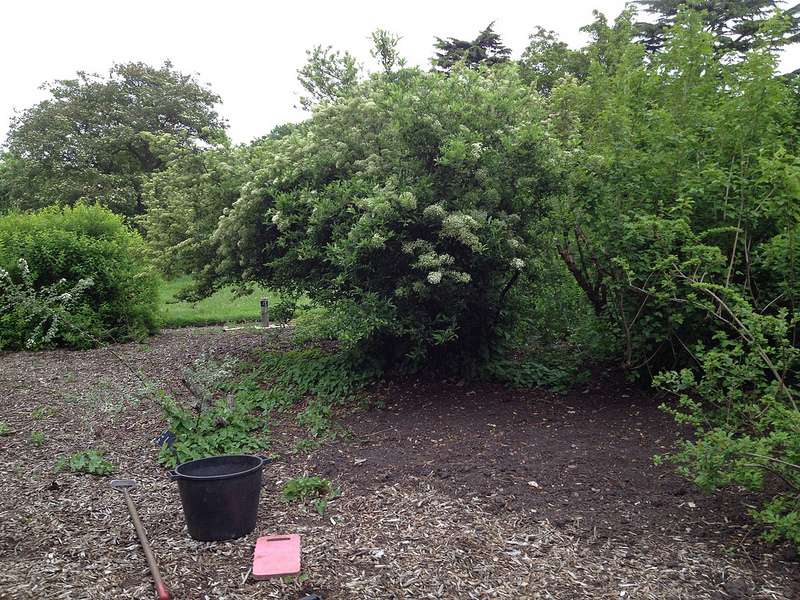 |
| .After my first half day… |
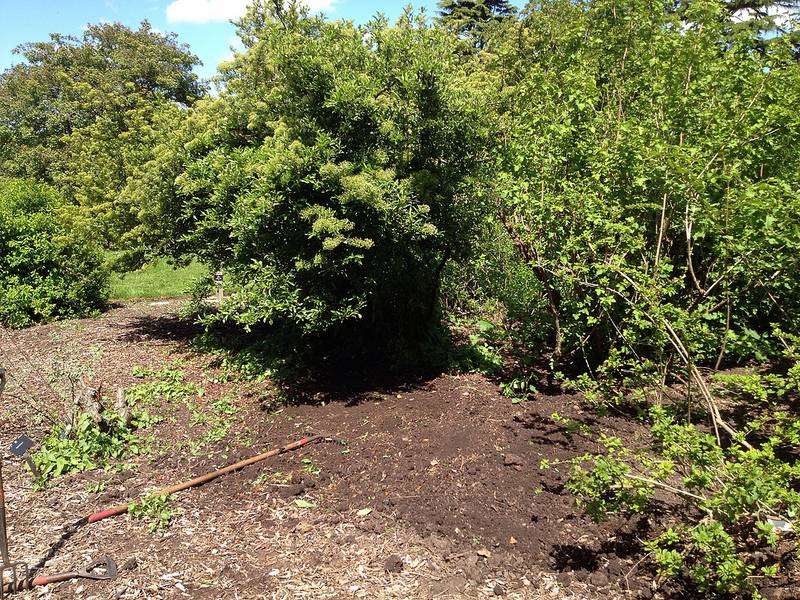 |
| … going… |
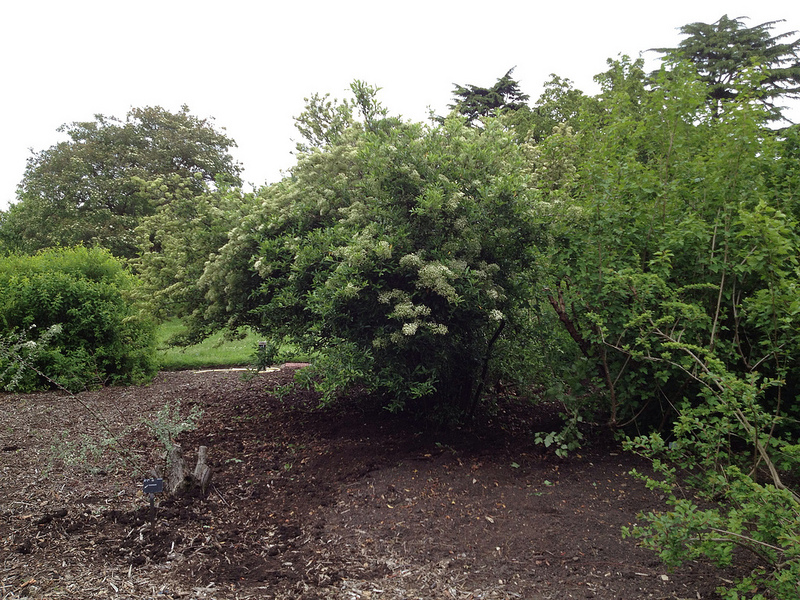 |
| … and gone! |
Now the bed is free from bindweed, clean and tidy, and the Pyracantha is competition free. What remains to do is wait and see.
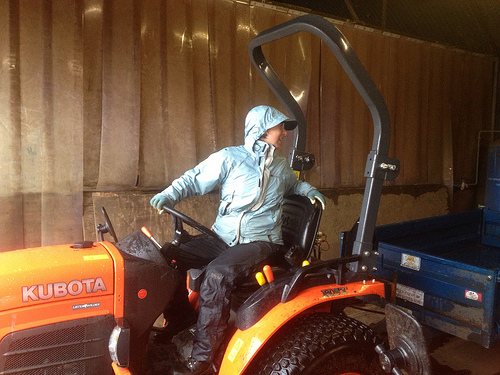
Look who’s driving a tractor! (Week 7, Friday)
And, finally, this was the day I had been waiting for for nearly 2 months: I was thought how to drive a tractor!
Despite sitting in a pool of water that the waterproofs did not manage to keep out, this was really really enjoyable and I was so impressed how maneuverable it is, much more agile than a car, and no comparison with a Gator which is rather stiff.
Without a trailer, it is dead easy to drive around. With a trailer, reversing is a bit more complicated, as you have to turn the wheel the opposite way to where you want the trailer to go – will need practice on that.
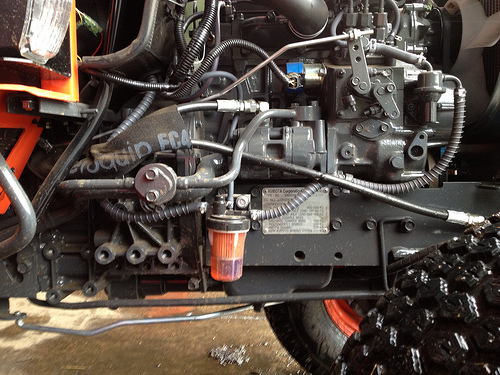 |
| Fuel filter |
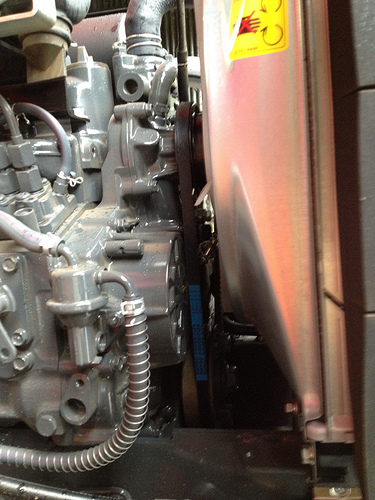 |
| Fan belt |
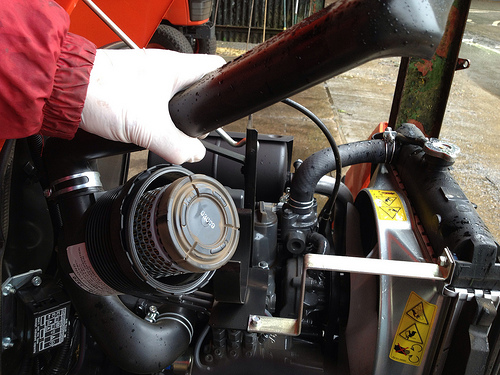 |
| Air cleaner |
To start with, I was run through some safety instructions and made aware of the 10 mph speed limit in the gardens, for the safety and comfort of visitors.
Then I got a quick look inside the bonnet (luckily we have a mechanic on site, so we have help at hand when needed, but I found the tractor manual online), before I was finally taught how to adjust the seating (if you are not sitting straight and square the engine turns off, for safety) and drive off:
- turning on the diesel engine
- turning up the revs
- using the range gear
- accelerating (speed control pedal forward) and reversing (speed control pedal backwards)
- using the brake pedal and handbreak.
- reversing to align to the trailer
- safely firming the trailer pin
- lifting trailer jack stand completely so it’s out of the way
- releasing brake
- attaching hydraulic pump
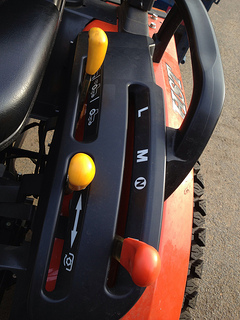 |
| Range gear |
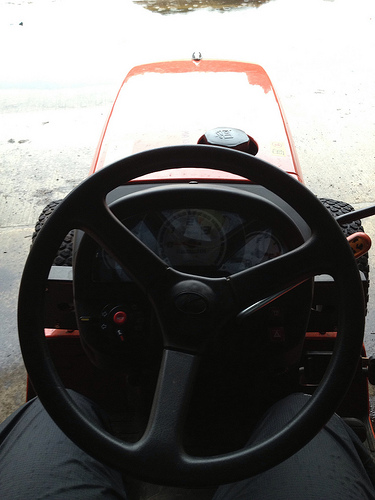 |
| Driving console |
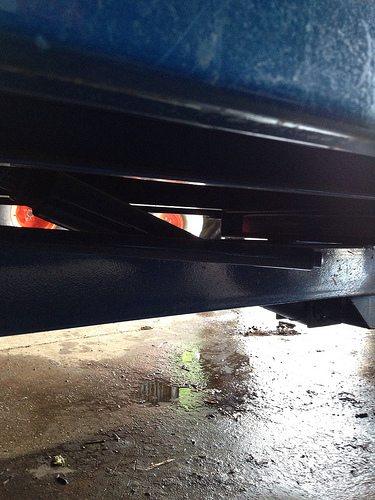 |
| Trailer brake |
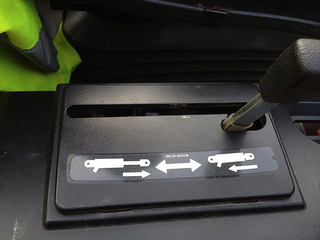 |
| Hydraulic pump lever |
Finally I was taught how to tip the trailer, and, the complicated stuff: how to reverse!
It was hard work, but at the end, both instructor and instructed seemed pleased.
About Me
 M.Paola, that’s me
I got my first allotment in the UK in 2007 and started growing my own food. Learning as I went along was not enough, so I studied horticulture. Faced with the horticultural warfare, I became a conscientious objector: I use no chemicals and support organic principles and regulations.
Brexit gave me a new life in the Netherlands, three new plots by a nature reserve and an MSc in sustainable food systems.
I write in my personal capacity and, as a language perfectionist and a non native speaker, I keep reviewing my entries’ text for clarity.
Some Rights Reserved

This work is licenced under a Creative Commons Licence.