Quite a few plants grow in a restricted space in greenhouses, so hygiene is particularly important to prevent and control the spread of pests and diseases.
In terms of prevention, clean tools and surfaces are very important. So pots are dipped into a sterilising solution and tools are cleaned with Hortisept, a persistent germicide active against bacteria, viruses and fungi.
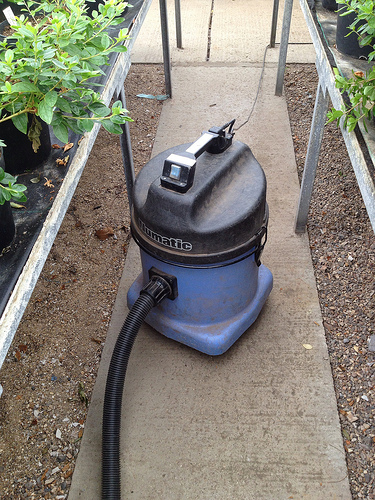
The greenhouse is hoovered clean of plant debris, including the benches, which I did today.
 |
| Bench after hoovering |
 |
| Bench before hoovering |
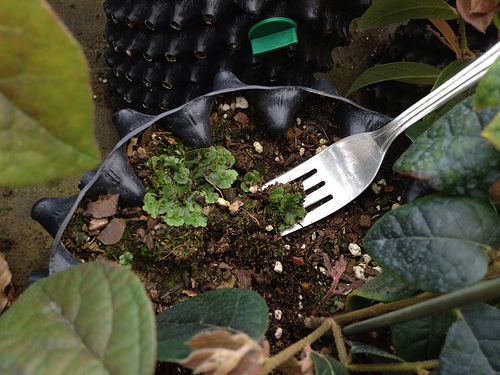
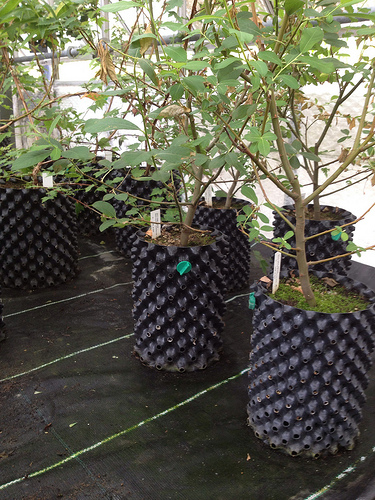
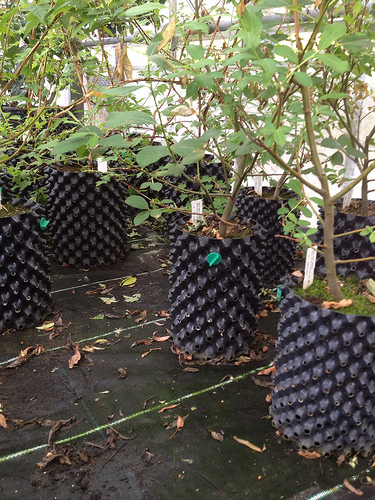
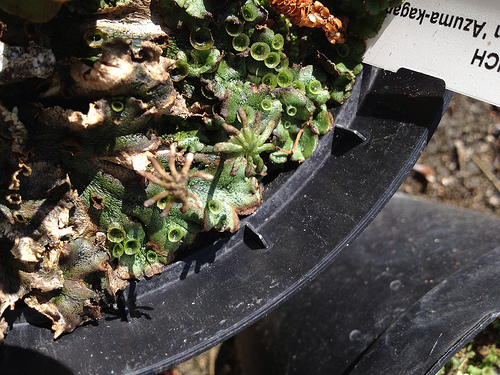
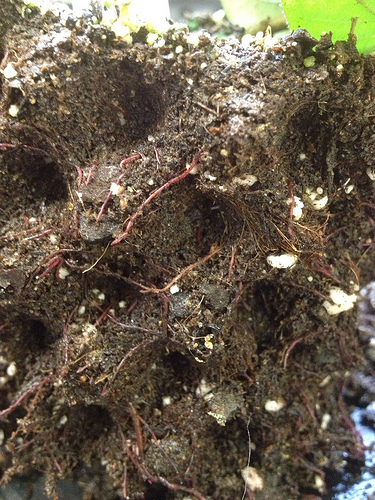
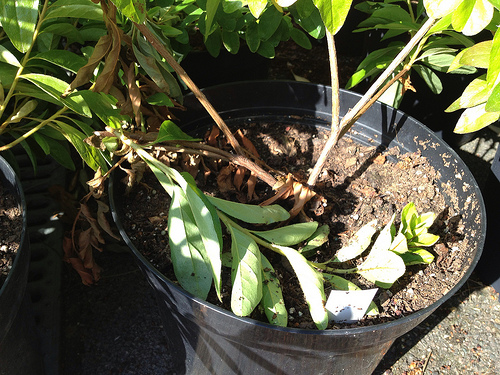
The pots in which the plants grow are also kept clean, by removing plant debris and any weeds, liverworts, mosses or algae that decide to take residence. In fact, although these last three groups do not have roots and do not strictly compete for nutrients with the plant, they are in the way of good maintenance. Availing myself of the latest technology, I used a kitchen fork to help me with the task.

In terms of pests and diseases, scouting for their appearance and monitoring spread is the best way to prevent them reaching unsustainable levels.
For this purpose, in the greenhouses we have plenty of butterwort (Pinguicola sp.), a carnivorous plant with sticky leaves, which is used to monitor the appearance of aphids, so as to release bio control at the right moment.
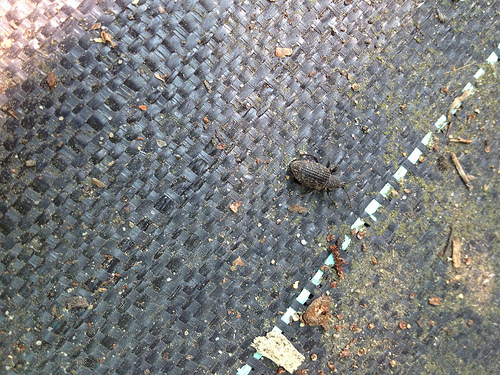 Today, when clearing debris from under the weaning pots outside, I found some vine weevils (Otiorhynchus sulcatus), so I alerted the greenhouse manager who is going to spread some more nematodes.
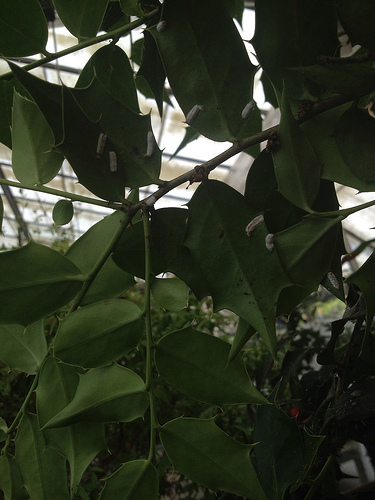
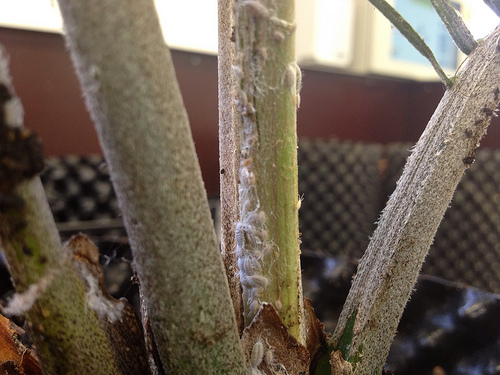
Inside, I encountered three pests so far:
- soft scales (Coccus hesperidum), which I was familiar with as they infected my Citrus at home a while ago, and which I was instructed to spray with insecticidal soap
- cushion scales (Pulvinaria floccifera), which were new to me, look like soft scale except when they lay eggs in sacs that appear on plants – holly in my case – as white cottony stripes (in fact they are also known as camellia cottony scales); they are most susceptible to insecticidal soap in the crawling stage
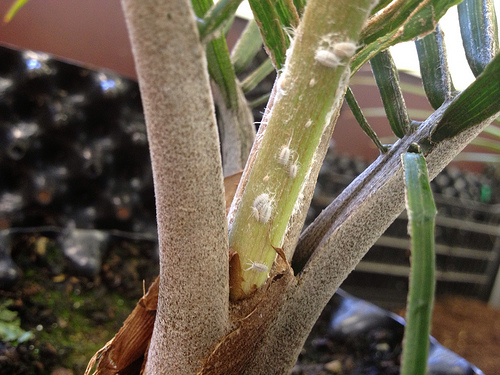
- mealybugs (Pseudococcus sp.). They nest in crevices in plants and are rather difficult to get rid of. They look like tiny, white woodlice with three tails, and cluster in masses, protected by waxy threads.
 |
| Individual mealybugs |
 |
| Cluster of mealybugs |
Mastering the art of potting on (Week 14, Tuesday)
I have been potting on plants for a few days now, and, as you usually do, the more you do something the more you see what’s wrong what you are doing, and get a better feeling of what you should do.
With air pots, I find there are two main tricky parts in potting on, and they are linked:
- pressing the soil well
- getting the level of potting right
If you do not press the compost well, you will have two issues: the superficial roots will come out at the surface when you water, but not only that, the compost level will fall below the rim margin and water will start pouring out from the holes at the end of the cones, instead of soaking through the compost itself. Which is also a problem if you do not get the level of potting right, and conversely, if you plant too high, water will run off from the top of the pot, with much the same result. So you have to have enough margin to fill with water so that it can soak through the soil, not too little (flows out from the top) or too much (flows out of the holes). I found mastering this particularly tricky, because we have different generations of pots and some have larger cones, some smaller ones, or they have two rows of cones for a rim instead of one.
Anyway, while trying to improve my potting on skills, I have also tried to speed up and while yesterday I managed to pot up 50 plants, today I managed 75!
 |
| Taking the potted on plants back to the benches |
 |
| The bench I am filling with the newly potted on plants |
I myself have mainly been potting on Euonymus cuttings, but also helped colleagues with the pretty plant in the Hamamelidaceae family, witch hazel Loropetalum chinenses f. rubrum ‘Blush’, which, besides pinkish leaves and stems, also has pink roots!
Auxins (Week 14, Monday)
I was mentioning the other day we used synthetic auxins as rooting powders, and today, walking about the greenhouse and the yard, I found more examples of auxins’ influence on plants, which I will share with you.
Auxins are one of the families of plant hormones, still rather elusive substances, synthesised in small quantitied by plants somewhere in their tissues (i.e. root tips) to send growth messages across to other tissues either locally or elsewhere .
Of these substances, auxins were the first to be discovered, the most common form they take in the family being IAA (indole-3-acetic-acid). Once they were discovered, we tried to replicate their effects, synthesising substances in the lab: those, together with the natural plant hormones, are collectively known as plant growth regulators.
The current hypothesis is that plant hormones are difficult to trace because they are active in such small quantities, and possibly different mixes of the same substances have different effects. If you read a range of books, they will all say slightly different things about plant hormones, but they generally agree that auxins:
- affect cell elongation in stem and roots, in particular, they are behind tropic responses. For example, take phototropism, the plant’s growth response to light. Positive phototropic plants grow towards the light (i.e. Kalanchoe stems bend towards the light: mind where you put your plant! Tropic responses are irreversible). Negative phototropic plants grow away from the light (i.e ivy-leafed toadflax – Linaria cymbalaria – which grows on walls, has stems that, after flowering, bend away from the light to direct seed pods towards wall crevices, where the seeds will get a chance to survive).
The way auxins work is by accumulating in the shady side, stimulating elongation of the cells, so that they get longer than the ones in the sun, and as a result the stem bends away from it.
Today I was watering a Rhododendron and noticed a broken stem. At first I thought I might have broken it, and was thinking how clumsy of me… when I noticed the stem’s tip had moved upwards towards the light: a phototropic response which would have taken some time to take place… so not my fault!
- Auxins are mainly produced in the stem and root tips and move directionally (top to bottom and bottom to top respectively). When produced in the stem tip, they help maintain apical dominance, which means that the uppermost bud grows tall and the other ones beneath it, in the leaf axils, do not grow. Once the uppermost bud is removed, the other buds start growing. Because of that, pruning generally makes plants bushier. I noticed that quite strikingly in a Euonymus cutting.

Apical dominance suppresses
the growth of lateral buds
Once the apical bud is removed,
buds in the axils start to grow - Auxins promote root initiation, that is why synthetic auxins (for example α-Naphthalene acetic acid or NAA and IBA or Indole-3-butyric acid), or willow water, are used to help rooting.
- Because of the way they make cell grow, some synthetic auxins (for example 2,4-Dichlorophenoxyacetic acid or 2,4-D for short and dicamba – 2-Methoxy-3,6-dichlorobenzoic acid) are used as broad-leaf herbicides: the auxins cause the plant to grow abnormally and consequently die. Sigh.
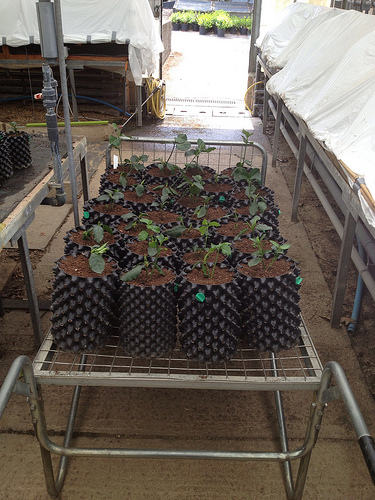
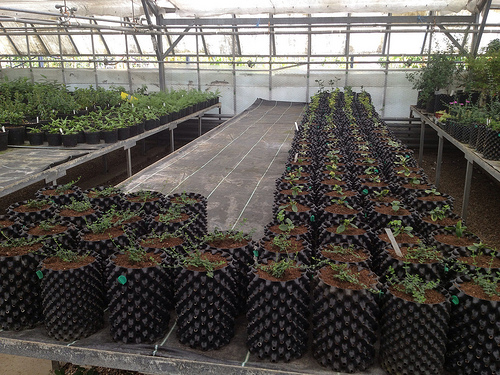
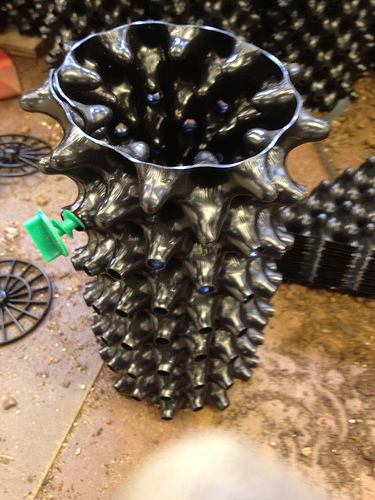
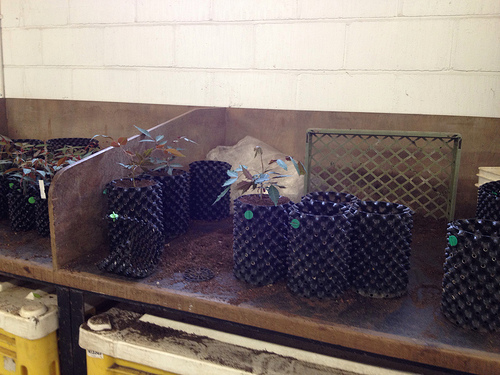
Air Pots (Week 13, Friday)
The polytunnel needed a tidy up, to make room for more plants, so we moved a few pots around.
We use regular plastic and terracotta pots, but more and more we use air-pots, which have some advantages over the usual pots, mainly:
- they don’t have a flat, circular surface, against which the roots start circling and become pot-bound; they have the same in-out structure of egg cartons;
- where the pot walls are sticking out, the cones end in a hole; roots are funnelled into these outward cones and reach the holes where they get air-pruned: they encounter air and die back, so the plant sends out new roots in response.
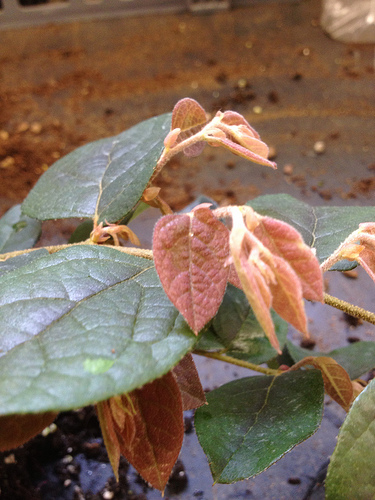
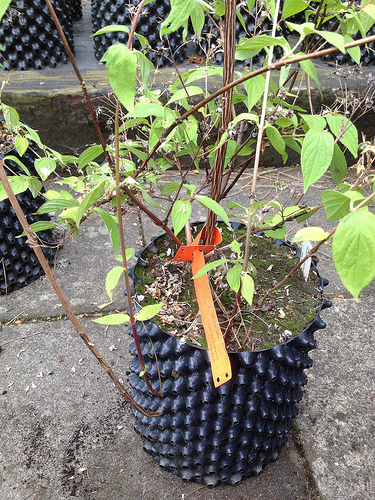 Fascinating things as they are, however, plants sometimes respond to air pruning by sending shoots out of the holes, like the Deutzia in this picture.
Another advantage of air pots is they unroll open, so they are quite convenient to pot on plants without disturbing the roots.


Also, they can be rolled closed again, cleaned and reused, which we do, after keeping them a few hours in a sterilising solution.
We also got a chance to make some new pots from scratch, as a new batch arrived for us to trial. It’s a new size, tall and narrow, meant to contain rootstock plants.
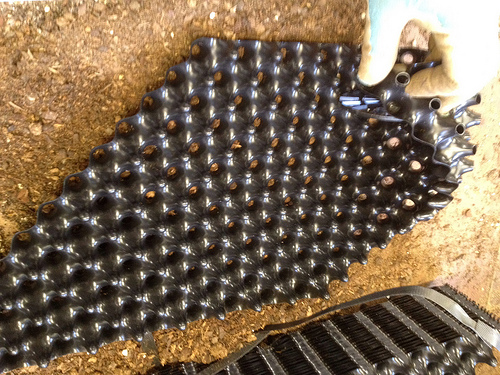
In the pictures below you can see how it is done step by step. The pots come in sheets, which I guess are easier to transport. You can tell what the top is because the first two rows of cones do not have holes, so they work as a water-retaining rim, that allows you to water the plant (otherwise the water would flow out of the holes sideways instead of downwards towards the roots)
There is a bottom disc, which is designed as a grid so that the roots grow downwards and do not get stuck inside the pot, and a little cone at the centre directs them outwards. You place the bottom some 3 rows up, so that roots will never sit in water and rot.
Then you roll the pot closed and firm it with a screw handle. Job done!
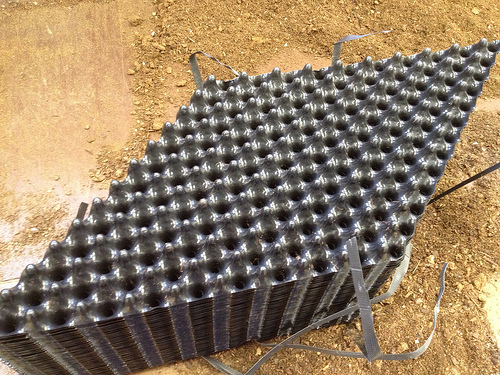 |
| Unpacking the pots |
 |
| Bottoms 3 rows up |
 |
| Roll the pot |
 |
| Screw close |
Mixing compost and potting on (Week 13, Thursday)
I learned how to mix compost today, that we then used for potting on. It was fun!
We get our compost components in bulk basic mixes in massive canvas bags. Depending on the use to which the compost will be put to, we will then mix those basic mixes together to give the desired texture: shovel and buckets at the ready….
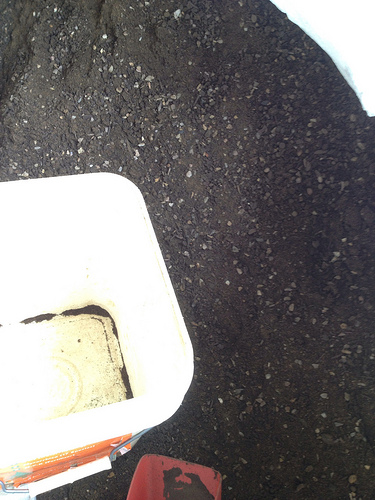
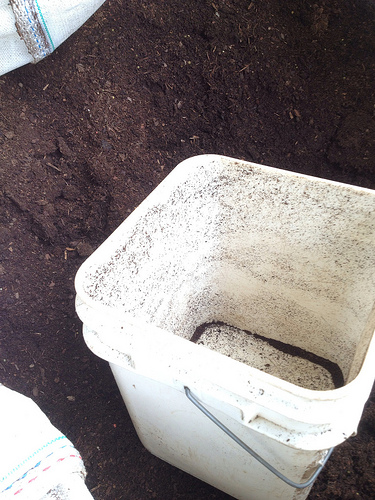
The compost we were making today was for general potting on and had to be made up of 3 parts of a coir + woodchips + controlled-release fertilizer mix to 1 part of a sand + gravel mix.
Add an electric mixer, like the ones builders use… et voila…
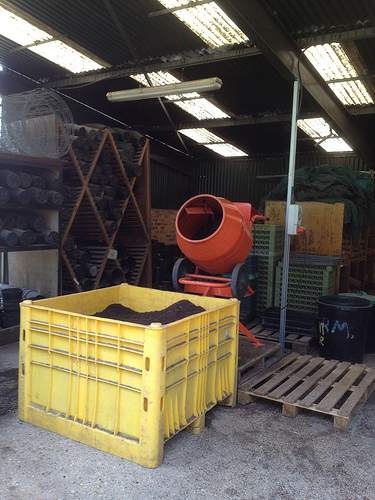 … our potting on compost is ready for the bench.
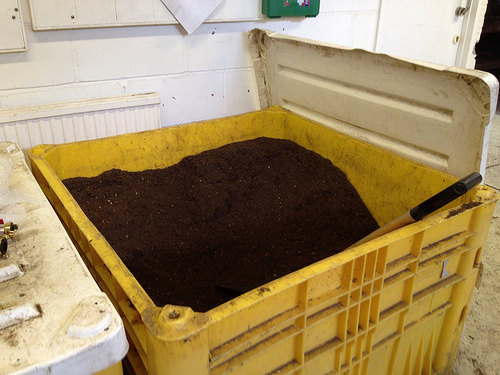
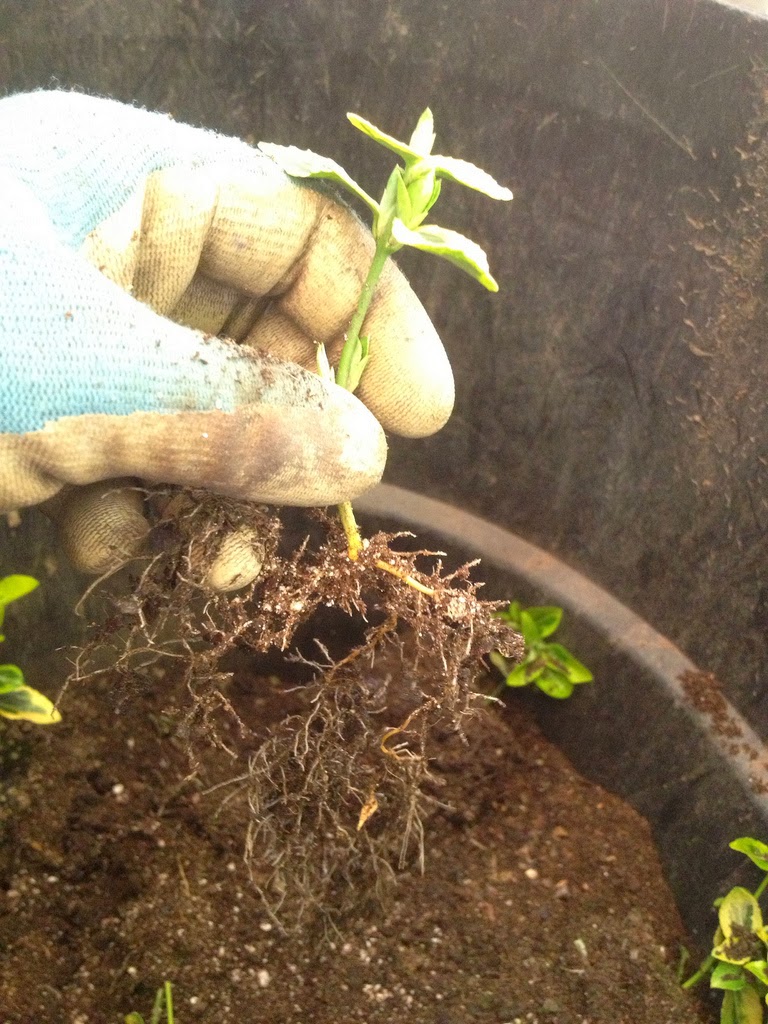
It is interesting to be able to observe plants this close when you pot them on, but potting is not an easy task to get right, especially when you are relative new to it (of course I have done it for my veggies, but here it is serious business).
You have to press the compost well at the bottom, otherwise the level will go down when watering and the plant will sink, so there will be less room for the roots to grow into. Also, if you don’t press it well around the plant, watering will make it unstable and it will get dislodged.
You also have to be careful that the level of the soil is at the root flare, so that you do not plant too deep.
When you are finished, the plant is ready for a good soak.
The nursery manages the stock so that they start with as many cuttings/seed as possible depending on:
- number of required plants needed at the end;
- available material;
- how easy the plants is to propagate;
Then, at each of the successive rounds of potting on they will keep a few less, choosing the best ones: the most vigorous and healthy, with a good root system.
In our case, let’s say there are 2 rounds of potting on: into mid-size pots and then on into large pots. 25 plants will be kept in the first round, and then 15 only will go into the large pots, to be weaned out of the nursery.
I have always found it hard to get rid of even the weakest seedling, because I am always fascinated by the growing process, and that “miracle” that a plant emerging from a seed is, or a cutting that sends out roots and lives on… but you have to be ruthless if you want flourishing plants, the best genetic material, with the best chances of survival. That is, after all, what happens in nature.
I am definitely getting better at it, even if I’m still making a conscious effort every time…
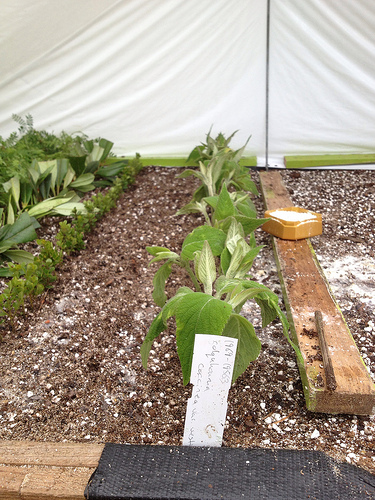
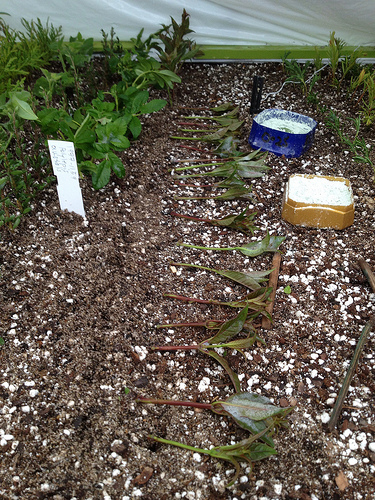
Planting out in the nursery beds (Week 13, Wednesday)
Today we planted out a few small trees and shrubs in the nursery beds, where they will grow on for some three years before they are ready for their final destination. They will be watered with a drip line and fed once a month from March to October.
For this task, I was joined again by the work experience lad, in his second week with us.

First of all, we had to mark a straight line 1.5 m away from the last row of plants in the ground. The line has red markers every 25 cm, so it’s quite convenient for the job.
 Then, we planted all the trees alongside the line, 1.5 m away from each other. We dig a hole so the plant would be planted at the same level in the ground that it was in the pot, at the root flare (if you plant it too deep, the stem might rot or start suckering). Then we filled back the hole and heeled the plants in, so they would not rock in the wind. You can easily feel whether a plant is well planted, by trying to wiggle it a little bit.

- they will not rock in the wind, causing the roots to become dislodged;
- they grow straight.
 With a tapener gun (a great device that catches the tape’s end at a shallow press of the handle, so that you can pull it to the desired length, and then staple it together by pressing the handles together hard) the stem is tied to the cane, quite tight. The right way to do it is by pulling the tape from the stem side towards the cane, so that you do not catch the stem in the stapler by mistake.


Day tree at the nursery over, and the plants ready for a good soak.
Cuttings for the Temperate House (Week 13, Tuesday)
The Temperate House at Kew is closing on the 4th of August for restoration, and will stay closed for 5 years. On account of that, some of the plants will be propagated to be ready when the House re-opens, and the arboretum nursery is taking care of part of the collection.
So today I had an opportunity to take softwood and semi-ripe, tip nodal cuttings from material the Temperate House sent us, which was lucky, because most of the propagation in the nursery is done in autumn and winter, when plants are dormant.
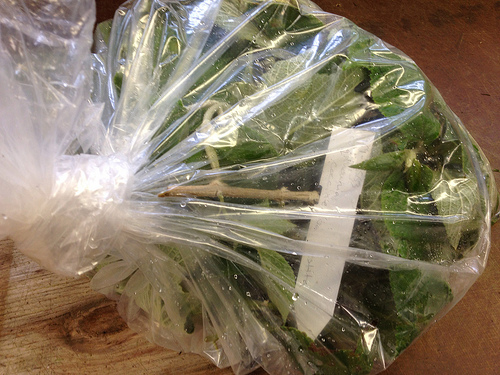
The material was collected by the Temperate House staff in the morning, before it was too hot, and put into sealed plastic bags to conserve moisture (so the cuttings did not wilt through transpiration) while being delivered to us.
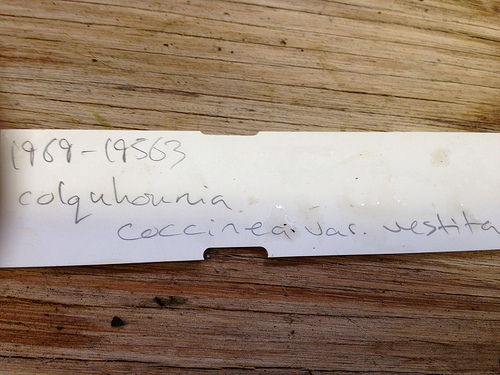 As soon as we received them, one by one we dealt with the bags of material, taking it out on our potting benches and selecting the best stems to cut. All the material was labelled with the plant name and its accession number.
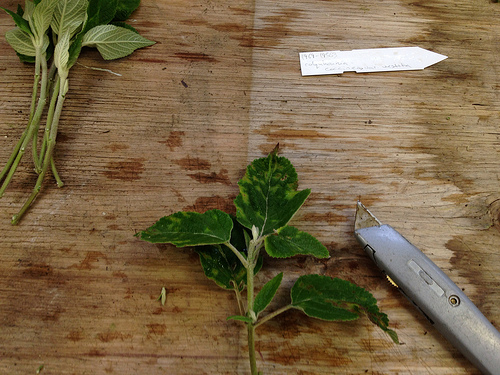 With a sharp blade, we mad a flat cut about 15 cm from the tip just under a suitable node (mostly to include some semi-ripe wood). Then pulled (or cut close to the stem, depending whether they came off nicely or peeled off some of the epidermis with them) all the leaves at the bottom. You usually leave only four at the top, so that photosynthesis does still take place and the cutting gets its food while putting out adventitious roots.
If you are restricted to material with any flowering tips on them (ideally you would get a non-flowering stem), the flower buds are best removed too, as they divert the plant energy from root formation (by releasing hormones).
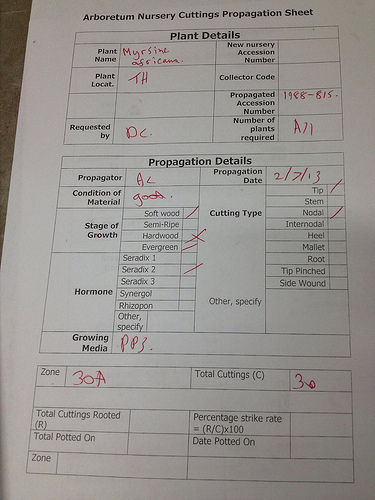 The cuttings were briefly dipped into an insecticidal soap solution to kill any pests, and they were thus ready for planting on the rooting benches. First, however, a propagation sheet needed to be compiled for recording purposes and to keep track of how successful the propagation has been. The form included:
- name of the commissioning entity in Kew,
- name of the propagator,
- name, accession number and conditions of the plant material,
- number and type of cuttings,
- treatment information (with rooting hormones, which have as active ingredients synthetic auxins, and often fungicide added to them, to protect the wound while it heals)
- composition of the rooting compost and location in the greenhouses.
Once the forms were filled in, and all leftover material disposed of for composting, we proceeded to the benches, where we planted the cuttings in rows, after dipping them in the hormone rooting powder.
As the cuttings are different sizes and numbers, depending on leaves and nodes’s structure and the amount of available material, we soon found out that it is quicker to lay them down in advance to determine spacing (not much is needed, by the way: I used to keep more at home).
 The bench is covered by a polythene tent to keep the moisture in and there is a heating pipe under the bed for bottom heat, which helps tissue to heal and roots to come out. The rule, as I studied it, is “warm bottoms and cold tops”, so that the plant is encouraged to root before sending out more shoots, which (by requiring extra water and nutrients take-up) might put too much stress on the weak rooting system while it develops.
Day two at the nursery gone in a whiff.
Just a NOTE, for those of you interested in organic: hormone rooting powders/solutions are not allowed as they contain synthetic substances and fungicides. I hear that dipping cuttings in willow tea/water (water in which willow bark/young stems have been soaked) might help, as willow – an easily rooted plant – is rich in natural auxins. I have not used it but know someone that does, if you are interested in more.
About Me
 M.Paola, that’s me
I got my first allotment in the UK in 2007 and started growing my own food. Learning as I went along was not enough, so I studied horticulture. Faced with the horticultural warfare, I became a conscientious objector: I use no chemicals and support organic principles and regulations.
Brexit gave me a new life in the Netherlands, three new plots by a nature reserve and an MSc in sustainable food systems.
I write in my personal capacity and, as a language perfectionist and a non native speaker, I keep reviewing my entries’ text for clarity.
Some Rights Reserved

This work is licenced under a Creative Commons Licence.