 |
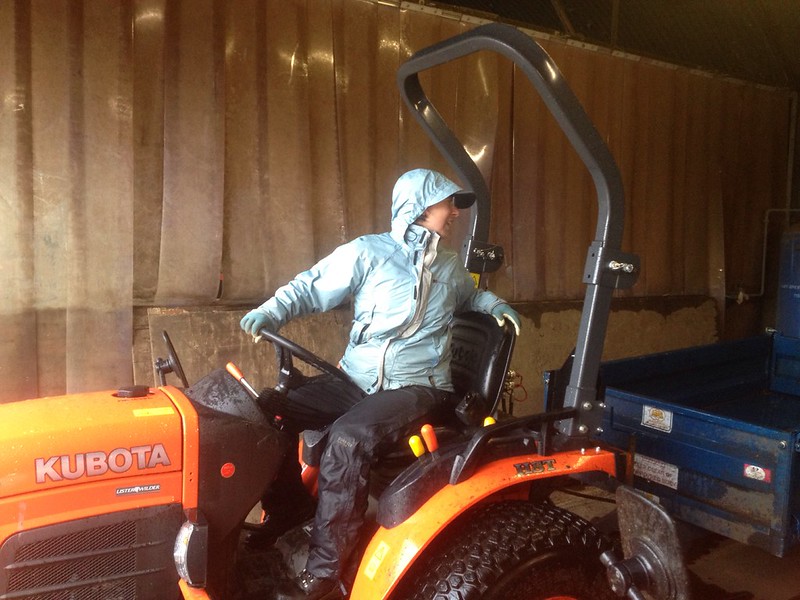
| My first tractor and trailer |
I first drove a tractor, with a trailer, on 24th May 2013. And, for some curious reason, I really really loved it.
Since then, I have driven two other tractors: a middle sized one with trailer, and (quite a lot of) a ride-on mower.
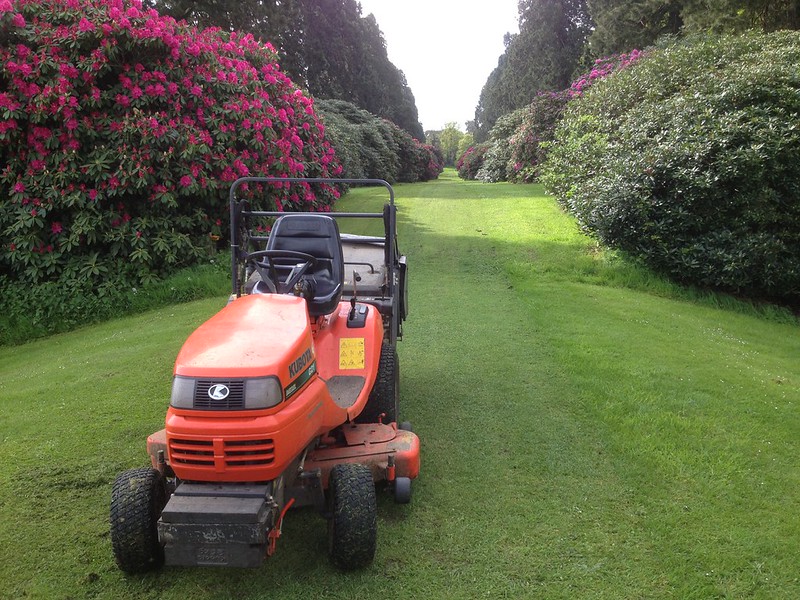 |
| Compact Kubota with mowing deck |
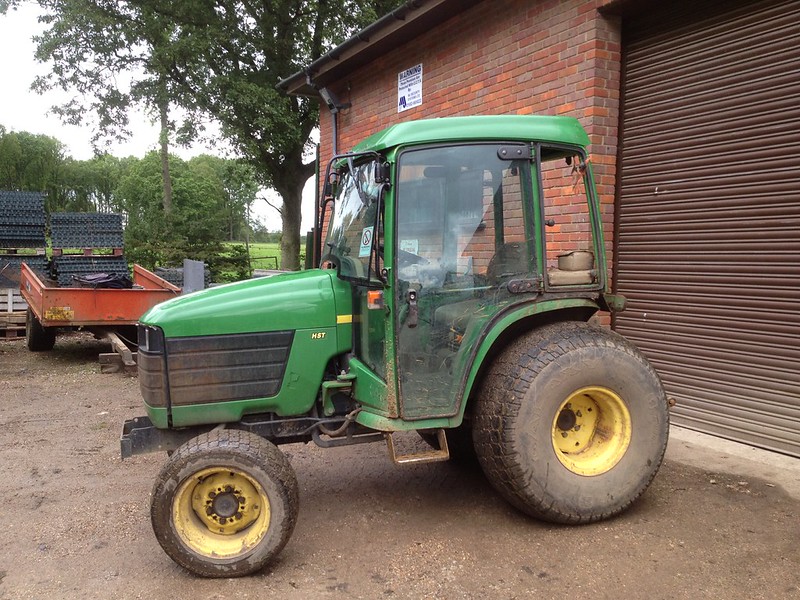 |
| Old mid-size agricultural John Deere |
Over the last 3 days (1.5 years from first mounting on a tractor) I have – with much delight – attended a course leading to a NPTC qualification in “Agricultural Tractor Driving & Related Operations”.
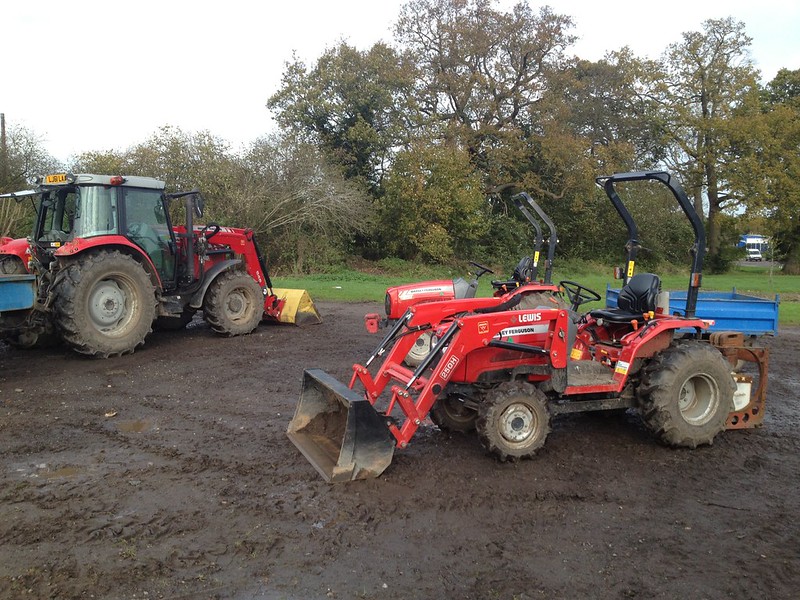 |
| Agricultural tractor; manual gear & hydrostatic compact tractors |
There would be so much to write about what I learnt, by working with 3 different tractors at the same time: so what do tractors have in common?
- Safe practices
- Forward movement
- Fore-end implements
- Mounted attachments
Safe practices
These can be summarised as:
- know your tractor and implements;
- know the area you are working in;
- maintain your machinery (i.e. greasing) & perform regular safety checks (fluids, external appearance, air intake, wheels & bolts, belts etc);
- always use a safe stop and make implements safe (when the tractor is stationary and off, lower them to the ground; when working on them, support any hydraulic or unstable equipment with ram stops, axel stands etc);
- never be around a moving tractor or in between tractor and implements; make sure nobody else is either;
- anything that rotates, is hot or belt-driven is particularly dangerous: guards serve an important function;
- the tractor is more stable the lowest you keep your implements and loads.
Agricultural and horticultural work causes some 50 deaths a year in the UK, so it’s rather dangerous and the HSE has issued several guidelines, among them one on working with tractors and on working with machinery and several pieces of legislation apply:
- COSHH, Noise at Work (protection over 85 dB), Vibration at Work, Manual Handling, PPE, RIDDOR, First Aid at Work – in terms of health
- H&S at Work (safety is everyone’s job), Management of H&S at Work (risk assessments), PUWER (regular checks & maintenance), LOLER (fore-end loaders and lifting attachments, not the three point linkage though), Corporate Homicide & Manslaughter Act – in terms of safety
- and, of course, the Countryside and Wildlife Act (avoid disturbance to wildlife).
Forward movement
Orange is the colour (or at least there is an attempt to standardise forward movement levers and buttons on tractors).
Forward movement is determined by at least four (not always separate) controls, once you have started the engine (remember tractors are diesel engines so they have cold start key positions too and manual gear ones need the clutch pressed down to start):
-
hand throttle, controls the power of the engine in the form of revolutions, which sometimes
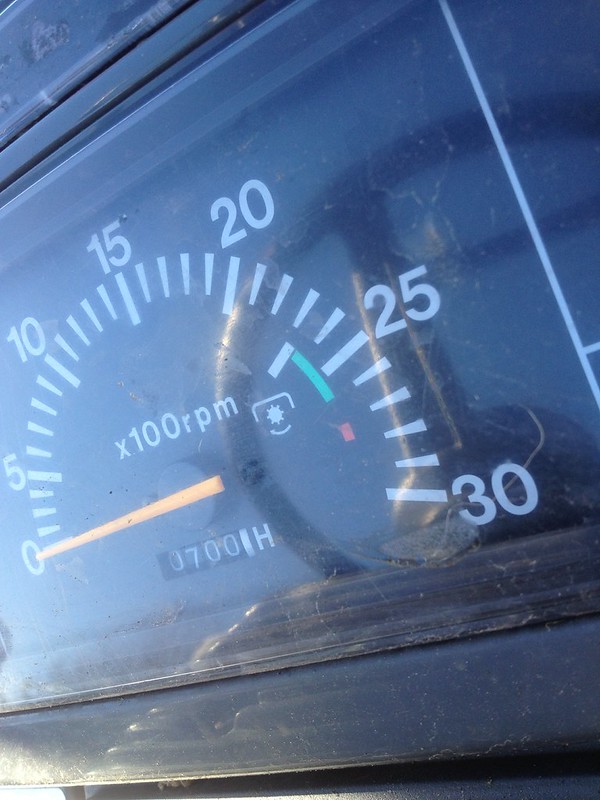
need to be fixed to use implements; it is linked to the controls’ panel tachometer where you can monitor the rpms. In the tractor we used, implements on a 540 PTO shaft needed 2300 rpms to work; -
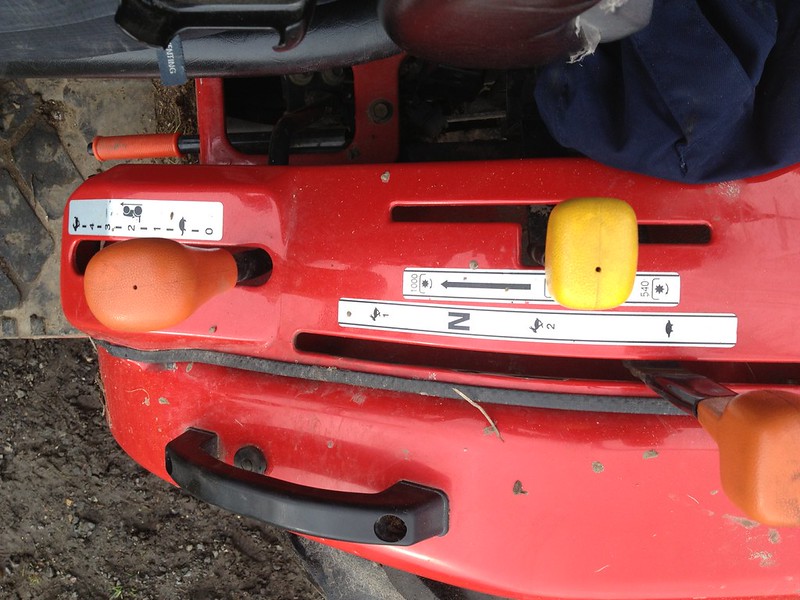 gear range: usually marked as N (for neutral), tortoise and hare(s), it set the overall engine speed;
-
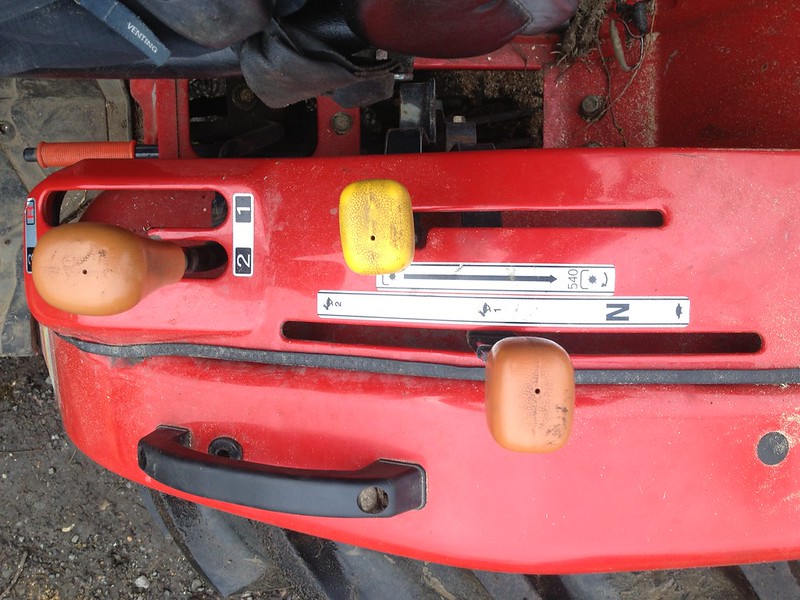 gears (and clutch): allow a further layer of detailing the engine speed, forward and reverse (the
big tractor we used had A-D 1-4 combination of gears and a lever to choose between forward and reverse movement; the clutch was not needed to change gear but was essential for starting and braking); my favourite tractors are the hydrostatic ones (automatic) that do not have gears or clutch, but an accelerator pedal for forward movement and one for reversing (they may have cruise control, as in the picture above); -
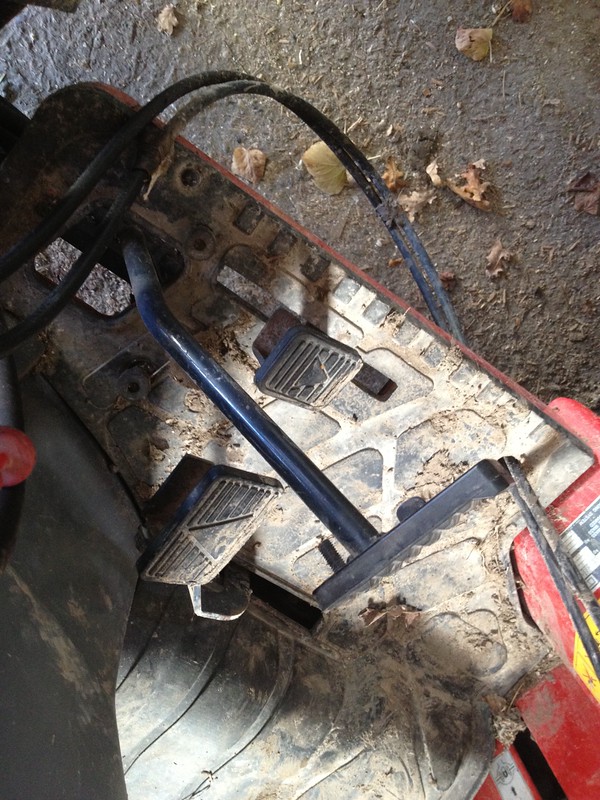 accelerator pedal (sometimes one for forward movement and one for reversing; or the same
pedal pushed forward or backward with the heel to reverse).
Of course brakes come in under forward movement: when a clutch is fitted, it has to be used together with the braking pedal. And of course the parking break needs always to be used in a safe stop.
Agricultural tractors often have extra features that allow for nimbler and safer movement of the wheels:
-
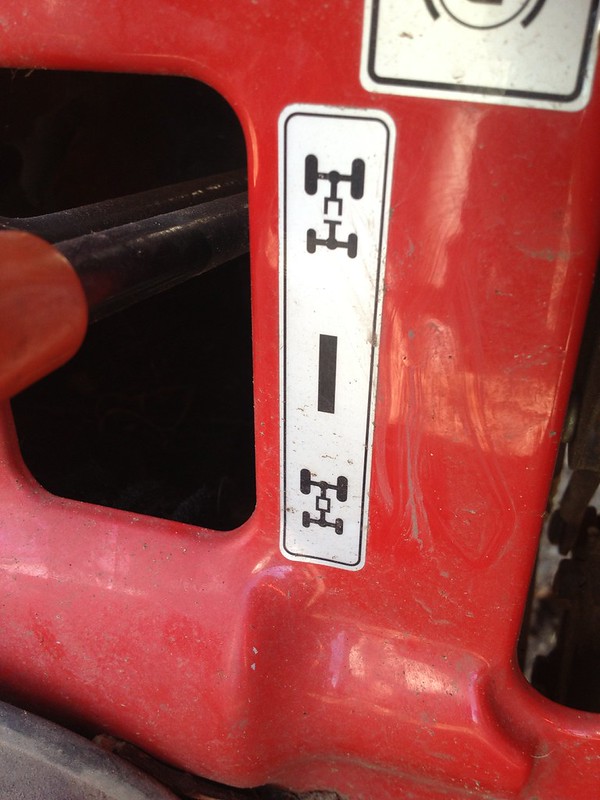 4 wheel drive, to be engaged only on uneven and steep ground rather than on hard surfaces, it gives grip to the front wheels (in addition to the rear wheels that pushes forward);
-
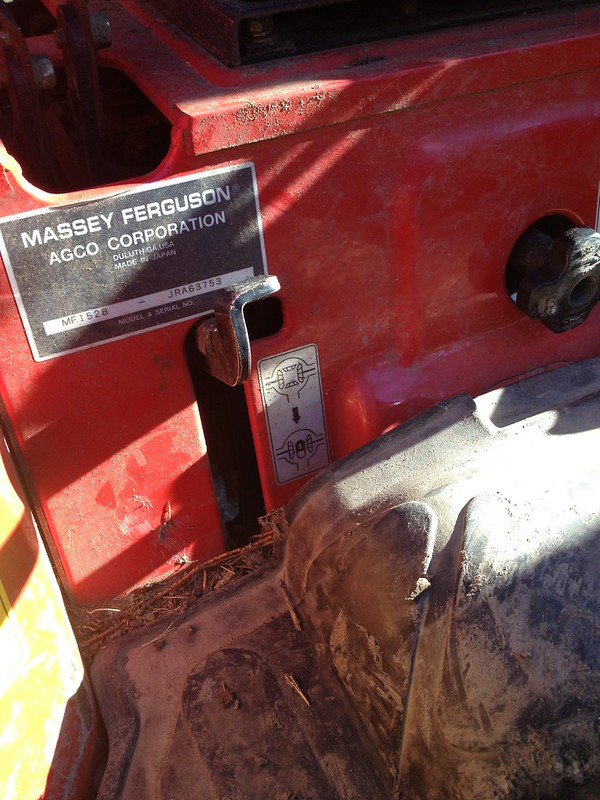 differential lock: it engages both rear wheels in traction, to be used when badly stuck, it is in the way of turning (as that is what the differential is for);
-
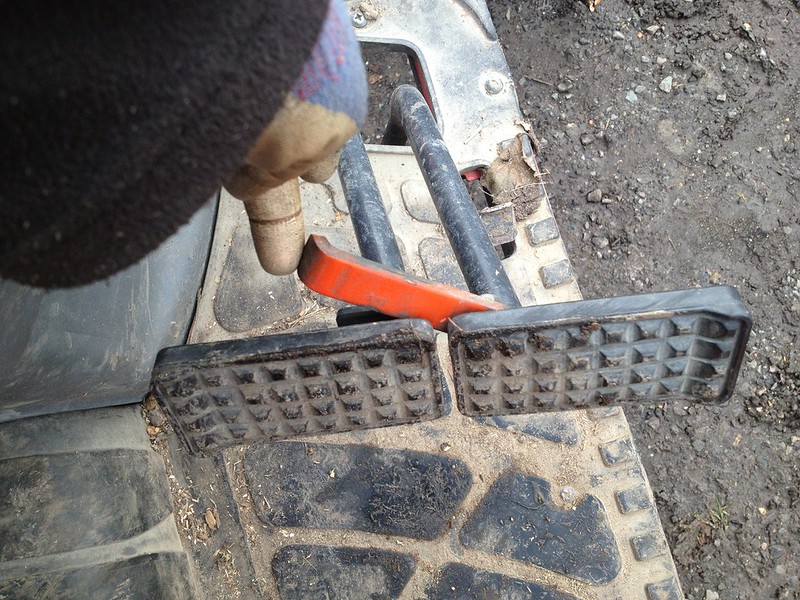 independent breaks allow the operator to break on a single rear wheel at a time to perform very
tight turnings. However, pedals should always be locked together when such feature is not needed, and breaks should be tested regularly to check they break in a straight line (as using them separately causes the wheels to wear out at different rates)
Fore-end loaders
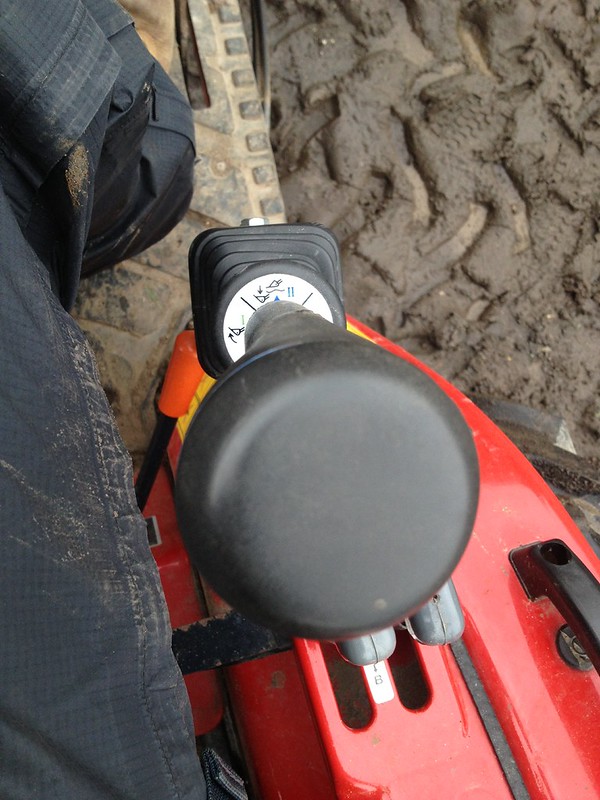
Fore-end loaders are covered by the LOLER regulations and are manoeuvred with a joystick with the following functionalities:
– 12 o’clock position: arm down
– 6 o’clock position: arm up
– 9 o’clock position: arm curling upwards
– 3 o’clock position: tipping
Mounting equipment on the loader arm is quite straightforward, once you learn how. I filmed a little video while we were practising with a bucket: aligning the arm with it, hooking it up, then curling the arm to swing it into position.
In the small tractor, one would need to lock the bucket in place manually (which requires a safe stop), to complete the procedure, while, in the bigger one, it would lock itself automatically in place. In both cases, the lock needed manual undoing to release the bucket.
Mounted attachments
I had previous experience of mounted attachments: hydraulically powered ones, both towed (trailers with hydraulic tipping) and hitched (a hydraulic grass collector), and a PTO-powered mowing deck mounted underneath a tractor, but never of rear-mounted and PTO-driven implements.
A PTO (Power Take-Off) – the shaft that distributes power from the engine to the attached implements and sticks out at the back of the tractor where attachments can make use of it – is one of the most dangerous part of a tractor. It can turn at 540 rpms (6 splines) or 1000 rpms (21 splines), depending on the tractor set up, but in either case it can cause serious harm (so much so it deserved a specific HSE leaflet) so it needs to be protected with a guard, like the other rotating parts in the tractor. It is activated by levers/buttons: yellow is their colour and the clutch (if fitted) is involved.
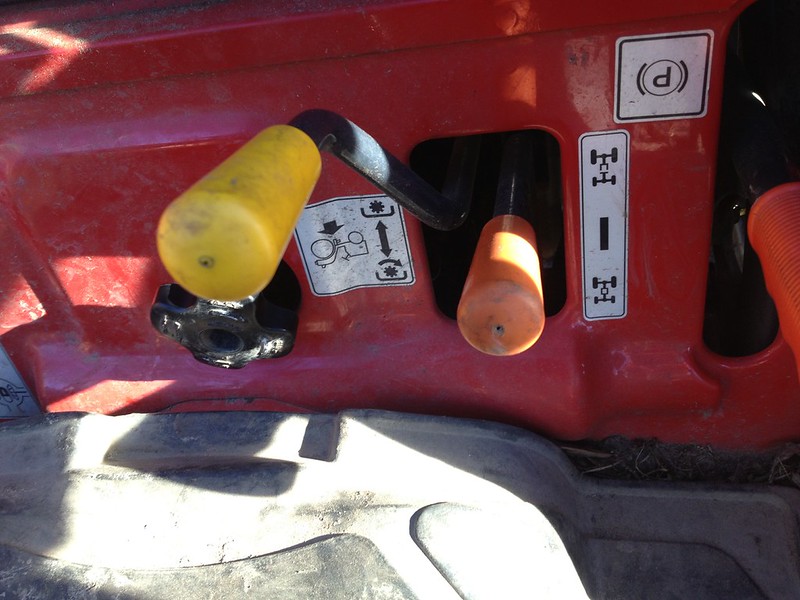 |
| Handle to adjust hydraulic response (left) |
Implements that get powered by the PTO are usually mounted on the 3-point linkage for safety and traction and the response of the hydraulic arms can be adjusted to cope with differing weights (position control); however, the weight of the implement needs to be appropriate for the tractor not to roll over (with or without ballast) and for the lifting arms to support: the tractor we used was fitted with category 1 linkage balls so the implement needed category 1 hitch pins, which are only 22 mm in diameter and therefore can only support a certain weight. Category 2 pins are 25 mm in diameter and there is also a category 3.
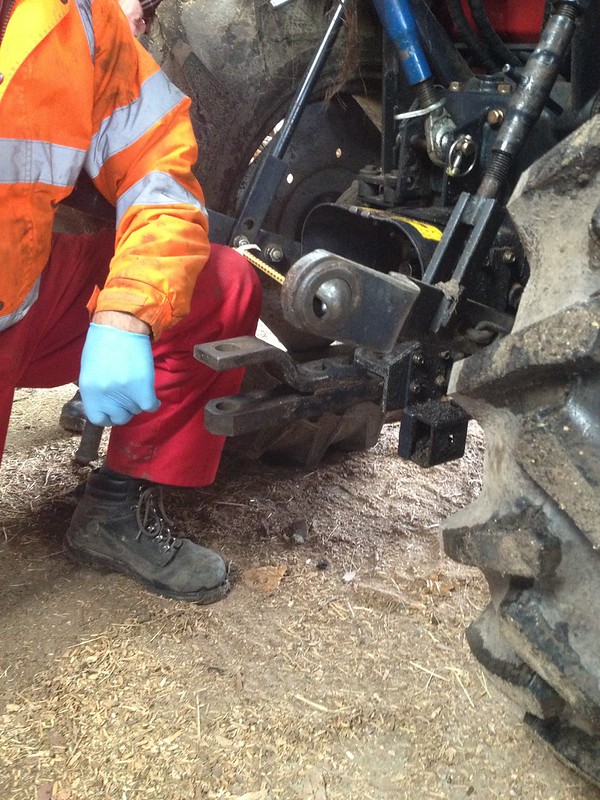 |
| 3 point linkage and drawbar |
Depending on the hitched implement, one may or may not have to remove the drawbar to avoid fouling the PTO shaft or other parts of the implement. In the case of towed implements that use the PTO shaft, one has to make sure the drawbar or pin do not interfere with it.
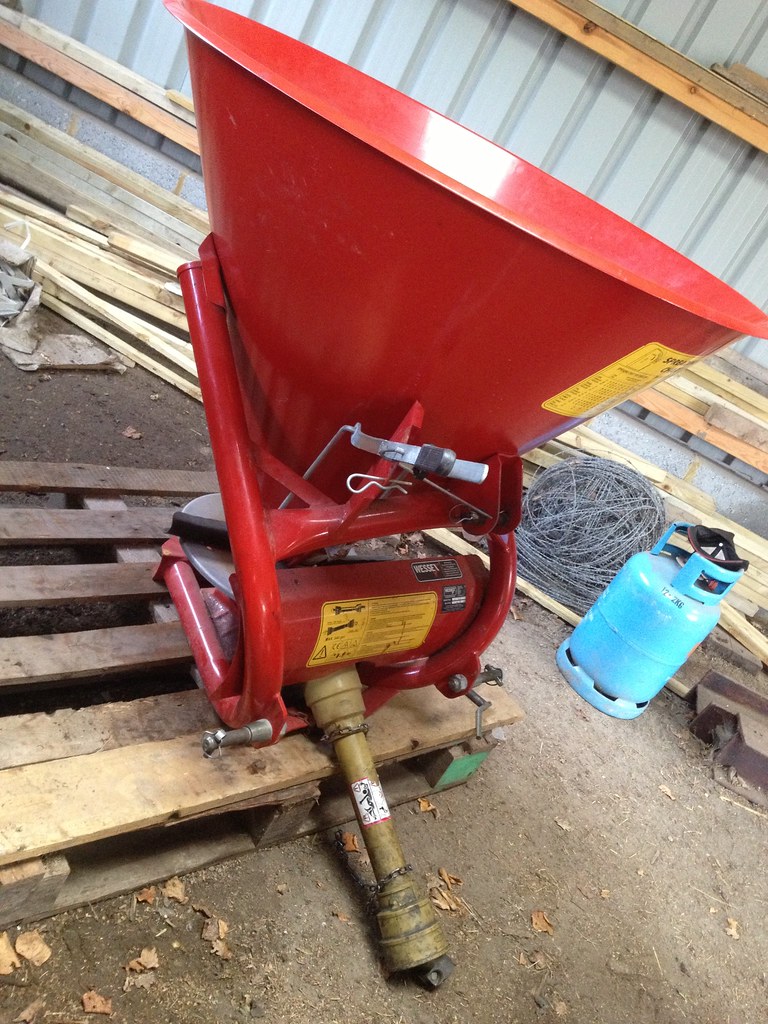
On one of the tractors we used, ballast was hitched on the back to counterbalance the fore-end loader, but it did not interfere with the drawbar so the latter was left in. But when we practice mounting the fertiliser spreader, we had to remove the drawbar as the first thing.
Then we proceeded as follows:
 |
|
| Fertiliser spreader on the ground | |
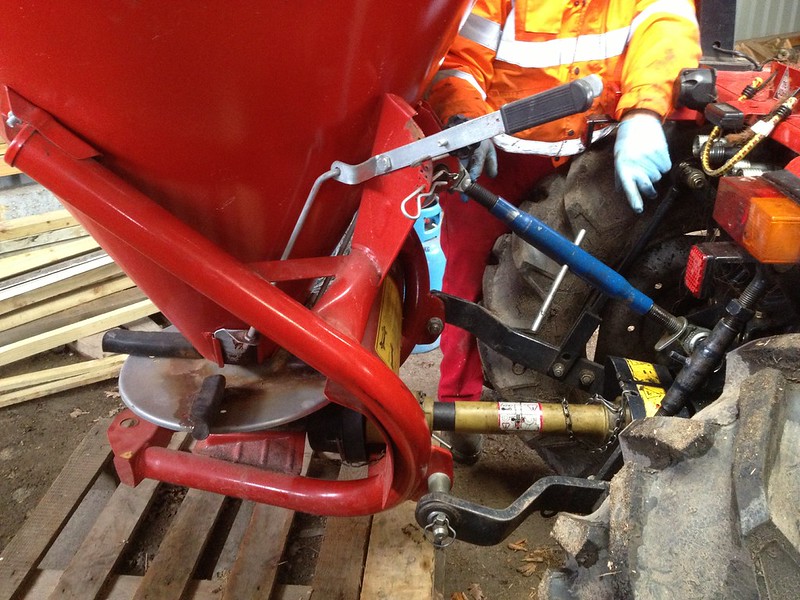
- reversing the tractor to the implement;
- lowering the hydraulic lower links;
- attaching the implement to the fixed link by way of a lynchpin;
- attaching the implement to the adjustable lower link by way of a lynchpin;
- attaching and fixing the implement rotating shaft and guard to the PTO with a pin and restraining device (chain), to avoid that the guard rotates with the shaft;
- attaching the top link to the implement;
- raising the lifting arms so that the implement shaft was on a straight line with the PTO for optimal use of power;
- adjusting the top link so the implement was parallel to the ground (even thread uncovered, locked);
- tightening the adjustable stabilisers so that the implement did not sway side to side;
 |
| Fertiliser spreader mounted |
Once the implement was up, we tested it would work:
It is of course dismounted by following the same procedure, in the inverse order.
Some modern tractors, especially the bigger ones, have sensors on the top link for a feature called “draft control”: this applies to soil engaging implements, and is designed to adapt the depth of the tool around obstacles so the implement is not damaged or the tractor is not jackknifed. If there is no draft control, one can only use shallow soil engaging implements.
Oh well, now I just have to put all of the above into practice in my exam… wish me good luck!
Two women and a Cottage Garden
I was fortunate enough to have our intern working with me today again on the Cottage Garden, so the two of us managed to go through a lot of weeding and we took up two bigger tasks that had revealed themselves by spending more time in the area: tender Pelargonium needed lifting and the existing patch of raspberries (Rubus idaeus) considerable downsizing (and possibly moving).
As this time of the year is just late for propagation, we set to work on the numerous specimen of Pelargonium without delay, even if some of them were still trying to flower. All the tender Pelargonium planted in the area (and some of the hardy ones too) have scented foliage, from citrussy to rose scented through a minty aroma: quite a riot of scent, it was, digging them out!
We got cultivars:
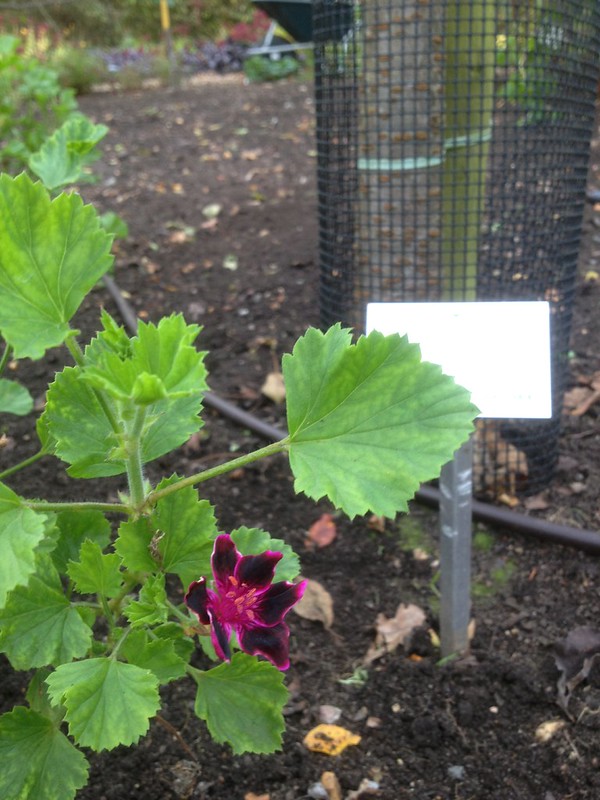
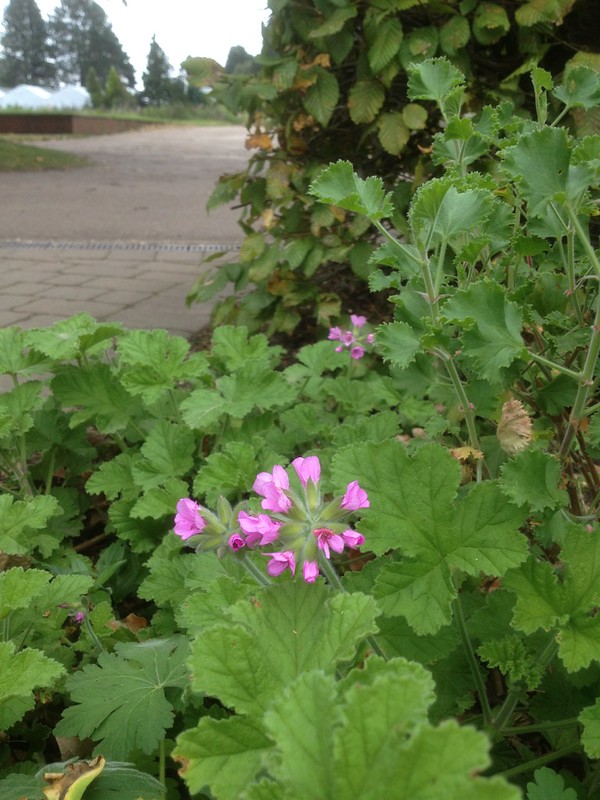
- ‘Citronella’
- ‘Attar of Roses’
- ‘Lady Plymouth’
- ‘Blandfordianum’
- ‘Frensham’
- ‘Sweet Mimosa’
- ‘Lord Bude’
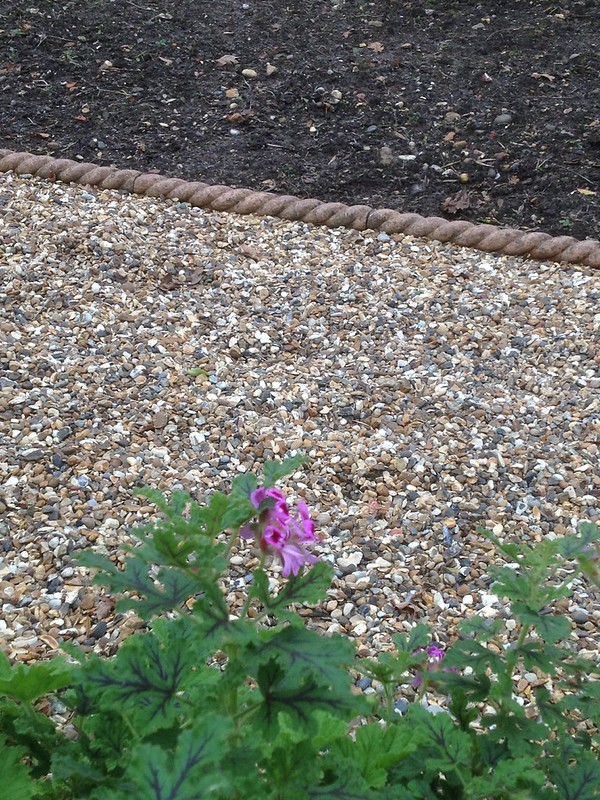
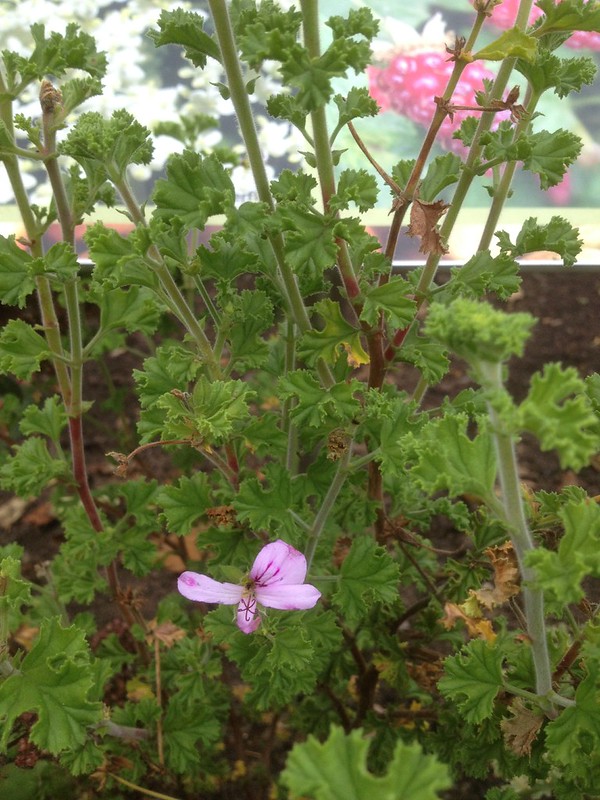
The options were either potting them up for overwintering and take cuttings in the spring, or risking with cuttings straight away, given that the season has been mild and Pelargonium take easily. The Prop Department – which are going to take care of them – suggested that we go for an intermediate solution: taking cuttings straight away, while overwintering some plants in case they won’t take.
Of the seven cultivars we digged out, next year I will need five plants each for six of them, and ten plants of the other one, P. ‘Lord Bude’, the only one with darker flowers. So we took in two-three plants of each cultivar, a couple more of ‘Lord Bude’, and composted the rest. My lovely colleague in the Prop Department helped me with the paperwork required, and now it’s just a matter for me to wait for spring.
Before the day came to an end, we also managed to remove half the raspberries (I will later move the other half, I think I will train them on a post and wire frame) and to tidy up the whole area, thanks also to the help of the manager that joined us later in the day. A good day’s work.
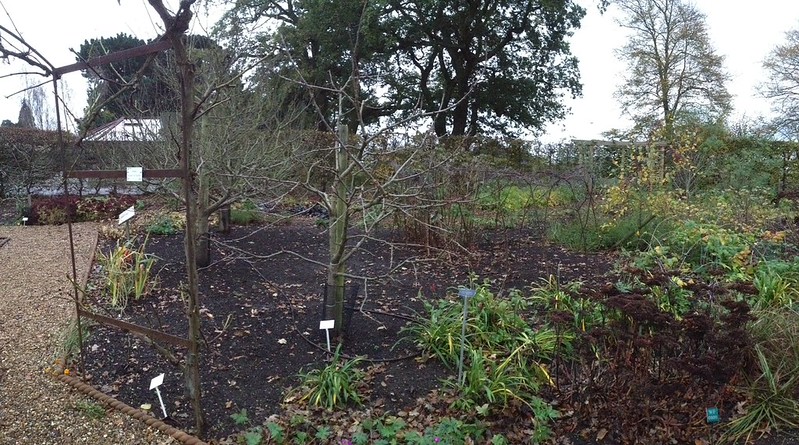 |
| After tidying up |
PS And it was perfect timing as we got frost overnight!
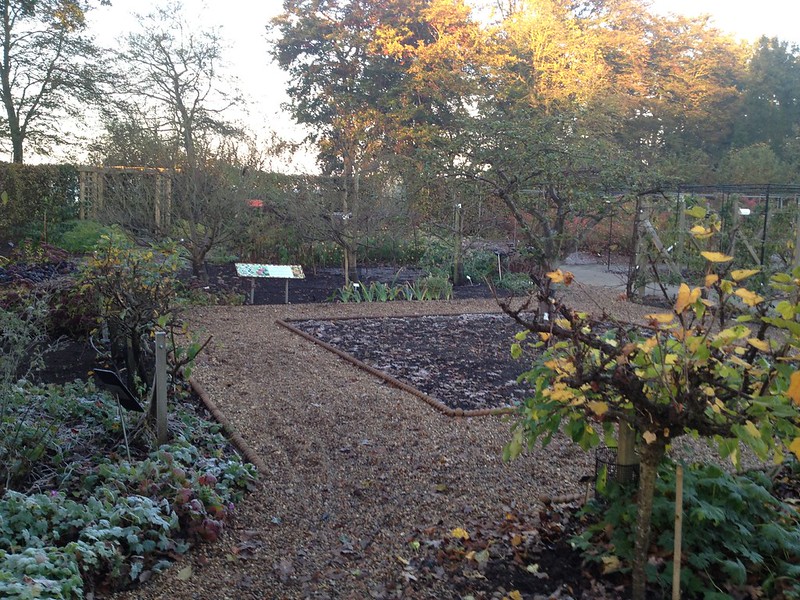 |
| The frosty morning after |
Tree planting “the RHS way”
“The best time to plant a tree is 20 years ago, the next best time is now”
unknownGrowing a tree is a long term investment, often a conspicuous one, so you want to ensure it will thrive and perform its function in the garden by planting it in the appropriate way.
It is a fact of life that, while there are a range of different science-based ways of planting trees (as different techniques develop on what works best on a particular site and within particular conditions: the horticulturist’s personal experience of translating into practice the applicable scientific principles in soil and plant science), not all techniques developed over time are equally good or even science-based.
No trademark is of course associated with an “RHS way”, as it would contradict its ethos of sharing of horticultural best practice: information on techniques for planting trees are widely available in print, online (like this guide to buying good specimens or this well explained planting video) and through courses.
When participating in a tree planting masterclass today, as part of my learning process, I was mentally comparing “the RHS way” to what I was taughtlast year, when I was working in the Arboretum at Kew, planting trees, and – of course – being inducted into “the Kew way”.
Choosing a plant carefully before buying is universally considered a best practice: last year I visited a specialist nursery for the first time with a professional horticulturist, and the way she selected plants surprised me: not only did she ask a lot of questions and look for healthy specimens, well grafted (if the case), with no signs of having been long in their pots and badly cared for (i.e. moss and weeds on the soil surface, suckering stems, roots sticking out or deforming the pot), she would actually be rather physical with the trees, touching them and shaking them gently out of their pots (they should come out easily with the soil attached, if the soil does not come out then the roots have not developed correctly, if the tree won’t let go of the pot, it has been in there far too much, and if it comes out but with all roots running around the pot or even backwards towards the tree that is not good either).
While at Kew we did not disturb the rootball (probably because their own nursery trees are grown in airpots which train roots to develop outwards anyway), here (something that is probably closer to the average gardener’s experience) rootballs needed to be, and were therefore teased out, before planting, preferably in the autumn, when the soil is still warm and roots can start establishing once they have shed their canopy.
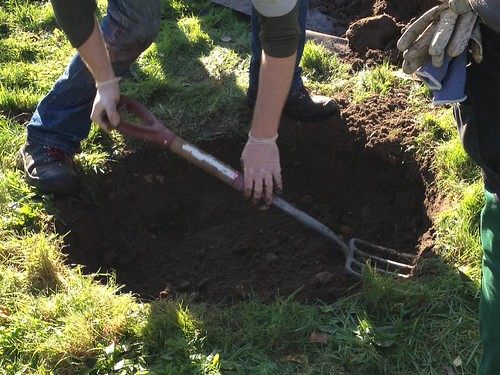
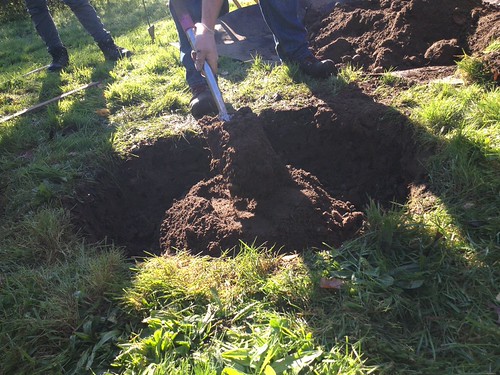
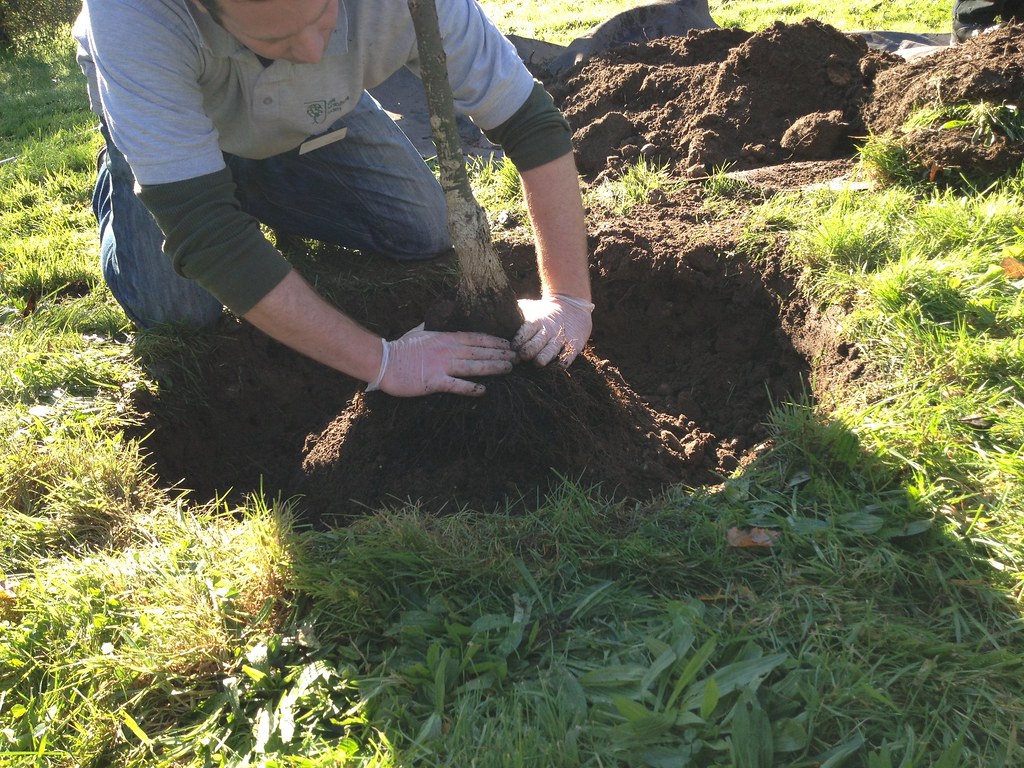
Planting hole dug, surfaces forked, mound filled back in to place the tree on so the root flare is just above soil level On Kew instructions, I have previously dug large square holes and back-filled them before planting the tree, to avoid the roots getting bound in their pits; here, however, we achieved the same result by digging smaller, round holes (a minimum of three times the pot diameter), forking the bottom and sides, then planting the tree with its root spreading out on a little well-pressed mound of soil to take the root flare just above soil surface. That is to account for some initial sinking; incidentally no organic matter is used by either garden I’ve worked in, as it would rot and sink with the roots in it; besides, the roots would be too cosy in the hole with its added nutrients to make the effort to spread out and anchor properly into the soil.
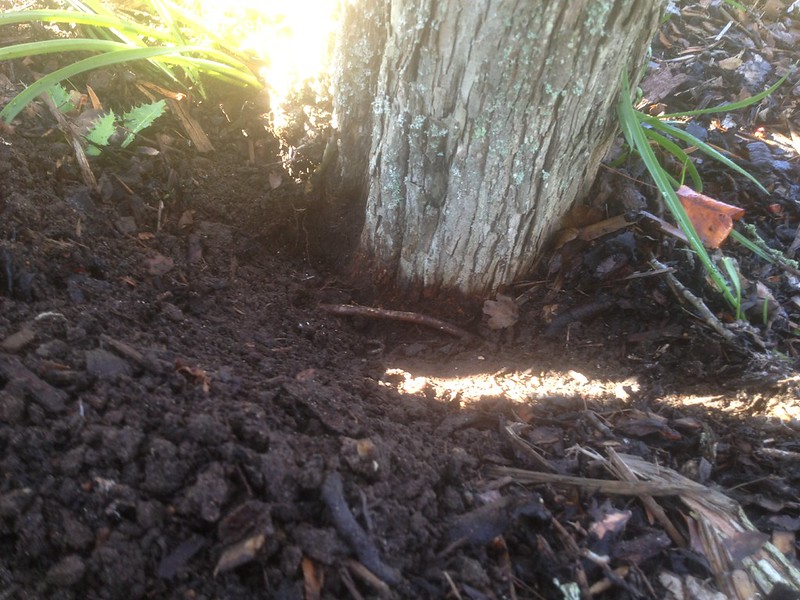
A correctly planted tree will have
its root flare above soil levelThe root flare is a very important part of the plant: the area where the trunk joins the roots, which spread out, it is a weak point in the tree that should be never planted below soil level. Bark, in fact, risks rotting and undermining the health and stability of the tree.
Tree planted too low,
girdling root just visibleI’ve seen the damage caused by low planting: in the best cases plants start to sucker, in the worst, roots girdle the tree or the bark dies back and the plant dies. So one should always find the root flare before planting a tree, if necessary freeing it of any soil accumulated over it in the pot.
As roots can grow bark if exposed, some prefer to plant higher rather then lower on the soil level, within reason. There are other considerations too: if trees are on a slope, soil will wash away from above it and might accumulate below it. In the garden there is also an oak whose root flare ended up 1 m below ground over the years, as part of natural land sliding.Mycorrhizae – beneficial fungi that work in symbiosis with plants, providing them with some nutrients they dig out from the soil, while getting carbohydrates in return – are used in planting in both gardens, some scatter them in the planting hole, while we rubbed them on the roots for maximum contact.
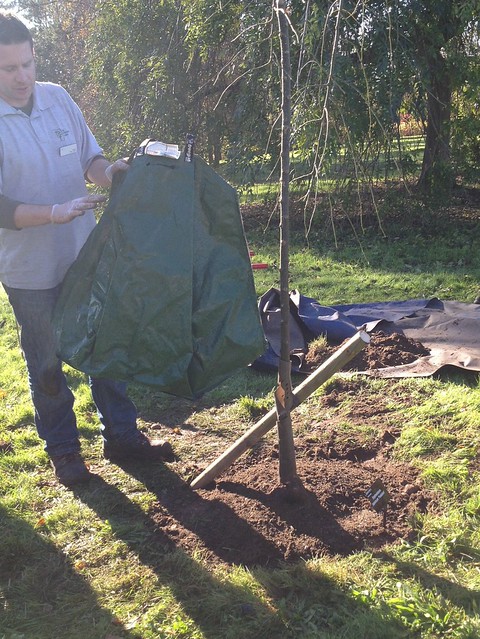
Newly planted tree – staked, and watering bag Something that I had not had the opportunity to learn about previously was staking of trees.
Staking prevents windrock from disturbing the roots (sometimes it may even pull out the plant altogether) but it has to allow the stem to flex and bend in the wind, something that helps appropriate secondary thickening to take place, and with it healthy bark development.So stakes should be short, at a 45° angle into the wind (so the stem, bending in the wind, is not swept into it, but away from it, pushing the stake into the ground at the same time).
One inch between the tree and the stake allows the use of soft pads firmed with rubber or plastic canvas ties, to minimise chafing.
Tree guards may be needed to protect the tree from ringbarking and death, where rabbit and deer are active.
A doughnut shape of mulching completes the planting hole, which needs to be well watered: proprietary watering bags are used that can be left overnight to allow water to soak thoroughly and percolate throughout the hole.
Implementing complex designs
As I am working on the cottage garden design, today’s short masterclass on how to implement complex designs came in quite handy.
The new winter display for the Walled Garden, a grass and white gravel knot design, was being finished after a month’s work (as narrated by my colleague who could see from his window)…
Lots going on outside my office window today…new bedding scheme being created….watch this space! pic.twitter.com/5u0EHl2bhE
— Tim Hughes (@TimHughes_) October 7, 2014Mmm it’s not your standard seasonal bedding display…..what do you think it is going to be? pic.twitter.com/7ZLdD8ihZi
— Tim Hughes (@TimHughes_) October 7, 2014Measure twice, cut once! pic.twitter.com/HS5tlvO3dm
— Tim Hughes (@TimHughes_) October 22, 2014Weed control fabric being installed, crucial this does not show through the next layer (gravel?). pic.twitter.com/1CxLDR3HjX
— Tim Hughes (@TimHughes_) October 24, 2014Hmm not sure about this….Mowing should be interesting!..Kids will love the gravel!….perhaps it will grow on me. pic.twitter.com/OPa5jxO75m
— Tim Hughes (@TimHughes_) November 3, 2014… and we had an opportunity to learn some of the principles that were behind its implementation.
The most important points were:
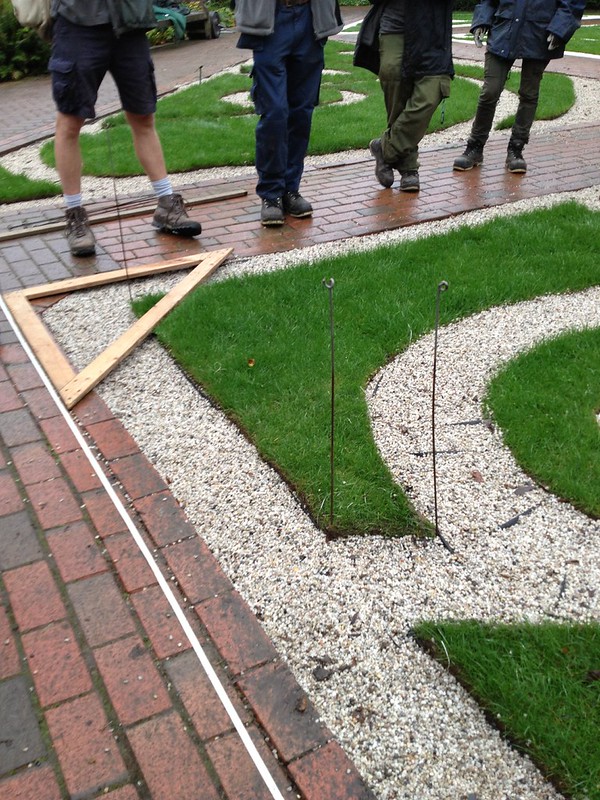
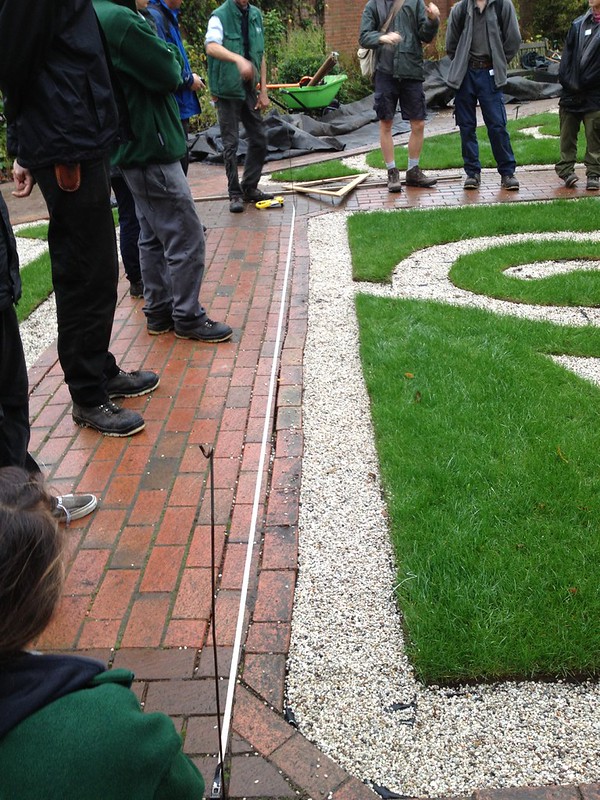
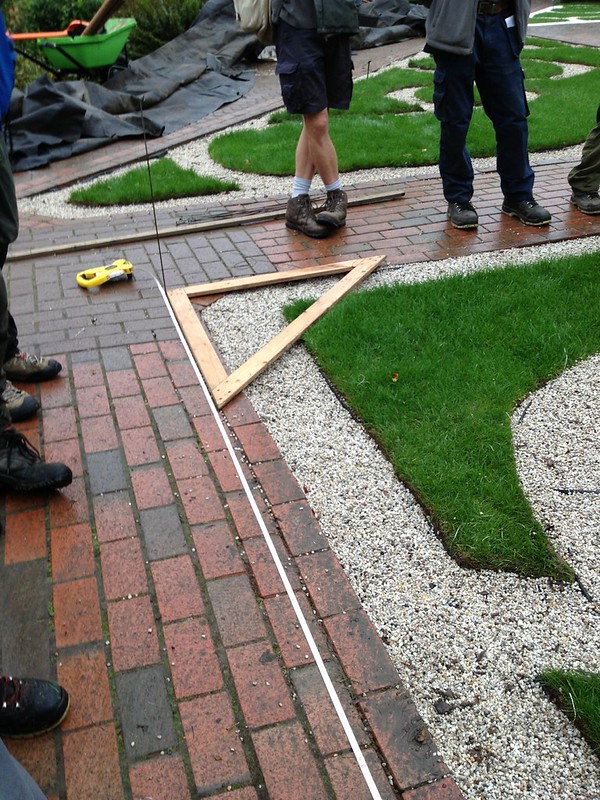
- measurements should always be from straight perpendicular lines, and the bricks in the Walled Garden beds are obviously not, so and external measurement baseline is needed
- a builder’s square with two tape measurers, pins and some string are all the equipment needed
- a circle is a line of points equidistant from a centre, so to draw circles you have to know where the centre is and then, from it, mark as many points on the line as you can to make it more accurate (in this case before cutting in the turf). The string at the bottom of the pins marks the outline of the shape.
Another suggestions we were given was that weed membrane is better than woven plastic when making designs, as it is easier to shape.
A rambling rose
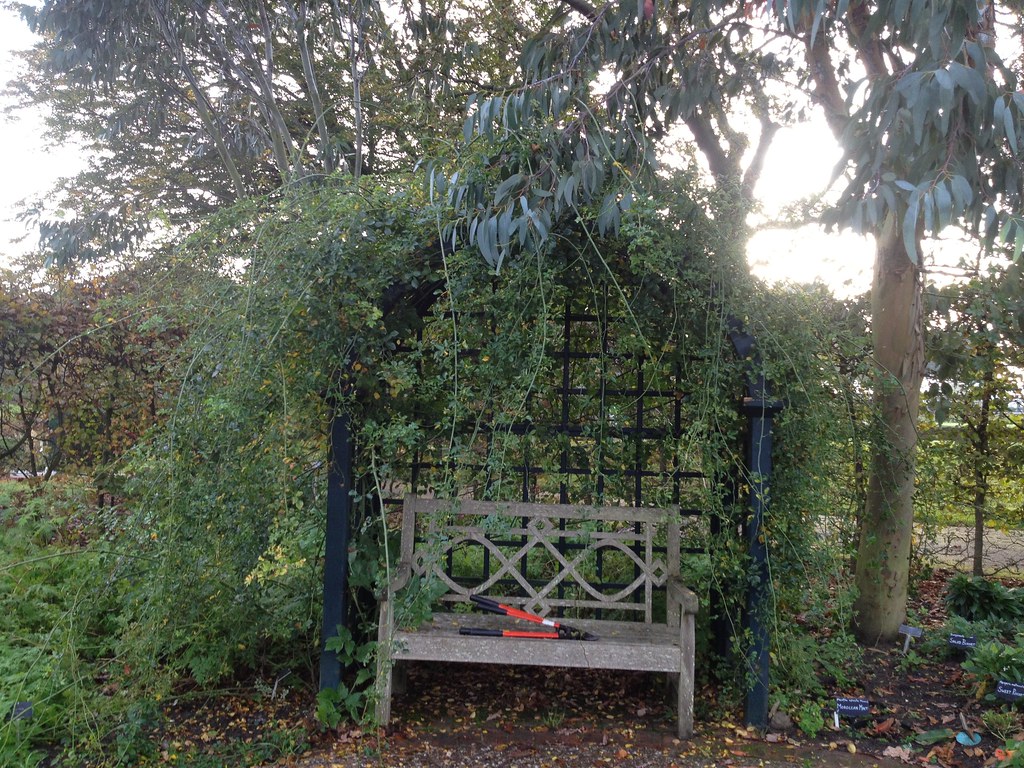
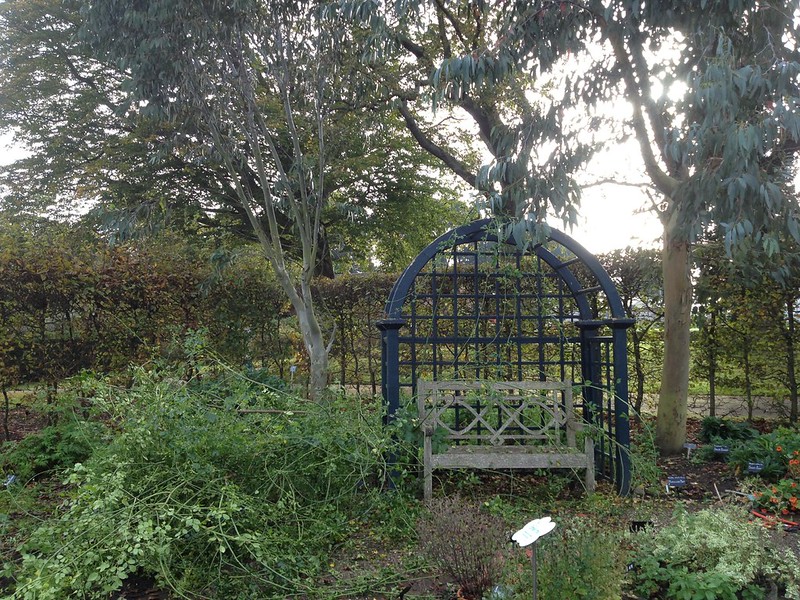
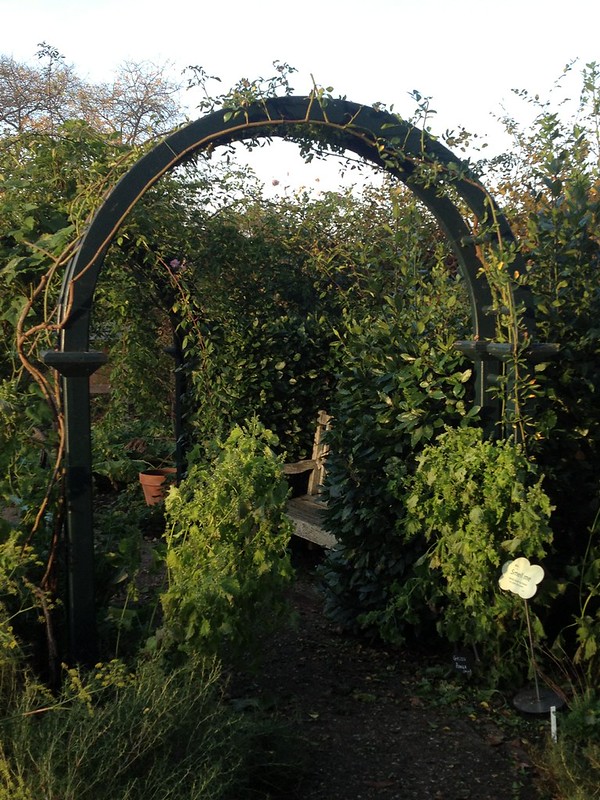
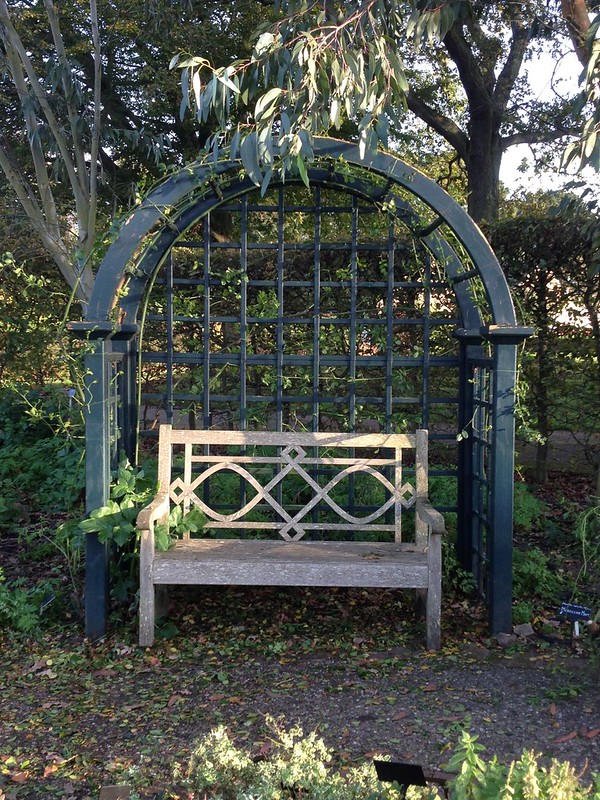
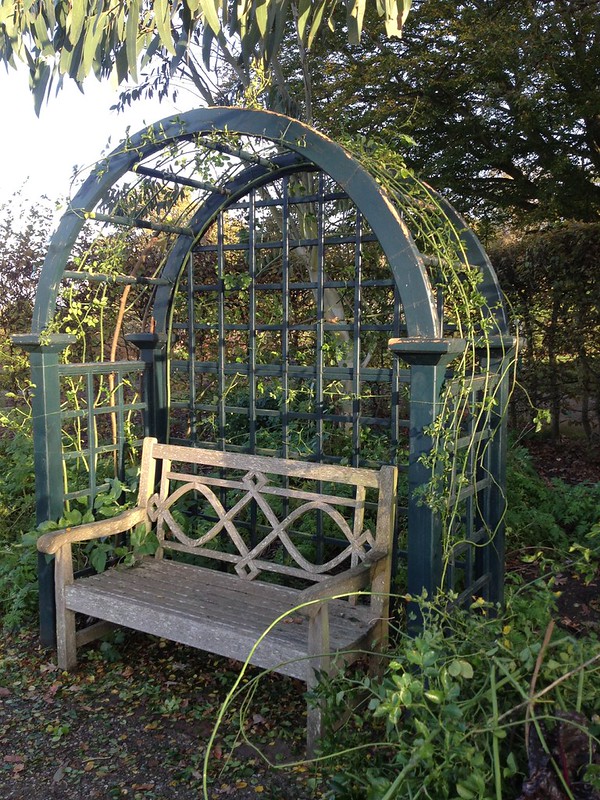
Surprisingly challenging task for me in the herb garden today, where I was asked to prune a rambling rose to fit on an arch.
I had never done that and my colleague explained we were cutting back 1/3rd of the older branches to the ground, then arranging the remaining ones on the arch and shortening laterals to 2/3rds.
Before starting First part of the task was removing all the old ties from the arch, and taking down the (rather heavy) branches so we could have a good look at them before choosing the ones we wanted to tie back.
All branches untied and spread out Once the branches were all on the ground, however, it looked to me very much like a tangled mess, and I found it so much more difficult to decide which ones were good to keep than I usually do: normally, by clearing around the plant and observing it from all sides, the branches that are to go “reveal themselves” to me (for want of a better expression). But here no clearing was possible and the plant had not much of a shape…
A previously pruned rose My colleague had to leave me to it, with a previously pruned rose as my sample, and I proceeded with as much care as possible, tying back branches to the back of the arch first, some 15-20 cm apart. Then I had to tackle the top. I was told that the arch would look best by having some branches softening its front, so I worked towards creating the desired effect.
It looked to me the plant was rather top heavy, with plenty of laterals and sublaterals on a single stem, so the most challenging part was to reconcile the principle of keeping suitably shortened branches and allowing some distance between them to avoide rubbing (that might cause dieback and provide access to other pests and diseases). By the end, I found what I thought was a good compromise, but I had cut more than the expected one third of the plant.
The final pruned rose, tied back on the arch My colleague confirmed: this was much more than she was expecting to prune, which was a bit demoralising, especially as this was the last rose that needed pruning, and I would have benefited from pratising on other plants with her, to get used to this new to me shape of plant.
Roses usually respond well to hard pruning, and there were some vigorous new shoots in this one that I left, but I am a bit worried that the plant might put too much energy in vegetative growth next year, as opposed to flowering, which would be a pity as this is a very attractive spot for visitors.
Well, one can only wait and see…
The very special veg garden and gardeners of Wisley
Today it was the first time I ever managed to work in the veg garden and I was so excited!
In the flurry of activities that the start of our traineeship was, combined with Garden events, staff leave and who knows what else (time flies here!) I never managed to get to work in the veg garden. I had heard so much about it and the specialist colleague that works there and how the area is popular with the public.
The reason why I was specially excited was because I’m so keen to learn about vegetable growing, my passion. I am the first trainee in the Fruit, Veg and Herbs Department that is not just working on Fruit and I am determined to make the most of it, so much so I’m planning to carry out my Horticultural Management project on veg growing (I’ll write more on this later on).
And the public is as excited as I am, it would appear, to learn more about growing veg, in fact the staff and volunteers in the area receive some 30-50 questions a day, from spring to autumn when most of the crops are growing!
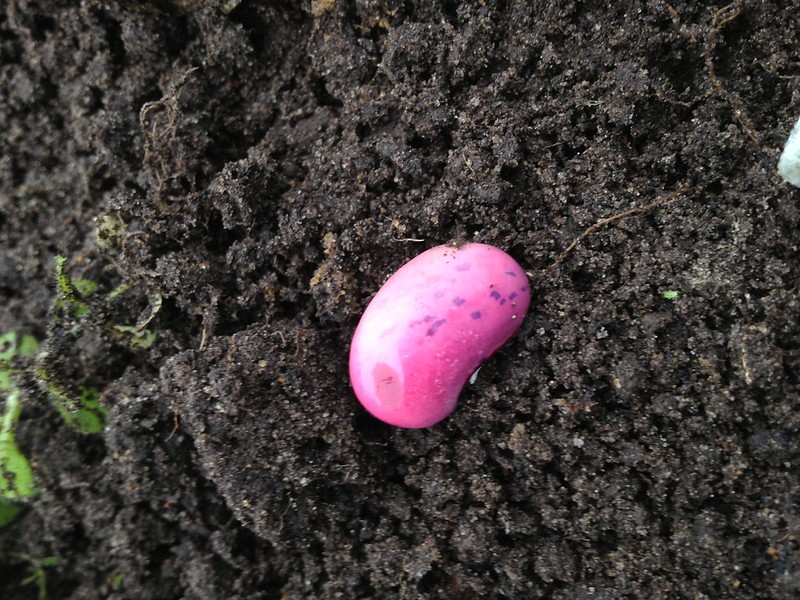
The bright seed of runner bean ‘Hestia’ I was there just clearing spent crops (namely beans and brassicas) yet received my fair share of questions, on the unusual plants they could spot (for example achocha – Cyclanthera sp, a crop I know very well as I’ve been growing and eating it for last three years) and on our plans for the beds that I was clearing.
Most of my colleagues do love to interact with the public and talk to people about crops and cultivation details: the specialist in the veg garden is particularly well endowed for the role as he used to be in catering in a previous career, so he can not only answer horticultural question, but culinary ones too!
But that is a very special brand of gardener that they are here, as in my experience there is a huge gap between those that like interaction and those that find it uncomfortable to receive questions on biocultural information. Some may well like to write about growing plants, but answering live questions is a totally different matter – I was reading about that just recently, as someone published a case study on their dissertation about growing and sharing information about new crops.
I have received a range of questions myself since I joined the garden, and it is quite an art to abstract yourself from whatever activity you might be busy on and figure out – off the cuff – what a question thrown at you is really aimed at knowing, putting it into context with counterquestions, and finding a suitable answer. I have done it in the past when – as a student – I worked in a customer service role, so I can see how it becomes easier with experience. But, as the relatively novice gardener I am, sometimes I am still thrown off. But it feels really good when you can provide helpful information, it does add to the job’s pride.
One question that made me feel like that was about lichens on apple trees: are they a problem? I knew the answer as we had discussed this last year when restoring orchards. Lichens cause no problem to the tree, but they are an indication that the plant is not growing fast, as they take time to establish. Apple trees that do not have some good vegetative growth tend to produce worse fruit with time, so if you see lichens on your apple trees when you want them to fruit, it’s time for a good pruning session!
Some other questions result in you learning something new, like when I was asked: can one train peaches and apricots as cordons to have more space in the garden? Never had I thought about that, but luckily I had our fruit specialist on hand to ask: the answer was, unfortunately for the visitors’ plans, no. And the reason why, is that peaches do not fruit on spurs, so you need whole branches and they cannot be restricted much, hence the fan shape they are usually trained as. In the case of apricots, it’s the fact that there is no suitable dwarfing stock to grow them on, and as a plant they are too vigorous for cordons.
My experience of the RHS
Today new staff from all the gardens (Wisley, Hyde Hall, Rosemoor and Harlow Carr) was brought together for induction day.
I have been through a good few induction days in my career, and that corporate self-congratulatory feel about a lot of them has made me less than excited to attend such events. But I did enjoy today: the atmosphere was genuinely friendly and pleasant, and, despite this being an exciting time for the Society, as £100 m of investment over the next 10 years has been approved by the board and the projects linked to it (more details of which are spelled out in the Annual Report) are underway already, I liked the way the Director General was rather down-to-earth about it.
I must say that to me as new entrant in horticulture, who’s finding it hard to be self-sufficient on the average salary, the RHS attempt to improve the conditions of horticulturists is particularly appealing. It’s rather appalling that we do not pay a living wage to people that produce our food, but the priviledge to make ends meet should extend to the competent gardeners that offer us the pleasure of beautiful gardens too! It is a complex and political issue to address, I know.
It is also very important for me that the RHS (of which I am a member as well as a trainee!) is investing in research and education, as we know still so relatively little about plants, and we definitely need to bring horticulture into an era where being kind to the environment we live in and that keeps us healthy is a priority, while pressures are strong in all sorts of contrary directions.
My hope is the Society will move towards establishing themselves as the world leaders of the new gardening that they started promoting back in 2007 with Matthew Wilson’s book, which I recently started reading. I have spotted signs of development: possibly a less complex, although certainly as highly political, issue to address…There is a lot in the RHS mission statement and guiding principles that I share and feel strongly about, and I was really impressed by the genuine effort to give visitors a pleasant experience in the gardens, and to bring gardening to an increasingly wider audience, beyond the traditional Flower Shows’.
I myself first became familiar with the society at Hampton Court Flower Show years ago, when I visited as a tourist from Italy. Once my interest in horticulture developed, I decided to take advantage of the RHS qualifications, and finally applied for this traineeship, so my horticultural experience is tightly interwoven with the Society! Curiously, though, I only visited the Wisley Garden for the first time in February 2013, on a spare afternoon after my RHS qualifications’ exams – that probably makes me an unusual member. That visit was however soon followed by one to Hyde Hall: I was hooked – I grew a thing for labelled gardens!
But there is so much more to the Society, for example the plentiful information available online on plants and their cultivation (which I always find myself consulting as a first point of reference, even though I might then disagree with it and not follow it). And a fantastic member service which I somehow never realised was available: the opportunity to contact the Society to identify plants, pests and diseases and ask for advice!
RHS numbers are of course impressive, and we were given some at our induction (but, as the RHS is a charity, all the information is public, and there’s a lot about numbers in the Annual Review). RHS Garden Wisley on its own is
a total of 600 acres in size, which gather together 27k taxa of
cultivated plants and 40 champion trees. 41k kids visit the Garden on
formal school visits every year, while the total visitors of RHS Gardens
across the country (which between them host 14 National Collections)
add up to 1.7 m.Now, now look who’s sounding that tad self-congratulatory… 🙂
But there is indeed a lot to improve in the horticulture industry, in my opinion, not only in how manpower is valued (or not so much) but also in terms of :
- resources and waste (in a job I had over the summer I was shocked to experience how much goes into raising bedding plants)
- cultivation practices and, in particular, use and misuse of chemicals.
It will be fascinating for me to observe how – as it expands, acquiring new and urban gardens, widening its membership and the education opportunities it offers, grounded in its own scientific research – the Society is going to apply its influence for positive change … which, I am assuming, will offer me and other new entrants better prospects of making a decent living, with a light conscience and a lighter doctor’s bill, in a chemically wiser and environmentally sounder industry…
About Me
M.Paola, that’s me
I got my first allotment in the UK in 2007 and started growing my own food. Learning as I went along was not enough, so I studied horticulture. Faced with the horticultural warfare, I became a conscientious objector: I use no chemicals and support organic principles and regulations.
Brexit gave me a new life in the Netherlands, three new plots by a nature reserve and an MSc in sustainable food systems.
I write in my personal capacity and, as a language perfectionist and a non native speaker, I keep reviewing my entries’ text for clarity.
Some Rights Reserved
This work is licenced under a Creative Commons Licence.